Camp Grandma: Try a Kids’ Art Project
On vacation in Washington, D.C., last year, I bought some art books at the National Gallery of Art bookstore. One of the books featured a kids’ art project that was perfect for virtual Camp Grandma!
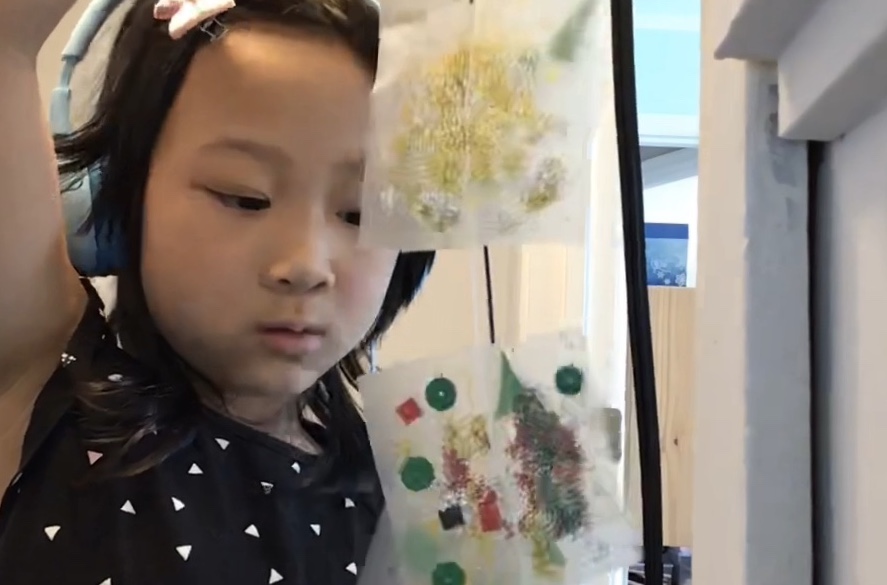
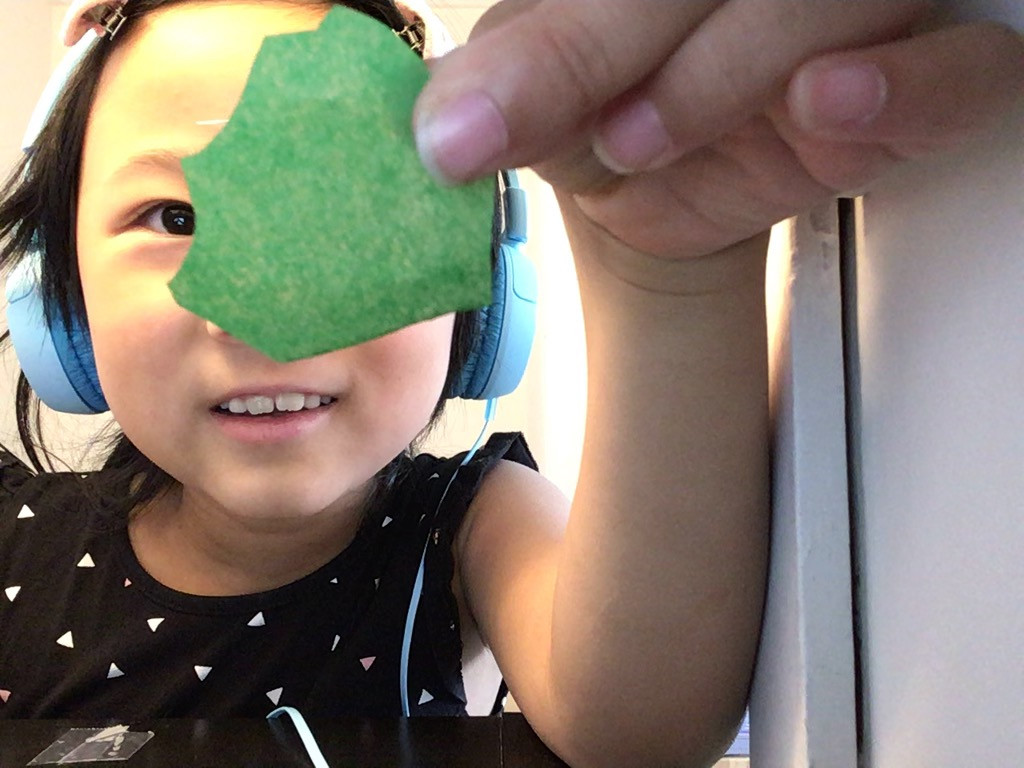
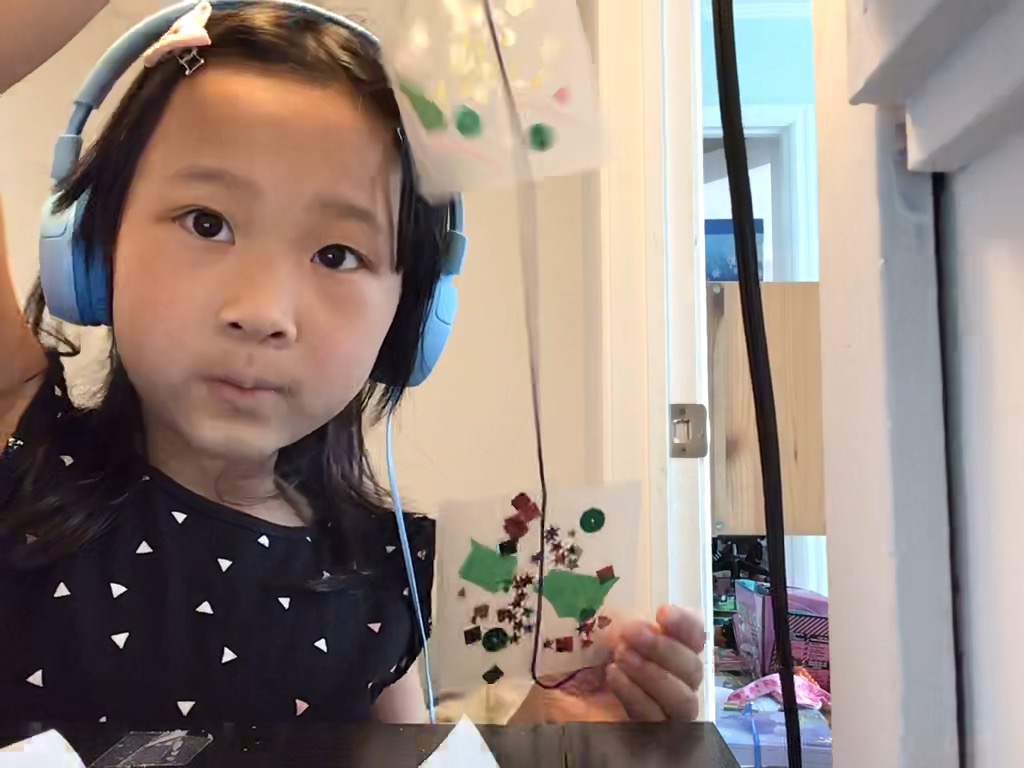
The idea is to encase bits of thread, glitter and other flat, decorative objects between two squares of clear contact paper. By laying down string or cord vertically through the squares, you can keep them connected to hang as one piece of art.
I had some clear matte contact paper left over from making board books for my grandkids. If I were buying some, I’d try clear glossy contact paper, which would probably give a more sparkly effect.
This kids’ art project is inspired by the Usborne Complete Book of Art Ideas written by Fiona Watt; it’s a treasure trove of fun art explorations and experiments.
Miss T and I spent about an hour and a half together, making five squares each. It was one of our quicker Camp Grandma projects. However, Miss T was so taken with this activity that she created a few more squares by herself the next day.

Materials Needed
It’s easy to gather materials if you’re a regular crafter; if not, it may take a bit more effort to source supplies. Here’s what you’ll need:
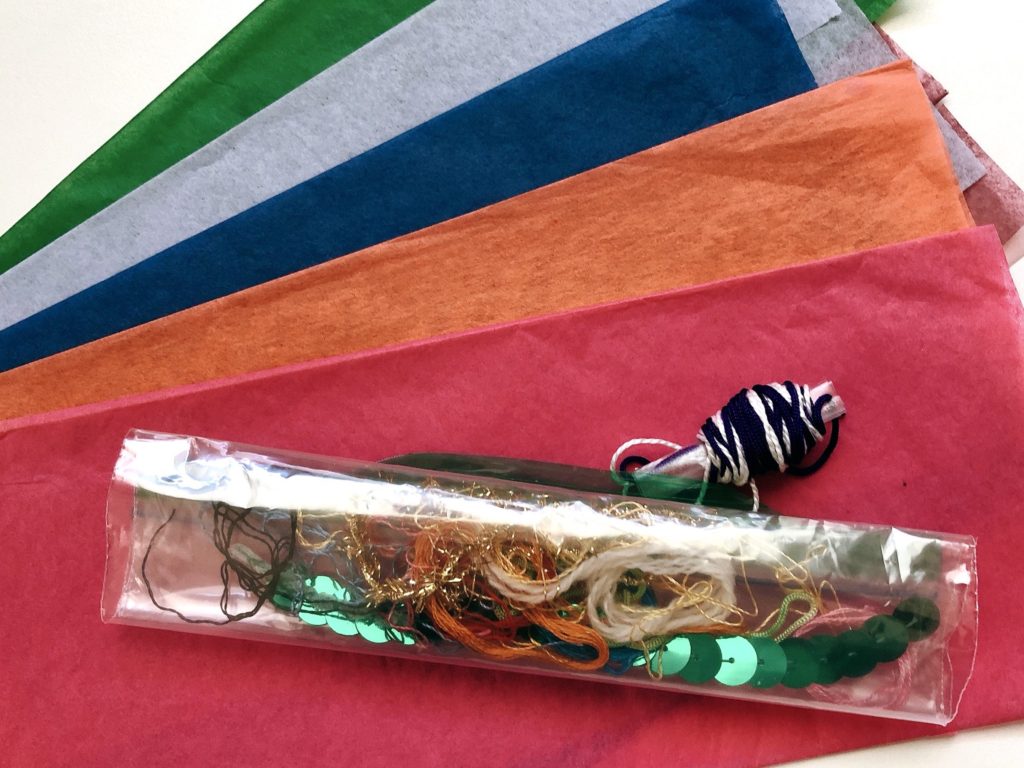
- String, ribbon, or thin cord long enough to cover the total length you want your finished hanging to be, plus some extra for hanging.
- Clear contact paper
- Shiny elements, such as sequins, metallic confetti, glitter
- Softer elements, like colored tissue paper and embroidery thread
- Small scissors to trim the finished squares
Preparation for this Camp Activity
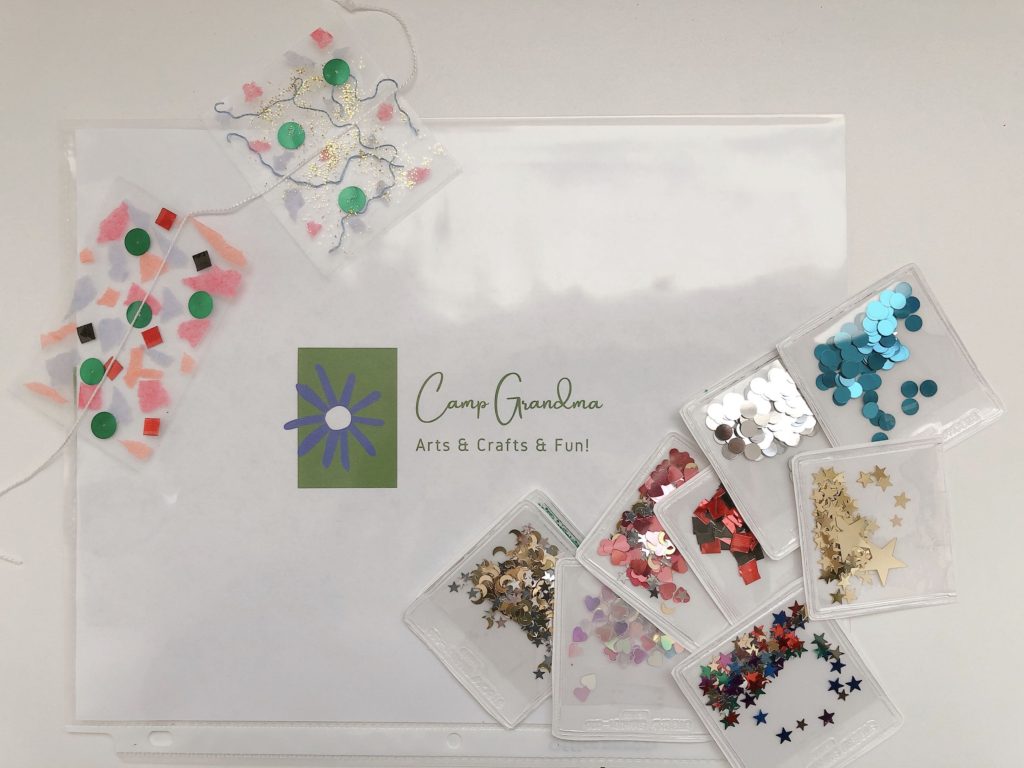
Start by making a sample, so the child can clearly understand the project. You’ll package the sample with the raw materials in the child’s kit.
Put each type of decoration in its own small bag–such as glassine bags, small cellophane envelopes, small plastic bags or small paper envelopes; seal or tape shut. Keep the remainder so you can make the project with the child.
Cut small swatches of tissue paper in different colors.
Package yarn, embroidery thread and sequins in a separate bag.
Wind string for hanging the artwork on a piece of cardboard to keep from getting tangled.
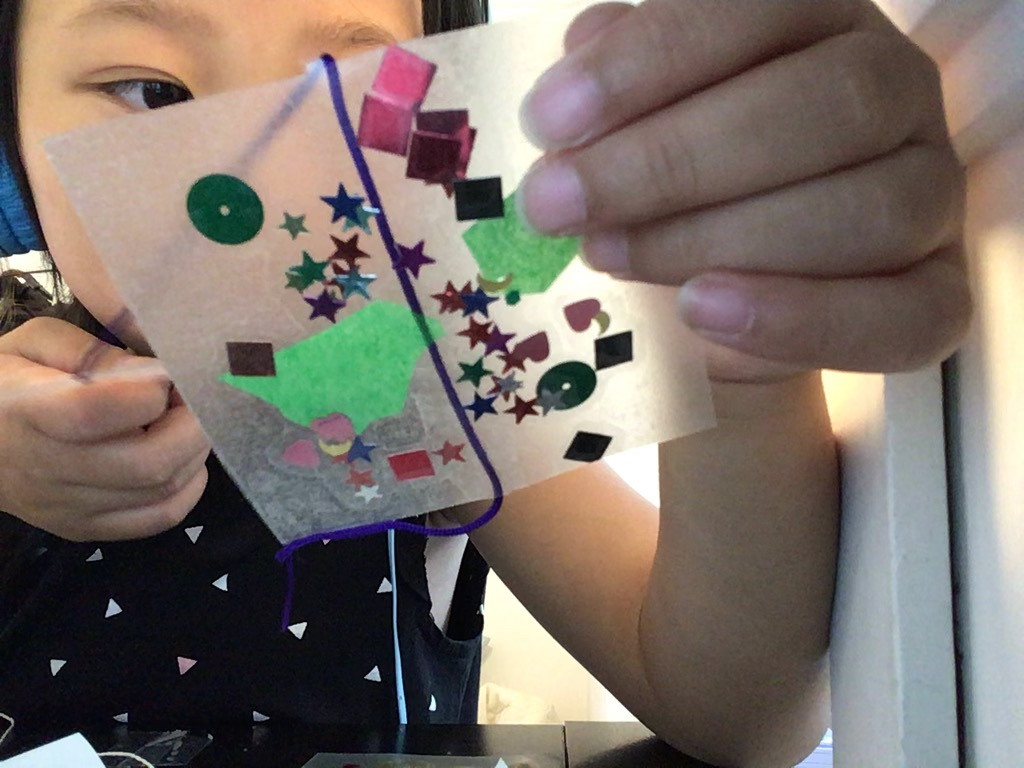
Cut the contact paper in squares. I cut mine into 3- X 3-inch squares. It’s easier and more efficient if you cut the squares in advance for the child instead of sending them contact paper to cut themselves. I gave Miss T enough for 12 sets (24 squares).
If your child tends to be impatient, pull back the corner on each square and snip it diagonally just a tiny bit to give the child a head start in separating the clear plastic from the backing. It can be frustrating to find a starting point. Miss T had no trouble, but I can imagine some others might.
Since all the items needed for this project are fairly flat, I put everything in a plastic sheet protector–the kind you use with three-hole binders–to turn the materials into an art kit.
How to Do this Kids’ Art Project
First, peel off one sheet of contact paper and lay it sticky-side up. Lay down the string that will connect all your squares together, vertically, in the center of the square. Leave enough lead string at the top for hanging.
Next, arrange decorations on the sticky side of the contact paper square. Tear the tissue paper into small bits and lay it on the contact paper for transparent color.
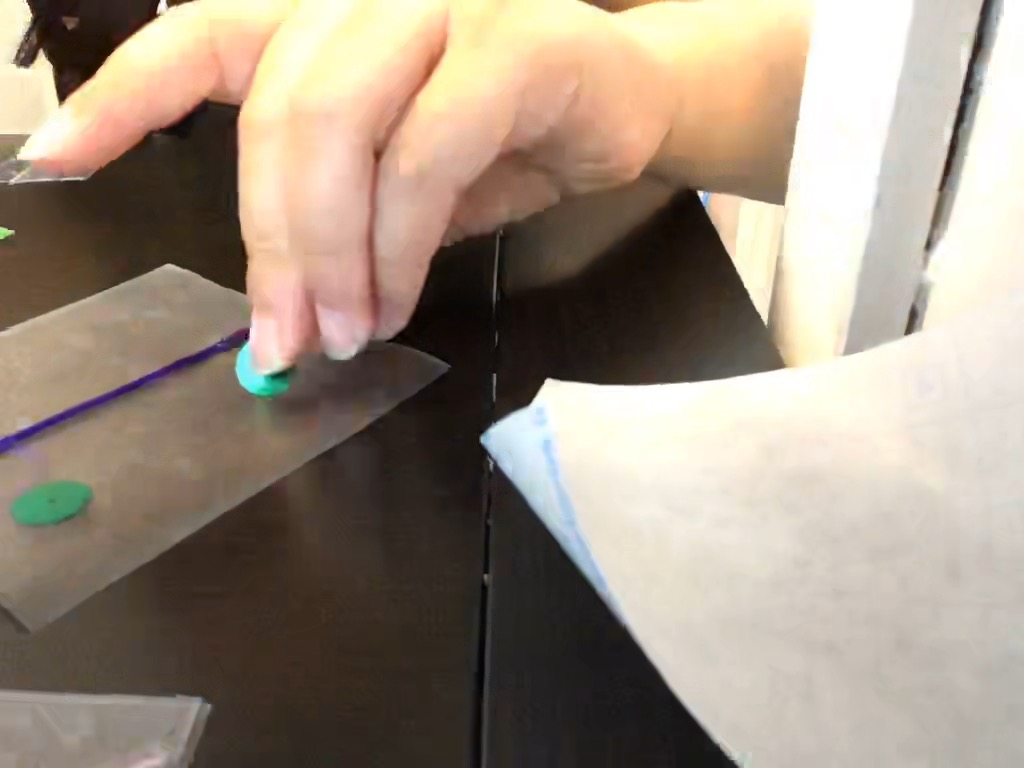
Finally, peel off a second contact paper square, turn it sticky-side down, and carefully lay it over the first contact square. Try to cover the bottom square as completely as you can.
Lastly, trim the edges with small scissors, being careful to avoid cutting the vertical string. This is an important step in neatening the artwork since it’s unlikely that you can match the top square exactly to the bottom square.
Repeat by affixing another square to the string, leaving a space between squares. Decorate as desired and continue to add squares to your string until you are satisfied with the results.
Note: to easily sort through the decorative items when designing the squares, use a cardboard box cover to spill out these decorative bits. It’s easier than trying to extract pieces from their storage bags.
What Kids Learn from this Activity
This project teaches:
- Creativity and design–working with colors, textures, and shapes to make pleasing compositions
- Enhanced small motor skills
- The satisfaction of completing a their own work of art
Coming Next Week
In our next session of Camp Grandma, we’ll make cascarones, Mexican confetti eggs.

Camp Grandma topics, to date:
- Introduction to Camp Grandma
- Designing paper doll dresses
- Learning to Embroider
- Kids’ art project: a hanging room ornament (this post)
.
Don’t forget to sign up for my email newsletter! Every Wednesday, I’ll give you a new idea for an activity or insight to nurture the little ones in your life. Come visit!