Easy Craft Idea: A Custom Board Book for your Grandchild
These days, you can buy all sorts of customized board books by searching online. But I think it’s extra-special when you make your own custom board book for your grandchild. This is an easy craft idea to try.
I fashioned these books for my own children when they were little and now I’m making them for the next generation. They’re so sturdy, they’ll become keepsake books, surviving chewing, drooling, bending, and other toddler manhandling tests.
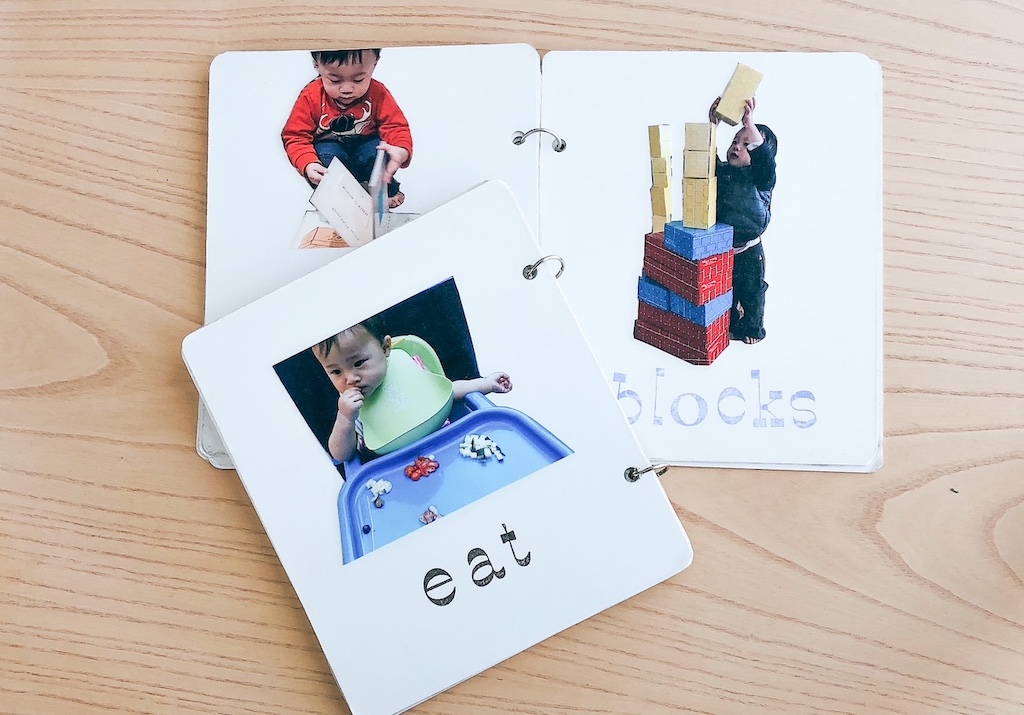
While these board books may not look very polished or may appear a bit makeshift, they serve a valuable purpose: they help babies to identify the most meaningful people and objects in their life and associate a name with each. And they are a precursor to reading.
Images to Capture for you Board Book
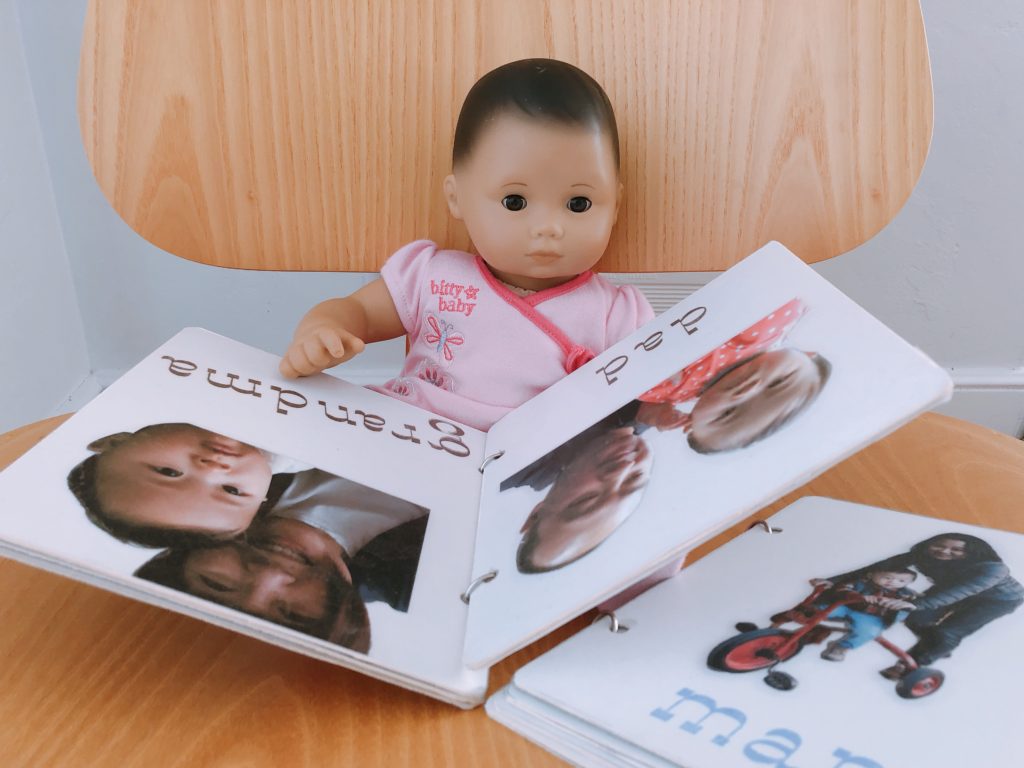
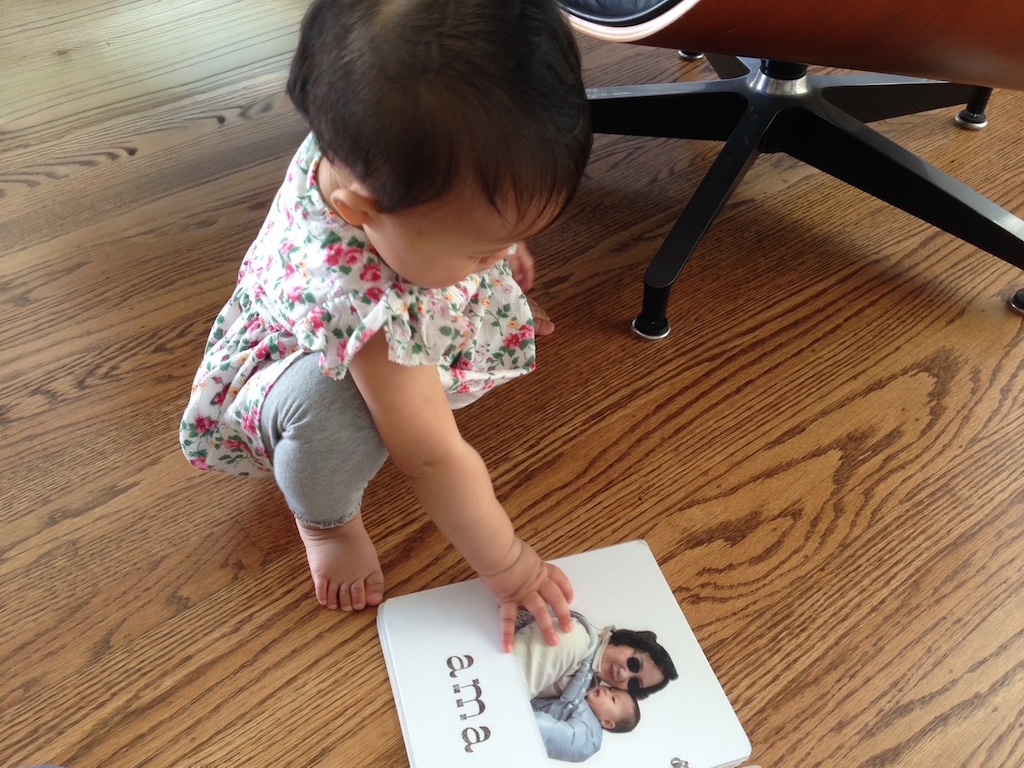
You’ll want pictures of all the grandparents–especially if they live far away–so the child can learn to recognize their faces and names. And of course, you’ll include the child’s parents and siblings in this board book.
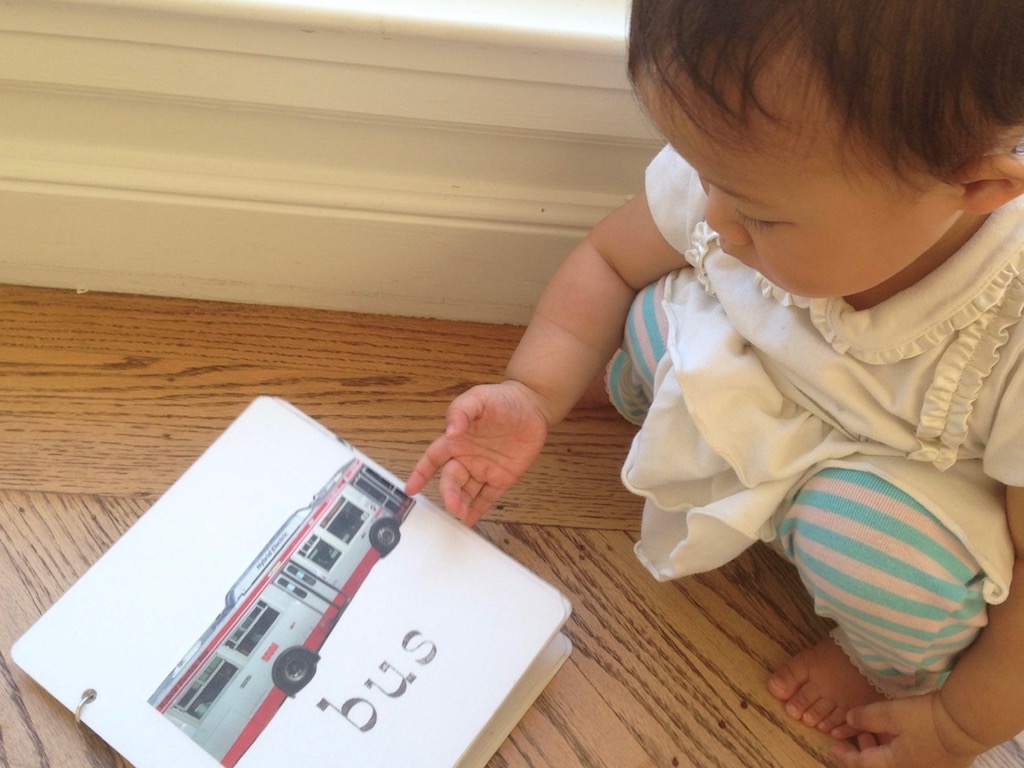
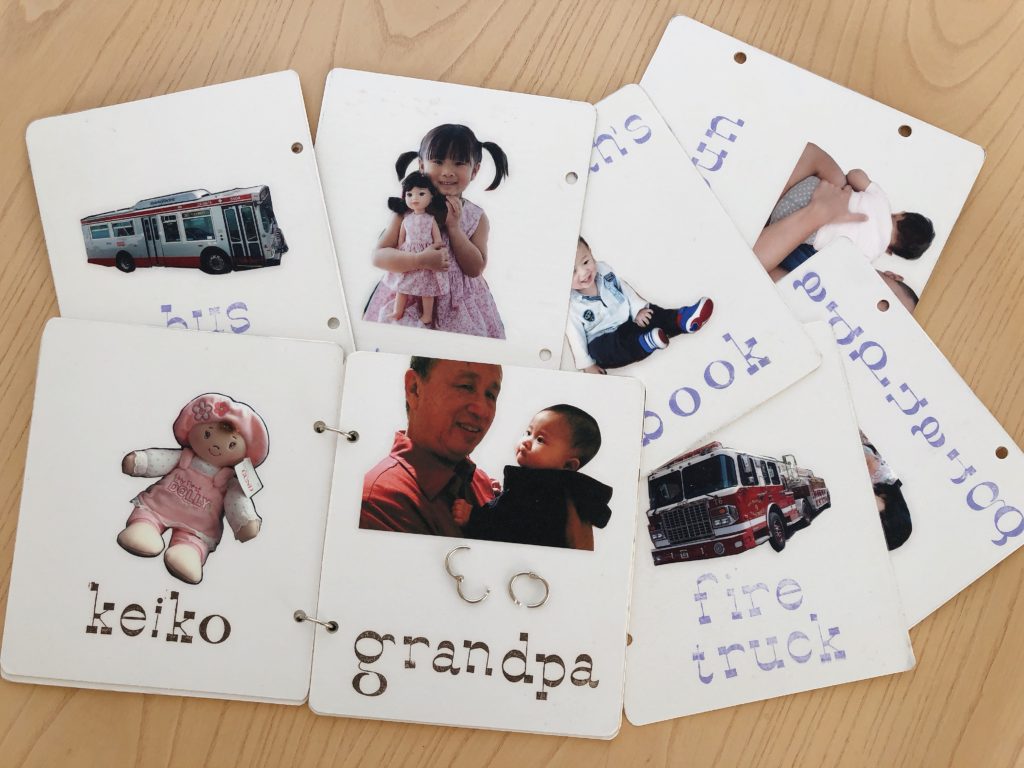
In addition, for Miss T, I choose an image of the bus that passes in front of our house. She loved to run to the picture window to watch the bus go by and to wave at the passengers. I added a photo of her doll, the toddler swing from the playground, and other familiar images.
For her brother, Little N, I included a picture of a fire truck because he was mesmerized, watching with excitement, any time they flew past our house with sirens screaming.
How to Make a Board Book
Materials Needed
- White cardboard
- Close-up photos of a child’s favorite things
- Heavy-duty glue stick
- Clear self-adhesive film, such as Con-Tact Paper
- 2 loose-leaf binder rings
Tools Needed
- Paper cutter or box cutter and ruler
- Sharp nail scissors or sharp small scissors
- Alphabet stamps and ink pad (optional)
- Regular scissors
- Single hole punch

How to Make the Pages
Determine the dimensions of your book. Mine were 7 inches by 8 inches. Cut cardboard to size with a paper cutter. If you don’t have a paper cutter, a box cutter will do, using a ruler as a straight edge to guide your cuts. (Be careful not to cut yourself!)
My books consisted of six cardboard rectangles. With images back and front, you’ll have a 12-page book. Use scissors to round off the sharp corners of the book pages.
Stitch a felt book for your toddler.
Prepare the Images
Now take photos of the most important people and favorite things in baby’s life; get prints made or print the photos yourself.
I printed photos from my phone using a compact Canon Selphy portable printer that my family had given me for Christmas one year. My model is now discontinued, but there are newer versions available. These small, portable printers are handy for other projects, too.
A less-expensive alternative: If you don’t have a photo printer and don’t want to send your images to a photo printing service, here’s another less expensive option.
Insert your photos into a Word document. Resize (shrink) each photo by clicking and dragging a corner of the photo inward to make it smaller. Now you can fit several images on a page to the size you desire. Then print the pages on a color printer. The images won’t be glossy, as on photo paper, but they should work just fine.
Using nail scissors or other small, sharp scissors, cut out the backgrounds from your photos. The background is a distraction for baby and makes it harder to focus on the subject.
Finally, glue the photo images onto your pages with a glue stick and use alphabet stamps to stamp out accompanying words to identify each image.
A less expensive and quicker alternative: Forget the alphabet stamps. Just use a dark-ink Sharpie to write the words in large print on the pages.
Assemble your Book
Now you’re ready to trim the self-adhesive film to the size of the book page and adhere the film, covering the entire page. Repeat for all pages.
This ensures that the photos stay permanently affixed and protected. Use a hole punch to punch two holes on the left side of each page. Secure the pages with the loose-leaf binder rings.
Why Make a Board Book?
Many of our easy craft ideas are designed as projects you can do together with your grandkids when they get a little older. This is one of the few projects at “Call Me Grandma!” that requires you to do the entire project for them.
Your board book will help to acquaint a grandchild with their family and their surroundings. Turning the pages and examining the pictures, the board book will encourage the idea of reading. And, having been handmade by you, it will be a book to cherish even when the kids get older.
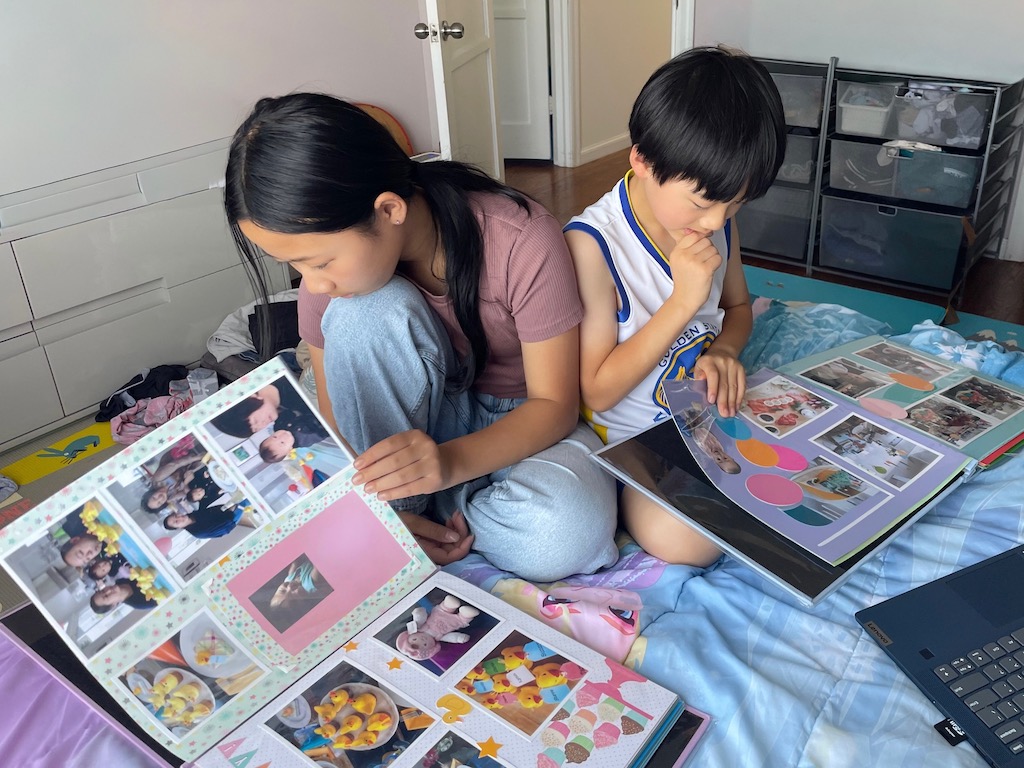
Another easy, related project is to start a scrapbook documenting baby’s first year. Most of us keep all our photos on our phone and in the cloud. So, a scrapbook provides a tactile experience that’s different from scrolling through digital images.
While too fragile for a toddler to manipulate on their own, older kids will continue to enjoy their scrapbook from year to year.
Sign up to Get Grandma’s Favorite Recipes–Free
.Sign up here for my email newsletter. Every Wednesday, I’ll give you a new idea for an activity or insight to nurture the little ones in your life. And once you subscribe, I’ll send you a link so you can download your set of quick and easy recipes as my thanks to you.
I think this is where Miss T and Master N learned many of their first words.
You may be right! We certainly “read” those books to them when they were very young. 🙂
I like what you said about leaving the backgrounds clean – “The background is a distraction for baby and makes it harder to focus on the subject.” – I had not thought of that before. Makes sense and is a great tip!
Thank you. The photos really “pop” when the backgrounds are eliminated.