Camp Grandma #2: How to Make an Art Tracing
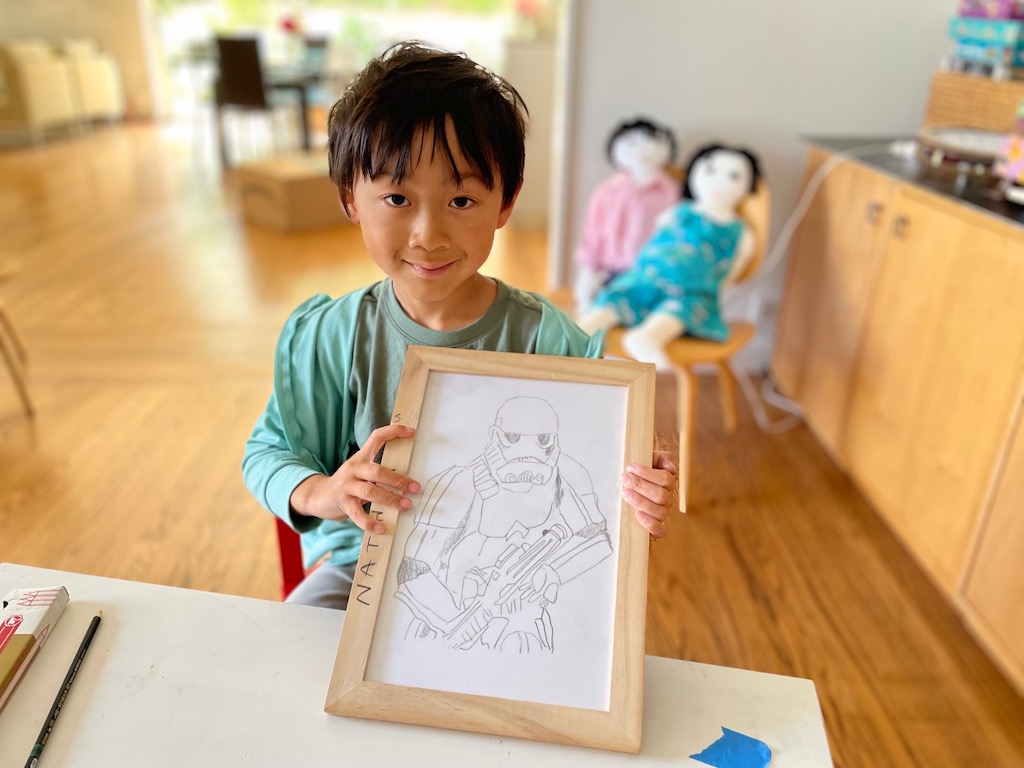
N’s parents want him to work on fine motor skills because he has difficulty forming neat letters at school. So, at Camp Grandma, we did an art tracing project, making a framed picture for his bedroom wall.
By tracing the outlines of an image, he practices control of his pencil, as he guides it over the lines as precisely as he can.
Find an Appealing Image
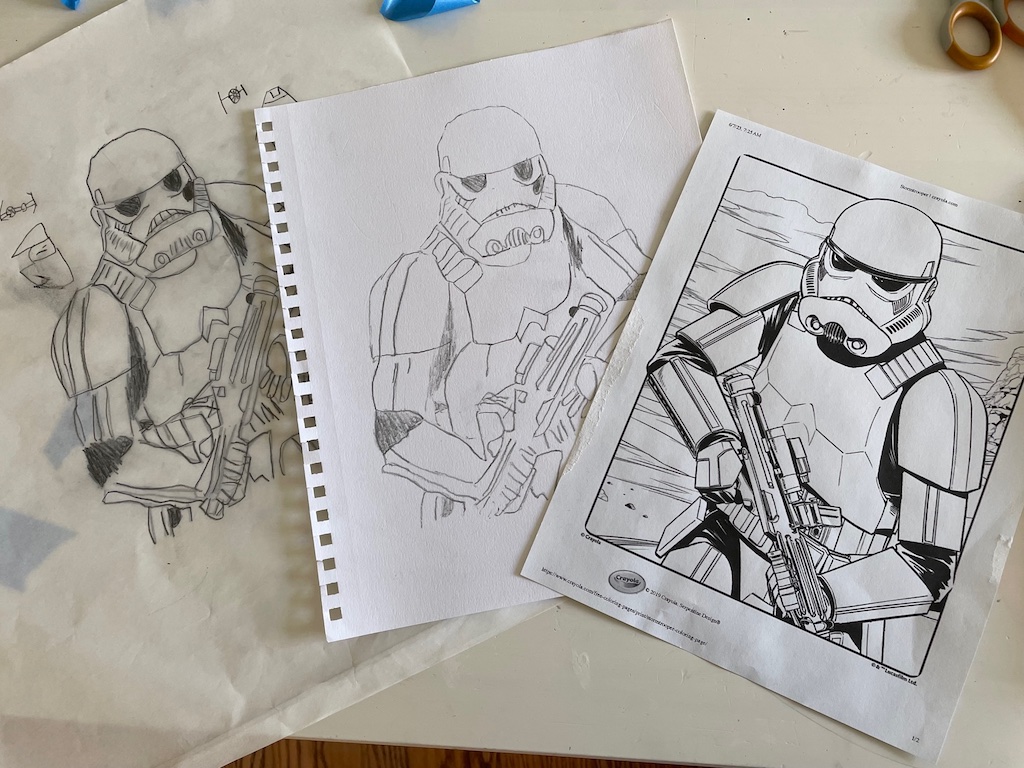
First, we needed an appealing subject. N is crazy about Star Wars. So, I found a few free Star Wars images from the Crayola website.
You can find a zillion free coloring pages online, on practically any subject, from princesses to pandas. Just google “coloring pages for kids.” Pick an image that’s not too detailed–kids can get frustrated if there’s too much to trace.
The Basic Task
N traced the image onto tracing paper using a soft graphite pencil, then flipped the tracing paper over, to trace over his original tracing, leaving an impression on good art paper that we could then frame. When you use this method, the art will appear as a mirror image.
If you want the image exactly as you see it, follow a slightly different technique I used to transfer Miss T’s drawing of an ice cream cone onto a dish towel to embroider. This second method will involve one fewer tracing, however, so it’s not as good an exercise if pencil control practice is your objective.
Art Tracing Materials Needed:
- Simple line drawing image printed on an 8 1/2- X 11-inch sheet
- Soft graphite pencil, such as a 2B sketching pencil
- Regular pencil
- Tracing paper
- Blue painter’s tape for securing the image or artist’s tape or drafting tape
- 9- X 12-inch good-quality paper
- Inexpensive picture frame
How to Make an Art Tracing
Step 1: Lay image, right side up and tape in place on a work surface. You want a tape that can be removed without damaging paper later.
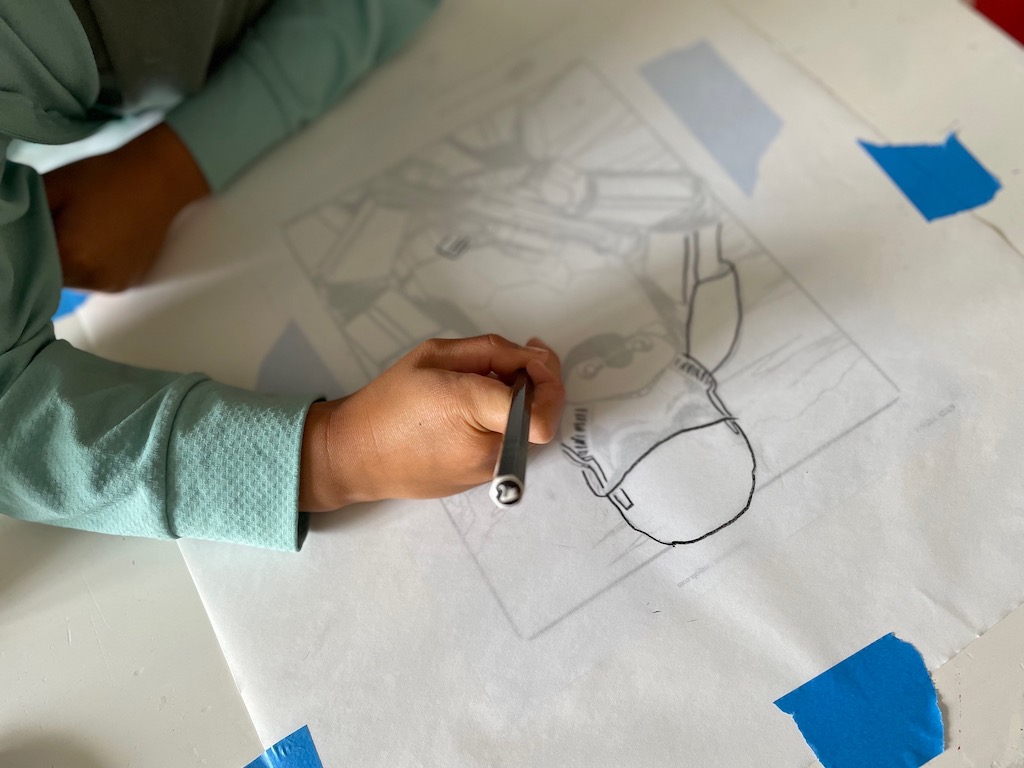
Step 2: Lay tracing paper over the image and tape again. Now the image and tracing paper are secure, so there will be no shifting or sliding as the child works.
Step 3: Have the child trace over the image with the soft graphite pencil. They don’t have to get all the details, but make sure the outline of the image is complete. If it starts to get too tedious for the child, help out by tracing some of the smaller details. Remove the tracing paper drawing and the original art.
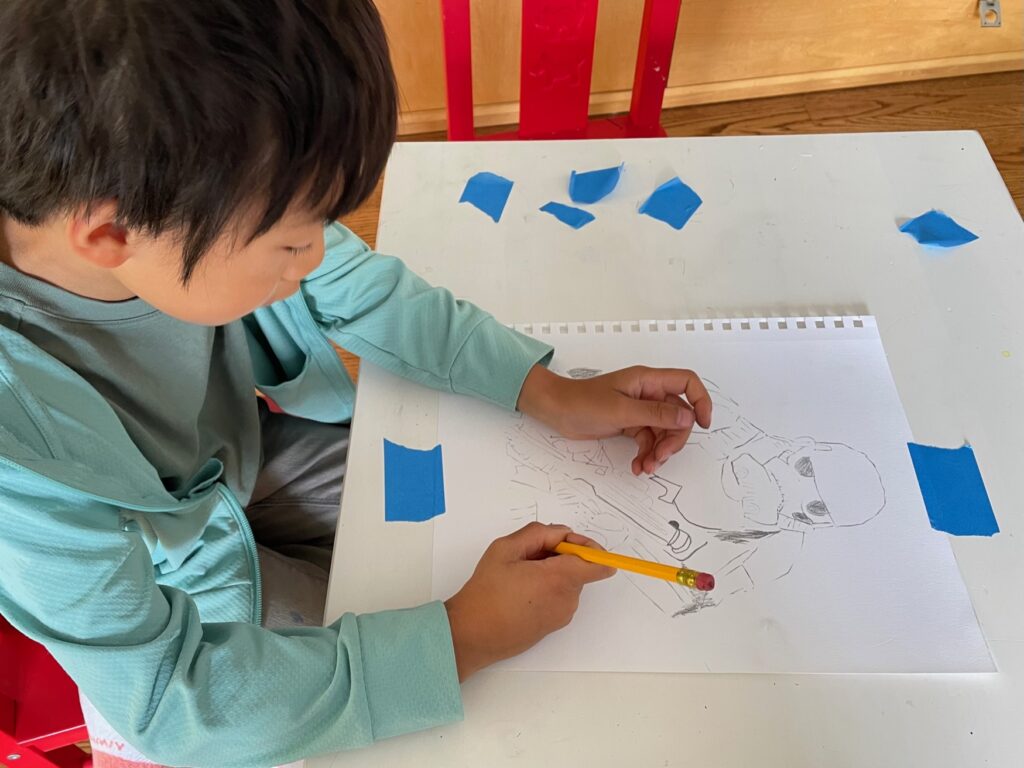
Step 4: Now lay down the good art paper and tape in place. Flip the tracing paper drawing backwards, so the pencil marks are against the art paper. Align the tracing paper image so it’s centered on the art paper and tape in place.

Step 5: Finally, have the child retrace the lines on the tracing paper, using a regular pencil. The pressure from his pencil should transfer all the markings onto the art paper.
Step 6: Remove the tracing paper and you should see the image on the art paper. Redraw lines that are faint to complete the artwork.
Step 7: Trim the art to fit your frame. My frame cost just a few dollars, and was purchased from IKEA years ago. Frame the illustration and hang it in the child’s room.
We liked the black-and-white image, but the child could color the image with crayons or markers before framing, if desired.
Also Happening at Camp Grandma…
Miss T and I made a few more recycle trash puppets for our puppet show and glued chopsticks and flat wooden craft sticks as handles for the puppets we had made last time.
If you’re making puppets from a plastic jar, such as a Costco vitamin bottle, you may not find purchase to glue on the handle because of the curved edge. If so, glue a few strips of felt to the inside edge of the mouth of the jar with a glue gun. Then glue the handle to the felt.
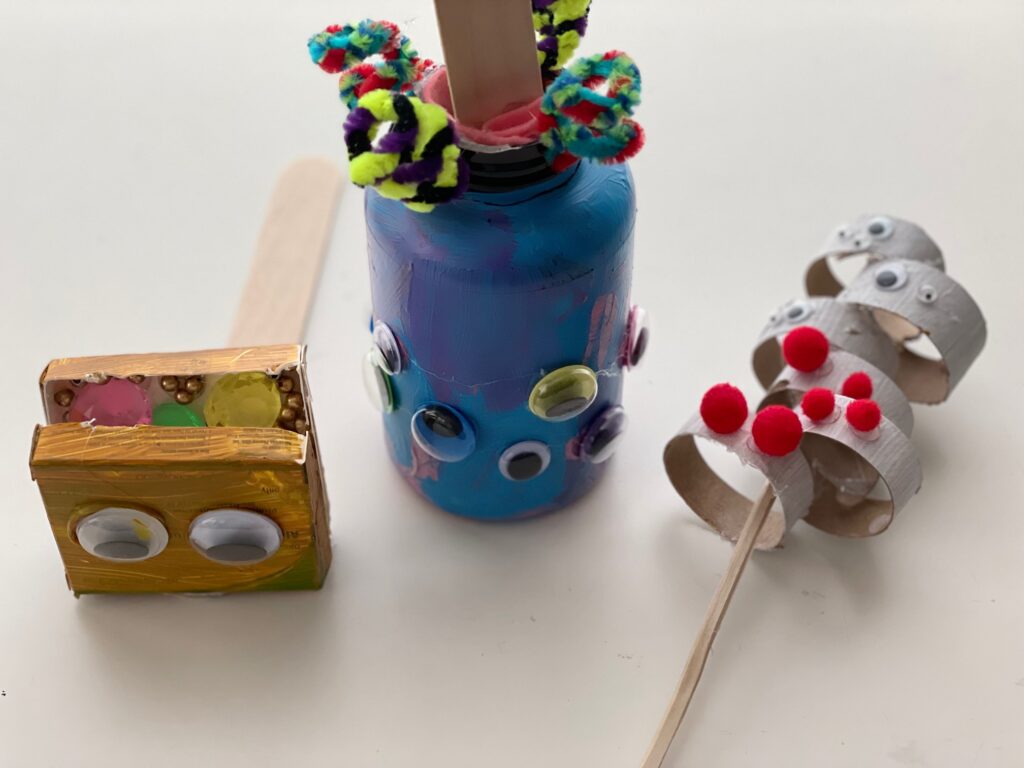
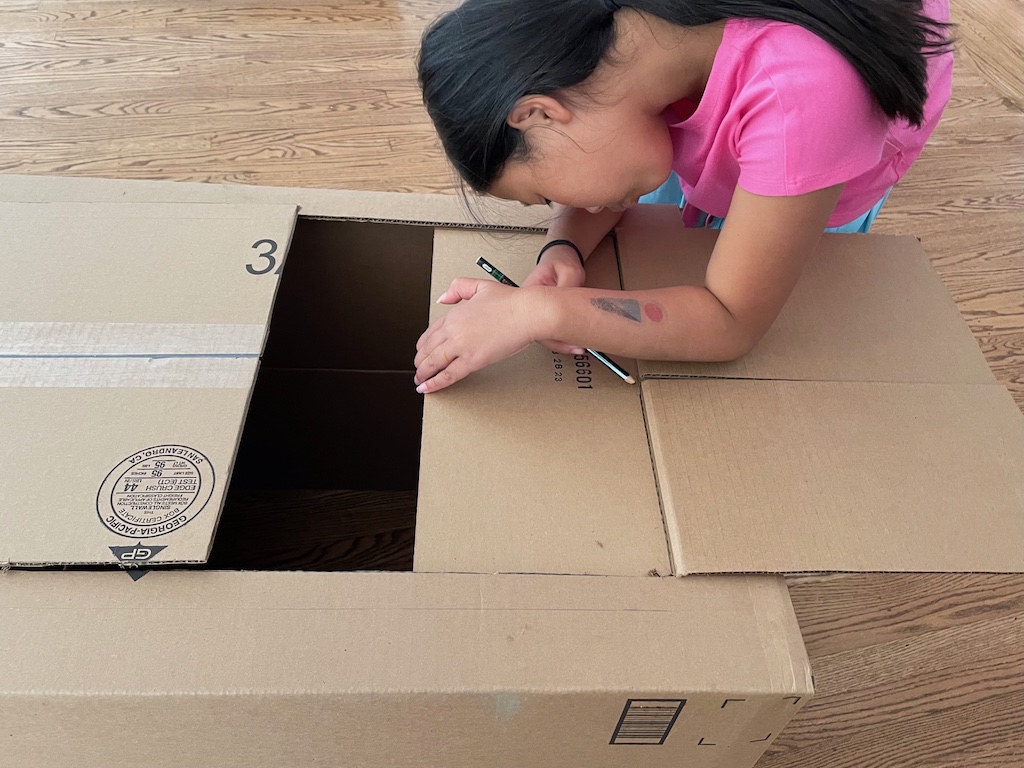
We’re also starting on our puppet theater, which we will make from a cardboard box
Still ahead at Camp Grandma, we’ll construct our puppet theater and write scripts for our puppet show as an instructive writing exercise and a way to tell more creative stories.
Sign Up!
Don’t forget to sign up for my email newsletter. Every Wednesday, I’ll give you a new idea for an activity or insight to nurture the little ones in your life. Next week, we’ll be working on Camp Grandma #3.