Camp Grandma: Making Confetti Eggs
At Easter, along with baskets and chocolate bunnies, I sent some confetti eggs, or cascarones, for the grandkids. It would have been fun to make these eggs together, but we were already in lockdown.
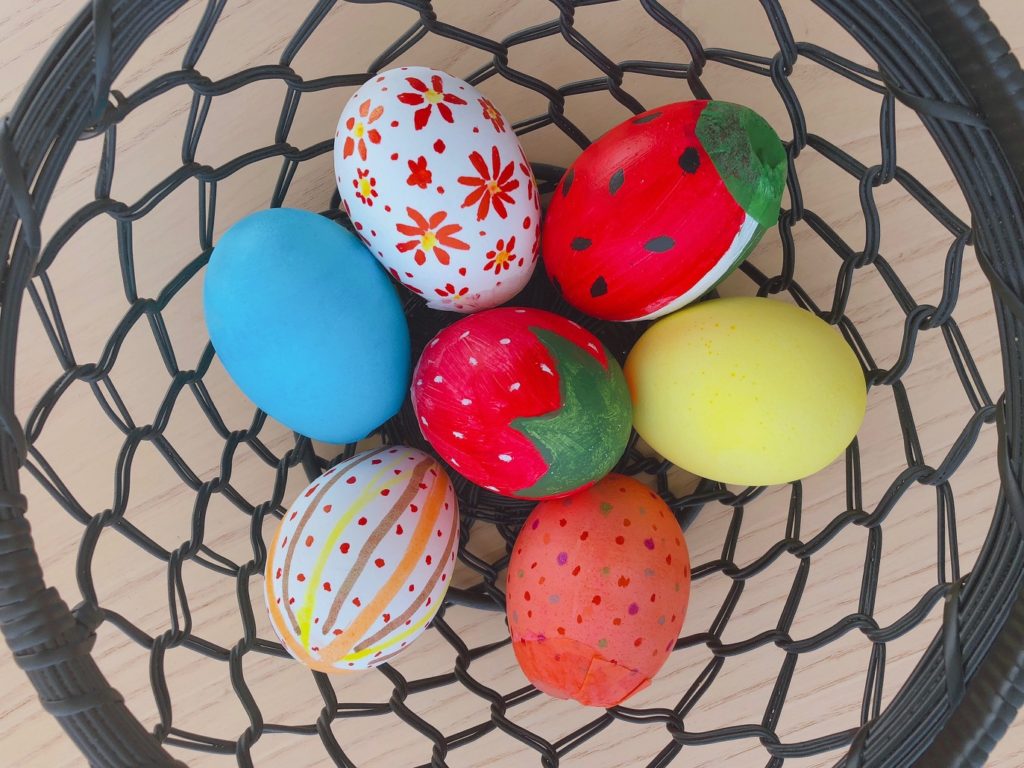
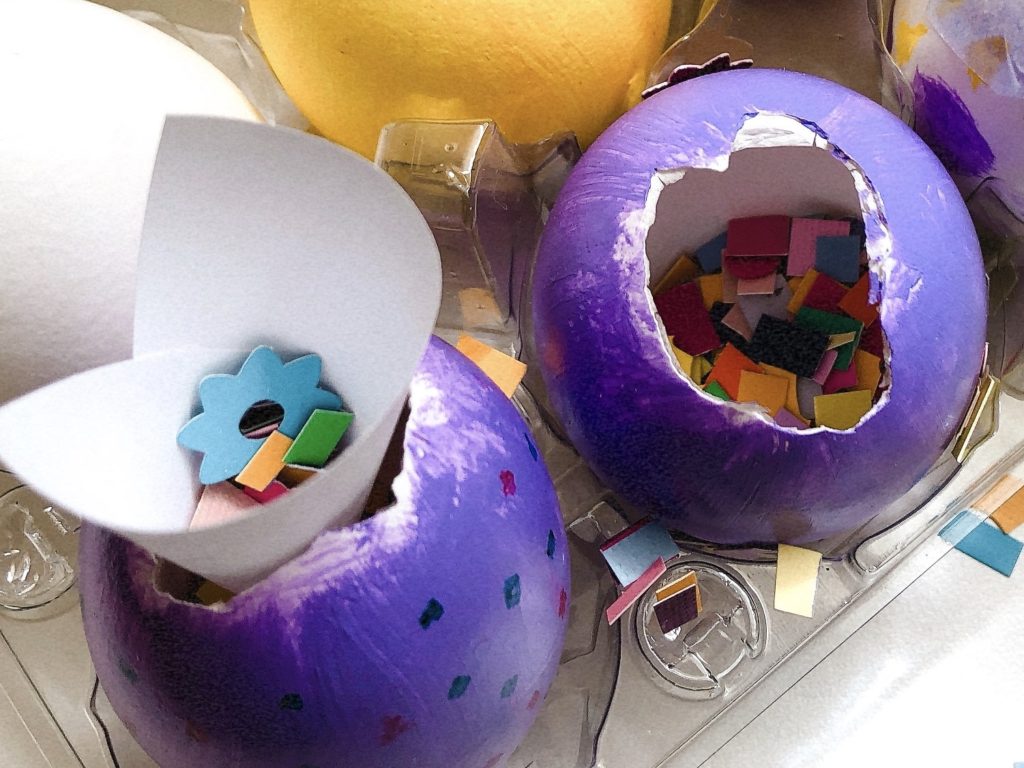
Mexican confetti eggs aren’t just for Easter but are popular for fiestas, too. Eggs are hollowed out, decorated, and filled with confetti. You crush them over people’s heads to bring them good luck.
I incorporated this project into the Camp Grandma schedule because I liked the idea of an ephemeral art project–one that would allow Miss T to express her creativity, but could later be destroyed without guilt.
How to Make Confetti Eggs
Refer to my previous post for step-by-step instructions, including how to hollow out the eggs. Basically, you:
- Prepare the egg shells and wash them out
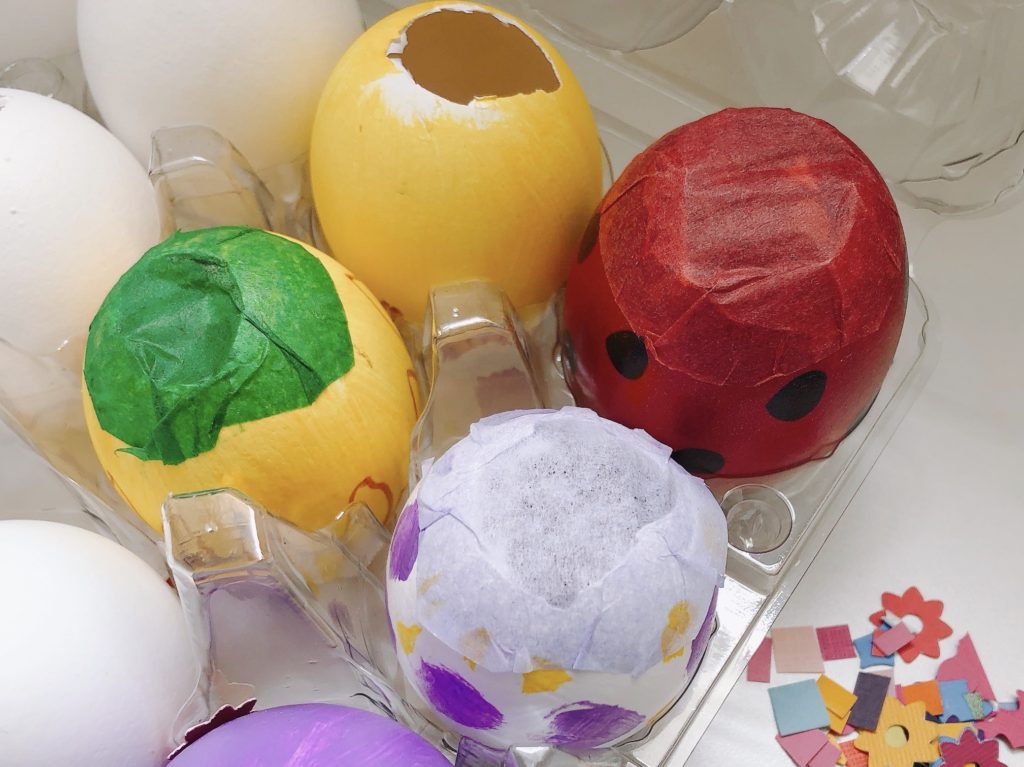
- Decorate the egg shells with acrylic paints, markers, or dye them with food coloring
- Fill the eggs with confetti
- Seal the eggs with tissue paper
How to Plan this Project
We completed this project over two sessions: one in the morning to paint the eggs with acrylic paint and another session that afternoon to fill the eggs after the paint had dried.
A simpler way to do this activity would be to skip the acrylic painting entirely. Just pre-dye eggs as you would for Easter eggs using this formula: 1/2 cup boiling water with 1 teaspoon vinegar and 10 to 20 drops food coloring. Dry the colored eggs and package them for the child, who can decorate the eggs further with markers.
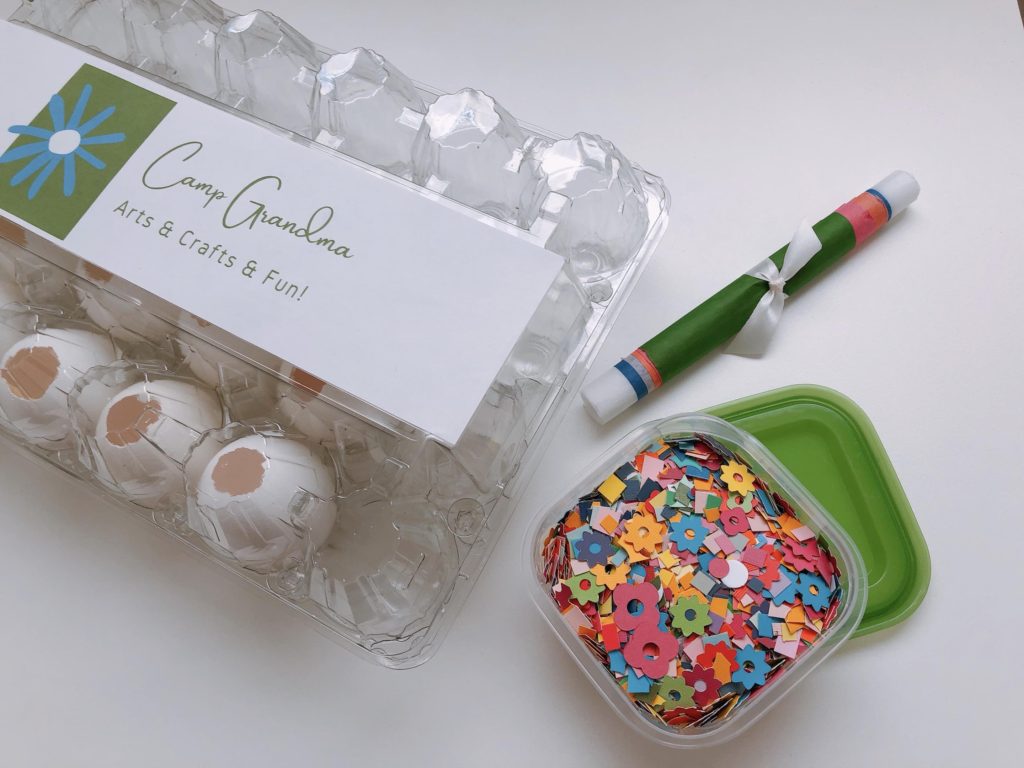
How to Make the Camp Grandma Kit
Here’s the list of items that should be in your kit or available to the child in their home.
- 8 hollowed-out eggs (check post for specific instructions–it’s easy). Eggs can be left natural for the child to paint, or colored in advance with food coloring
- Egg carton to hold the eggs; if the carton is plastic, the carton cups can also be used as a palette for painting
- A set of marking pens in a variety of colors
- Confetti (check post for how to make confetti, or buy some)
- White glue (such as Elmer’s)
- Tissue paper in a variety of colors to cover the hole of the eggs
If you plan to use acrylic paints, you’ll also need:
- A set of acrylic paints
- Paint brushes
- Water jar and water to rinse brushes
- Empty toilet paper rolls to hold the eggs while painting
- Scissors to cut the toilet paper rolls to fit the eggs
- Adhesive tape to tape the toilet paper rolls in place
Remember that you’ll need a duplicate set of everything for yourself so you can do the project with the child.

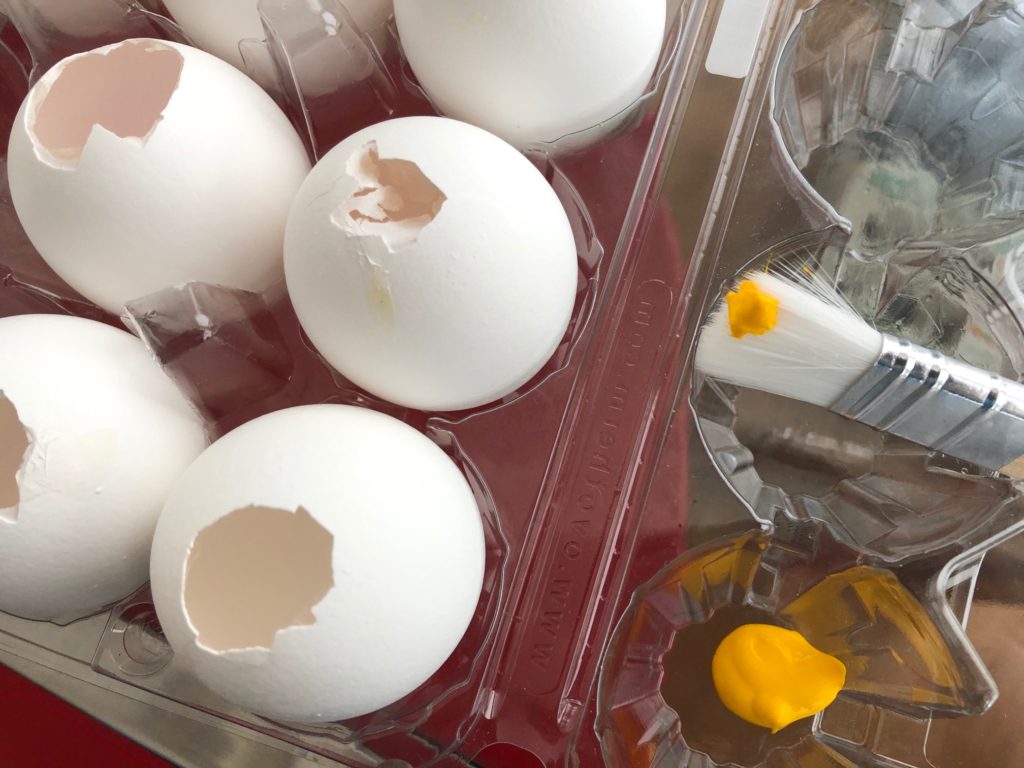
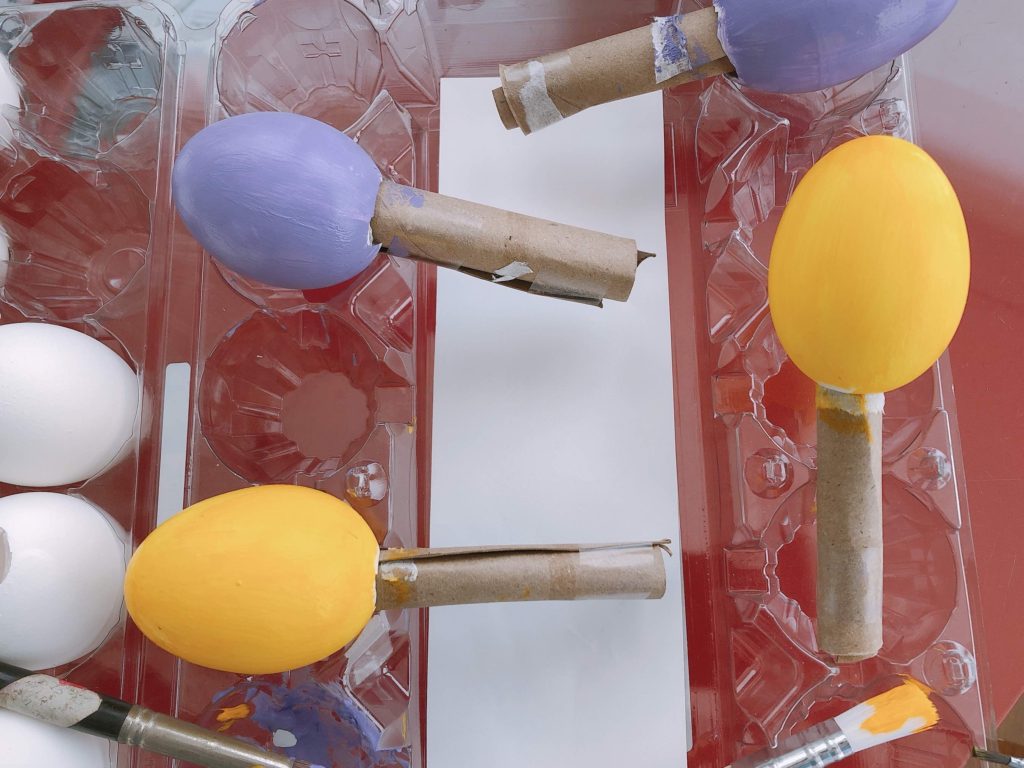
How to Color Eggs with Acrylic Paint
It’s a little cumbersome and messy to paint a three-dimensional surface. Here are two options:
- Stick a finger in the hole of the egg to stabilize it and paint halfway; allow to dry and paint the other half.
- Slit a toilet paper roll lengthwise and re-roll it to form a tube small enough to fit the hole of the egg, trimming away excess cardboard. Tape the tube in place securely so it keeps its shape. Stick the tube into the hole and use it as a handle to paint the entire egg. Carefully set the egg down, resting it on the cardboard tube to dry.
How to Fill the Eggs
If the hole is large enough, you can spoon the confetti right into the egg. For a smaller hole, make a funnel from a scrap of paper.
How to Seal the Opening
Cut a square of tissue paper about 1/2-inch larger than the opening of the egg. Trim the corners for a rounder shape. Apply glue around the edges of the egg hole and cover with the tissue paper.
You may need to trim the edges of the tissue paper a bit more and add more glue to seal the paper securely.
Once the eggs are decorated, stuffed, and sealed, arrange them in a pretty basket. Use the eggs to celebrate a birthday, the start of virtual back to school, or any other commemorative occasion. Just be sure to crack the eggs in an area that won’t make a hard-to-clean mess!
Coming Next Week
In our next session of Camp Grandma, we’re preparing a dessert that kids can make without parental supervision.

Camp Grandma topics, to date:
- Introduction to Camp Grandma
- Designing paper doll dresses
- Learning to Embroider
- Kids’ art project: a hanging room ornament
- Making cascarones, Mexican confetti eggs (this post)
.
Don’t forget to sign up for my email newsletter! Every Wednesday, I’ll give you a new idea for an activity or insight to nurture the little ones in your life. Come visit!