Camp Grandma: Gift Tags from Scraps
This post was written during the pandemic, when we were distanced from the grandkids. I was creating Camp Grandma activities for my grandchild to do remotely and to help us stay connected.
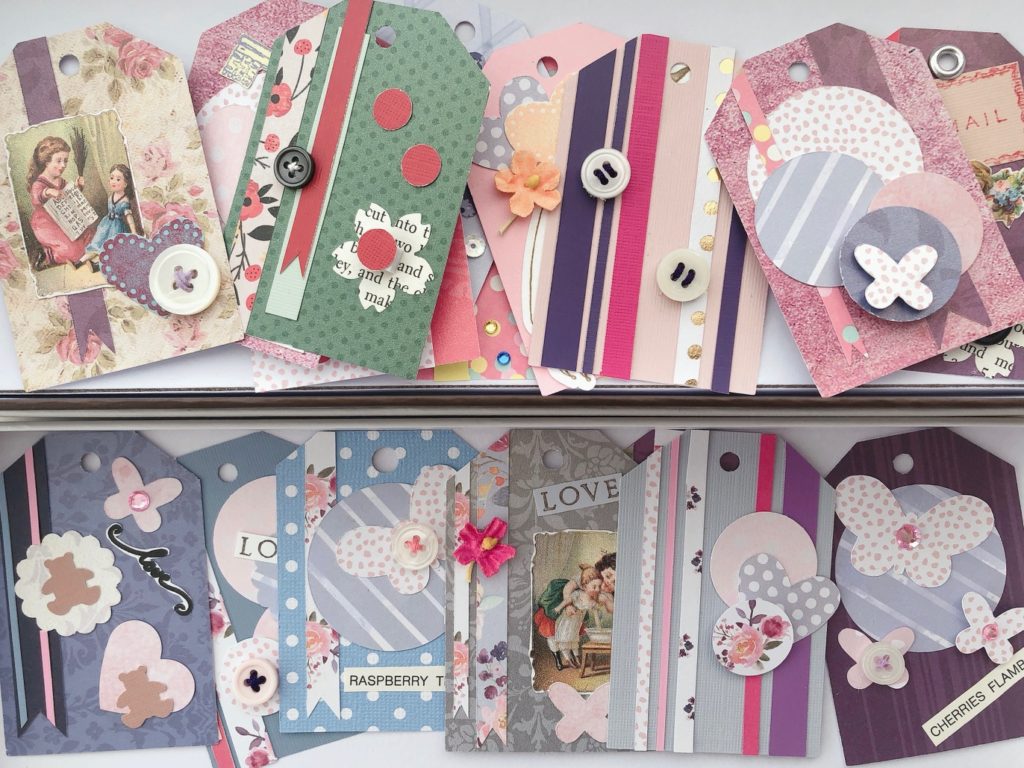
Recently, I’ve been making gift tags from scraps of cardstock. So I turned this project into our sixth and final virtual Camp Grandma activity.
While it works best if you already have paper scraps on hand, of course you can make these tags from new cardstock, too.
To make the tags, I used the Fiskars tag-making punch, bought on sale. However, at no cost, you could cut your own tags using a paper cutter, or cut wide strips to fashion bookmarks, instead of gift tags. The point is simply to have a base for a quick and satisfying collage.
How to Package your Gift-Tag-Making Kit
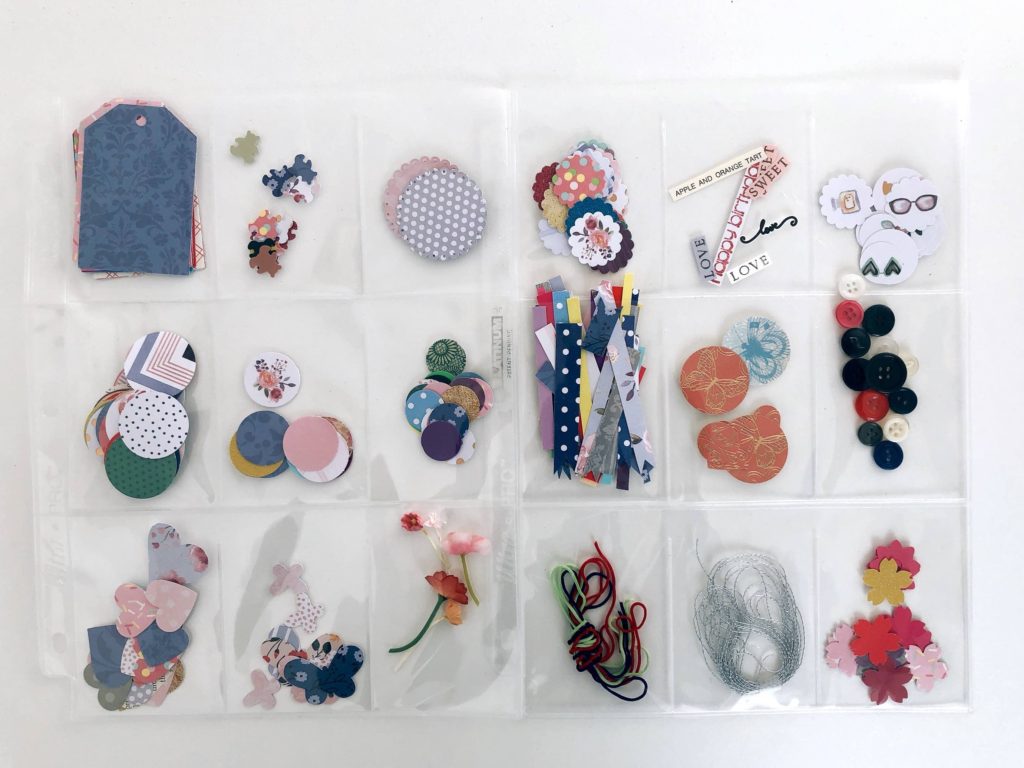
Making gift tags from scraps works best if you turn the elements into a kit. I made mine by organizing everything in sheet protectors with pockets–the kind used by trading card collectors. I had some leftover from my kids.
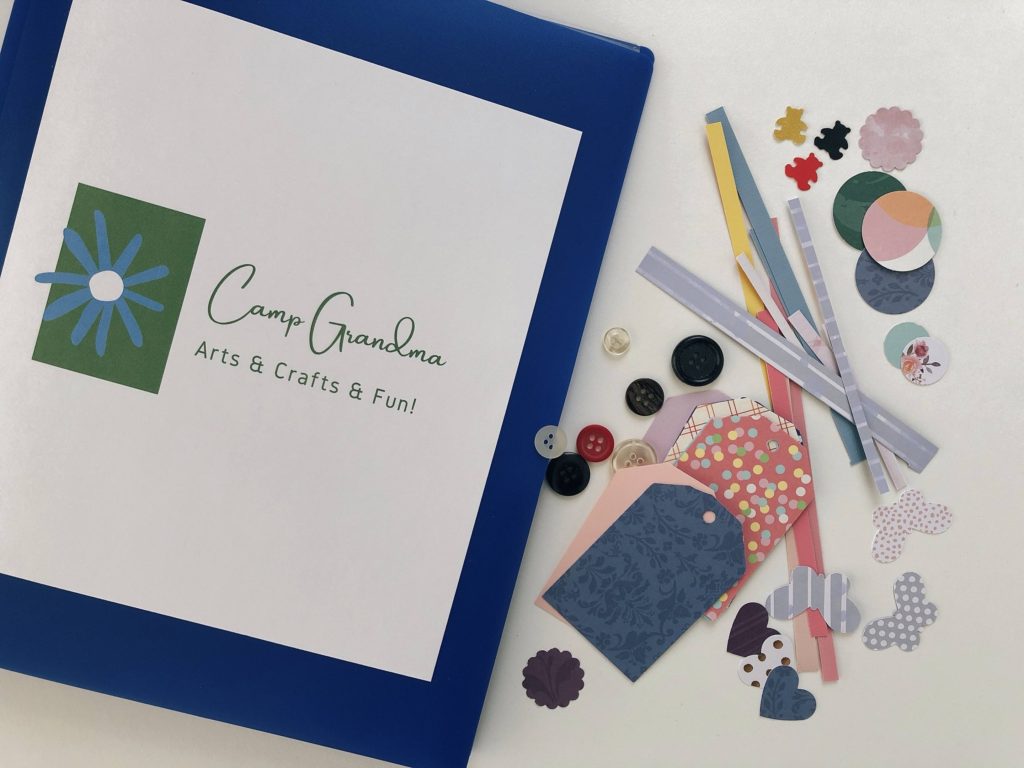
I put the filled sheet protectors into a 3-prong folder to make a resource book for tag-making. Miss T just opens the folder and selects the elements she wants to design her tags.
A good-to-have tool for this activity is a small glue gun. I bought a low-temperature mini for Miss T that cost just $2.99. I already had the glue sticks. A complete kit, such as this one, with 10 glue sticks was $6.99.
What to Package in your Gift-Tag-Making Kit
I used cardstock scraps exclusively for these gift tags. If you are buying cardstock to make a kit, it’s usually more cost-effective to buy cardstock stacks, that come with 36 to 40 sheets bound loosely together. They seem to be on sale perpetually at some craft stores. Best if they are two-sided (one side printed, one side plain), for more variety.
Create cardstock shapes to add to the kit. I made mine with decorative paper punches, but you can simply cut triangles, squares, and rectangles from cardstock. A basic hole punch, is great for making small circles.
Here’s what I put in Miss T’s kit; you may have other ideas:
- A dozen pre-cut gift tags using printed and solid-colored cardstock, with hole punched at the top
- Paper-punched shapes, such as hearts, flowers, butterflies, circles, and scalloped circles; or hand-cut your own shapes
- Strips of cardstock to create stripes and other designs
- Self-adhesive foam squares to add dimension to your designs
- Self-adhesive rhinestone stickers; I buy a large batch and cut off strips in different colors when I give them to Miss T, to prevent waste
- Stamped images and sentiments using rubber stamps
- Small, flat artificial flowers
- Assorted buttons
- Cord or string to attach to the finished tag
- Heavy-duty glue stick; lipstick-size is easiest to handle
- Low-temperature glue gun for gluing on heavier items, such as flowers and buttons (if parents allow the child to use one unsupervised)
How to do this Project
Have the child select from items in their kit to lay out a design on a gift tag. Use a glue stick to affix the elements onto the tag. Use the mini glue gun to secure heavier items. (I like to batch the elements that need the glue gun, then heat the glue gun and hot glue all at once.)
Show the child how to thread a length of string or cord to the tag so it is ready for gift-giving.
Make sure that the child has unplugged the glue gun when your Camp Grandma is over.
What Kids Learn from this Activity
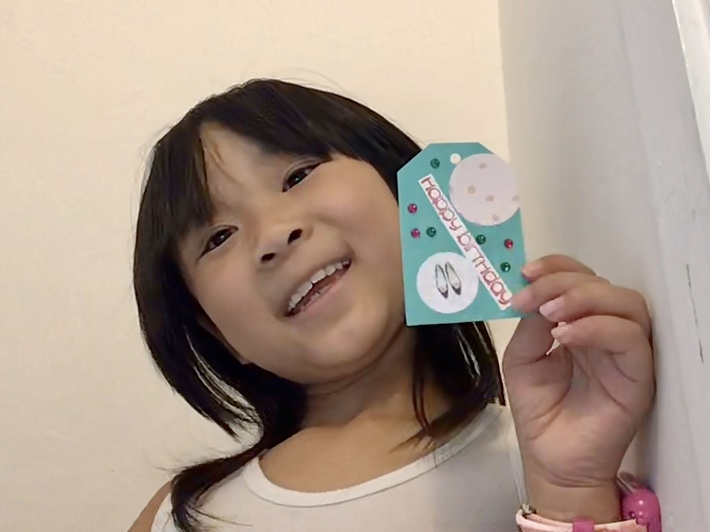
Miss T and her friends aren’t having birthday parties these days, due to Covid-19. However when it is safe to have parties again, Miss T is ready with handmade tags for her gifts. She also has learned to:
- Explore colors, patterns, and shapes to create harmony
- Think through her design layout and execute
- Be responsible for an electrical appliance
- Respect resources and create something of value out of scraps that would otherwise have been discarded
Coming Next Wednesday
After six sessions, Camp Grandma has closed its doors and Miss T will be starting back to school remotely. Camp Grandma began on a whim–to keep Miss T entertained. In the course of it, I learned some important lessons about how to maintain a relationship with a child remotely–whether you are still in lockdown or live too far away for in-person contact. My thoughts and tips next week.
Camp Grandma topics, now complete:
- Introduction to Camp Grandma
- Designing paper doll dresses
- Learning to embroider
- Kids’ art project: a hanging room ornament
- Cascarones, Mexican confetti eggs
- Making an easy dessert
- Creating gift tags with scraps (this post)
.
Don’t forget to sign up for my email newsletter! Every Wednesday, I’ll give you a new idea for an activity or insight to nurture the little ones in your life. Come visit!