Crafts for Kids: Make Ice Cream Cones this summer!
If you’re planning a program of crafts for kids this summer, consider making ice cream cones. Miss T and I have a cookie and ice cream shop where we buy and sell Styrofoam ice cream and clay cookies to each other.
Our shop is more than for pretend play. In fact, the shop teaches Miss T about math and she learns some life lessons. You’ll find the game playing details in next week’s Grandma Fun post.
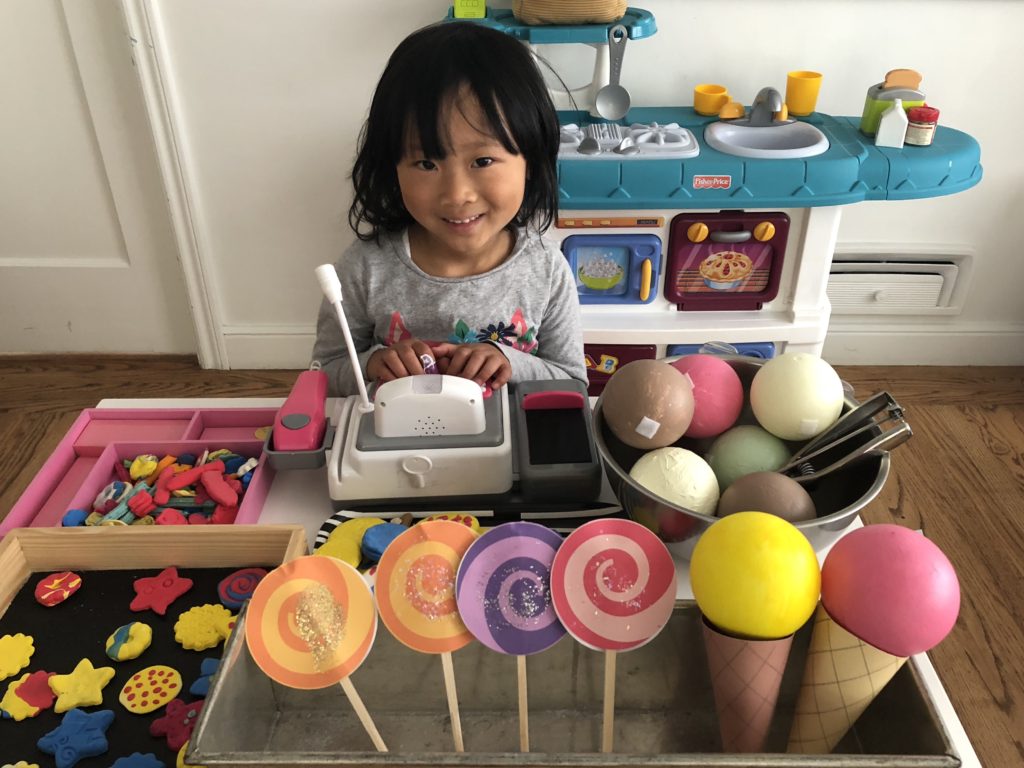
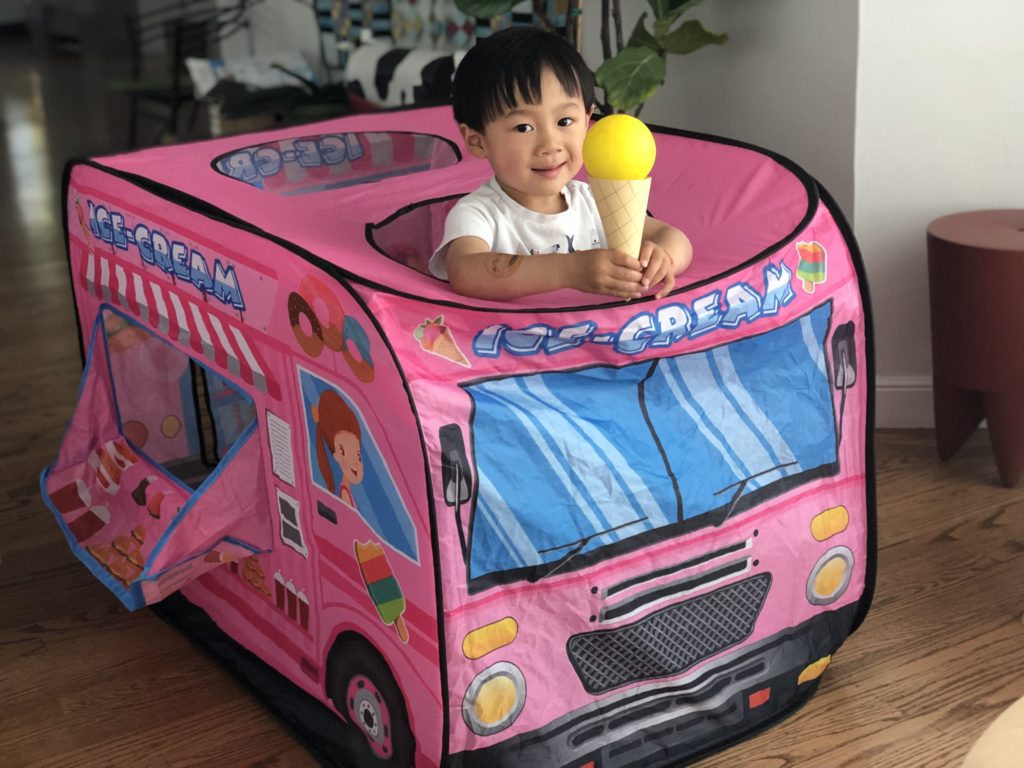
Miss T’s little brother is too young to participate in the shop. So, he just has fun selling the ice cream from this ice cream truck. Made from polyester and held together with flexible wires, we anticipated that the truck would be rather flimsy when we bought it–and it is!
But the brilliant part is that when they’re done playing with it, the truck collapses like a laundry hamper and fits neatly back in its box. Caution: Not for rambunctious children who could tear it apart.
What you Need for the Ice Cream Cones
- Card stock in ice cream cone colors (light beige and dark brown for chocolate)
- Ruler
- Pencil
- Scissors
- Brown marking pen with fine tip
- Glue gun
- White Velcro (1/2-inch-wide) strips

To Make the Ice Cream Cones
For each cone, cut card stock into a 6-inch square. Using a ruler laid diagonally across the square, measure 6 inches and mark with a pencil. Keeping the ruler affixed at the base, swing the top of the ruler to the left and right of the diagonal like a compass, marking off 6 inches in increments until the marked lines form an arc. Cut out the shape with scissors.
Using a ruler as your guide, mark off equidistant lines ¾ inches apart in a cross-hatch pattern to replicate a waffle cone.
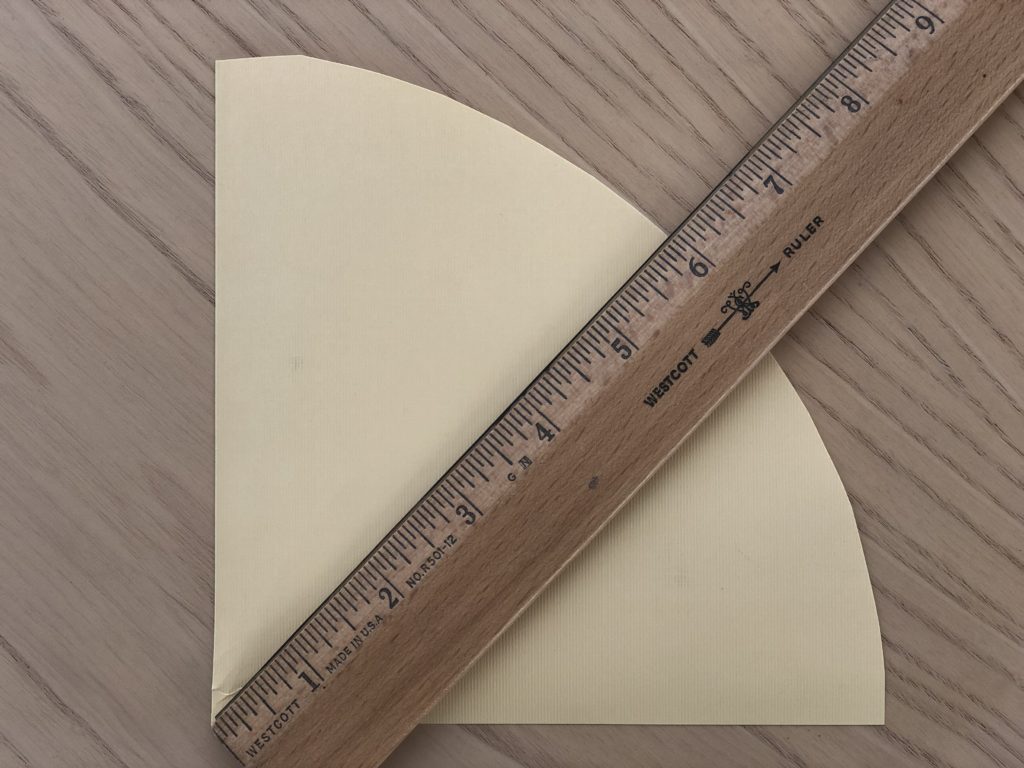
Roll the card stock into a cone shape and glue the edges with a half-inch overlap. (It’s not easy to shape the cone without bending the card stock at the tip of the cone. To help me, I use the handle end of an artist’s brush first, to gently coax the pointed tip of the paper into a roll.)
Once the cone is glued in place, the final step is to glue on a ¾-inch piece of Velcro to the lip inside the cone at the top. Save the opposite half of the cut Velcro strip to glue to the ice cream ball.
For another fun craft project, create a board book for baby.
IMPORTANT: Velcro has a hook side and a loop side, to enable the two sides to adhere. Be sure you use the same side for all the cones and the opposing side for all the ice cream balls. This ensures that the ice cream balls can be affixed to the cones interchangeably.
What you Need for the Ice Cream
- 10-inch bamboo skewers
- 3-inch Styrofoam balls
- Paint brushes about 1 inch wide
- Acrylic paints in ice cream colors
- Paper plate to use as a palette
- Water jar to rinse brushes
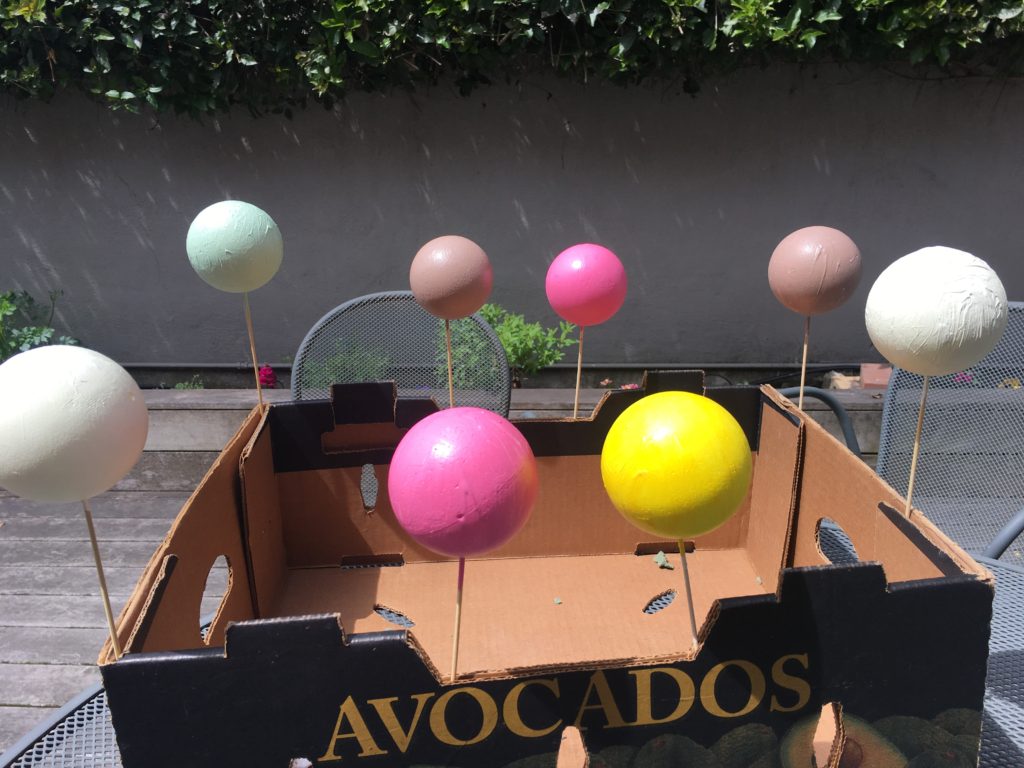
- Corrugated cardboard box or tray, (see note)
To Make the Ice Cream
Insert a bamboo skewer about 1/2 inch into a Styrofoam ball or until the ball feels securely impaled. Be careful with the sharp point of the skewer around children. Squeeze out paint on a paper plate (or an artist’s paper palette if you have one) and have kids paint the balls to cover completely, using the skewer as a handle. We tried to paint some parts with little splotchy dabs to replicate the texture of ice cream.
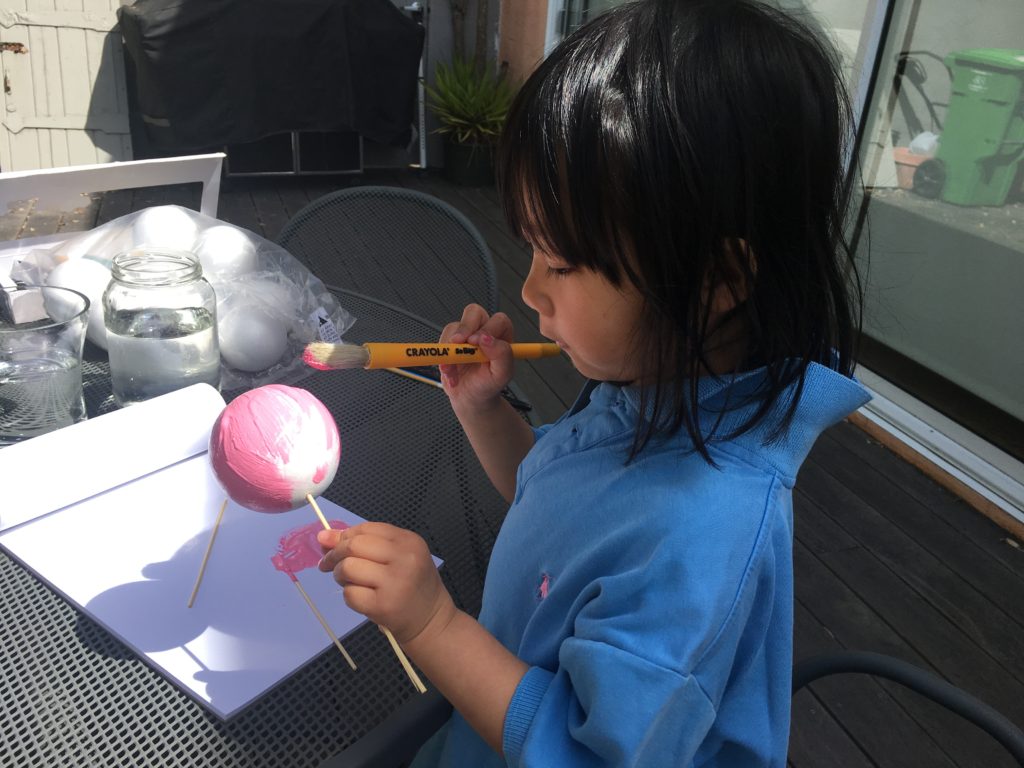
To dry the balls, insert the skewers into the spaces around the edge of a corrugated box. Once the paint is dry, glue the remaining half of the Velcro strip to the ice cream ball.
How to Assemble the Ice Cream Cones
To assemble, attach the ice cream ball to the cone with the Velcro strips. The ice cream won’t sit securely in the cone, but neither will it fall out while playing. While you could glue the ice cream into the cone, this doesn’t allow for interchangeability. Part of the fun is being able to order whatever flavor of ice cream you want in whatever cone you desire.
Notes:
- The corrugated tray is needed to dry the Styrofoam balls. I like the cut-off boxes from Costco or the kind of box that flats of fruit are sold in at Trader Joe’s, for example. Alternatively, you can just cut off the top of any corrugated carton. What you want to expose is the zig-zag pattern between the layers of cardboard, which is perfect for holding the bamboo skewers in place.
- When you glue the Velcro into the cone, test one first to find the best placement for the Velcro to hold the ice cream ball.
- If you have a Cricut cutting machine, you can find a pattern for an ice cream cone to purchase. The machine will cut the cone shape and mark diagonal lines for a waffle cone.
What Children Learn from this Activity
- They learn that toys and games can be made and don’t have to be store-bought.
- How to use your imagination to concoct ice cream flavors.
- Dexterity with a paint brush.
- A focused program of crafts for kids will help to entertain and keep young minds active all summer long.
Sign Up!
Don’t forget to sign up for my email newsletter. Every Wednesday, I’ll give you a new idea for an activity or insight to nurture the little ones in your life.
First of all, love, love love your Home Page!
Did a double take when I saw this on your IG. How did they do that???? Very clever and very easy, although it takes a bit of patience to paint all the styrofoam. [Really, who cares when the end result is so much fun.] And great solution for drying each. So looking forward for more…
Thanks a million for your comments! I’m so encouraged, since I’m just getting started. I so appreciate your support.
Thanks Sandy! Your giving me project ideas for my preschool class😊
Thanks so much for checking out the website, Claudia! Many more craft projects coming. 🙂
Sandy, I’m always seeking a craft or outing for my 3 grandchildren and I LOVE making ice-cream cones without the dripping ice-cream. My oldest granddaughter is 10 and she has just “gotten over” the slime fad, which was not only messy but expensive to purchase all the ingredients. I look forward to learning more crafts and entertaining ideas for grandchildren and grandmothers together.
Miss T is adorable and I’m sure a joy to teach!
Thanks so much for your lovely comments, Suzanne. If you have any ideas you’d like to share, please let me know. And thanks for subscribing!
I’m so happy I may have given you an idea that you could try with your grandchildren. Thanks for your response and your encouragement! I’ll keep the ideas coming.:)