Toilet Paper Roll Crafts: How to Make a Car

I hate throwing out toilet paper rolls because I anticipate doing lots of toilet paper roll crafts with the grandkids. So I keep the rolls, rarely use them, and they just end up taking space in my craft room.
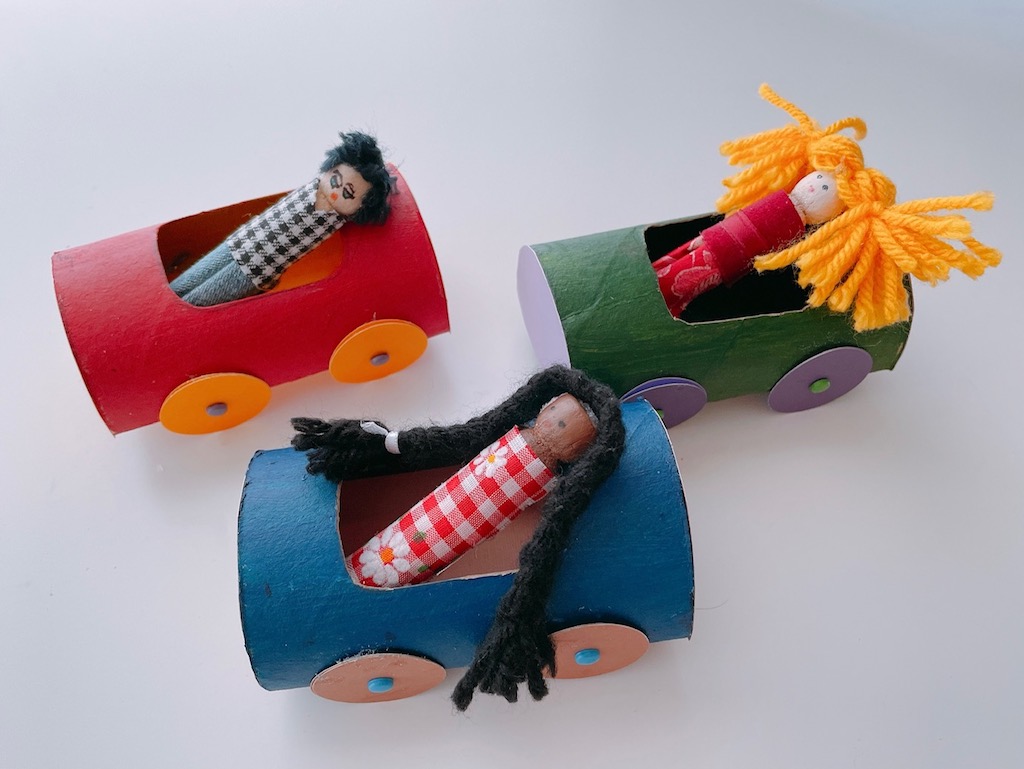
Recently, I was motivated to use a few to manufacture cars for Little N. He had commandeered a shallow box as a car to drive his clothespin doll to a pretend Christmas tree lot so he could buy a tree for our shoebox house.
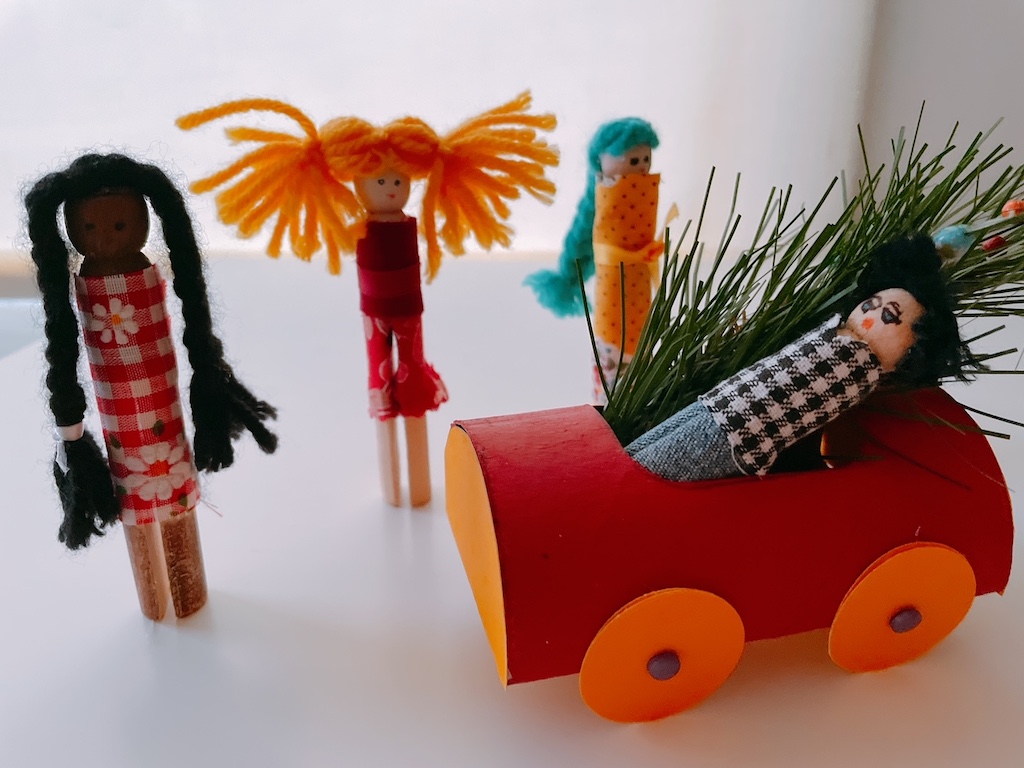
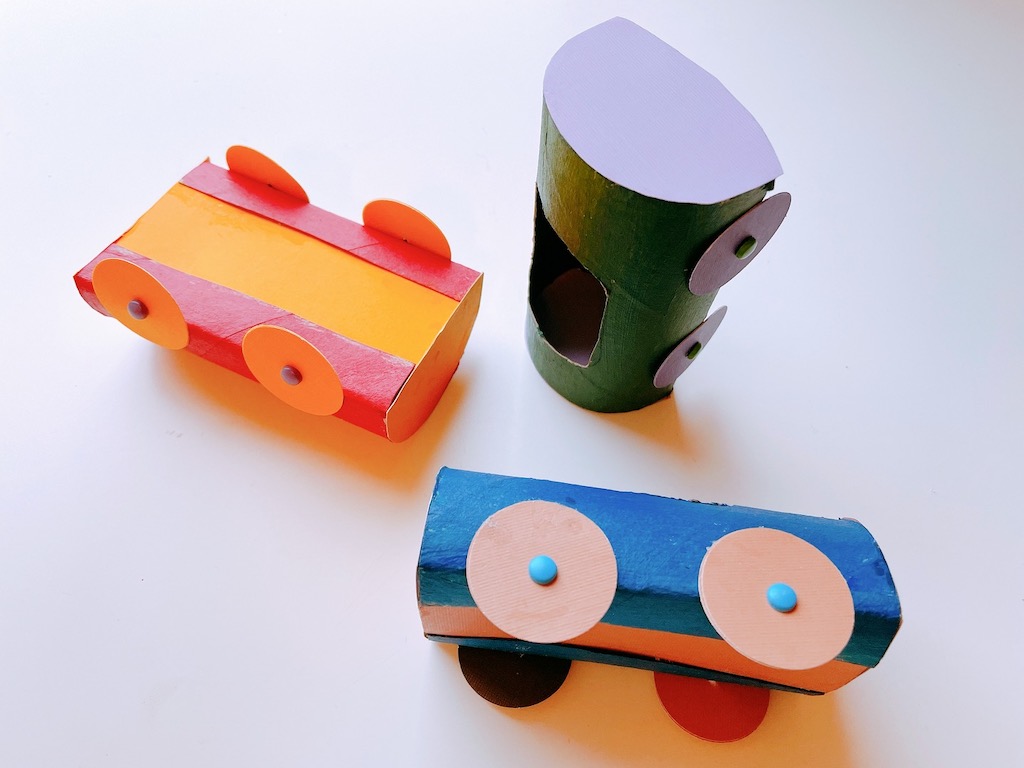
By looking at the photos, you can see that, as toilet paper roll crafts go, this one is fairly simple. You cut a hole for the people, attach wheels, add a front and back piece, and you can drive the car home.
Try these other toilet paper roll crafts from “Call Me Grandma!“
The trick is where to place the wheels and how to get the hole centered in the car. To do this, make a pattern.
One note of caution when making toilet paper roll crafts: all cardboard rolls aren’t the same size. So if you’re making a pattern for the car, make sure your pattern is the same size as the cardboard roll you’re making it for.
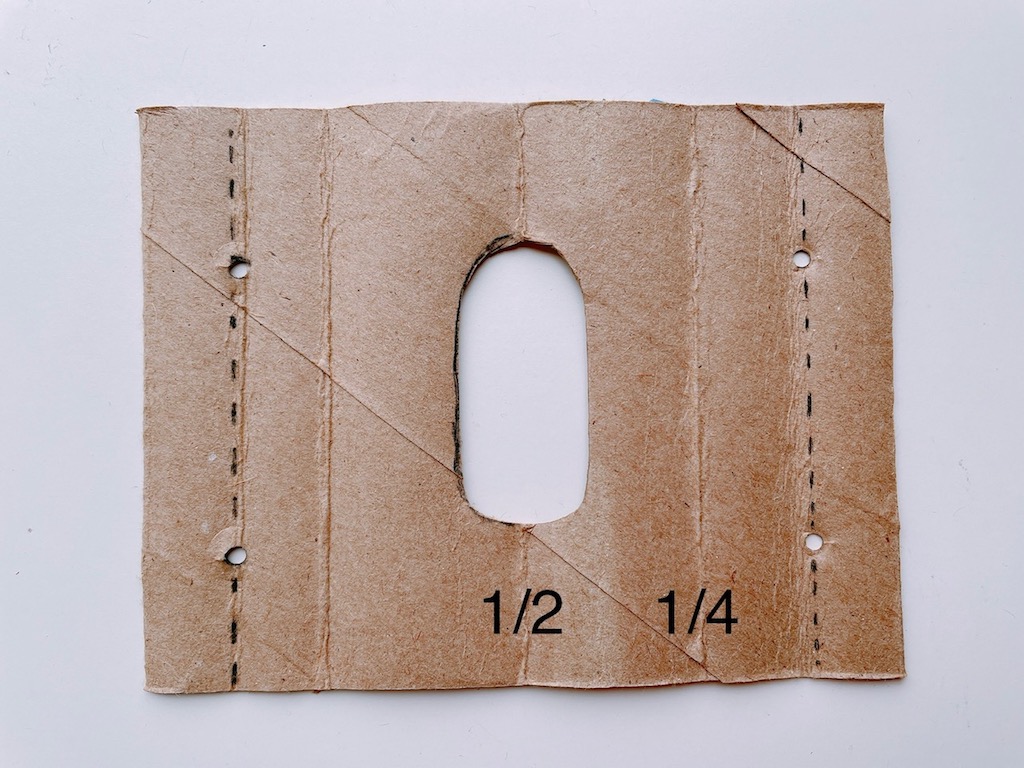
First, Make a Pattern
Materials
- 1 toilet paper roll
- Pencil
- Sharp scissors
- Hand paper punch that makes small holes or an awl or other sharp-pointed object to pierce holes
- Ruler
Instructions
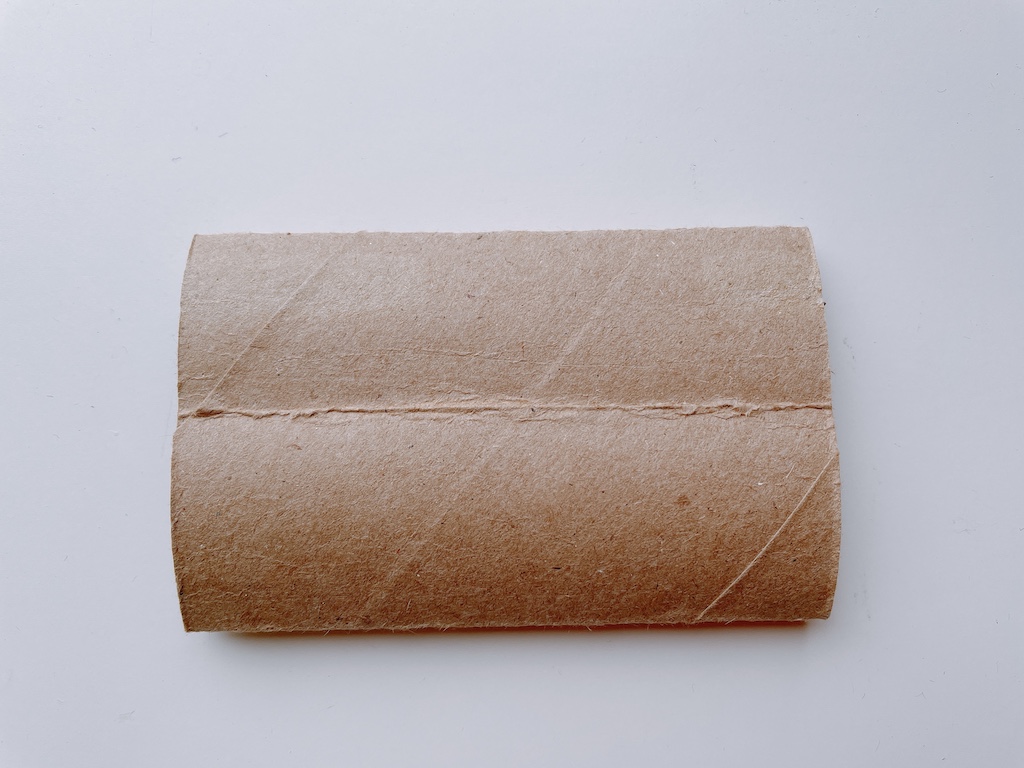
Fold the toilet paper roll in half lengthwise; open it up and fold in half lengthwise between the first folds, so your cardboard roll is divided into quarters.
Now, cut along one of the folded lines and fold the toilet paper roll in half. Then fold one cut side so the cut edge meets the closest fold line. This is the line where the wheels will go. (When you made your first fold, you divided the cardboard roll in half; when you made the second fold, you divided the roll in quarters. Now you’re folding the quarter of the roll from the cut edge to make eighths.) Do the same for the other cut side.
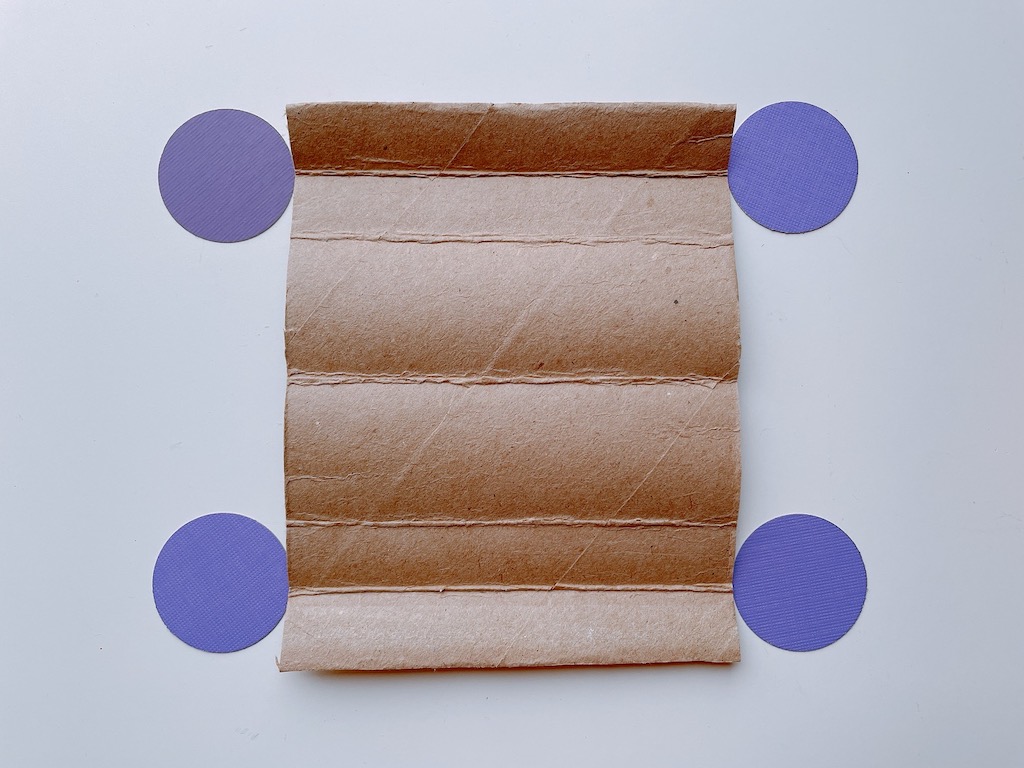
Now you’re ready to draw your pattern. Draw the hole for the opening and mark placement for the wheels. Use a ruler so you can place the wheels equidistant from the edge on both sides. Mine were 2 inches from the edge.
Finally, cut the hole for the opening and hole punch where the wheels will go. Your finished pattern should look like the photo below.
Construct the Car
Using your paper pattern, you’re ready to construct as many cars as you like.
Materials Needed (for one car):
- 1 toilet paper roll
- Car pattern (as shown above)
- Acrylic paint
- 4 small brads with prongs (for wheels)
- Cardstock for wheels, floor of the car, and for the front and back of car
- White school glue (like Elmer’s)
Tools Needed:
- Pencil
- Sharp scissors
- Paint brush
- Paper punch (1 1/2-inch circles), optional
- Small hole paper punch or awl
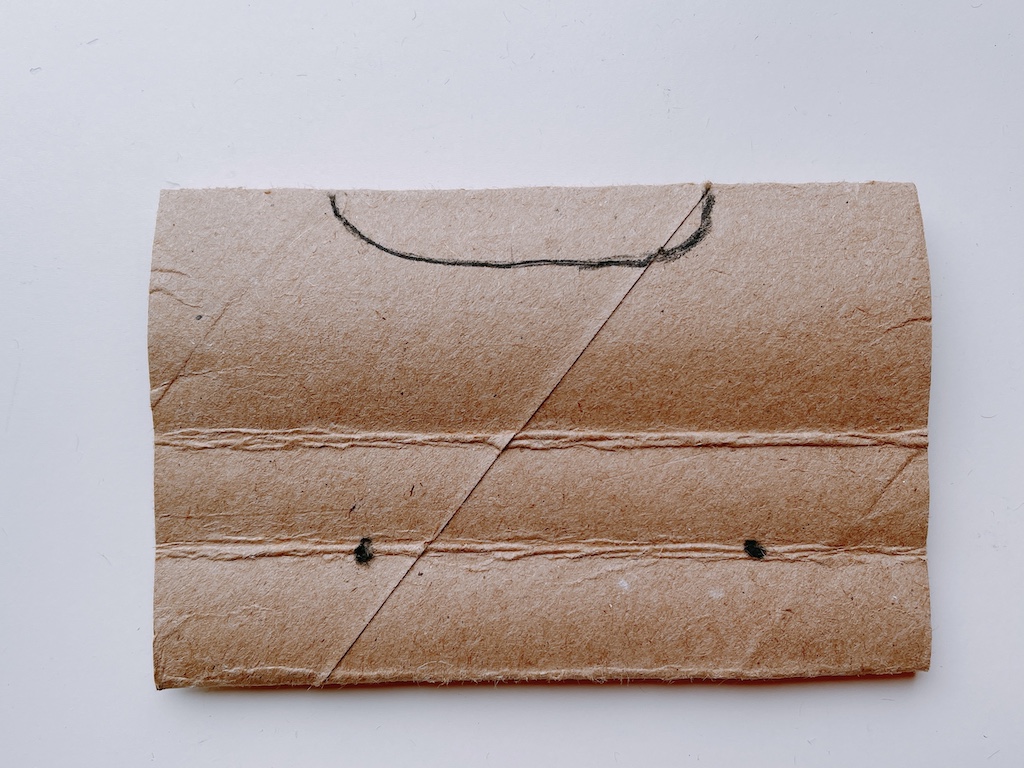
Cut your cardboard roll, lengthwise, like the paper pattern. Flatten the cardboard roll and use your paper pattern and a pencil to mark the opening for the car and the placement for the wheels. Cut out the opening and hole punch the place for the wheels. Fold the cut edge of each side up to the markings for the wheels.
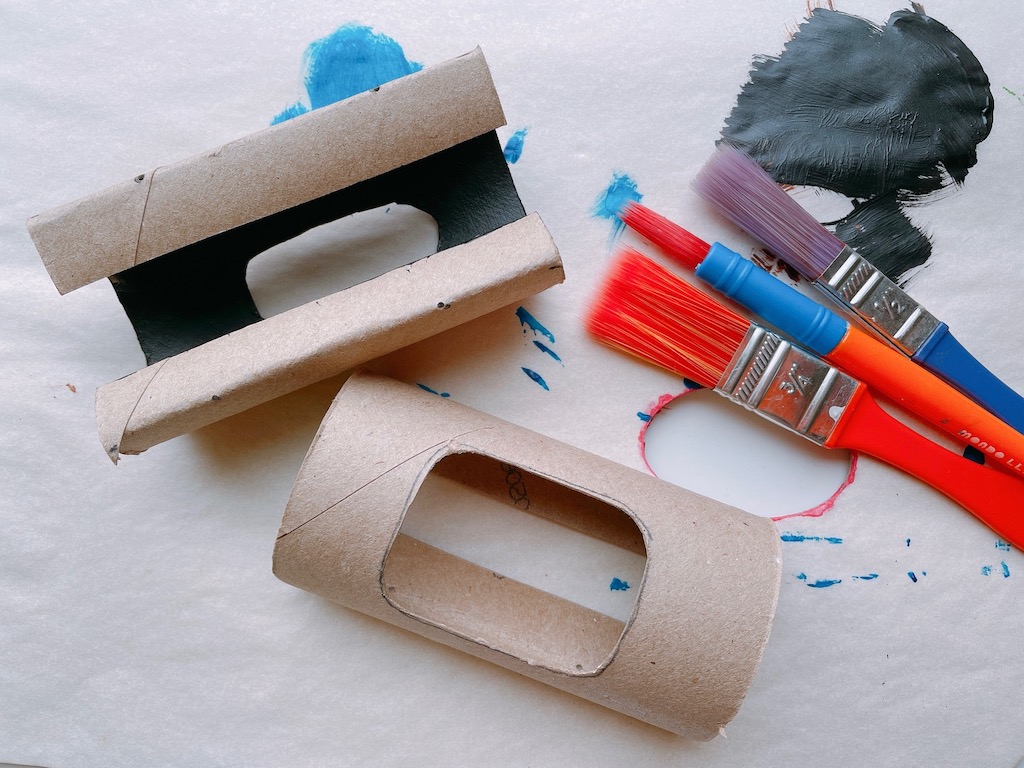
Paint the cardboard inside and outside; allow to dry. (It’s easier and less messy to do one side first, let dry, then do the second side.)
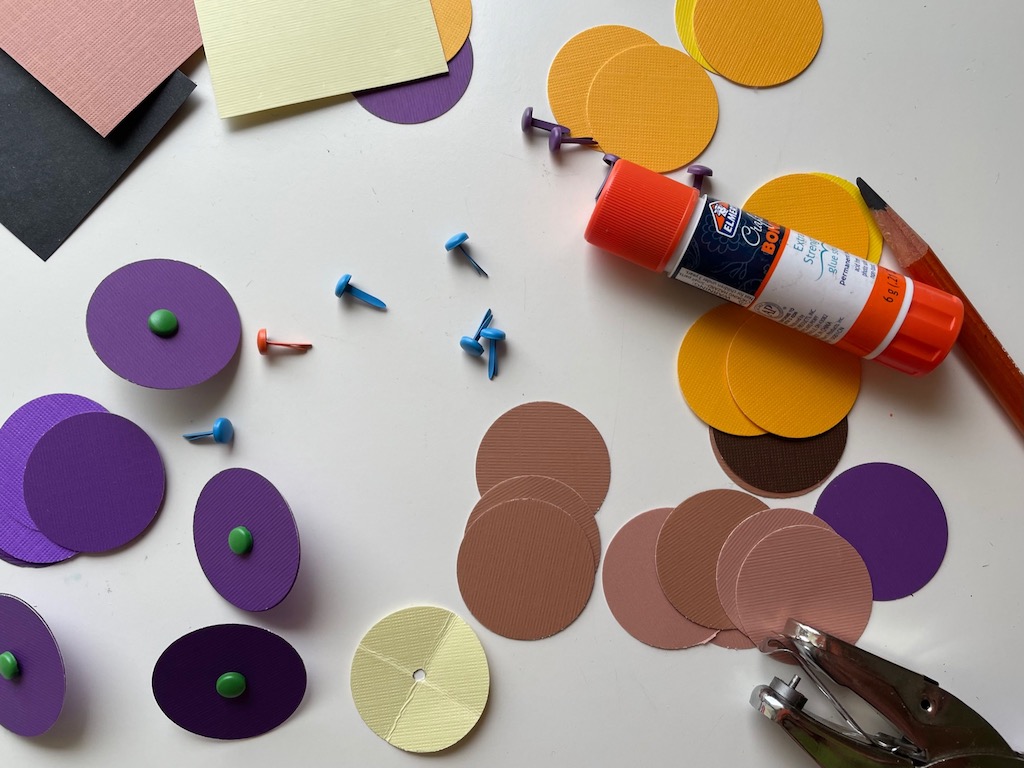
In the meantime, make the wheels. I used a paper punch and cut twice as many circles, gluing two together for stability for each wheel. (I used a glue stick for this, but you can use white glue.) If you don’t have a circle paper punch, use scissors to cut 1 1/2-inch circles. Use a small hole punch or an awl to make a hole just large enough for the brads to go through and thread brads into the holes.
Assemble the Car
Insert the wheels into the car, securing with brads. Use white glue to glue a rectangle of cardstock to fit the floor of the car. Mine was 2 1/2- X 4-inches. You have to hold the glued pieces together for a while until the glue sets since the cardboard will tend to pop up.
Now glue the top of the wheels to the car with white glue because they tend to sag, otherwise. The wheels won’t turn, anyway–the brads are just for design. If you don’t want to use the brads, you can just glue the wheels directly onto the car. If you’d like to make a car where the wheels turn, here are some instructions.
To finish the car, trace the shape of the front and back of the car onto cardstock; cut out. Add glue to the edge of the toilet paper roll; press the cardstock to the glue and hold in place while the glue sets.
Gluing Tip:
Instead of squeezing out glue directly from a bottle, I squeeze some glue into a plastic sauce cup with lid–the kind you get with takeout food. To glue difficult areas, like attaching the front and back pieces to the car, use a bamboo skewer or an unfolded paper clip to dab a small amount of glue and apply to the edges. This gives you better control and keeps from squirting out too much glue as you work.
Making this Project with Kids
A younger child will need help because it does take a fair amount of dexterity to glue the parts to the car. The best way to plan this project is to cut out the opening and hole punch the holes for the wheels in advance. Have kids do the painting and insert the tires.
You can then glue the floor of the car and the front and back pieces. Have the child decorate their cars with markers or stickers.
For More Toilet Paper Roll Crafts
Visit my Pinterest page, where I’ve collected some fun toilet paper roll craft projects. I can’t wait to try some of them out myself!
.
Don’t forget to sign up for my email newsletter! Every Wednesday, I’ll give you a new idea for an activity or insight to nurture the little ones in your life. Come visit!