How to Make Mexican Paper Flowers
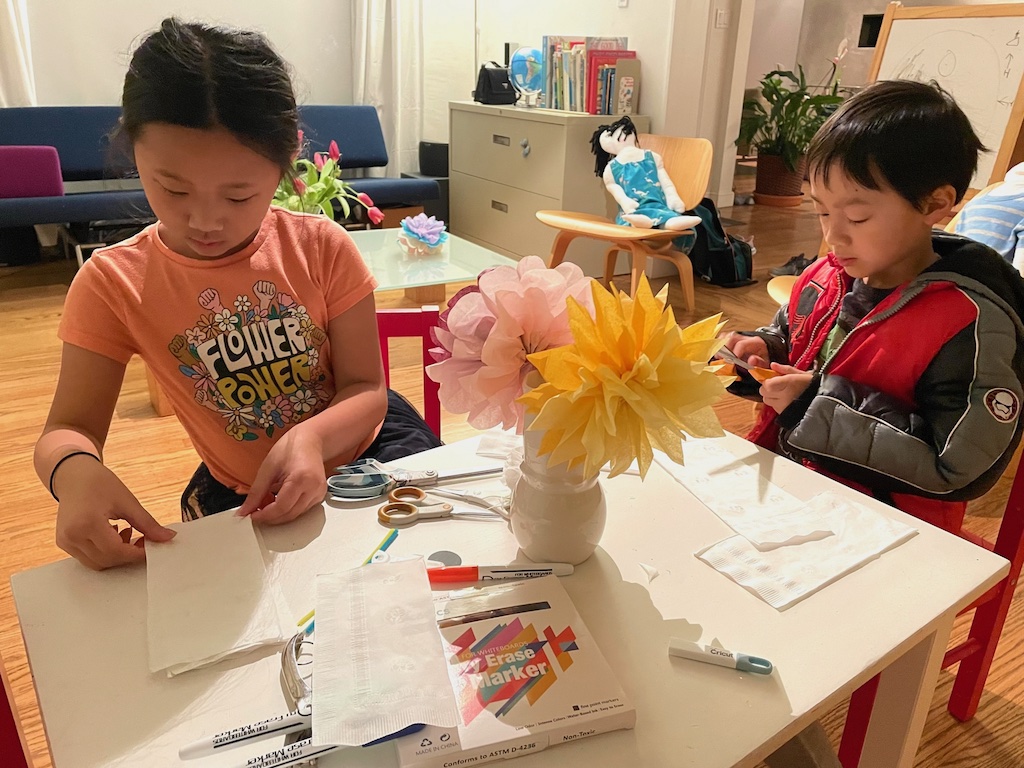
I don’t know about you, but I’m getting pretty tired of gray skies and cold weather. So last Friday, the grandkids and I made Mexican paper flowers to add color and sunshine to our world!
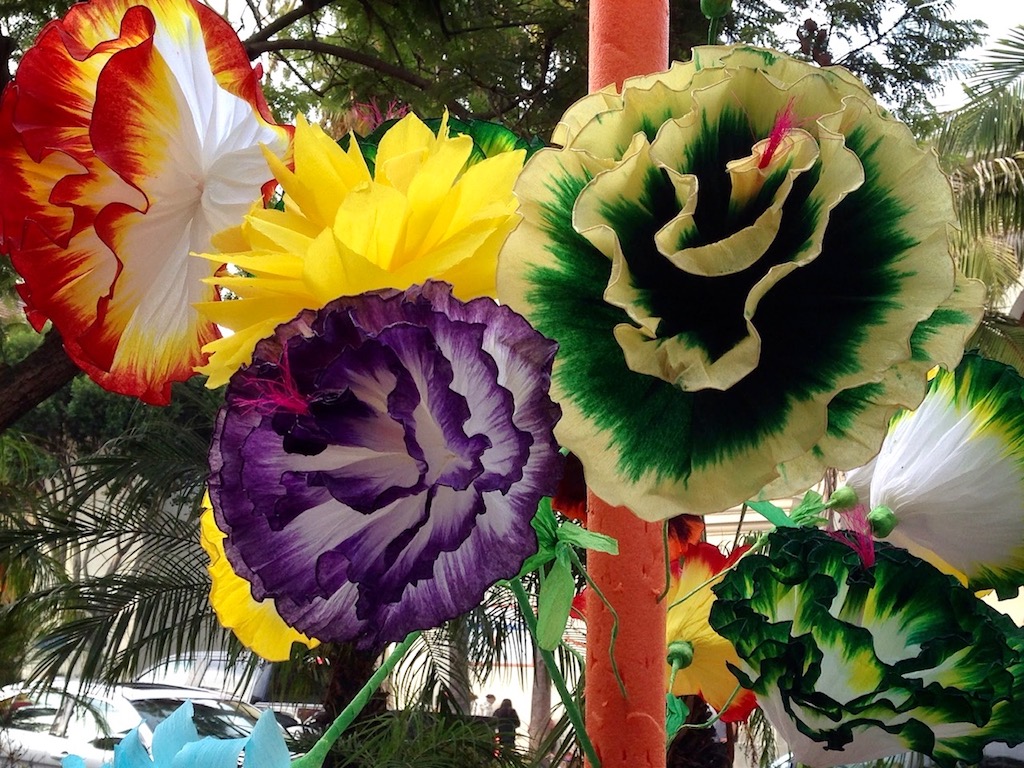
I fell in love with Mexican paper flowers at Old Spanish Days in Santa Barbara, California. This lively annual fiesta celebrates the city’s history, culture, and heritage. There’s a grand parade, great food and music, and sidewalks bustling with vendors selling Mexican paper flowers and cascarones.
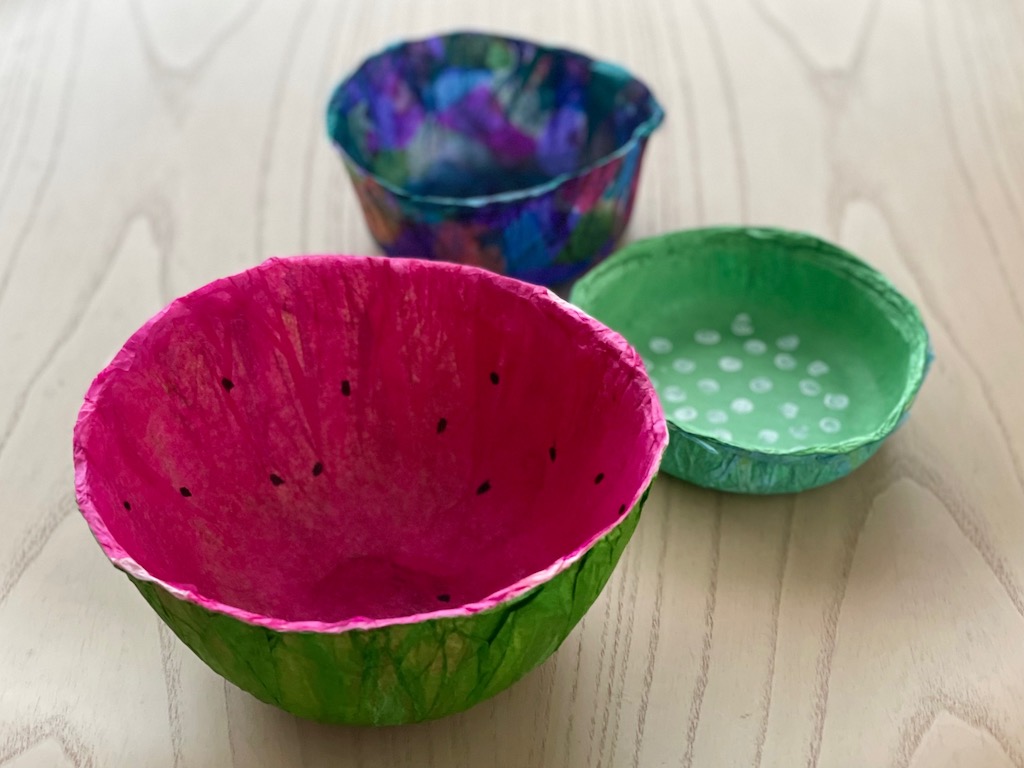
Make pretty bowls with leftover tissue paper scraps.
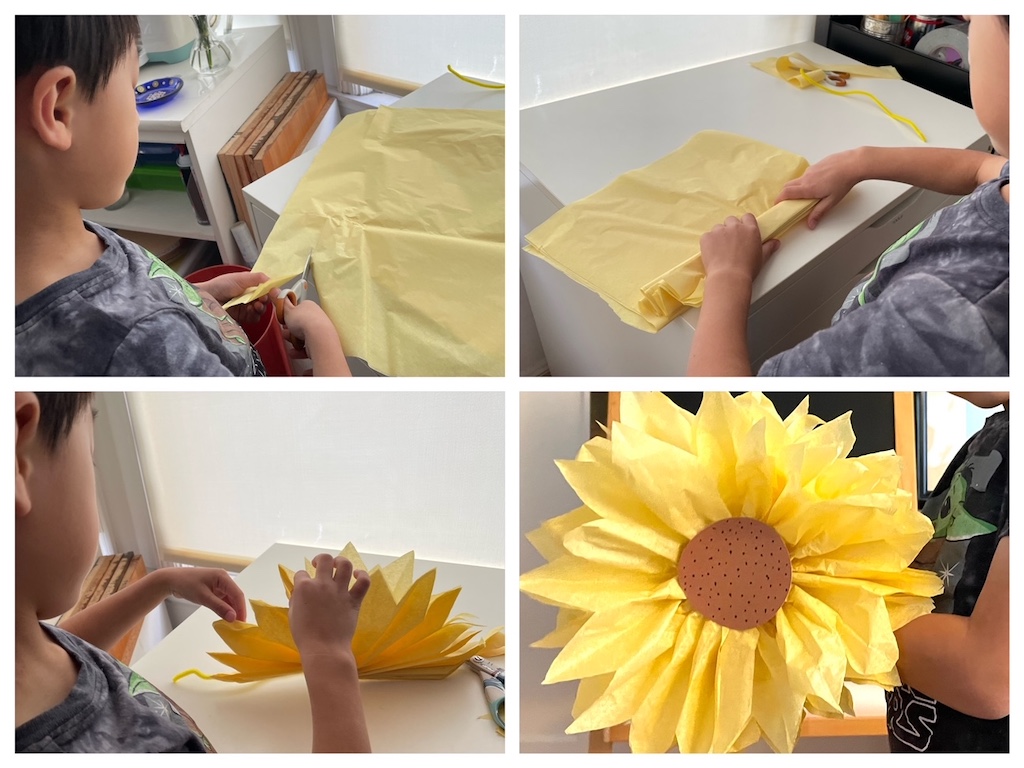
Mexican paper flowers are simple to make, but do require a little patience and dexterity. Still, I was surprised that N, who is six, crafted his flower with just a little help from grandma. In fact, it was his idea to make a paper sunflower and he executed it perfectly.
The Basic Paper Flower
Materials Needed:
For large flower
- 4 sheets of colored tissue paper 12 X 20 inches, or crepe paper
- For stamen (optional) 1 sheet of contrasting colored tissue paper 7 X 20 inches, or crepe paper
For small flower
- 4 sheets of colored tissue paper 8 X 12 inches, or crepe paper
- For stamen (optional) 1 sheet of contrasting colored tissue paper 3 1/2 X 12 inches, or crepe paper
Either flower
- 1 pipe cleaner, about 12 inches long
Tools Needed
- Sharp scissors
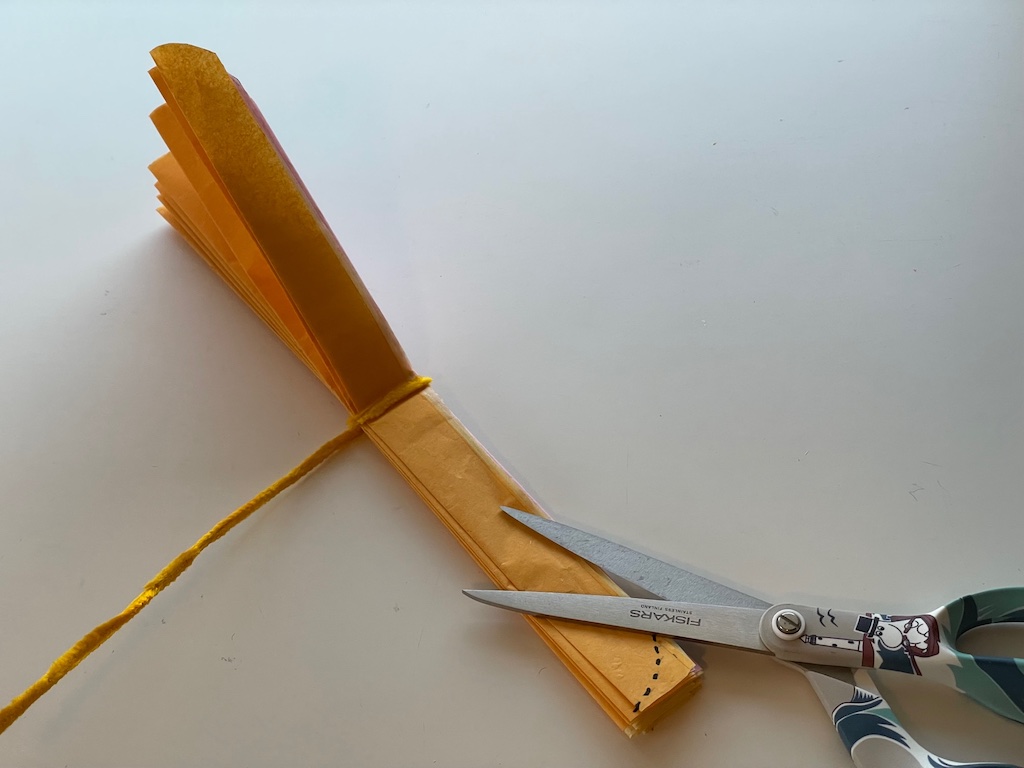
Step 1: Stack the four sheets of paper together evenly. Fold up the short end about 1 inch, then accordion fold the rest, like making a fan. Continue to fold the paper until you reach the opposite end.
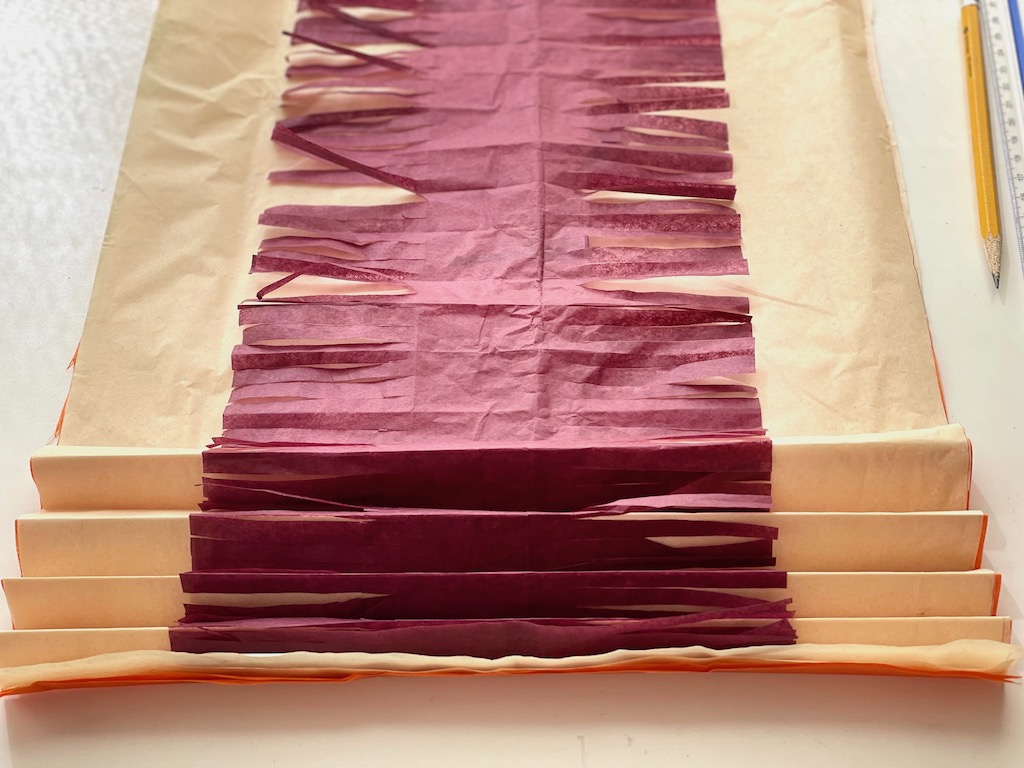
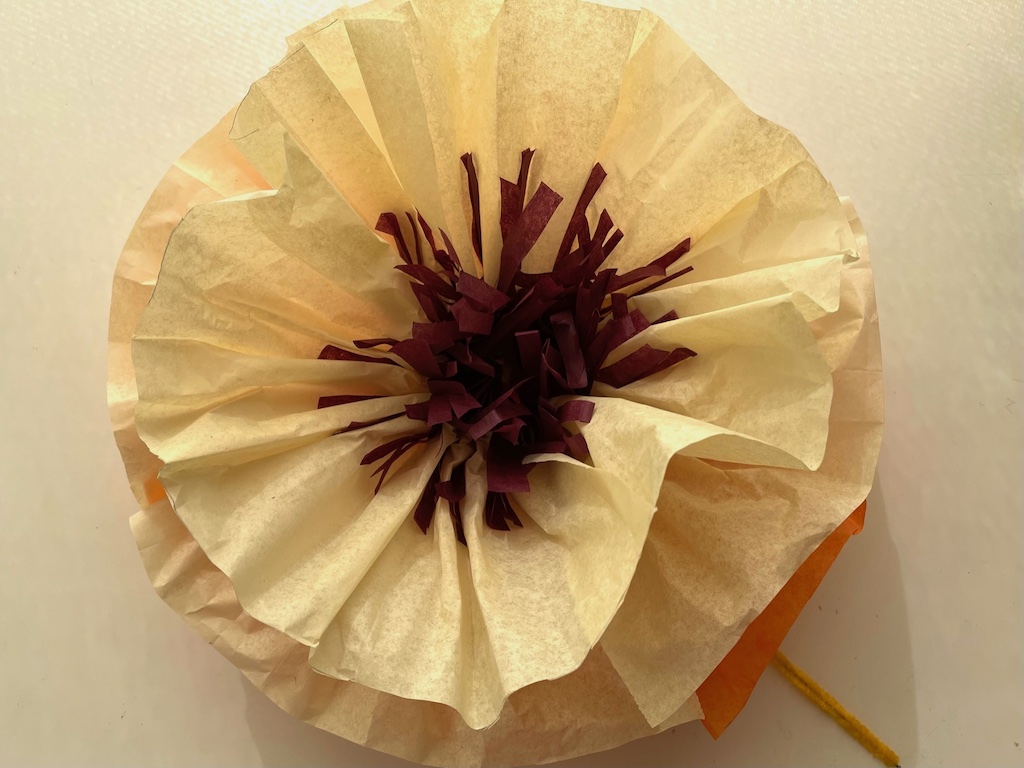
If you want a stamen, fringe the contrasting tissue paper and lay it in the center of the tissue stack before you start folding.
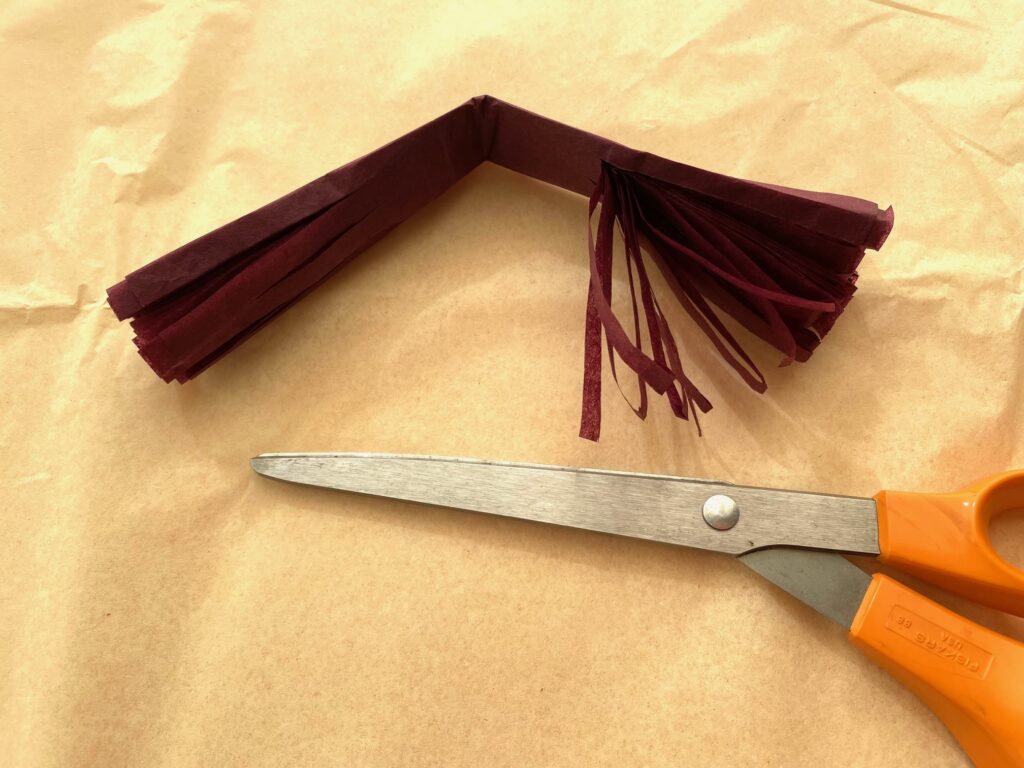
Step 2: Twist one end of the pipe cleaner around the folded stack to cinch the stack together in the middle. To find the exact center, fold the stack crosswise in half. You want the cinch to be tight, but not scrunching up the paper.
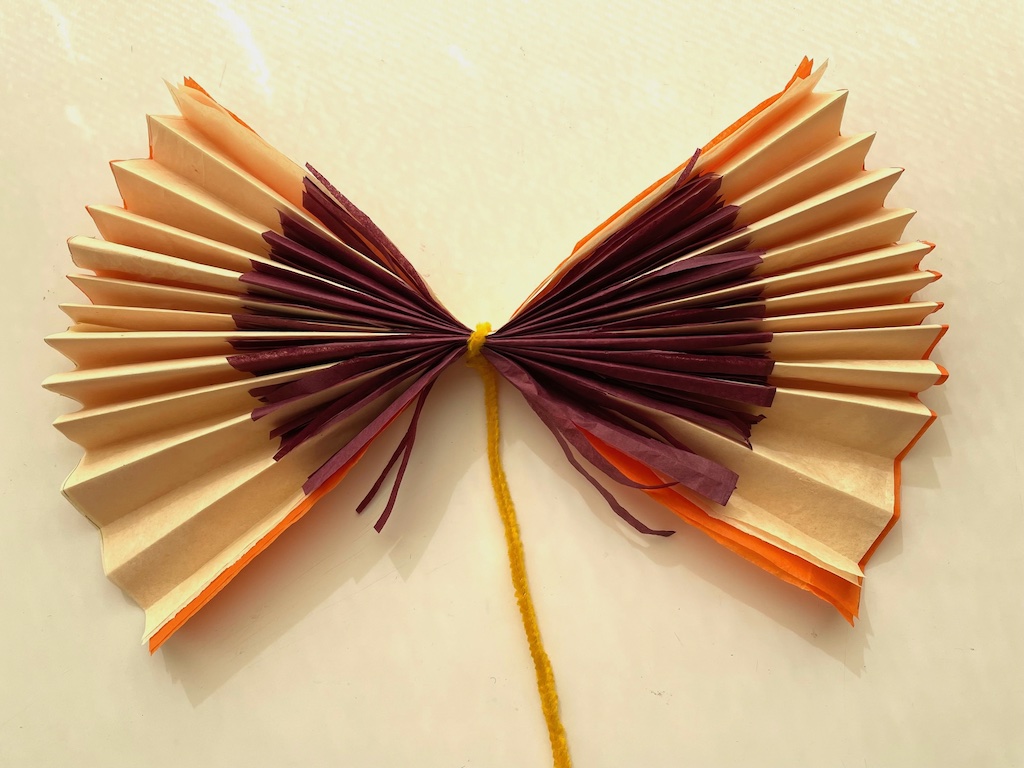
Step 3: Now gently lift the first sheet of tissue paper up towards the pipe cleaner center. Repeat with the opposite side.
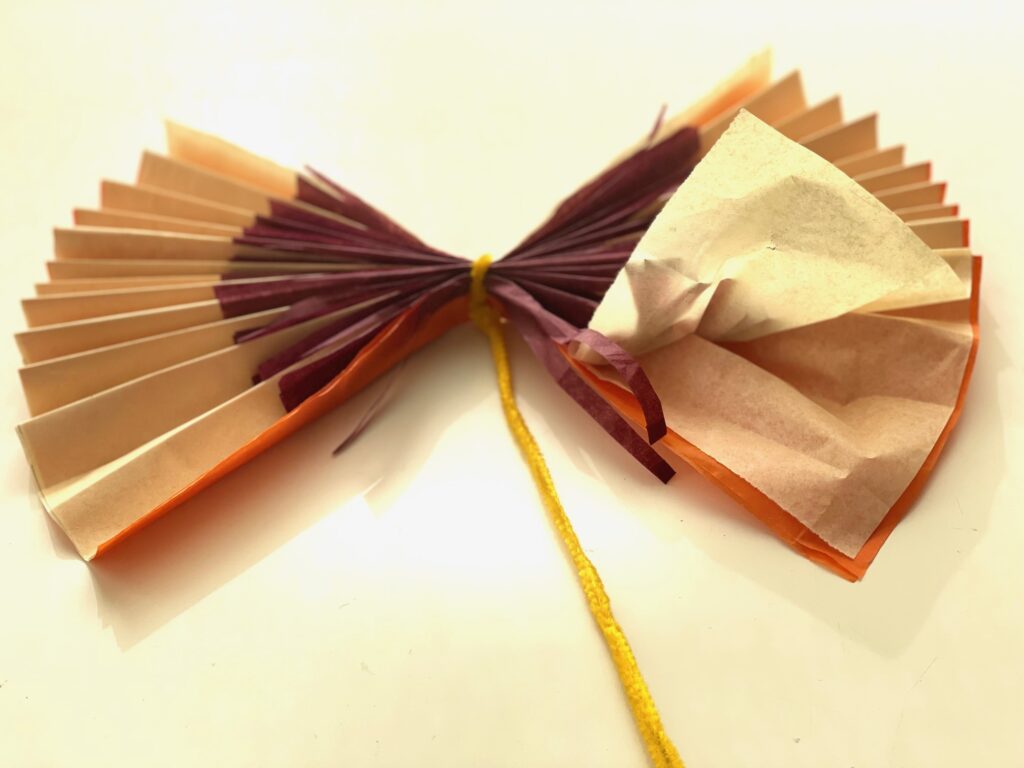
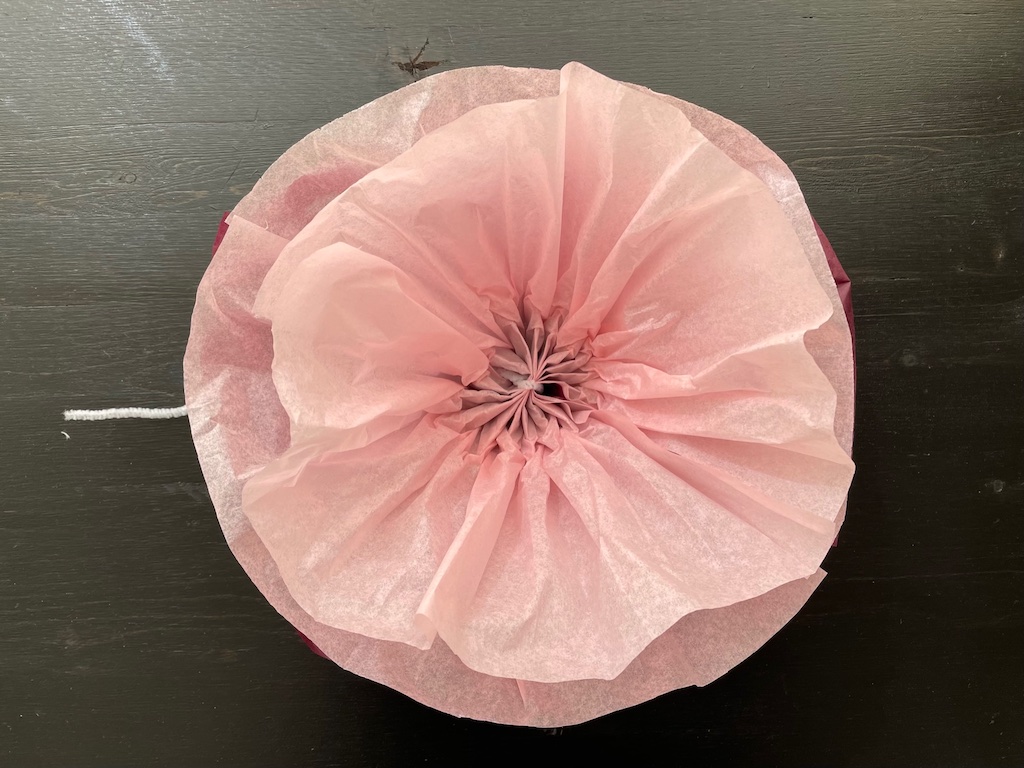
Step 4: Continue to lift the tissue paper, layer by layer, towards the pipe cleaner center. The layers will begin to cup, making a flower shape.
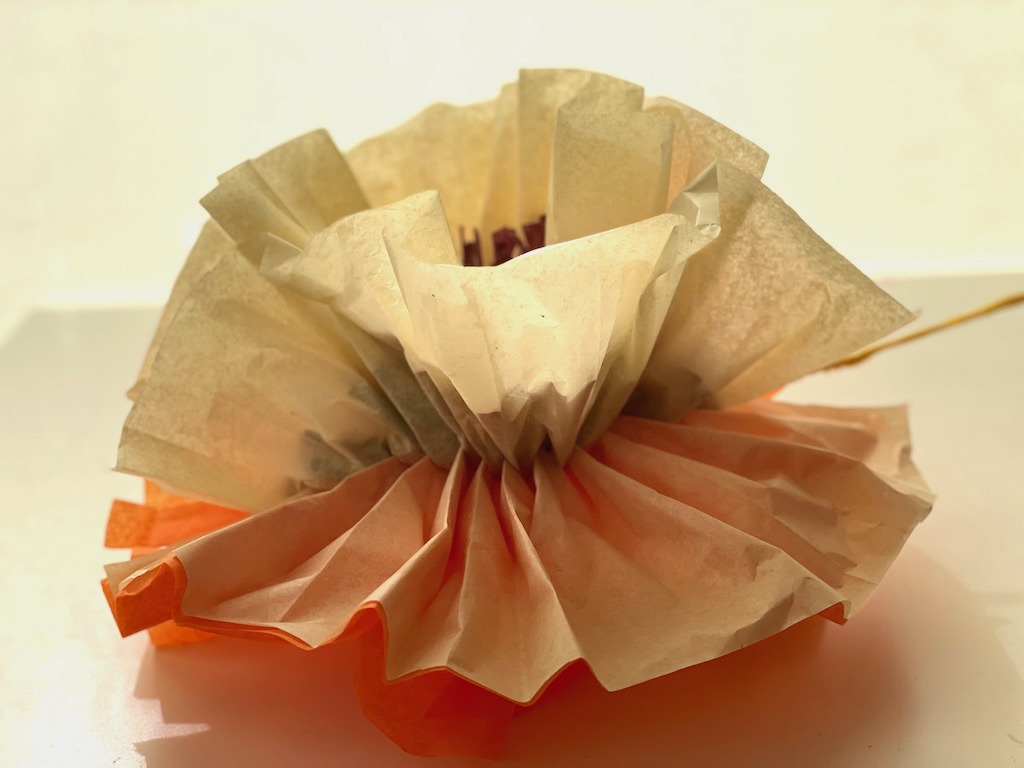
Step 5: Fluff and adjust the tissue paper so each layer makes a continuous circle.
Tips:
- It’s easiest to cut the four sheets of tissue paper to size by first making a pattern from manilla folders (you’ll need to join two for the large flower). Trace around the pattern with a pencil onto the first tissue paper layer and cut the four layers together.
- If you want a sturdier stem, after making the flower, tape the pipe cleaner to florist wire using green florist tape. Or insert the pipe cleaner into a straw.
- To make shaped petals, after accordion-folding the tissue paper and securing with the pipe cleaner, cut the entire folded stack in a curved or pointed shape.
- You can cut a cardstock circle to glue in the center of the flower to hide the pipe cleaner and the inner folds. Secure with white school glue. N used a brown circle for his sunflower, adding black dots with a Sharpie.
What to do with your Mexican Paper Flowers
Make a bunch of flowers to decorate a child’s room or surround a doorway arch.
Have a flower-making session for kids during a playdate or birthday party. It will keep them entertained for a few minutes and give them a favor to take home afterwards.
Plan a Mexican-themed party with paper flower decorations, cascarones, and a piñata–we’ve made these ourselves at Camp Grandma.
Mexican paper flowers make a festive table centerpiece for a Cinco de Mayo celebration. Add colorful pottery candlesticks–but not too close to the flowers.

Use Mexican paper flowers to add some color to your house. In the living room, they can look quite nice arranged in a bowl on the coffee table.
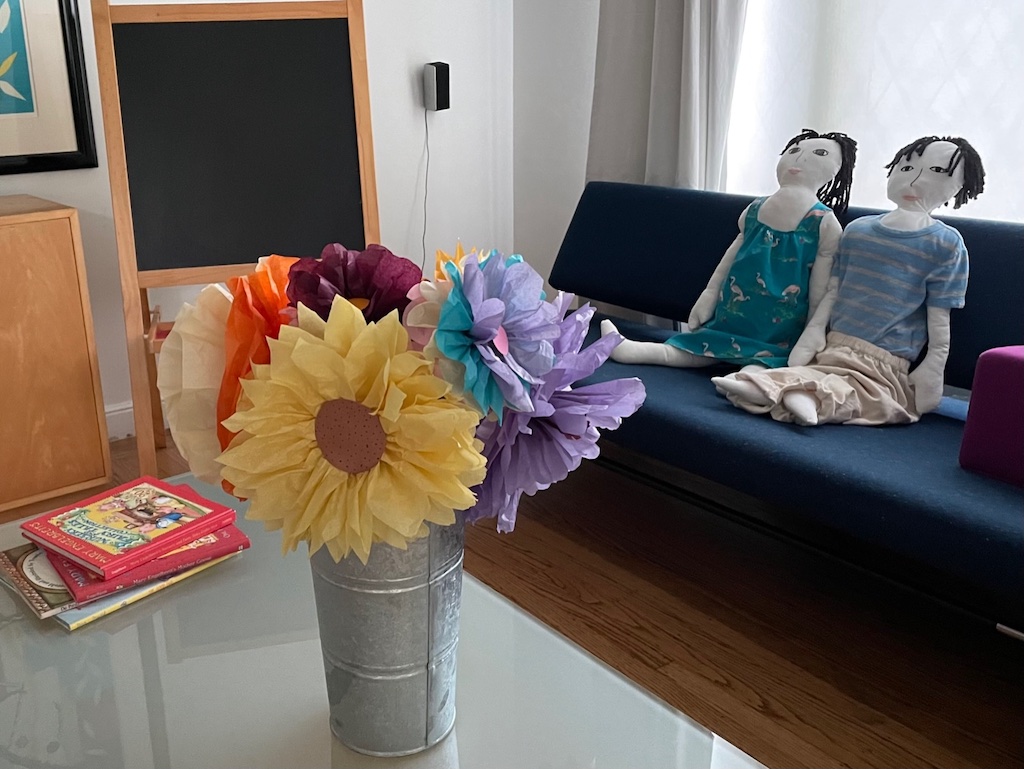
Next, I moved the flowers to the family room, having arranged them in a French flower bucket.

Finally, I settled on hanging them in my craft room, integrated into the existing wall decor. This is where they will remain–the place where all our craft projects end up on display.
What Kids Learn from this Project
This project goes rather quickly, so it gives kids immediate satisfaction and a feeling of accomplishment. Kids will work on:
- Fine motor skills in tracing and cutting the tissue, then opening up the flower layers
- Design and color–they’ll have to determine what kind of flower they will make and what colors to use
- Appreciation for having made something beautiful that they can use to decorate their room at home
- Imagination and application–Miss T began to fashion her paper napkin into a flower at the dinner table that night, so I gave her fresh napkins to experiment with. She taught herself to apply the same technique using this new material. The white napkin flowers were quite beautiful!
Sign Up!
Don’t forget to sign up for my email newsletter. Every Wednesday, I’ll give you a new idea for an activity or insight to nurture the little ones in your life.