Winter Activities for Kids: How to Make a Terrarium
We’ve had a deluge of rain lately, and this weather gifted us with beautiful moss in our garden. I decided to show the grandkids how to make a tiny terrarium to utilize this unexpected bounty!
I realize you might live in area that’s blanketed with snow. No moss.
So, below, I’ve put together resource links of winter gardening activities you can still do with kids of all ages.
How I Found my Terrarium Containers
The challenge of being a grandmother of two, instead of an elementary school teacher, is that you end up purchasing more than you need. For example, when I wanted magnets so the kids could make photo refrigerator magnets for Mother’s Day, I had to buy 24.
More indoor fun: make fish, then try our go fishing game!
The same was true for the clear plastic bath bomb molds in two sizes we used to make photo Christmas ornaments. I have more than a dozen molds left. One of them was still sitting on my desk, looking like a mini terrarium, so I thought, why not?
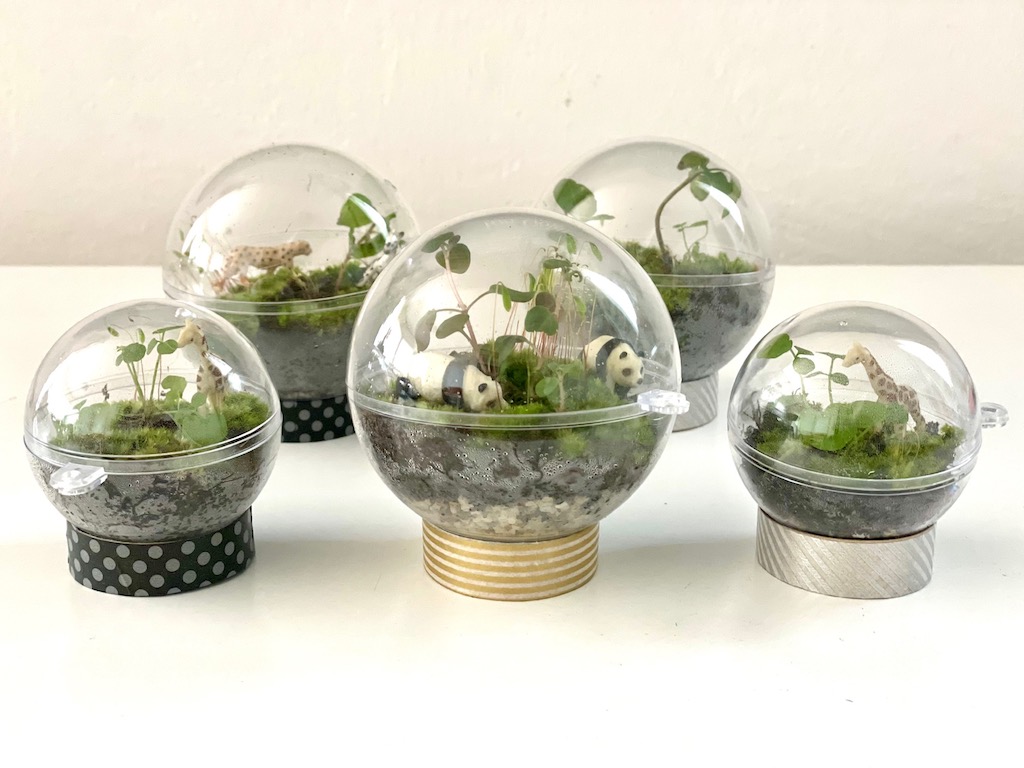
If you don’t want to purchase these molds use a small, squat glass jar with lid — maybe something jam or mustard came in. Or buy the molds and make the ornaments with the remainder before Christmas. They’re really cute! And they’re lovely keepsakes.
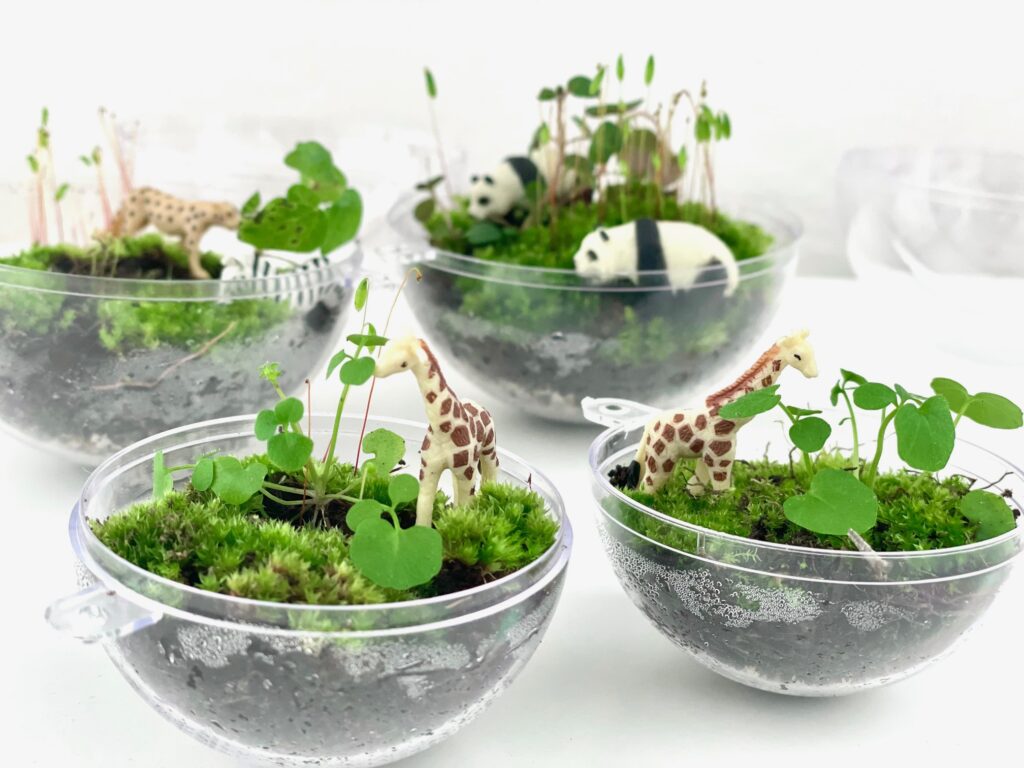
How to Make a Tiny Terrarium
“Tiny” is key. Tiny terrariums are almost foolproof. They take few materials and the don’t need much looking after. Their little ecosystem is easier to control.
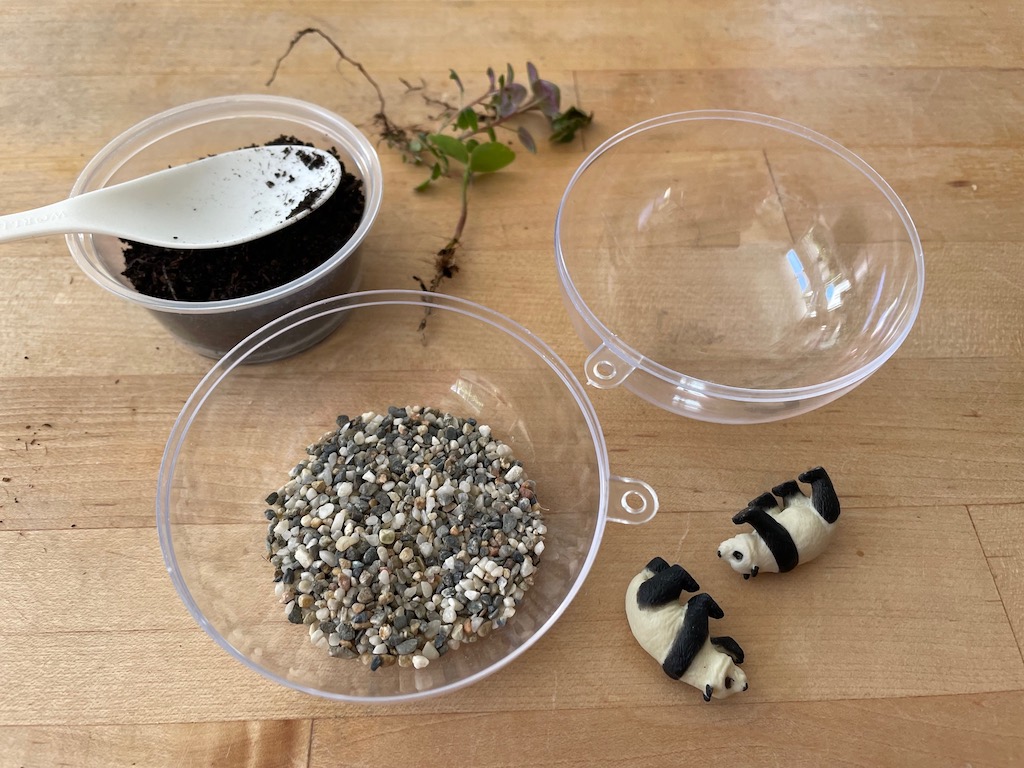
Materials
- small clear container such as clear bath bomb shells * or small jar with lid
- gravel
- potting soil
- moss
- small plants
- small plastic animals
*My bath bomb shells were 3 inches in diameter for the large, and 2 1/4 inches in diameter for the small.
Equipment
- plastic spoon
- bamboo skewer
How to Make It
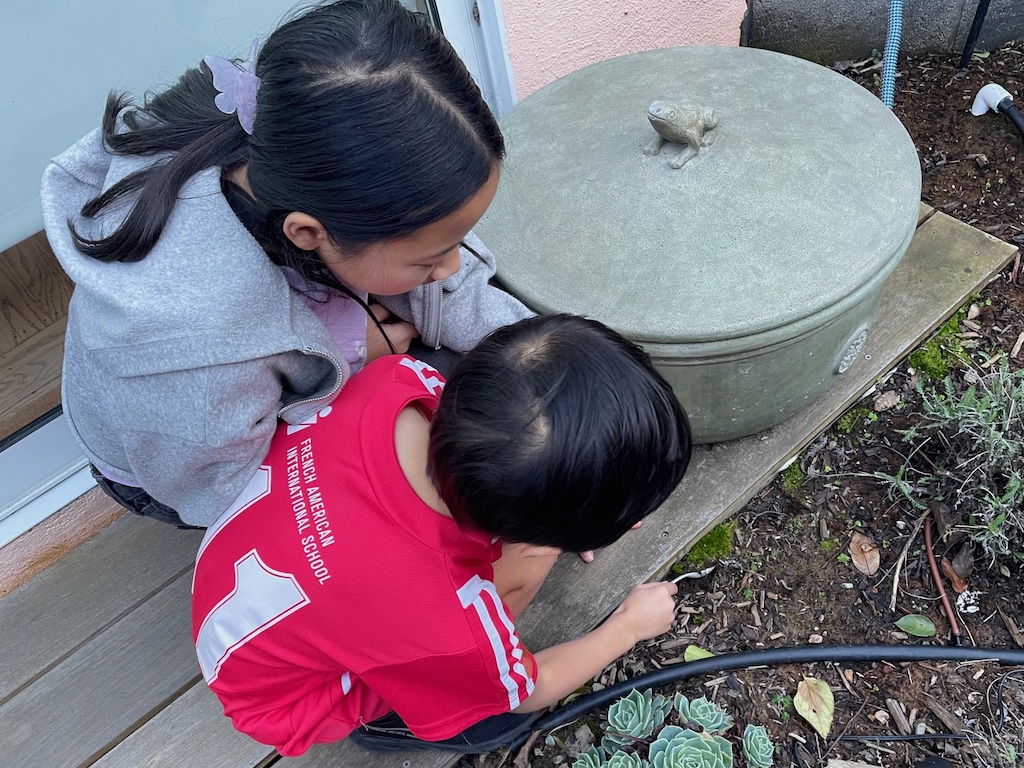
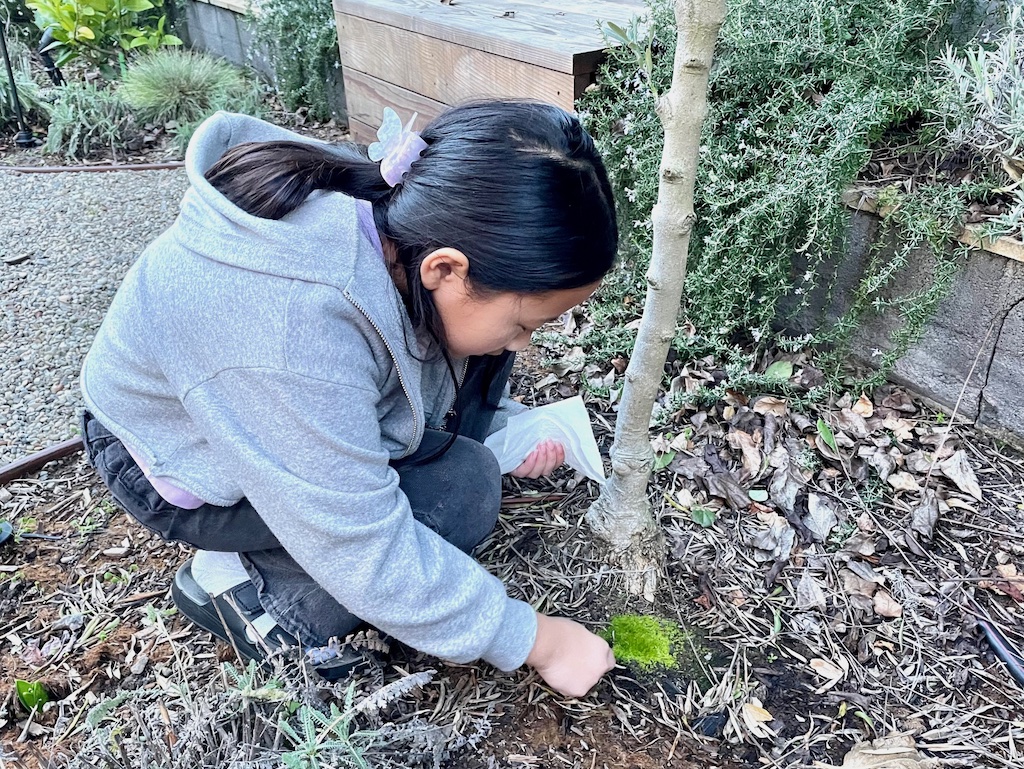
Go outdoors to collect the moss. Using a spoon, gently pry moss from the ground, keeping roots intact. Lay on a paper towel. Look for small plants or grasses and uproot them carefully with your fingers. Lay on your paper towel and bring indoors.
Pour gravel into your terrarium container to about 1/2-inch deep. The gravel will provide drainage. Spoon soil over the gravel to about 1-inch deep. (I transferred soil from a big bag into a plastic takeout sauce cup so it would be easier for the kids to work.)
Now, lay the moss gently over the soil in small chunks, inserting the plants between the moss chunks, as you work. Pat moss and plants in place gently with your fingers. Use the skewer to jiggle the plants and moss in place to your liking.
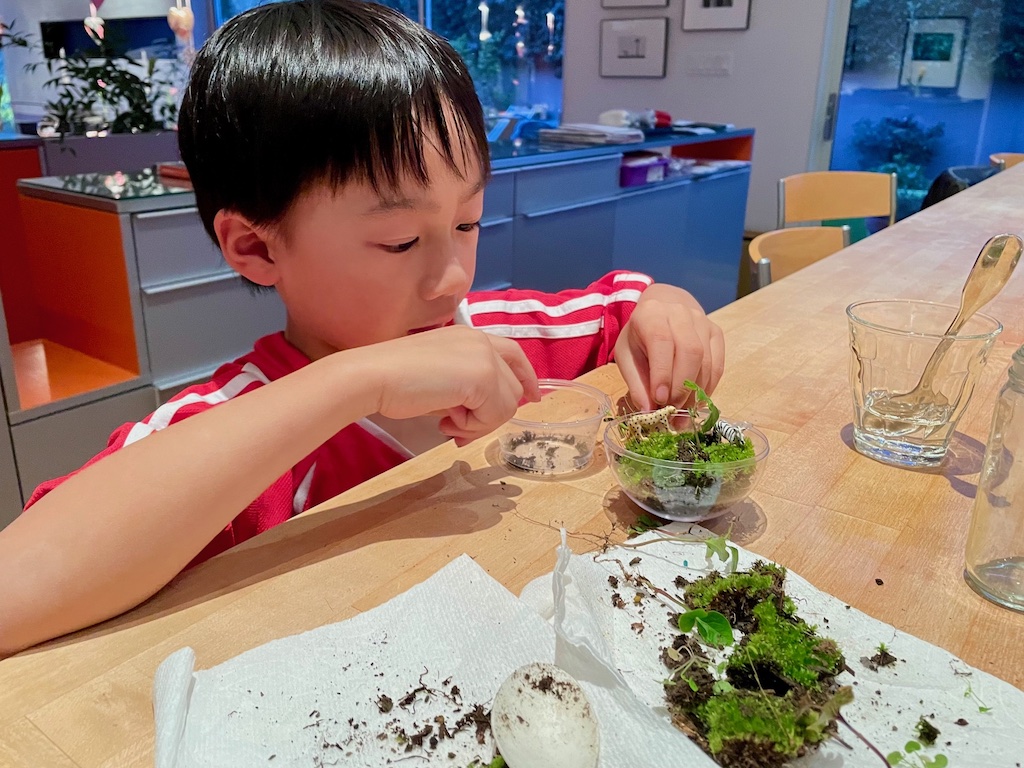
Next, add tiny animals. Finally, dribble a tiny bit of water over all using your spoon or spray lightly with water, and close the terrarium.
The terrarium will mist up during the day and water will condense on the cover. Take off the lid occasionally and let it sit exposed to air about 15 minutes to dry out some of the extra moisture, then close terrarium again. I haven’t had to water the terrariums since we made them. If the plants start to droop or if the moss appears a little dry, water sparingly and keep the terrarium covered to equalize the moisture.
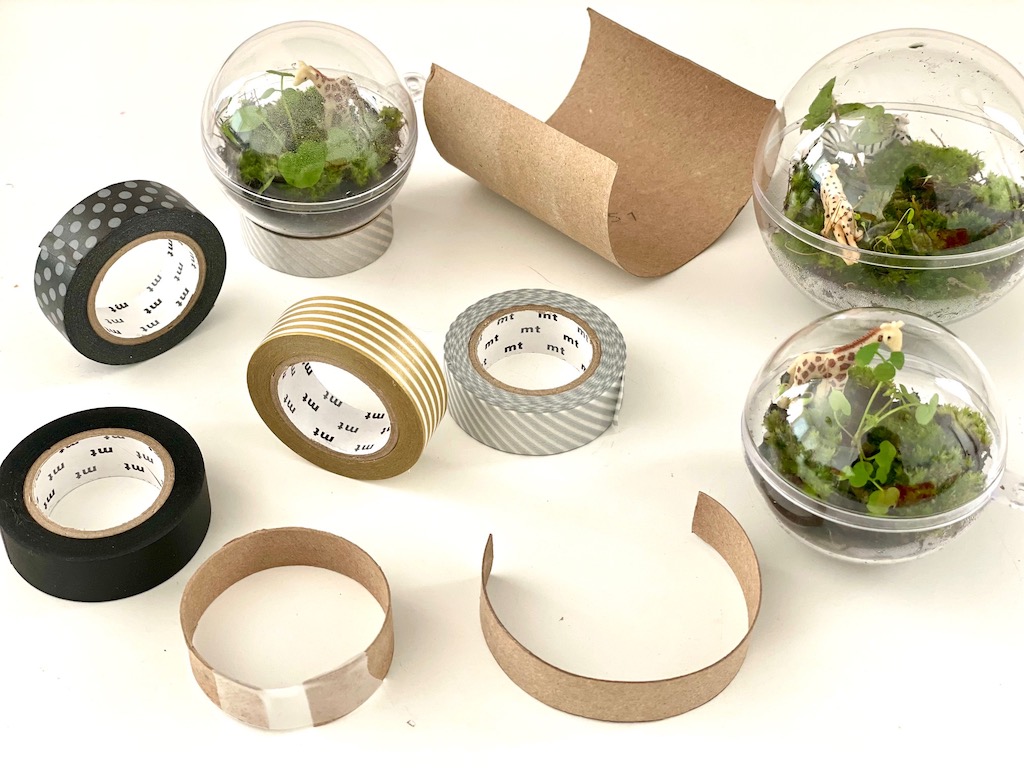
How to Make a Stand
If you use bath bomb molds for your tiny terrarium, make a stand to keep them from rolling about. Cut a toilet paper roll lengthwise. Then cut the roll in 1-inch strips. Tape the ring back together with clear adhesive tape and cover the stand with washi tape.
For the larger-size terrarium, tape the ring back together, but instead of closing the ring, open up more space between the two cut ends of the toilet paper strip and bridge the open space with the clear adhesive tape. Cover with washi tape.
Additional Terrarium Instructions
Here are two blog posts for more information about making terrariums.
- How to make mini terrariums.
- Basic terrarium instructions.
Winter Gardening Activities for all Ages
If it’s too cold for moss to grow where you live, here are some interesting and fun activities to do with the grandkids, no matter the weather, no matter the age, to keep them engaged.
- Plant activities for toddlers.
- Grow your own seeds from your cupboard.
- 15 winter gardening activities for kids.
- 6 more winter gardening activities for kids.
- Winter outdoor gardening activities to get kids out and about.
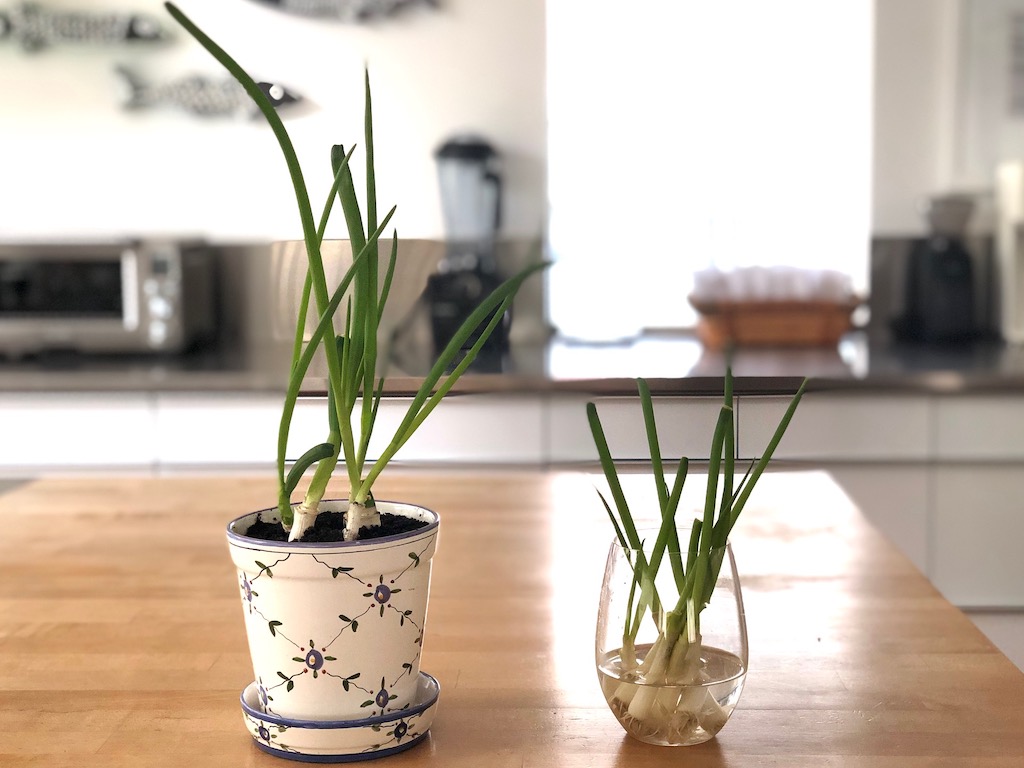
- Grow a vegetable forest from vegetable tops in the fridge. During the pandemic I grew green onions by rooting the bulb, first in water, then in soil.
Sign Up!
Don’t forget to sign up for my email newsletter. Every Wednesday, I’ll give you a new idea for an activity or insight to nurture the little ones in your life.