The Best Easy Indoor Play Idea: A Fishing Game!
It was raining on Sunday. What to do with Miss T, here for a visit?
I remembered a fishing game from Curious Jane magazine, perfect for indoor play because you had to craft your game pieces first, keeping the child engaged for an entire afternoon.
I added an extra level of complexity by introducing math. We would assign points for each fish. The winner would be the one who tallied the most points, not the one who caught the most fish.
For more indoor play on a rainy day, stage a treasure hunt.
This is an easy indoor game to prep for, because most people have all the materials at hand and the construction is simple.
Make the Fish
Materials Needed
- Lightweight cardboard, like a discarded manilla folder, to make your pattern
- Origami paper or plain printer paper
- Crayons (if using printer paper)
- Paper clips
- Cellophane tape (like Scotch tape)
- Glue stick
Tools Needed
- Pencil
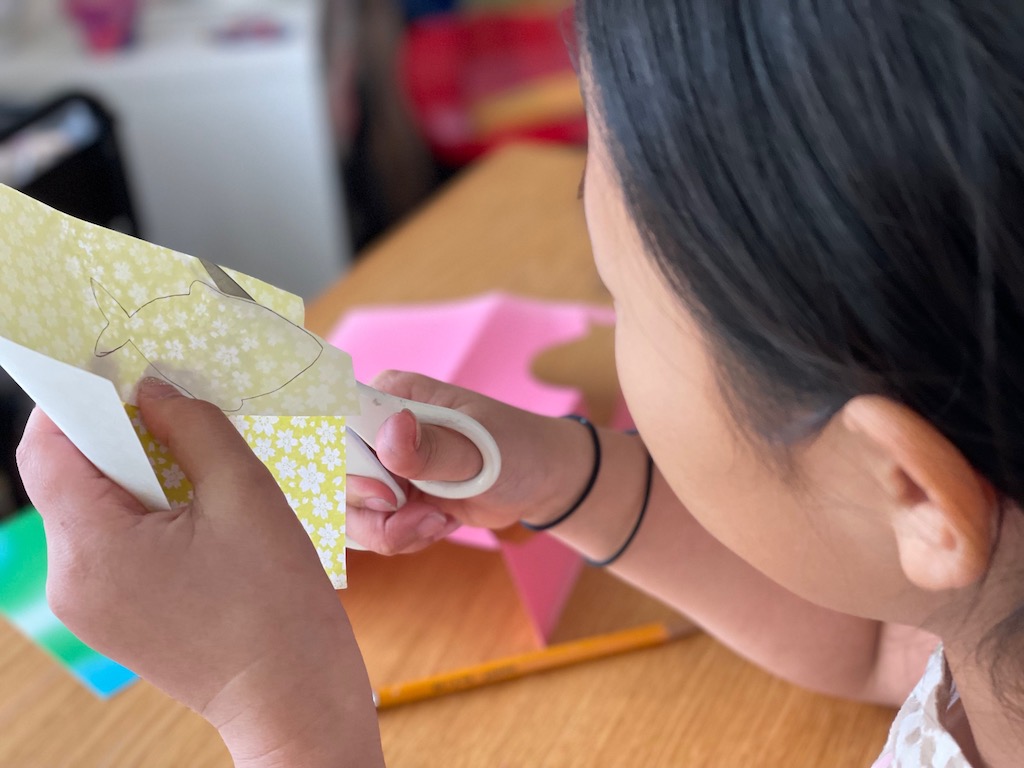
- Small, sharp scissors
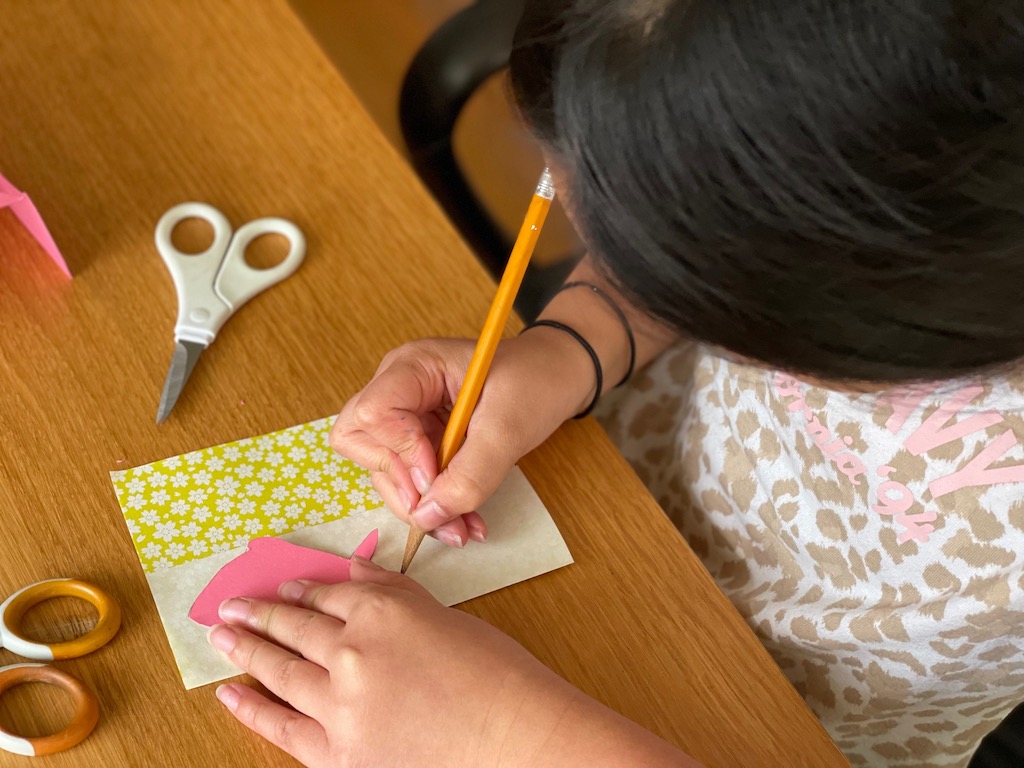
Make the Pattern(s)
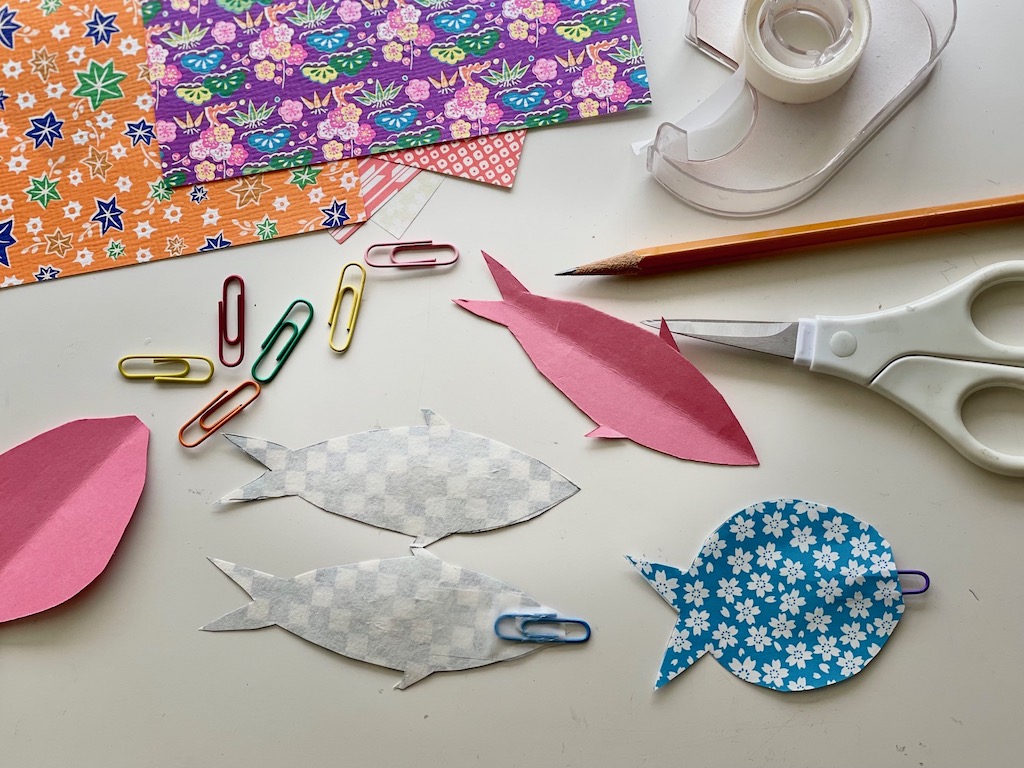
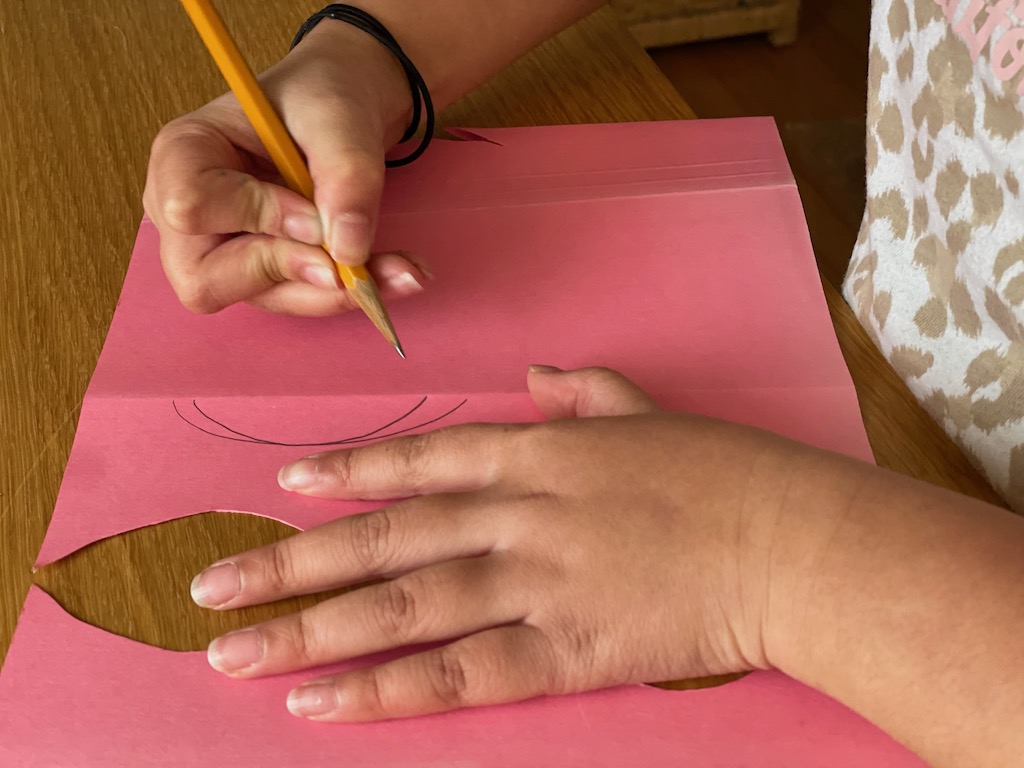
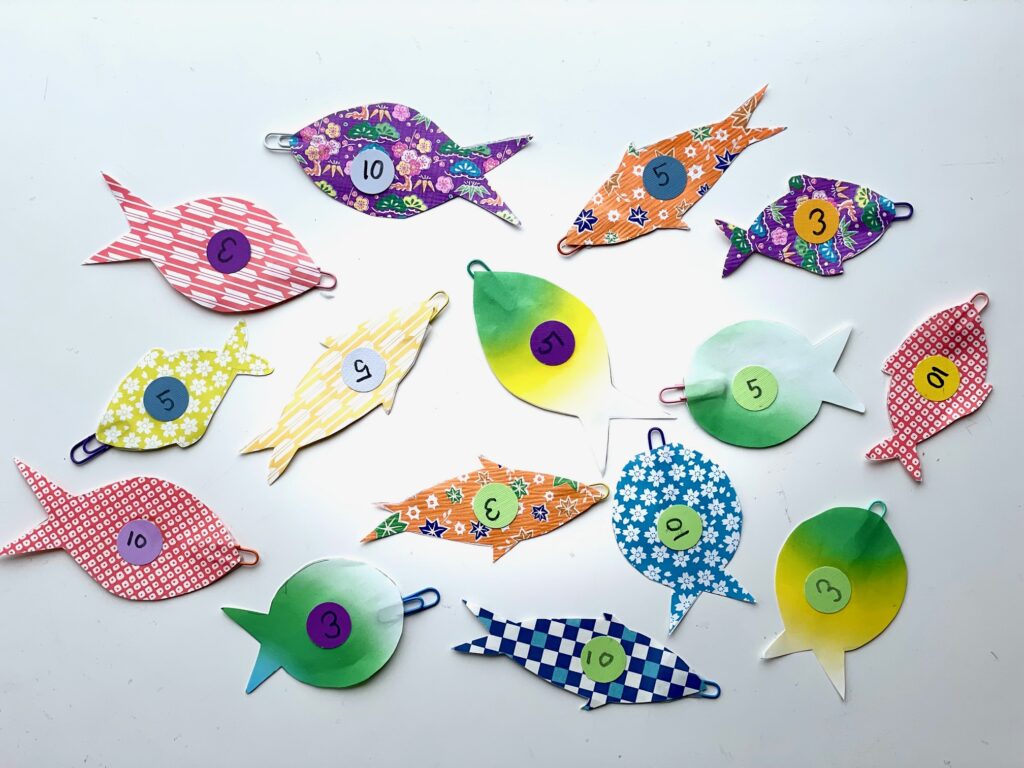
Fold the cardboard in half and draw half the fish, from head to tail, starting and ending at the fold. Cut out the drawn shape through the folded cardboard; when you open up the fold, you’ll have a symmetrical fish. Use this for your pattern. Your fish should be about 4 inches long.
Make the Fish
Now, using a pencil, trace the fish from the pattern onto origami paper. You’ll need sets of two fish because you’ll be gluing two of them together.
If you use printer paper, have kids color the fish with crayons before cutting.
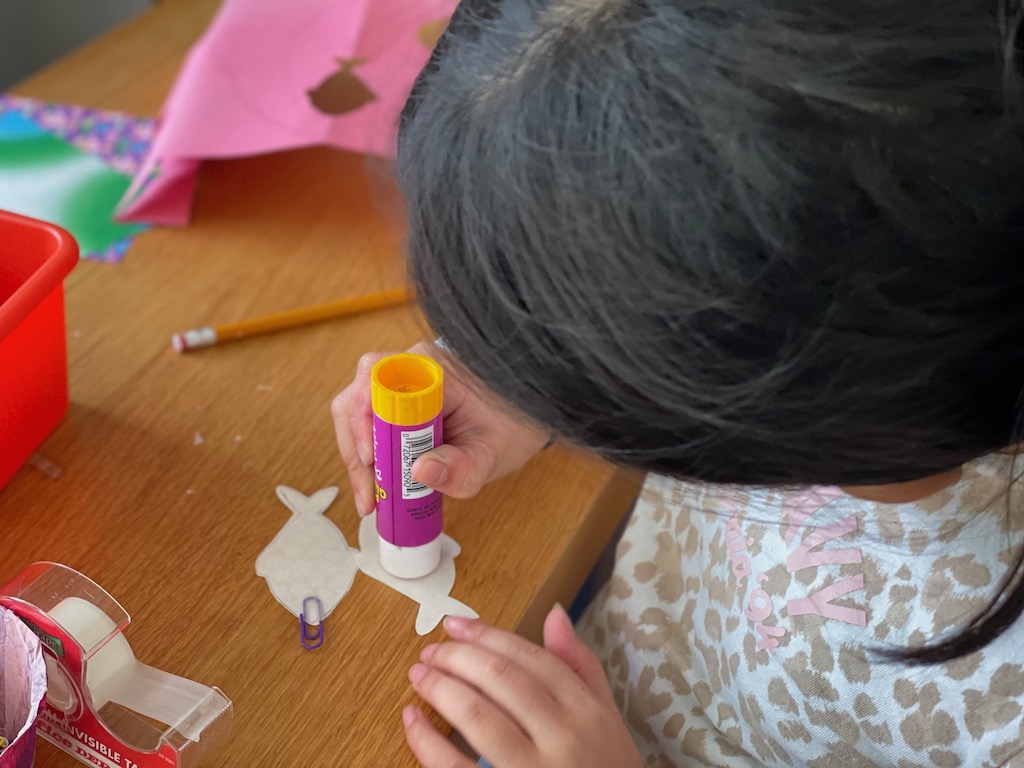
Assemble the Fish
With one fish, printed side down, tape a paper clip where its mouth would be; you may need to trim extra tape that goes beyond the fish’s silhouette. Be sure to have enough of the clip sticking out so the magnet will be attracted to it.
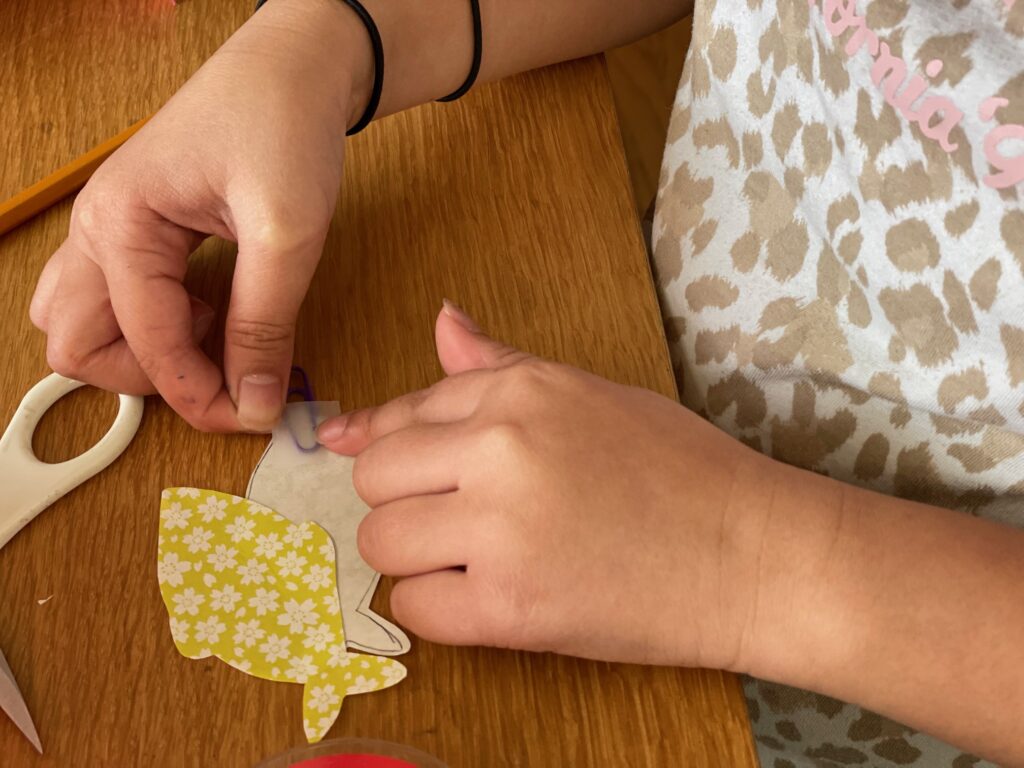
Using a glue stick, cover the entire inside surface of the second fish with glue; lay it over the fish with the paper clip, sandwiching the paper clip in between, and press with fingers to seal.
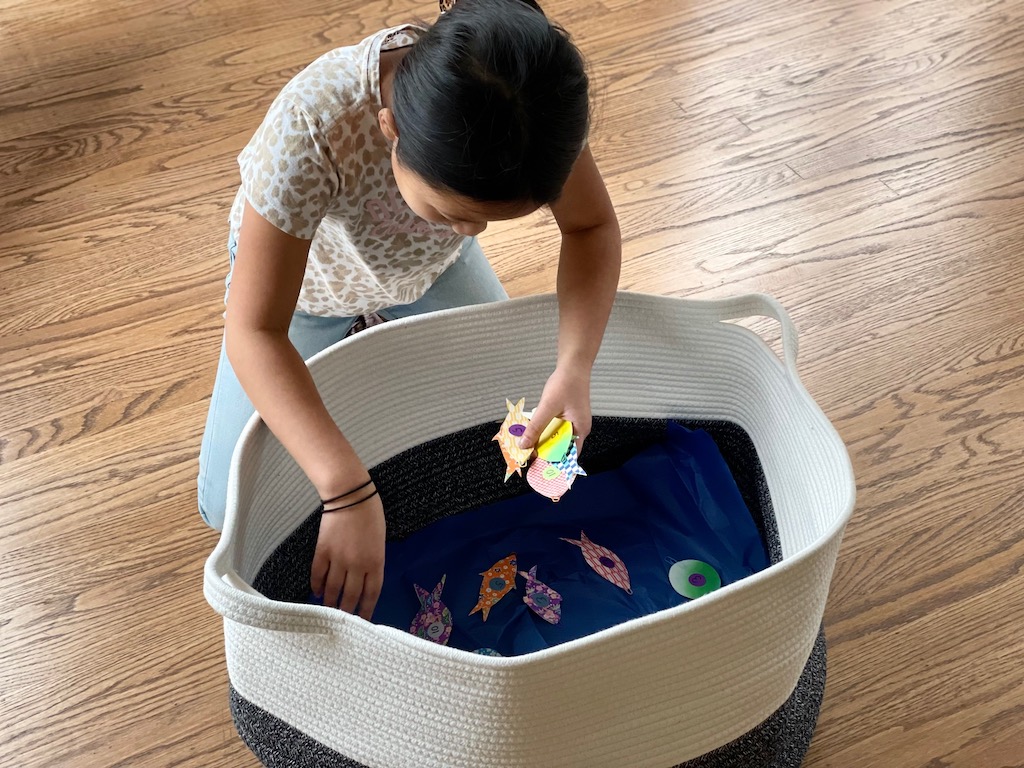
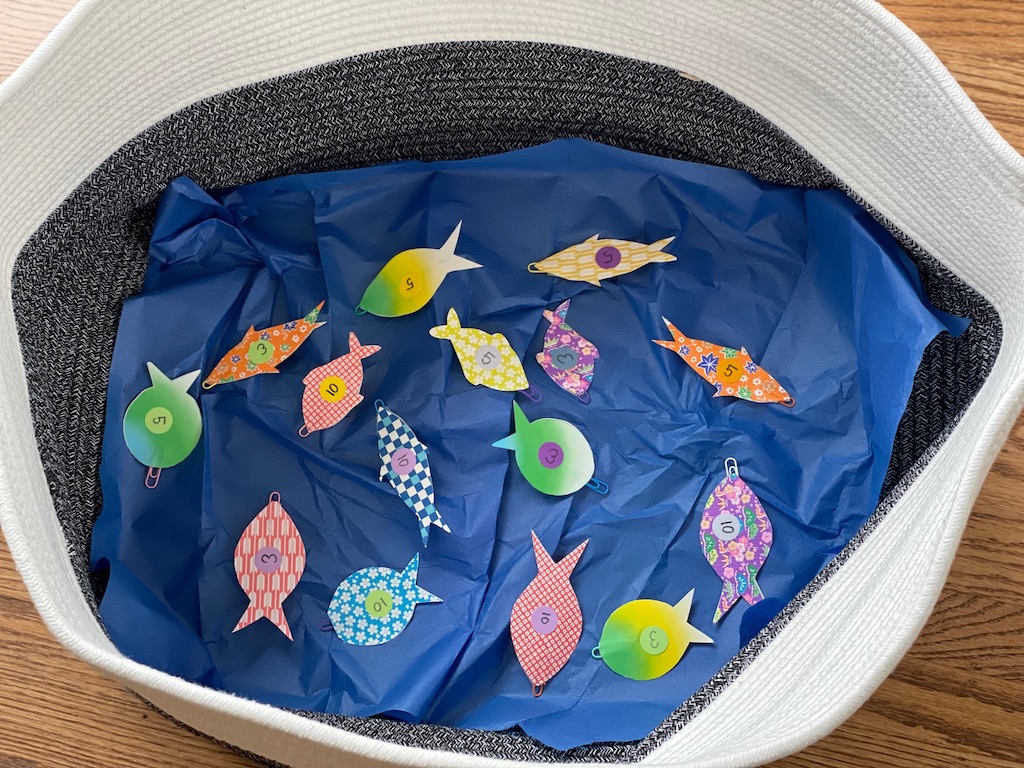
How many fish do you need? For a game of two people, Miss T and I made 15 fish and that worked out quite well for a quick game. Make more for a longer game or if you have more players.
Optional extra step: Cut circles out of cardstock with a 1-inch hole punch. Write numbers on the circles and glue to the fish on both sides with glue stick. For an easier method, just write numbers with a thick black marker directly on the fish. For our points, we used 10, 5, and 3.
You can make the points system more complex to give kids a bigger math challenge using two-digit numbers or ones which might seem harder to add, such as 7 and 8, instead of 2 and 5. We kept it simple because Miss T’s brother, who is six, would be joining us later.
You can also skip the numbers; the player who catches the most fish wins. This would work best with younger kids who can practice counting.
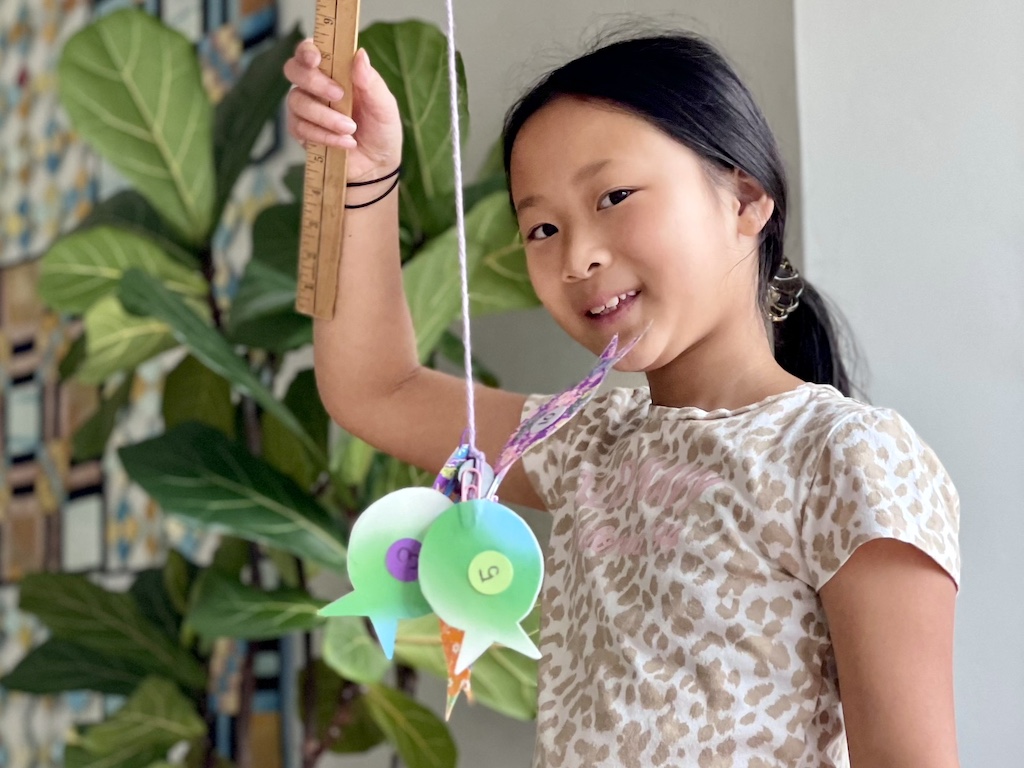
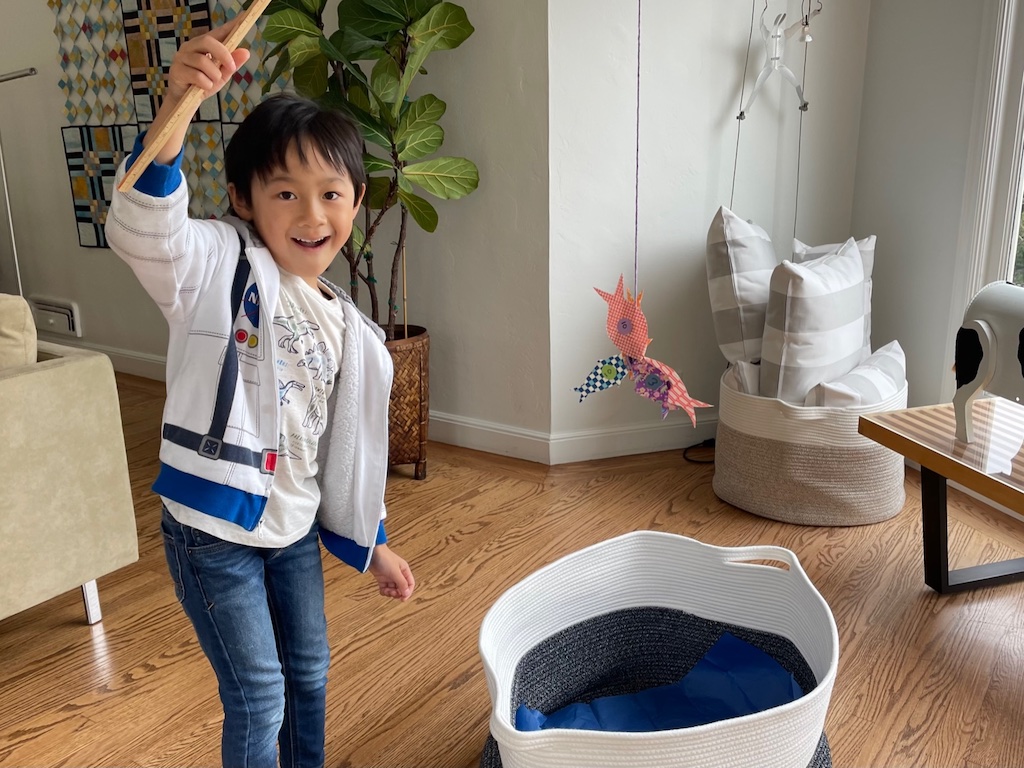
Make the Fishing Pole
Materials Needed
- A wooden dowel, ruler, yardstick, or long cardboard tube for the fishing pole
- Yarn for the fishing line
- Magnet (I used one left over from another project when we made photo magnets for Mother’s Day)
Tie the magnet to the yarn securely. Then tie the other end of the yarn to the dowel. We used a yardstick.
Starting the Indoor Game Play
- Lay the fish out on a surface. I used an emptied-out rope basket that I keep blankets in. Miss T suggested we lay a sheet of blue tissue paper inside for the water. We had some left over from making tissue paper bowls.
- Set the timer on your smartphone for 15 seconds.
- Let the first player hook as many fish as they can until the buzzer rings.
- Take turns setting the timer and catching fish.
- Count points when all fish are caught.
What Kids Learn during Indoor Play
Here are some ways this fishing game can help kids develop:
- Perfecting fine motor skills for performing exacting work
- Accepting deferred pleasure; they need to make the fish before they can play the game
- Math practice, motivated by the need to add up points to win
Sign Up!
Don’t forget to sign up for my email newsletter. Every Wednesday, I’ll give you a new idea for an activity or insight to nurture the little ones in your life.