Use an Oatmeal Container for Easy Recycle Crafts
I’m addicted to the Famous Maple Almond Granola recipe from Earthbound Farm. And, as I kept making more and more granola, tossing empty oatmeal canisters into my blue bin, I mused that there must be recycle crafts kids could fashion from these nice cardboard containers….
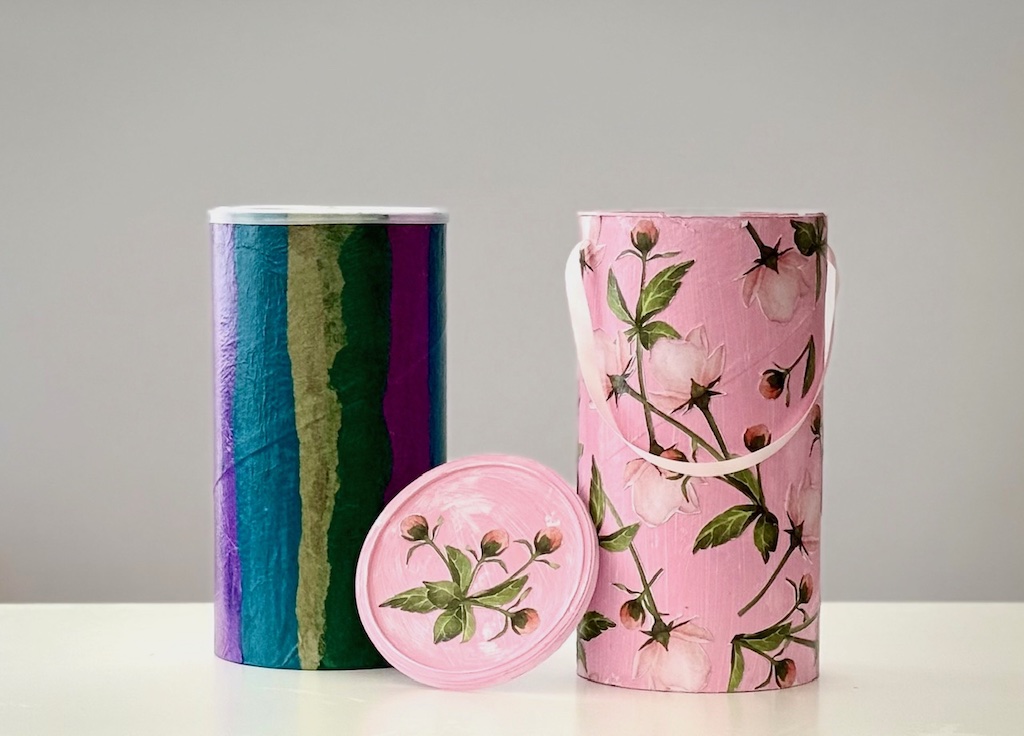
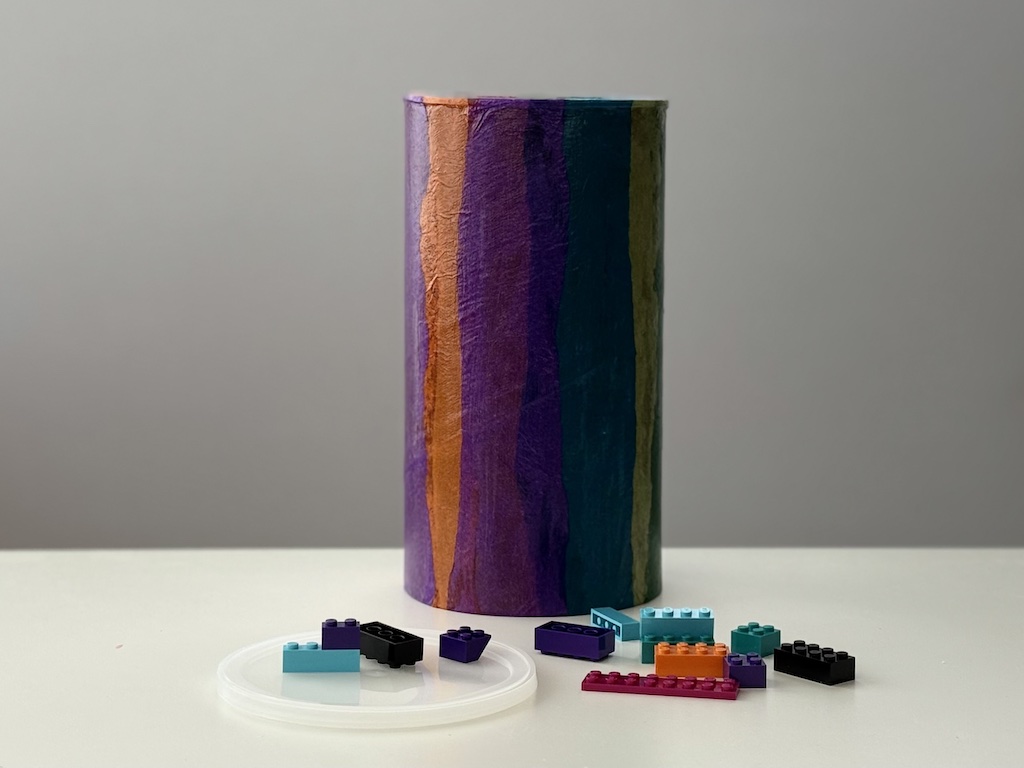
On my first try, I painted a canister pink and glued on flowers. Then, searching for an easier and cheaper design, I simply covered a second canister with strips of leftover tissue paper. They both made pretty storage containers!
This is a great project for a grandchild on those, what-shall-we-do-now days. I’m saving an empty container for Miss T to make when I see her next.
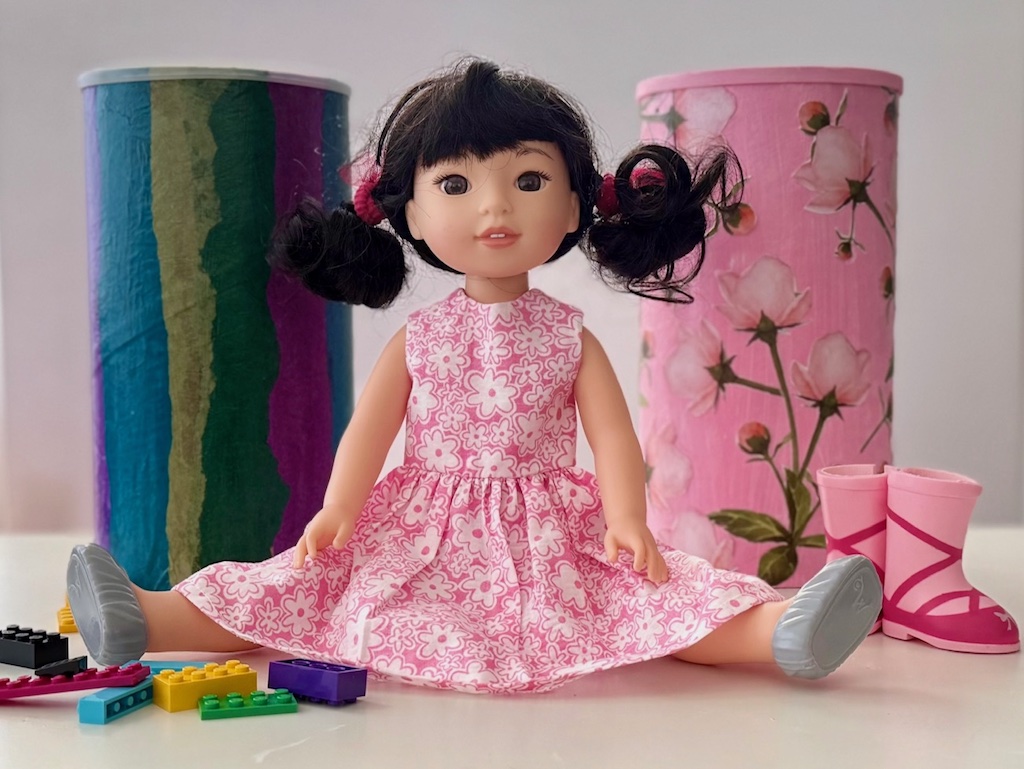
Use these attractive and practical containers to store:
For kids:
- Building block toys, such as LEGOs
- Doll clothes and accessories
- Art supplies
- Small cars and trucks
- Loose crayons or markers
For adults:
- Cookie cutters
- Smartphone cords and chargers
- Sewing supplies
- Embroidery and other needlework projects
Choose your Oatmeal Container
I experimented with two brands of oatmeal containers, but of course, there are many more choices.
If you use Quaker Old Fashioned Oats, the label will not peel off; you’ll have to paint over the label with one or two coats of gesso.
If you use Good & Gather Old Fashioned Oats, Target’s own brand, the paper label will tear right off. No priming coat should be necessary.
More recycle craft ideas: the best toys.
Paint and Cut-Out Design
Materials Needed for this Recycle Craft
- Empty cardboard oatmeal container
- Gesso
- Tempera (generally cheaper) or acrylic paint
- 1 to 2 sheets (12 X 12 inches) cardstock with simple pattern
- Mod Podge (matte or gloss)
Tools Needed
- Wide paint brush
- Foam brush
- Small sharp scissors
How to Make It
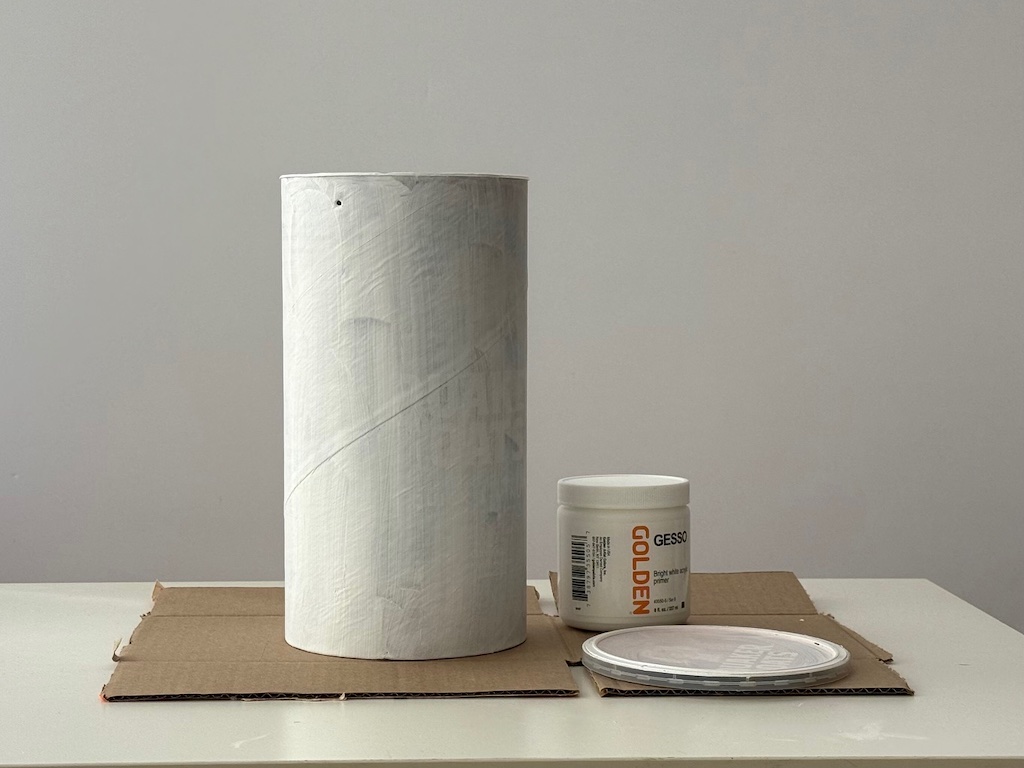
Clean out the oatmeal container by wiping with a damp paper towel. Paint the container with gesso and let dry. If the container label still shows through, add another coat. Let dry between coats.
Paint over the gesso with tempera or acrylic paint (I used tempera because it’s usually cheaper–especially when you have a big surface to paint).
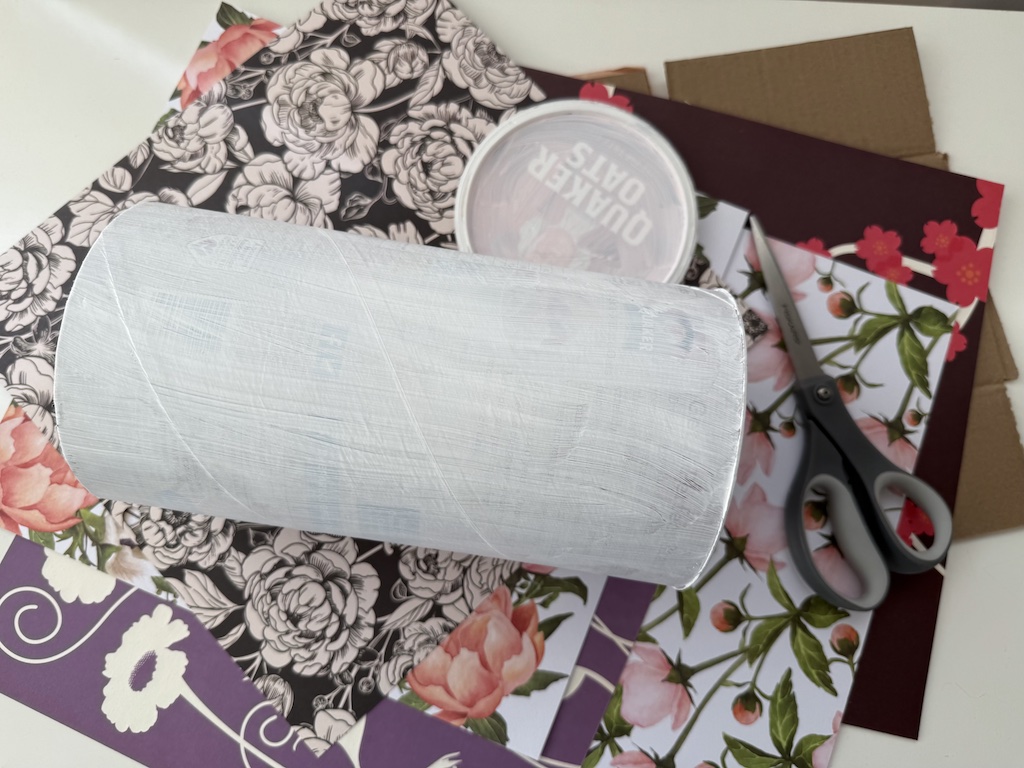
Meanwhile, select a cardstock pattern that’s fairly simple to cut out. Cut the images and glue onto the oatmeal container with Mod Podge.
Instead of cardstock, you could use patterned gift wrap paper. Look for big, simple images that would appeal to a child’s taste and be easy to cut out.
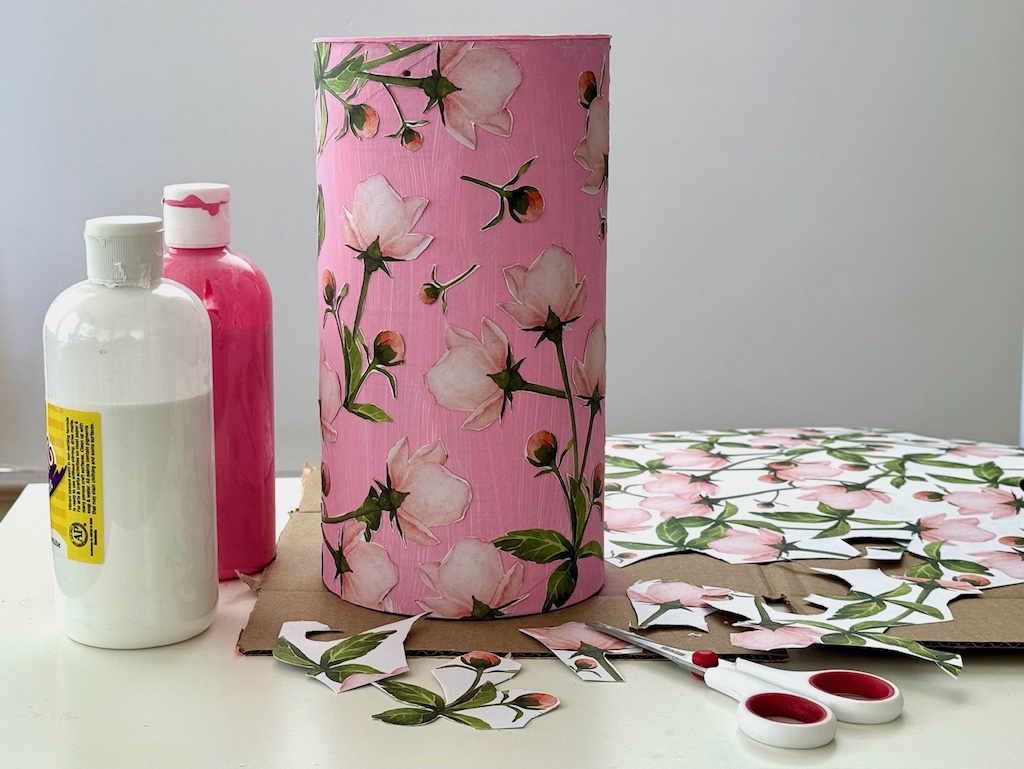
Now paint the entire surface of the oatmeal container with Mod Podge. I used two coats, drying between each coat.
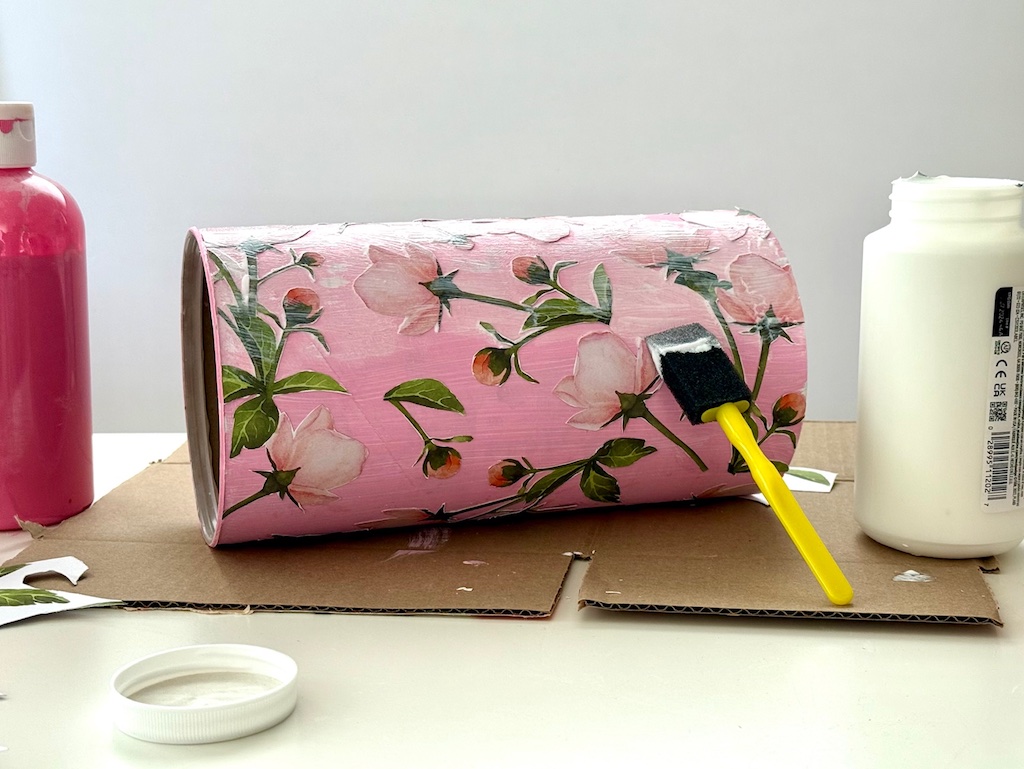
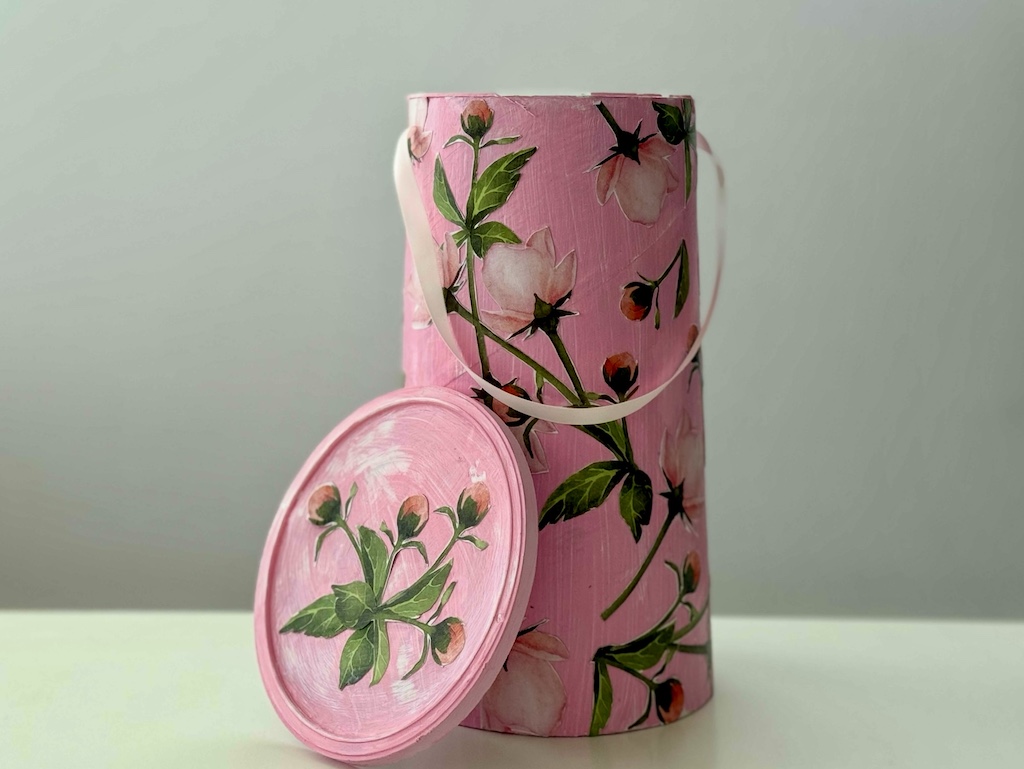
These containers will get a lot of wear and tear on the edges as the container is opened and closed. Reinforce the edges by applying 2 additional coats of Mod Podge just where the plastic cover will abrade against the container. It will dry clear.
Paint and decorate the plastic cover, too, if you like.
Tissue Paper Collage Design
This design is easier to execute, especially if you start with an oatmeal container with an easily removed label.
Materials Needed for this Recycle Craft
- Oatmeal container with peel-off label (such as Target house brand)
- gesso (only if your container has a non-removable label)
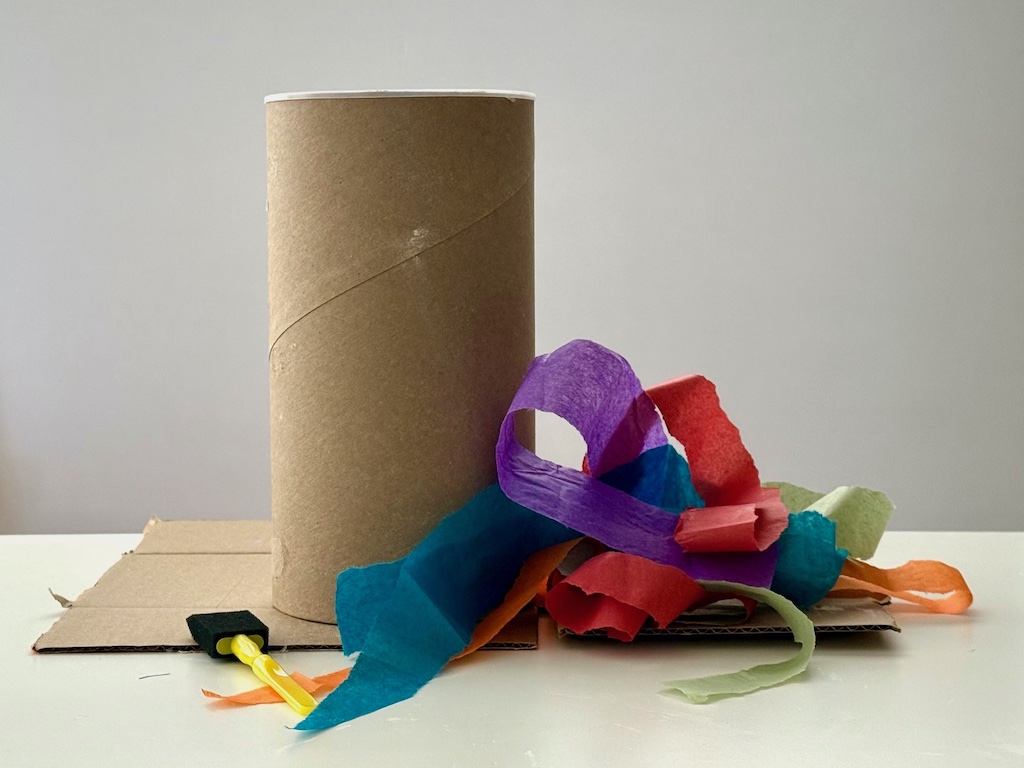
- Torn strips of tissue paper about 4 inches longer than the length of the oatmeal container (dark colors are best)
- Mod Podge (matte or gloss)
Tools Needed
- Wide paint brush (only if your container has a non-removable label)
- Foam brush
- Small sharp scissors
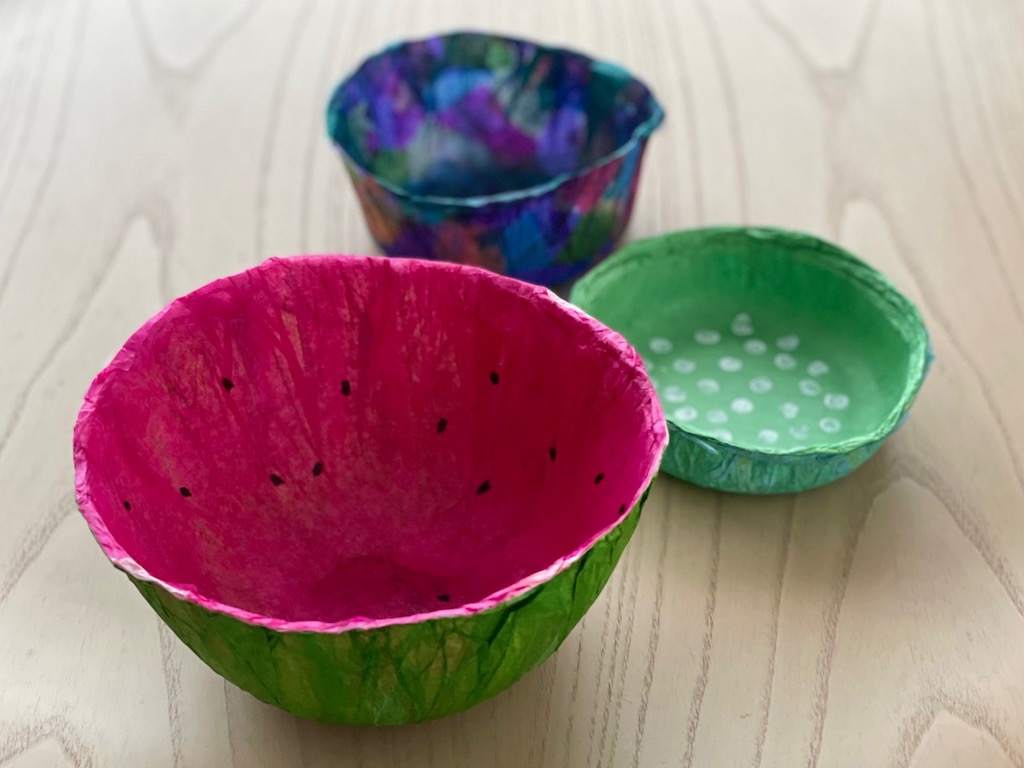
More recycle tissue paper crafts: make a bowl.
How to Make It
Clean out the oatmeal container by wiping with a damp paper towel. If your container label doesn’t peel off, paint the container with gesso and let dry. If the container label still shows through, add another coat. Let dry between coats. If your container label peels off, skip this step.
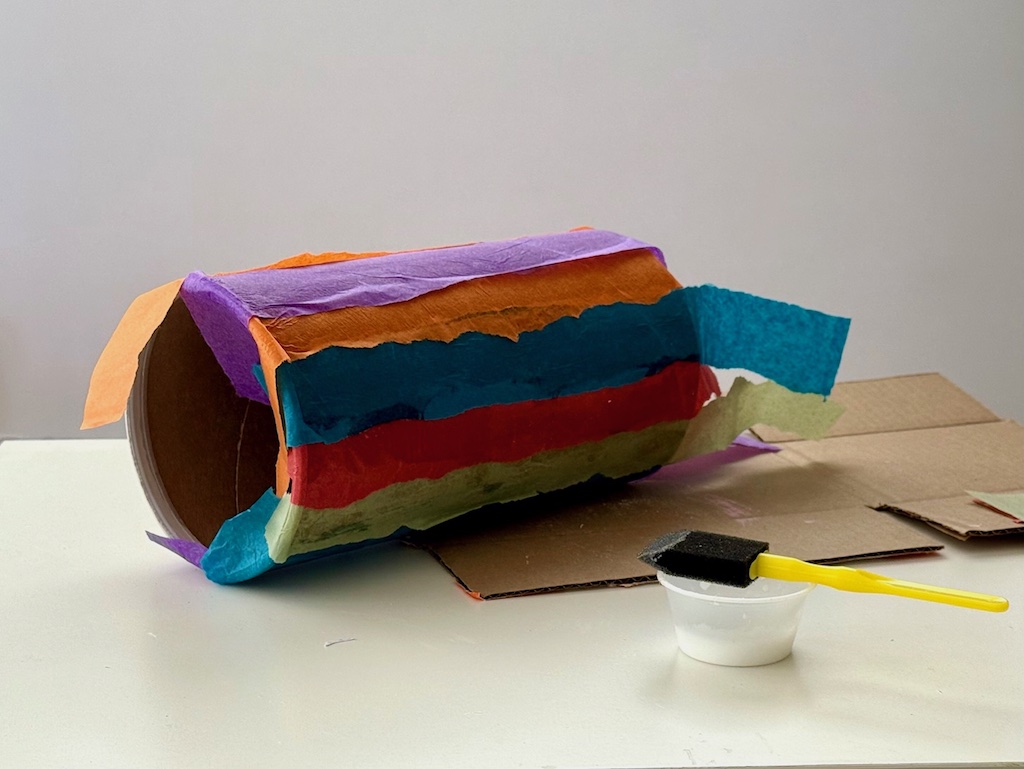
Lay tissue paper strips over the oatmeal container lengthwise, leaving a 2-inch margin at top and bottom. Glue in place with Mod Podge.
When you have encircled the container with tissue paper, gently press the excess paper at the top into the mouth of the container. The pressure will leave ridge marks on the tissue paper.
Using the ridge marks as your guide, trim off excess paper around the mouth of the container.
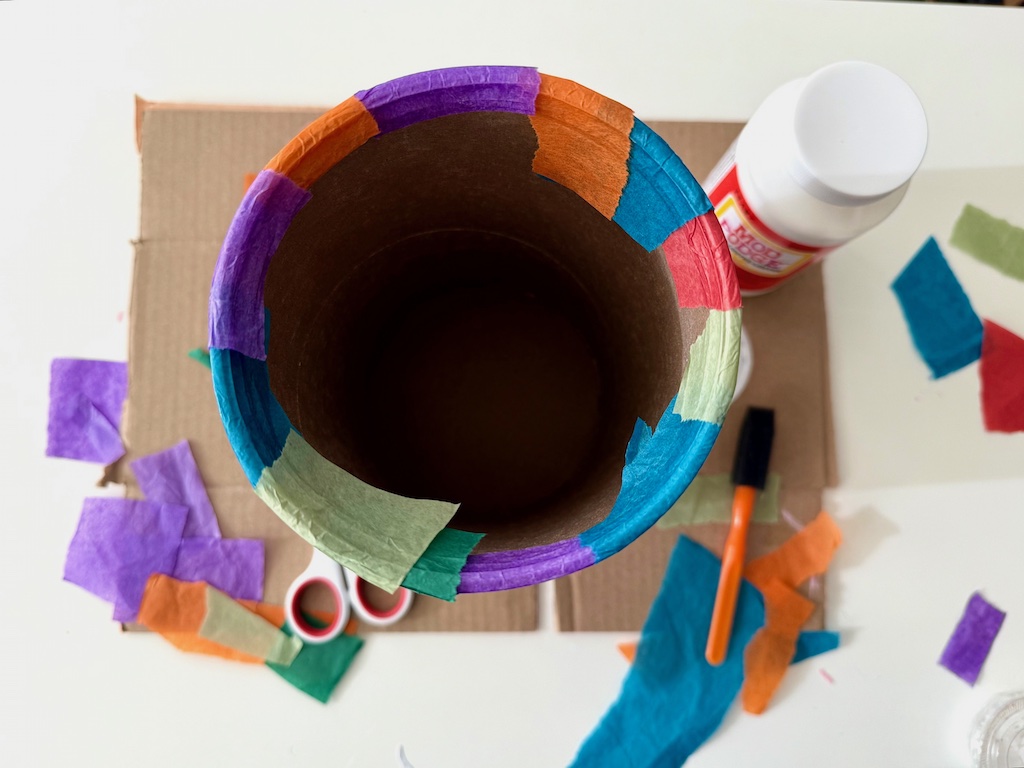
Glue down the trimmed margin with Mod Podge. Turn the container upside-down and follow the same procedure to trim excess paper and glue the tissue ends neatly to the bottom of the container.
Paint the entire oatmeal container with Mod Podge to protect the tissue paper and keep it in place. I used two coats.
These containers will get a lot of wear and tear on the edges as the container is opened and closed. Reinforce the edges by applying 2 additional coats of Mod Podge just where the plastic cover will abrade against the container. It will dry clear.
How to Make a Ribbon Handle
If your container will be holding heavy toys, such as a container full of metal cars, skip the ribbon handle, which won’t be able to accommodate the weight for long.
Materials Needed
- 3/8-inch wide ribbon (non-wrinkling like polyester) about 18 inches long
Tools Needed
- Pencil
- Tape measure
- Sharp pointed object such as a pushpin or nail to pierce holes
Use a pencil to mark your first hole 1 inch from the top of the container.
To place the second hole halfway from the first hole, measure the circumference of the container with a tape measure (for the Quaker container, it’s 16 1/2 inches). Divide that measure by 2 (8 1/4 inches). This is the distance where you’ll place the second hole, again 1 inch from the top of the container.
Use a pin or nail to pierce the container through the hole. Then enlarge the hole with the pencil point, twisting it back and forth, until it create a hole large enough for a ribbon to go through. Thread the ribbon from the inside of the container to the outside. Use a skewer or the pencil point to push the ribbon through.
Double knot the ribbon end from the inside. Thread the other end of the ribbon through the other hole, from the outside to the inside of the container. Adjust to the desired length of handle, then double knot the ribbon end from the inside. Snip off extra ribbon.
A Riff on Recycle Crafts
You can use this oatmeal storage container idea to create other variations:
- Cover the container with a length of fabric scrap; glue on lace, rickrack, braid trim, ribbons, and/or buttons.
- Have kids paint the container to create a solid color background, then when dry, paint pictures or designs on them. These works of art would make wonderful, keepsake containers as parent gifts.
- Decorate the containers with photos of the grandkids. For the most impact, cut out the backgrounds so the children’s images pop.
- Cover other plastic or cardboard containers, such as containers for yogurt or dry breadcrumbs to create pretty storage containers of different sizes and shapes.
Sign up to Get Grandma’s Favorite Recipes–Free

Sign up here for my email newsletter. Every Wednesday, I’ll give you a new idea for an activity or insight to nurture the little ones in your life. And once you subscribe, I’ll send you a link so you can download your set of quick and easy recipes as my thanks to you.