Plastic Egg Easter Crafts: How to Make an Egg Vase
I have a multitude of plastic eggs from years of Easter egg hunts. I tend to forget where I stored them from year to year, and I keep buying more. So, I decided it’s time to come up with some plastic egg Easter crafts to recycle the stash!
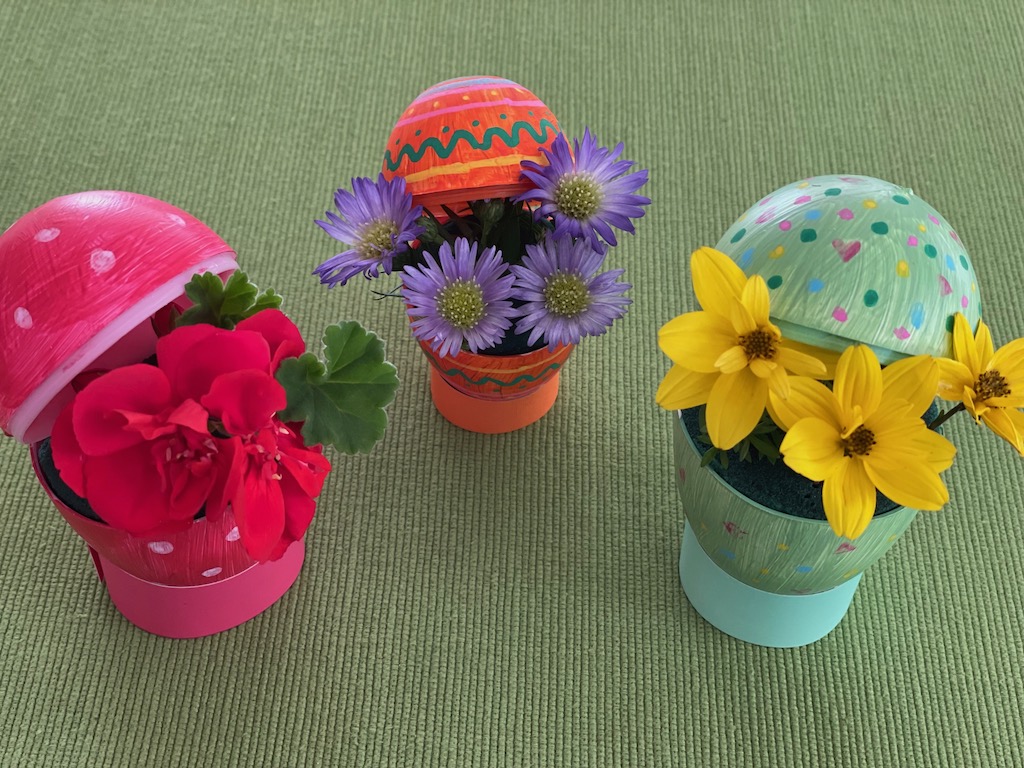
I began thinking…what if I paint and decorate the eggs and add fresh flowers to make tiny Easter egg vases? Group them on the table for a pretty centerpiece. Or set one at each place setting…. It was the genesis of an idea.
Easter Egg Vases
Materials
- Plastic eggs (mine were 2 1/2 inches and 3 1/2 inches tall)
- Bamboo skewers
- Gesso
- Acrylic paints
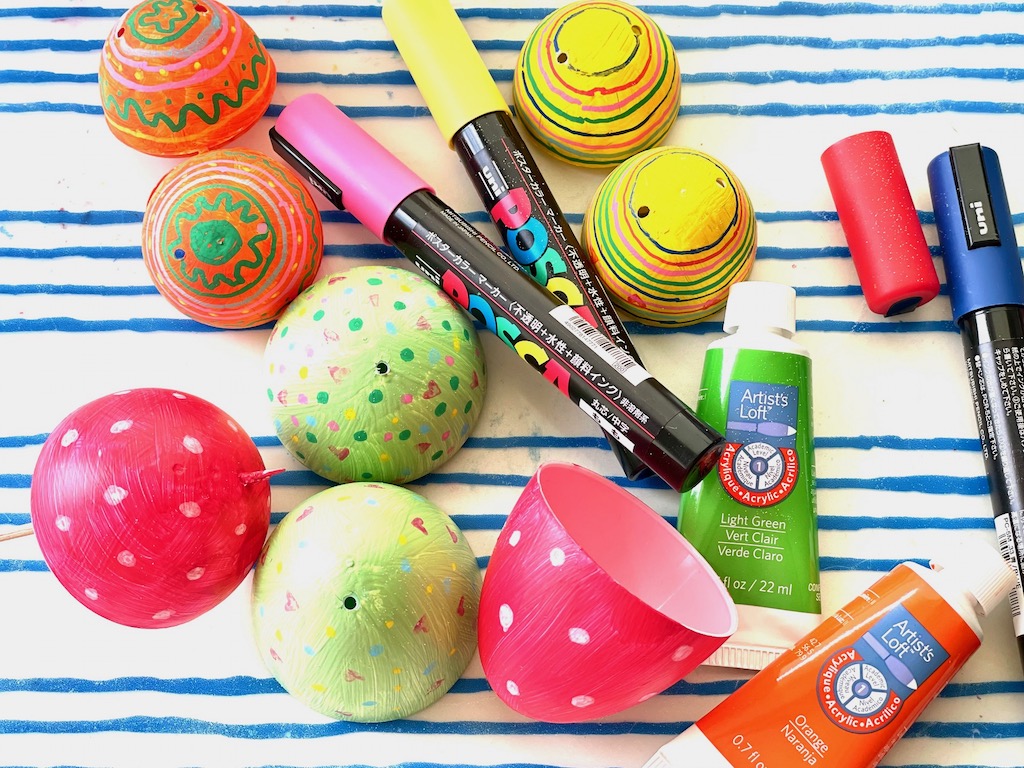
- Color markers I used the POSCA Japanese brand
- Baby wipes (optional)
- Floral foam bricks *
- Cardstock strips
- Adhesive tape
- Small fresh flowers
*Be sure to buy foam that will absorb water and is made for fresh flowers. There is a green styrofoam that will not absorb water, meant for artificial flowers.
Kids have fun making cascarones, Mexican confetti eggs, to crack over one another and shower with confetti.
Tools
- Paint brushes
- Paring knife
- Paper cutter or scissors
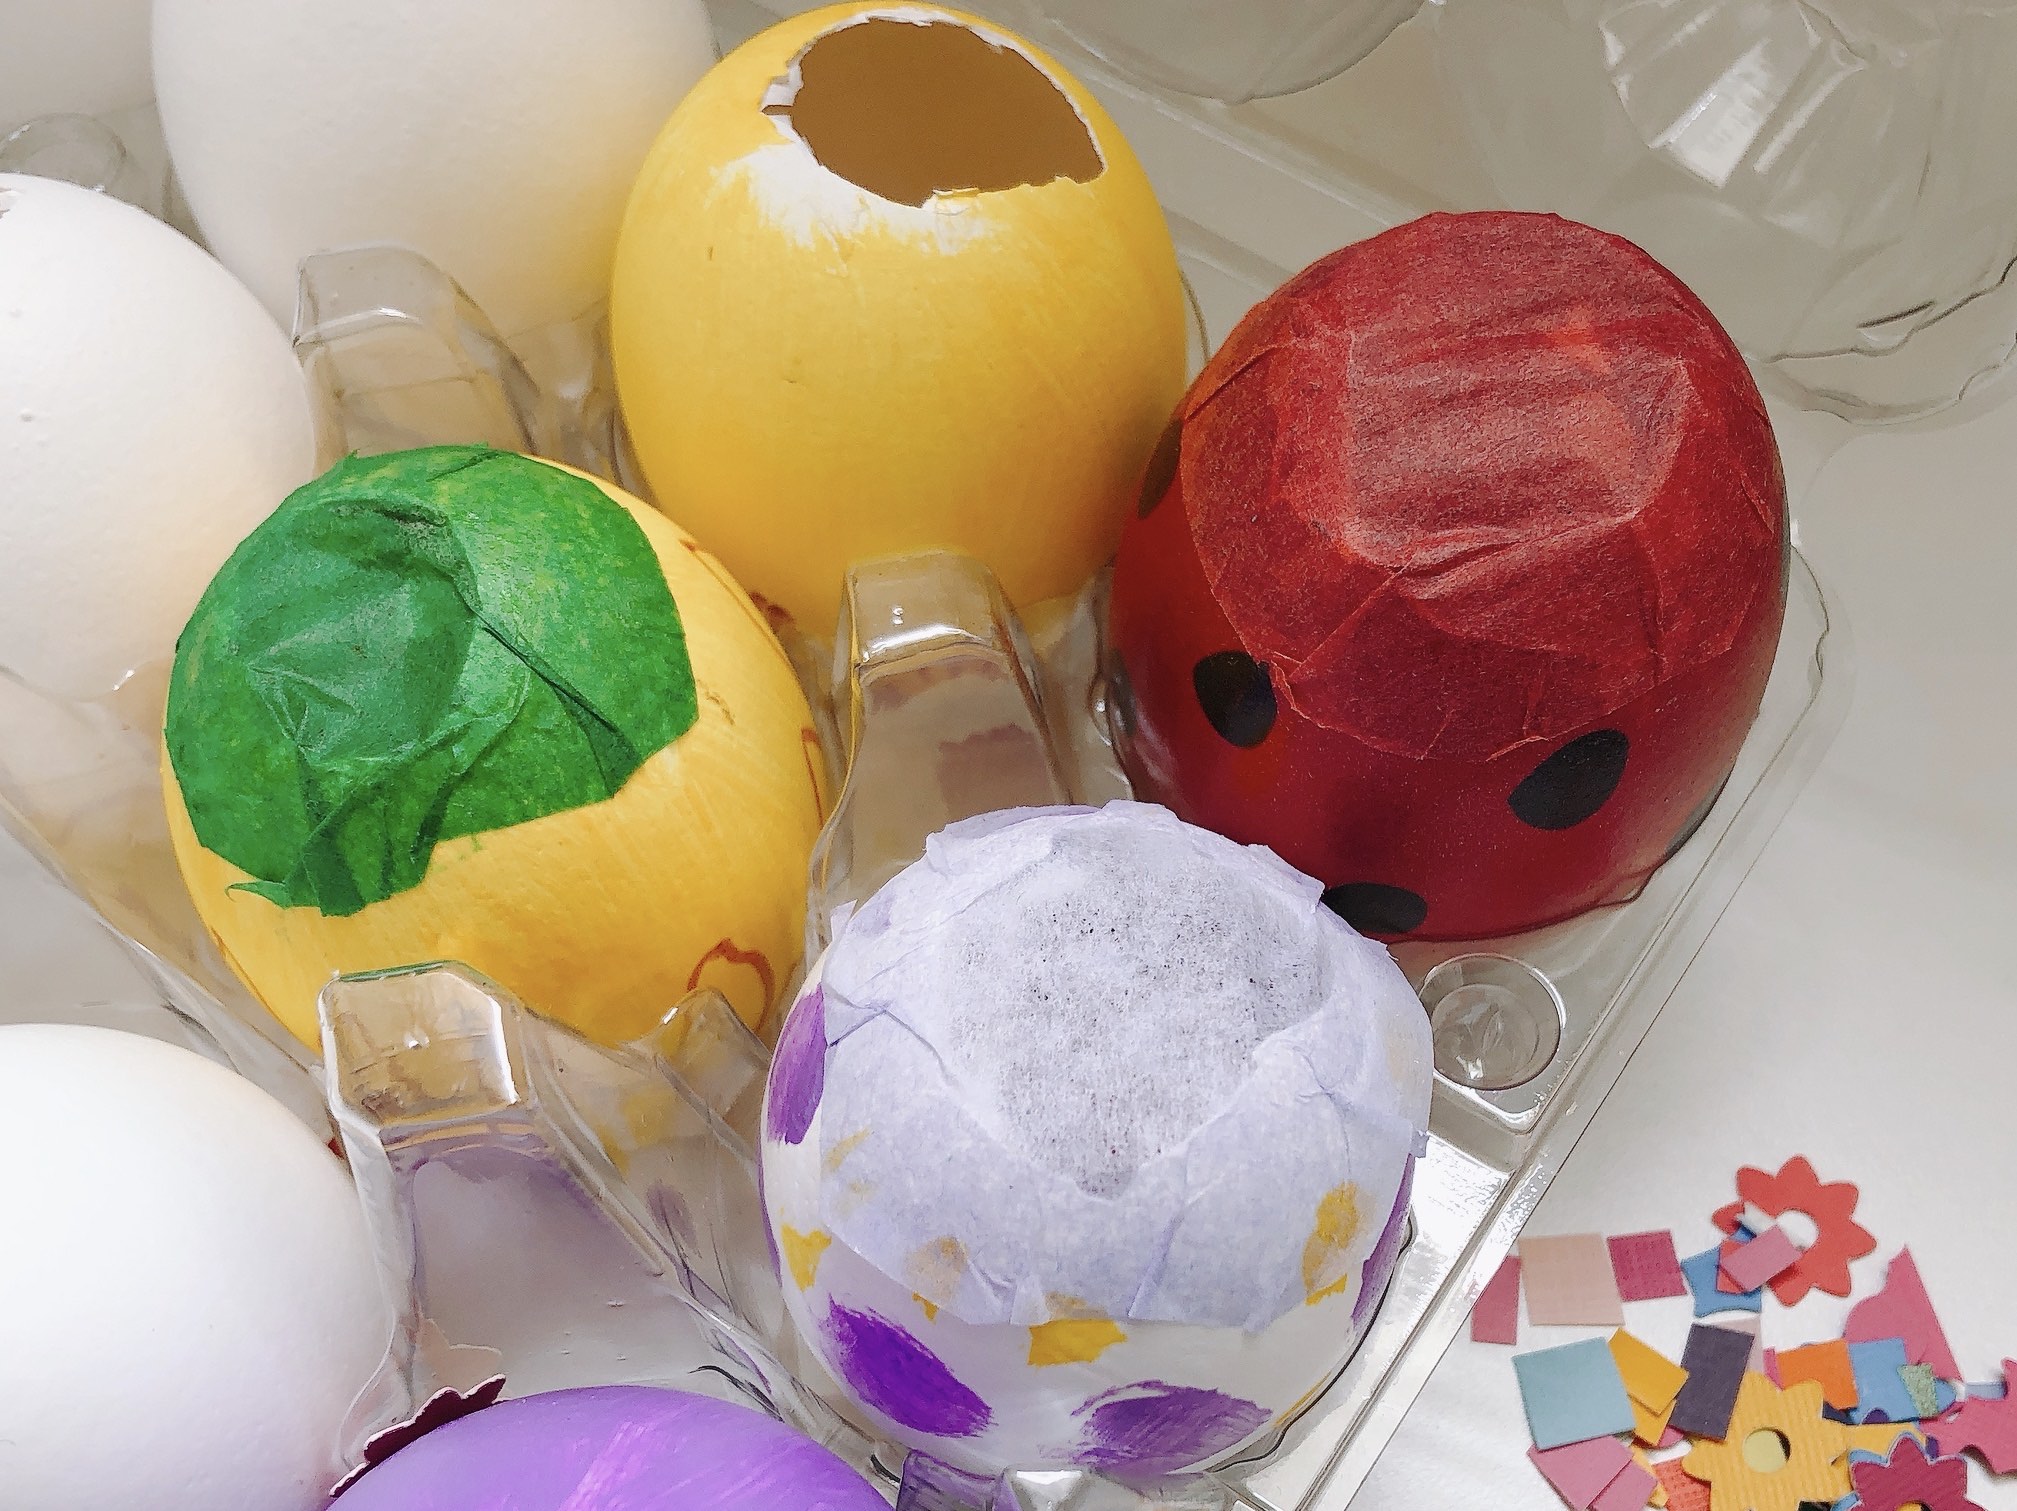
Step #1: Paint the Egg
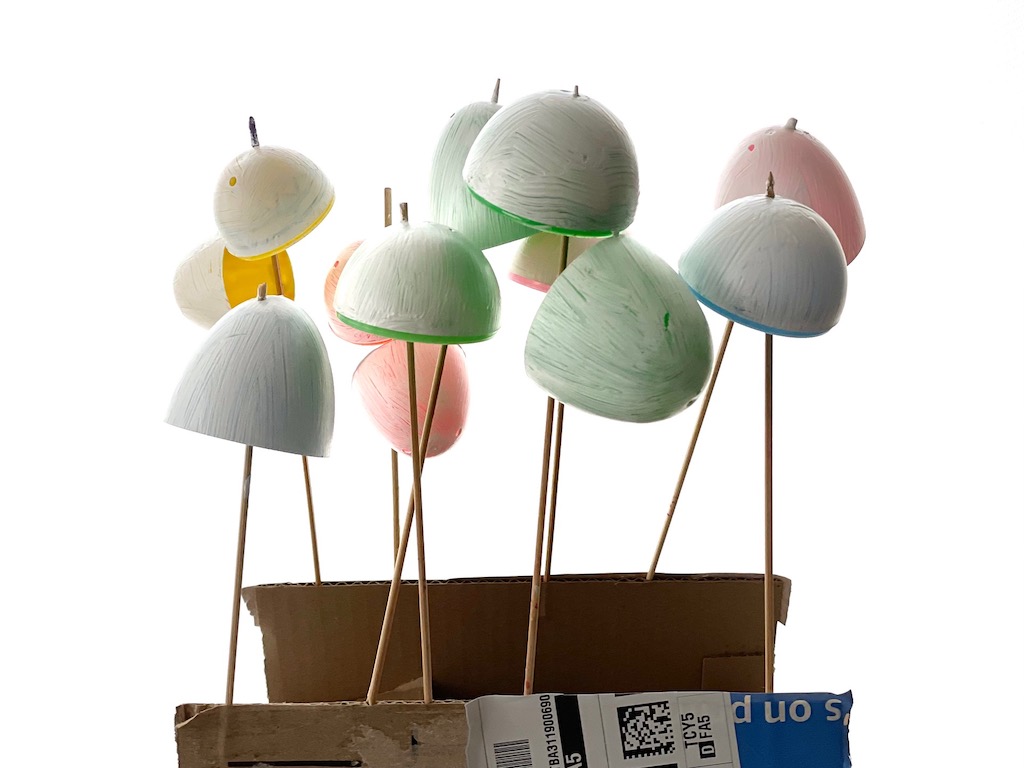
Lodge a skewer into the hole of a plastic egg to use as a handle and paint the outside of each egg with gesso. You’ll need to skewer each half of the egg separately. If the two halves of the egg are joined, don’t detach them for painting.
Using a small, corrugated cardboard box, poke the skewers into the zig-zag spaces in the cardboard lid, standing the lid up, so the skewers remain upright.
Set eggs aside to dry completely. You might want to do this part a day ahead if this is a craft project for kids; this way, they can begin decorating immediately.
Paint the eggs with acrylic paint. It’s best to stick to the original color of the egg. This way, painting mistakes won’t be glaring. Allow paint to dry completely, then use markers to decorate the egg.
When first applied, markers are quite liquid and will smear when touched, so either decorate by keeping the egg on the skewer, or place the fingers of your non-dominant hand in the cavity of the egg to hold the egg half steady from the inside.
If you have a smear, a tiny corner of a baby wipe might erase it. Alternatively, try a bit of wet paper towel.
Step #2: Make the Stand
To make a stand for your egg, cut a strip of cardstock and make a ring using tape to secure. I made the stand for the small eggs 1/2 inch high and the stand for the large egg 3/4 inch high. Another way to make a stand is to use strips from a toilet paper roll covered with washi tape, as we did recently for our terrariums.
Step #3: Arrange the Flowers
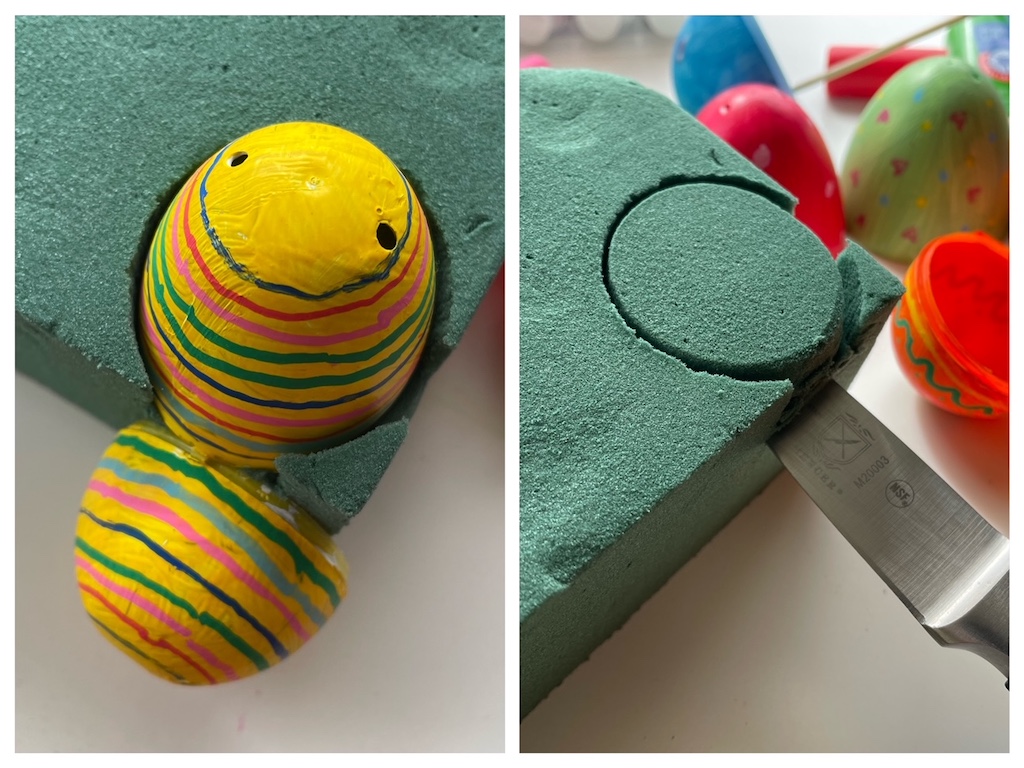
To cut the floral foam, turn the base of the plastic egg upside down on the foam and gently but firmly push down into it about 1/2- to 3/4-inch deep. Remove the egg and use a paring knife to cut horizontally to release the cut-out circle.
Remove the circle and press it into the base of the egg until the foam is level with the edge of the egg half.
With a small, beaked measuring cup, dribble water over the foam a little at a time, until the foam has soaked up all the water it can hold.
Set the egg half on the cardstock base.
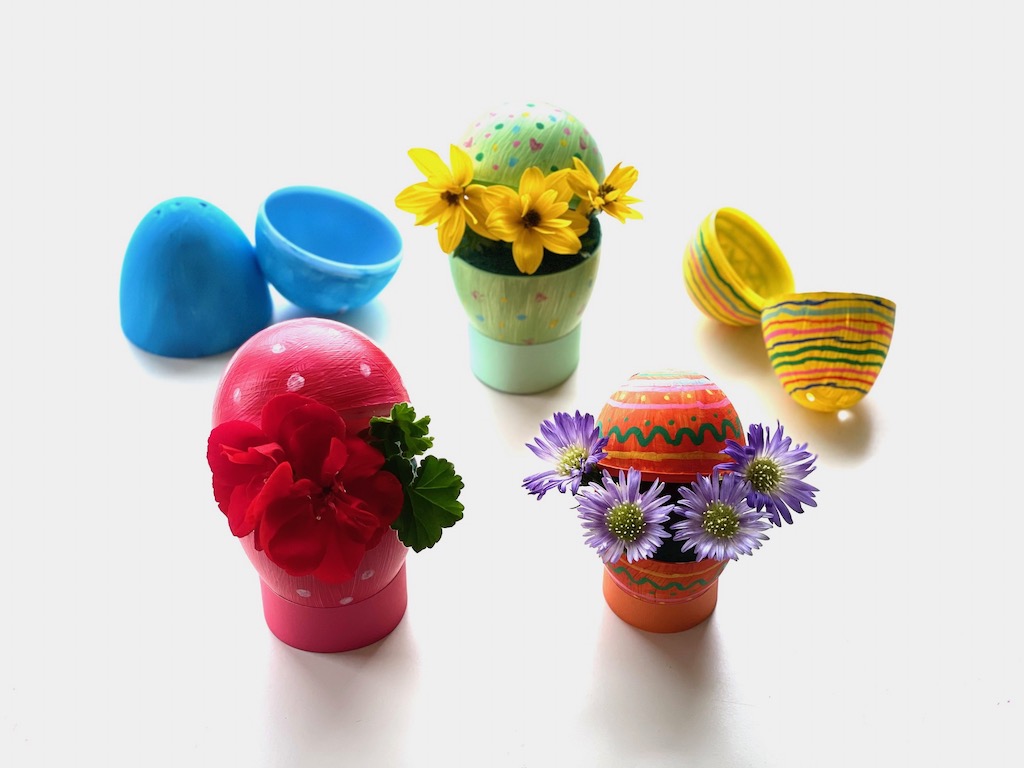
Arrange flowers in the egg, securing the stems into the foam. Use a wooden skewer or a toothpick to make indentations if the stems are too delicate. Add the top half of the egg by gently pushing it into the foam at an angle at the edge of the egg. For hinged eggs, simply drop the top half of the egg over the arrangement, without obscuring the flowers.
Add a little water each day to keep the foam moist.
Cautionary Note:
Each egg has a couple of holes in the base; the soaked floral foam could leak water through the holes. I haven’t had a problem with leakage, but to be safe, you could plug up the holes by puddling the bottom of the egg with glue from a glue gun or taping over the holes with blue painter’s tape before inserting the floral foam and adding the water.
Sign Up!
Don’t forget to sign up for my email newsletter. Every Wednesday, I’ll give you a new idea for an activity or insight to nurture the little ones in your life.