Make Tissue Paper Bowls, an Easy, Inexpensive Craft
Miss T’s mom was cleaning out her garage ruthlessly. “Do you want some tissue paper?” she asked.
I never say no to free craft supplies. And I knew that with grandpa’s birthday on the horizon, Miss T could turn them into tissue paper bowls.
Using new and used tissue paper makes this project inexpensive to do and a great recycling activity.
Tissue paper bowls requires a child crafter who is patient and able to work gently with fragile materials. The alternative balloon method (below) is simpler and should be doable by any child.
Materials Needed for Tissue Paper Bowls
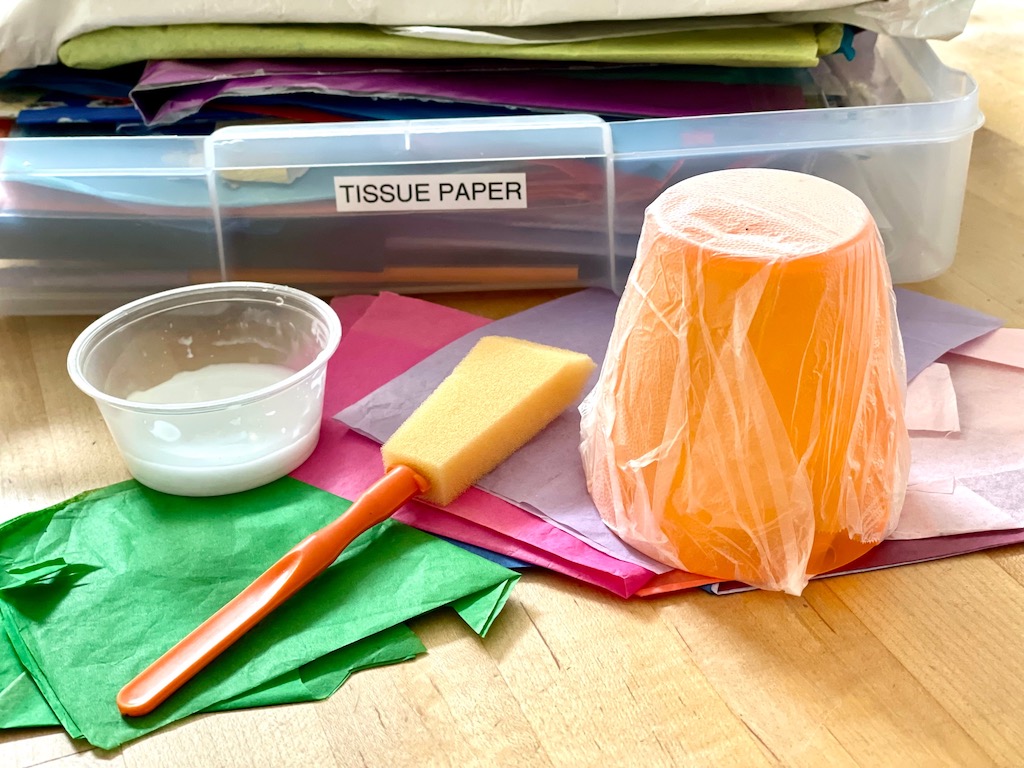
- Colored tissue paper, new or used
- Something to use as a mold with a flat base such as a plastic drinking cup, a ceramic bowl, or a small glass storage container
- Plastic wrap or Glad Press’n Seal wrap
- Cooking spray or petroleum jelly, such as Vaseline
- White school glue, such as Elmer’s
- Small container for diluting the glue
- Foam brush (can be purchased as cheaply as 87 cents at Walmart)
- Scissors
Another fun tissue paper idea: make dragons!
How to Make It: Prepping the Project
Turn the mold (cup, bowl, or other container) upside down. Cover with a sheet of plastic wrap, encasing the outside completely and tucking the ends under.
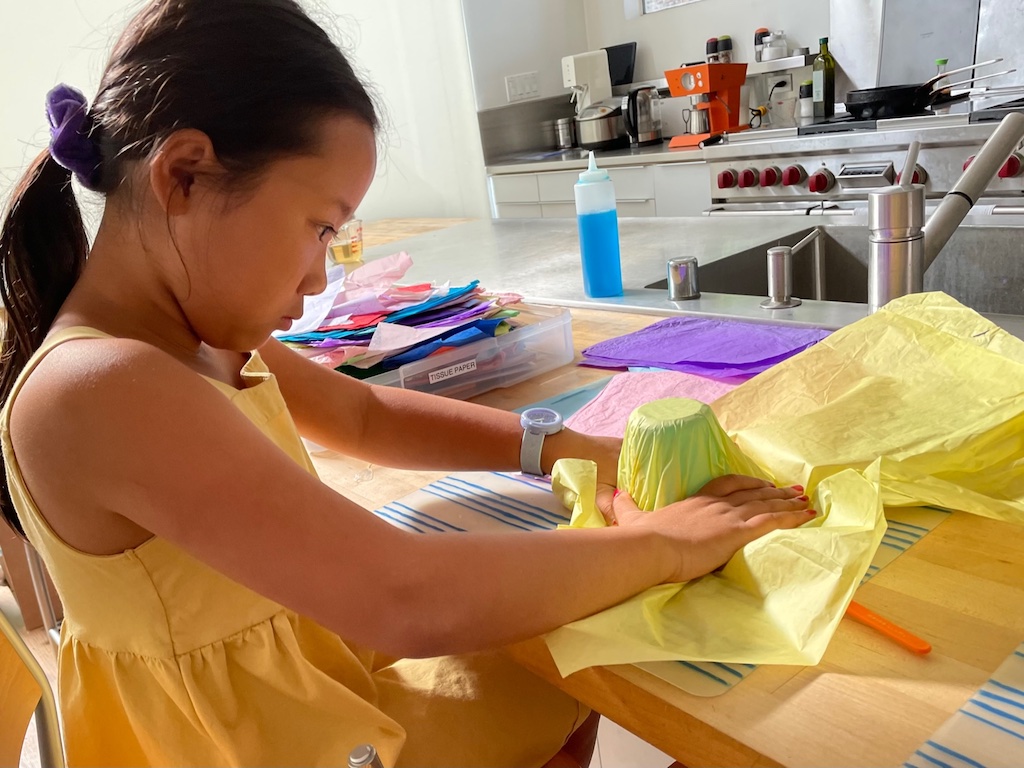
Lay a sheet of tissue paper over the mold to determine the size of the tissue paper sheet you will need and cut sheets to size. You’ll want about 5 sheets.
Coat the plastic-wrap-covered mold with a thin layer of cooking spray or petroleum jelly. This will enable the tissue paper bowl to be removed easily.
How to Make It: Gluing the Tissue Paper
Dilute the glue with an equal amount of water in a small container. I use a plastic takeout sauce cup. Brush the glue over the surface of the mold with a foam brush.
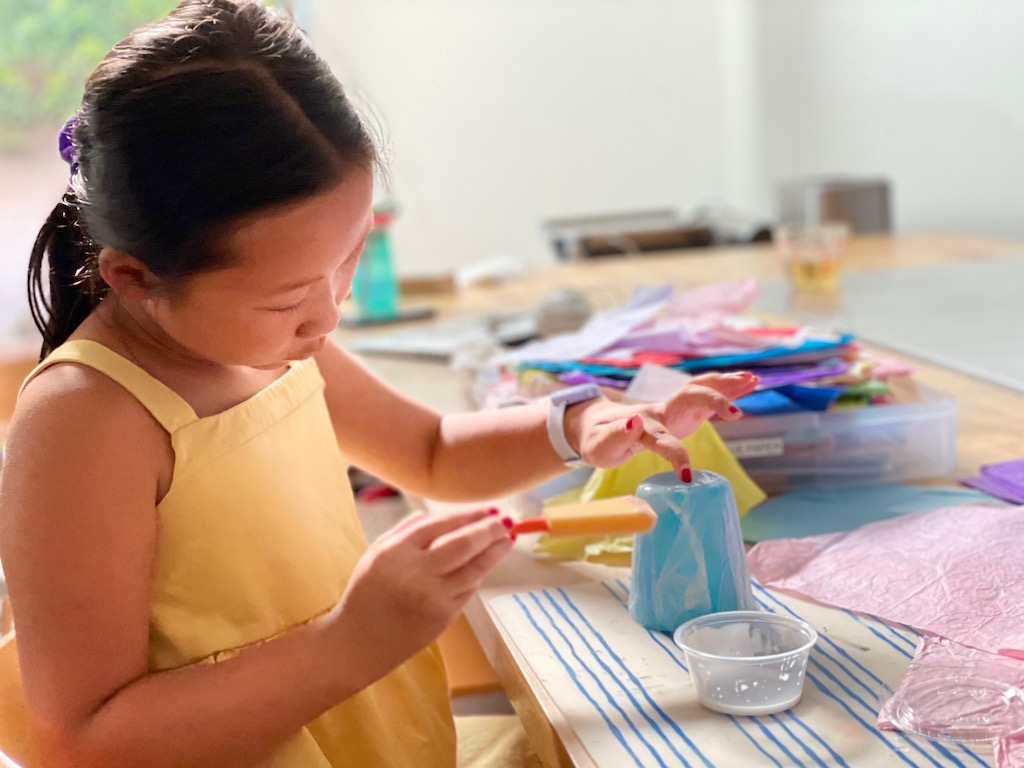
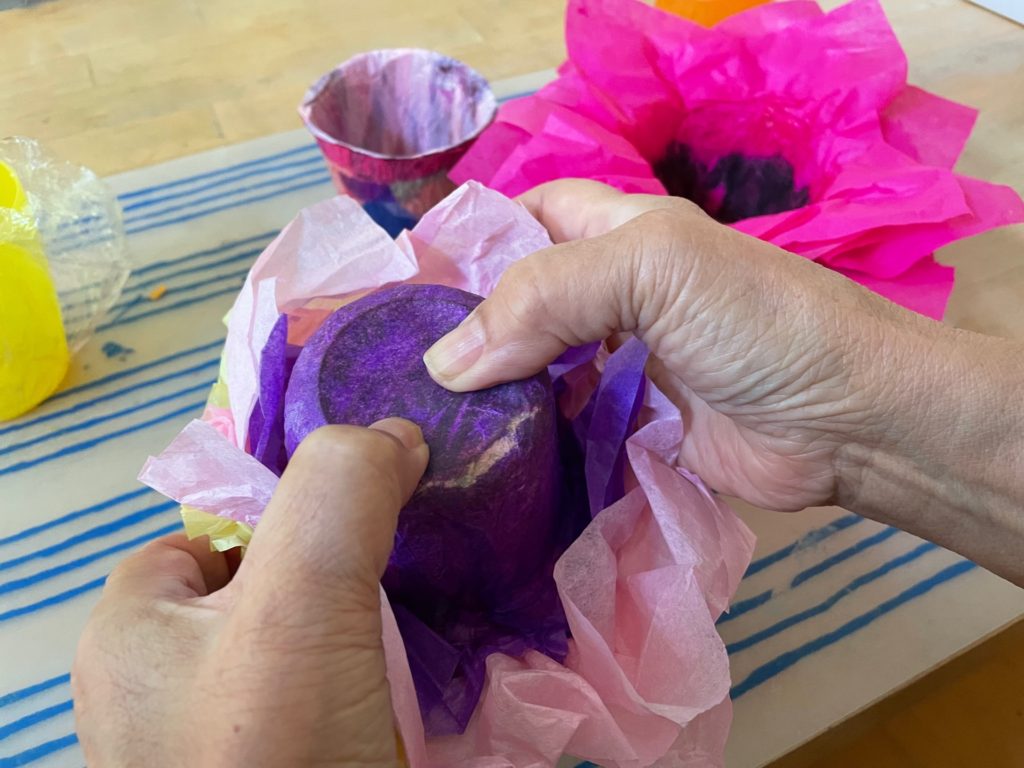
Lay a sheet of tissue paper over the mold, and press gently in place. Tissue paper is thin and will tear easily. If it tears, just pinch the tear closed as best you can. The next layers will patch the tear.
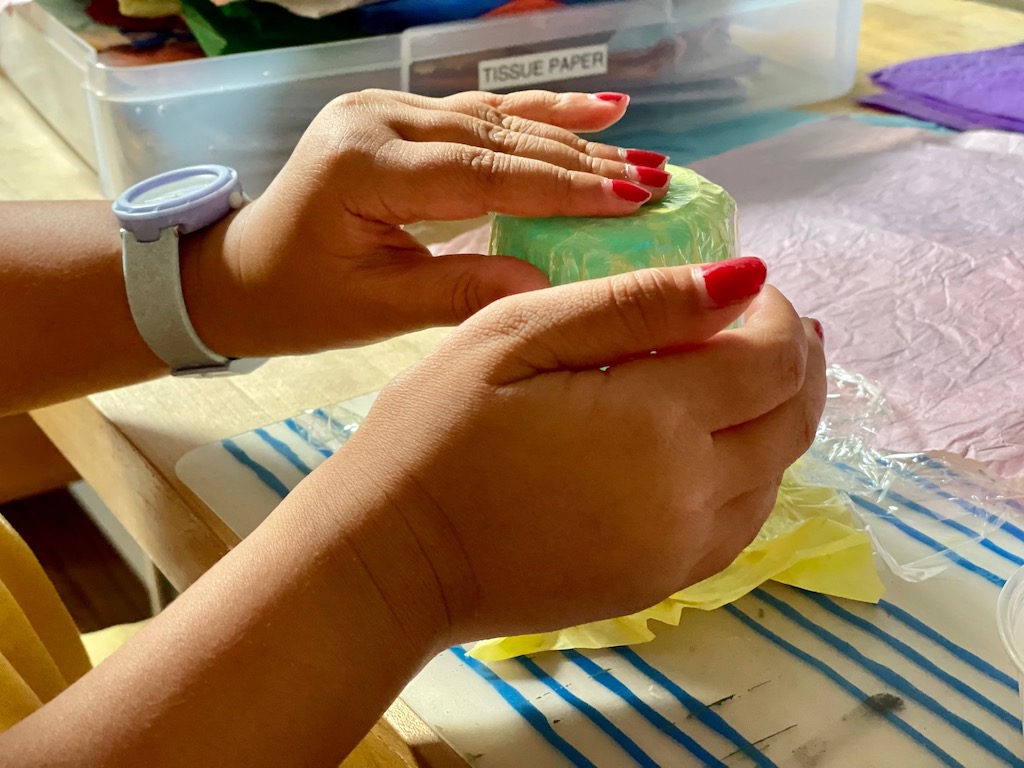
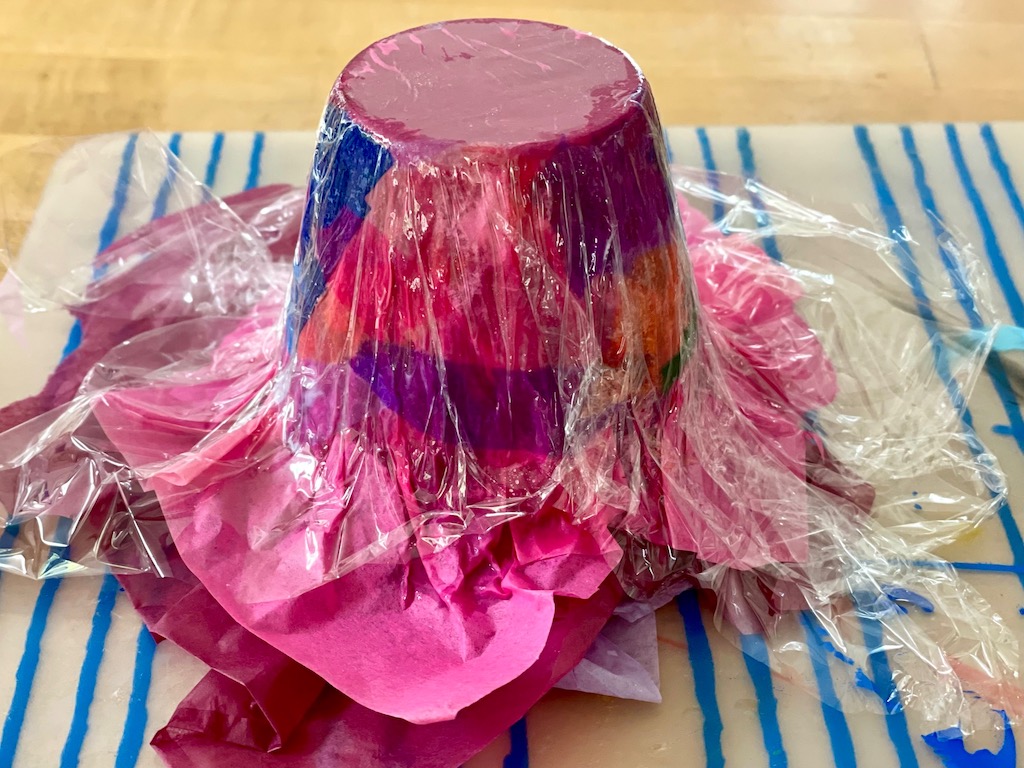
Glue on about four or five layers of tissue paper, brushing glue between each addition. Add more layers for a thicker bowl. For a multi-colored, stained glass effect, tear bits of tissue paper and glue over the last layer. It’s better to tear than cut; the torn ends will blend more smoothly.
After the last layer, take a sheet of plastic wrap to cover the entire surface and press the tissue layers gently to the mold. You could do this with your hands, without the plastic, but it’s much messier. Remove plastic wrap and brush the entire surface with glue to provide a finish.
Allow tissue paper to dry. Depending on the number of layers of tissue and the weather, this may take a half day to overnight or longer.
How to Make It: Releasing the Mold
To remove the tissue paper bowl from the mold, turn it upside-down and gently press from the top, pushing the tissue paper out from the mold and peeling back the plastic wrap. If it doesn’t come out readily, stick a thin-bladed knife between the tissue paper and the mold at intervals to give it a nudge.
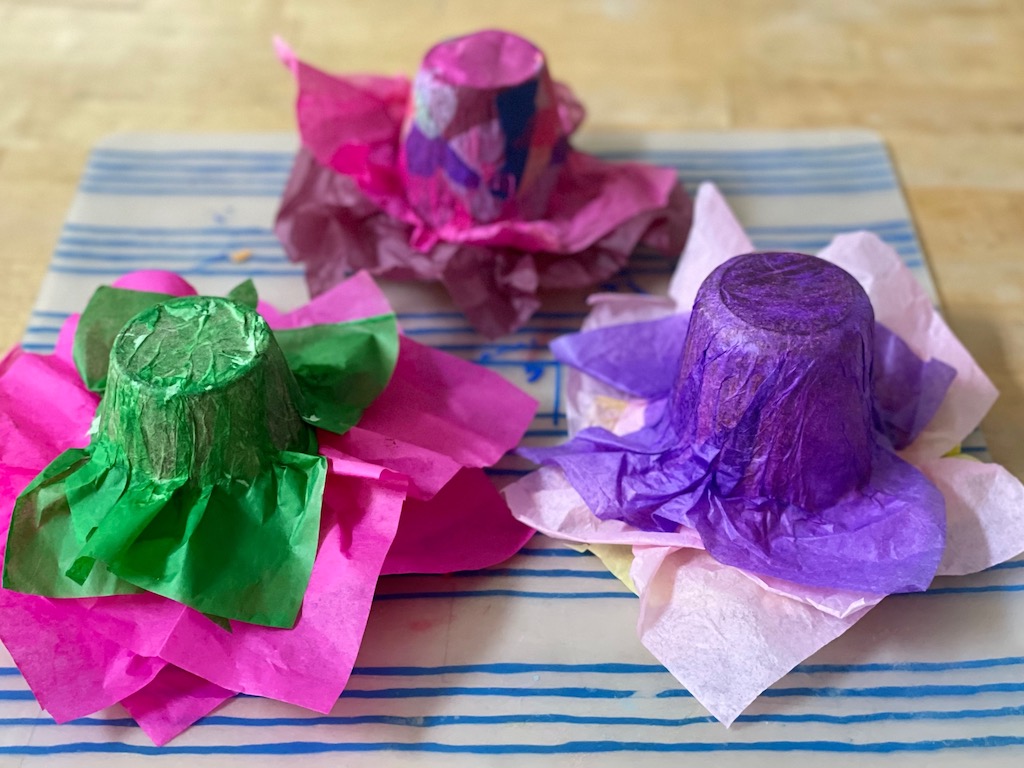
Once the bowl has been released, use scissors to trim around the bowl, removing the excess tissue paper. Or, leave the tissue paper as a frill, if you like.
The Balloon Method for Tissue Paper Bowls
You need three more items for the balloon bowl:
- Balloon
- Heavy cup or mug
- Masking tape or blue painter’s tape
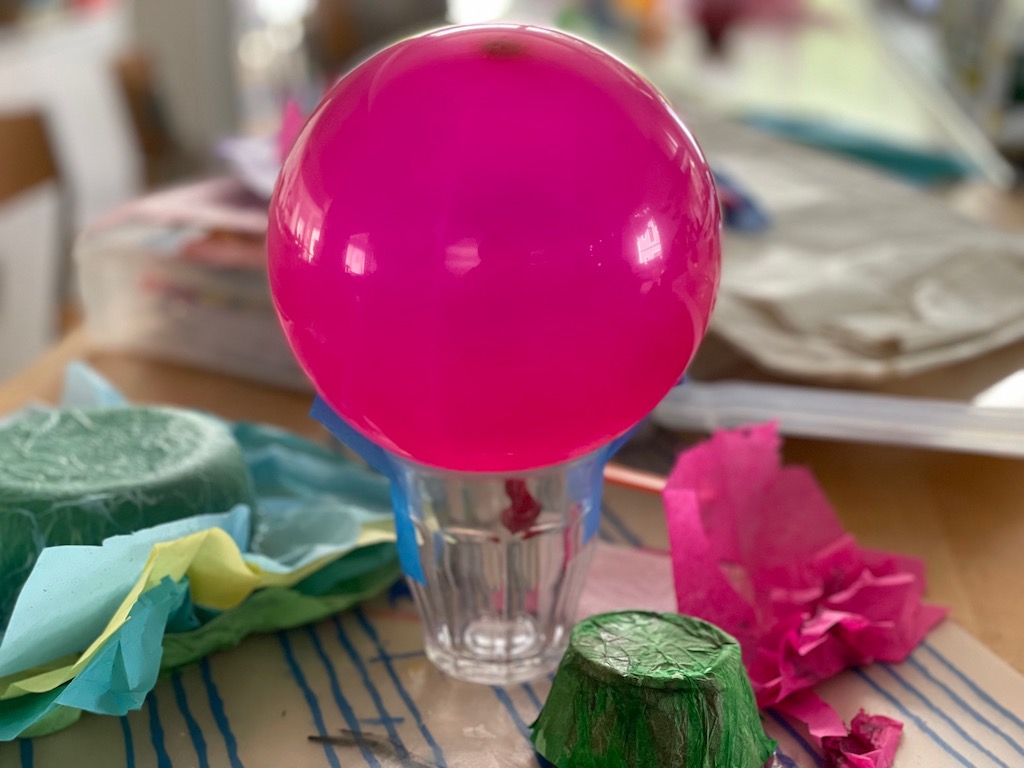
Blow up a balloon (not too large) and tape it to a cup to hold it in place. Brushing glue mixture a section at a time, cover each section with torn tissue paper pieces. Do not cover the entire balloon; just go halfway to form a bowl shape. Repeat layers, brushing with glue mixture between layers. Do about four layers.
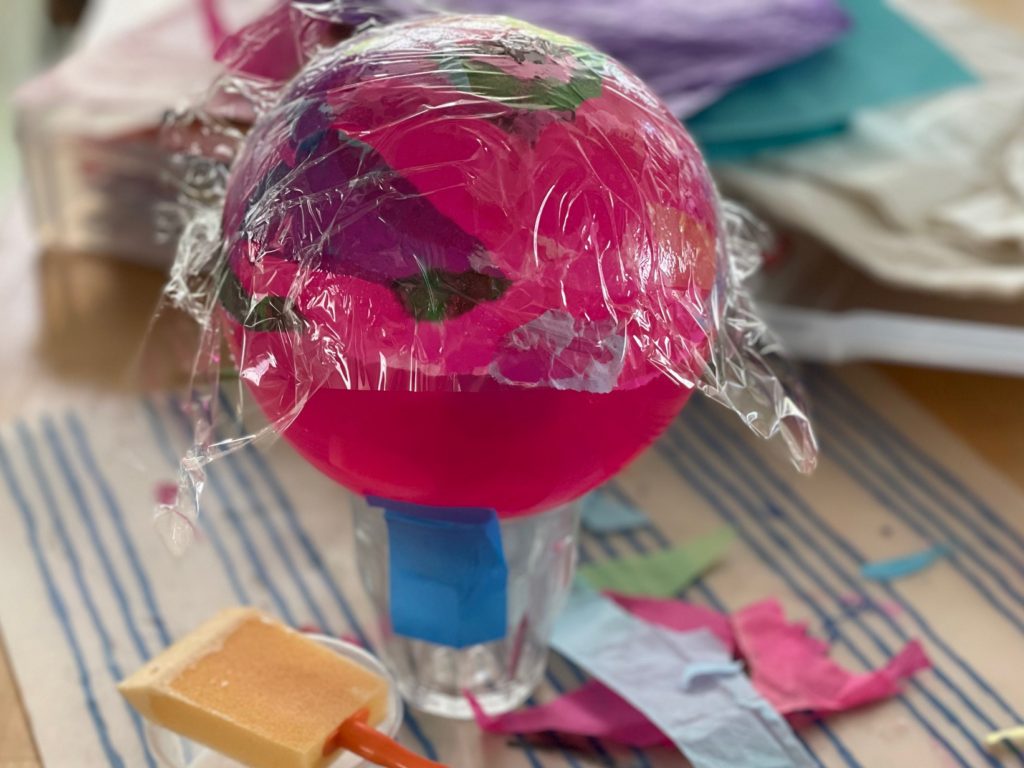
After the last layer, take a sheet of plastic wrap to cover the entire surface and press the tissue layers gently in place. Remove plastic wrap and brush the entire surface with glue. Allow tissue paper to dry. Depending on the number of layers of tissue and the weather, this may take a half day to overnight or longer.
The Balloon Method: Releasing the Mold
To release tissue paper bowls from the mold, simply pop the balloon. If parts of the balloon still stick to the bowl, simply peel it out. You may have to reshape the bowl with your fingers.
Tips and Tricks
Here are a few additional considerations.
- If you mix dark and light layers of tissue paper when making your bowl, the dark colors will bleed into lighter ones. To keep the dark color from penetrating, use several layers of light colors as a barrier between dark and light.
- You can decorate the tissue paper bowls with acrylic paints and indelible marking pens, if you like.
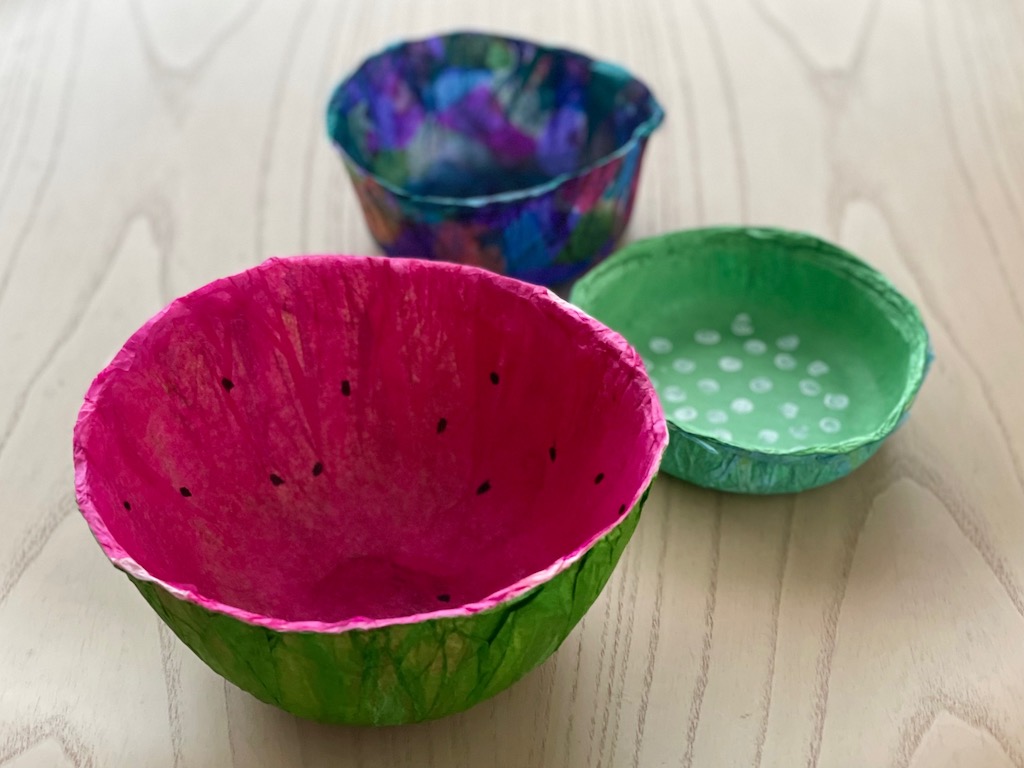
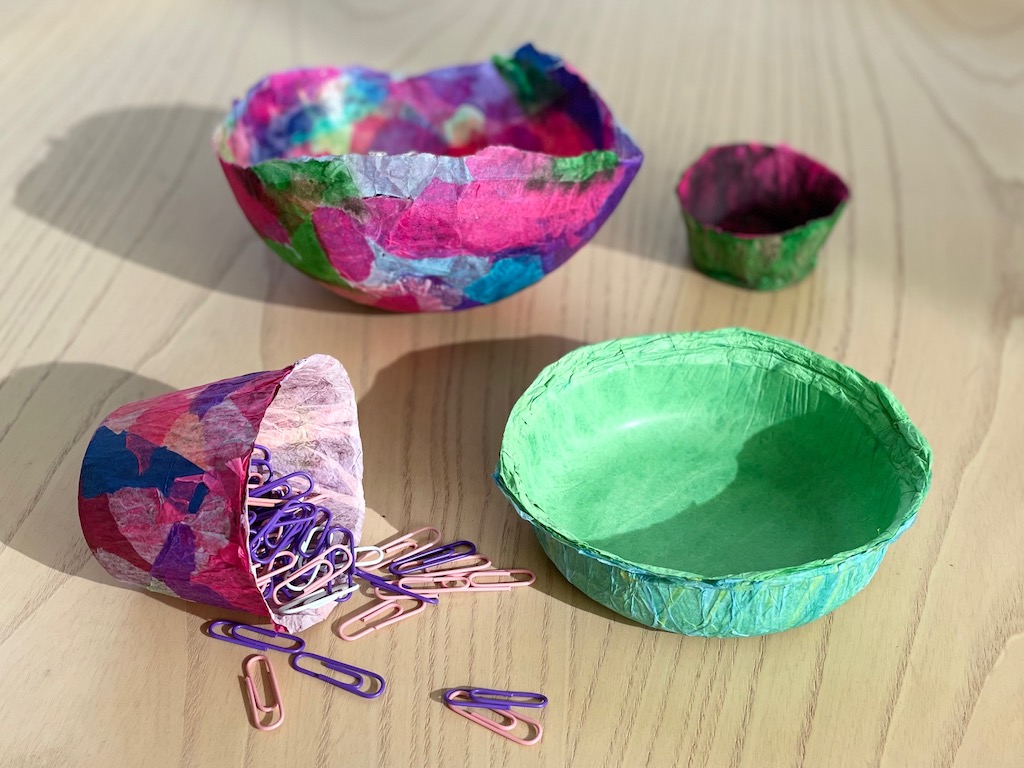
- To make the WATERMELON, we used one layer of dark pink, followed by two layers of light pink, one layer of light green, and one layer of dark green over an inverted bowl. The seeds were drawn with a black Sharpie.
- To make the “STAINED GLASS” bowl, we used two sheets of tissue paper over a glass food container and followed with two layers of torn tissue paper.
- To make the POLKA DOT bowl, we dipped a pencil eraser in white acrylic paint and stamped random dots.
What to do with Tissue Paper Bowls
These lightweight bowls make pretty gifts kids can make for any occasion. Use them to hold lightweight objects such as paper clips, rubber bands, cotton balls, or hair accessories like hairpins or elastic bands.
Sign Up!
Don’t forget to sign up for my email newsletter. Every Wednesday, I’ll give you a new idea for an activity or insight to nurture the little ones in your life.