Introducing…A Quick Tour of my Craft Room
When I was a young child, I spent many happy hours with my mom in her sewing room, playing with remnants, buttons, and trims. My mother was a homemaker at the time, and she sewed aloha shirts (what you call Hawaiian shirts on the Mainland) to earn extra money.
Aside from the time I got into trouble for cutting the sewing room curtains for no apparent reason, this was the place that inspired creativity and treasured childhood memories.
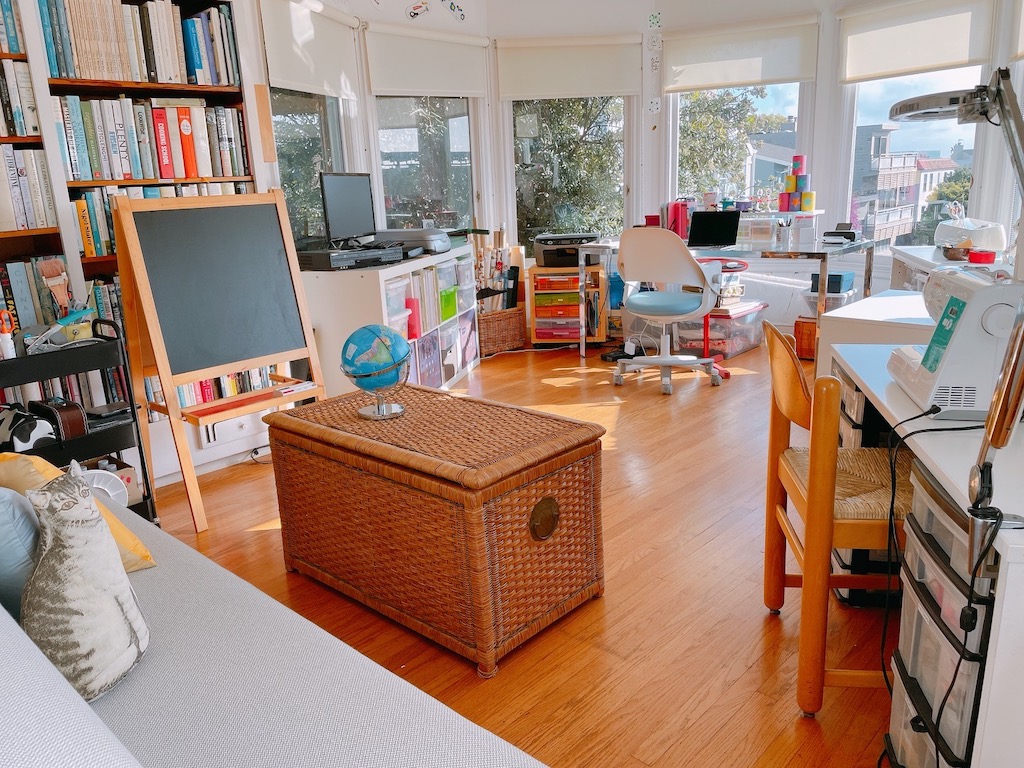
As a grandma, I’m lucky to have a dedicated craft room where I conceive of DIY projects for the grandkids. It houses my sewing machine, Cricut, photo printer and scanner, and a big, old-fashioned paper cutter.
I hope one day, Miss T and Little N will remember my craft room with the fondness I still hold for that sewing room in Hawaii.
If you’re thinking of creating a craft room in a new stage of your life, here are some tips. Many of the projects from “Call Me Grandma!” add decorative touches. Take a look!
My Craft Room Furniture
I’ve repurposed furniture from other rooms or purchased inexpensive IKEA items to furnish my craft room. For example, I use a glass parson’s table that was our first dining table in New York City, as my desk. Then I moved a wicker chest that held bed linens from a bedroom into the craft room to store fabrics.
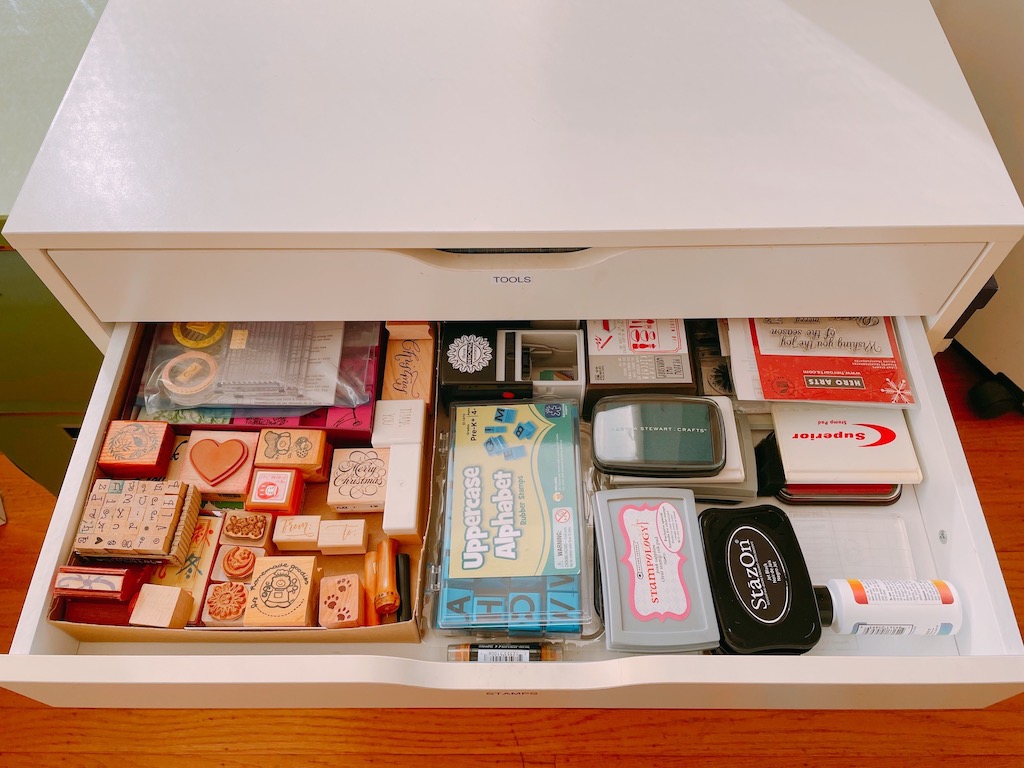
I use a 26-inch-wide rolling chest to holds craft tools, separated by type. One is dedicated to storing stamps and stamp pads, for example. These wide but shallow drawers make it easy to find what’s needed; it helps to label each drawer’s contents on the outside using a label maker.
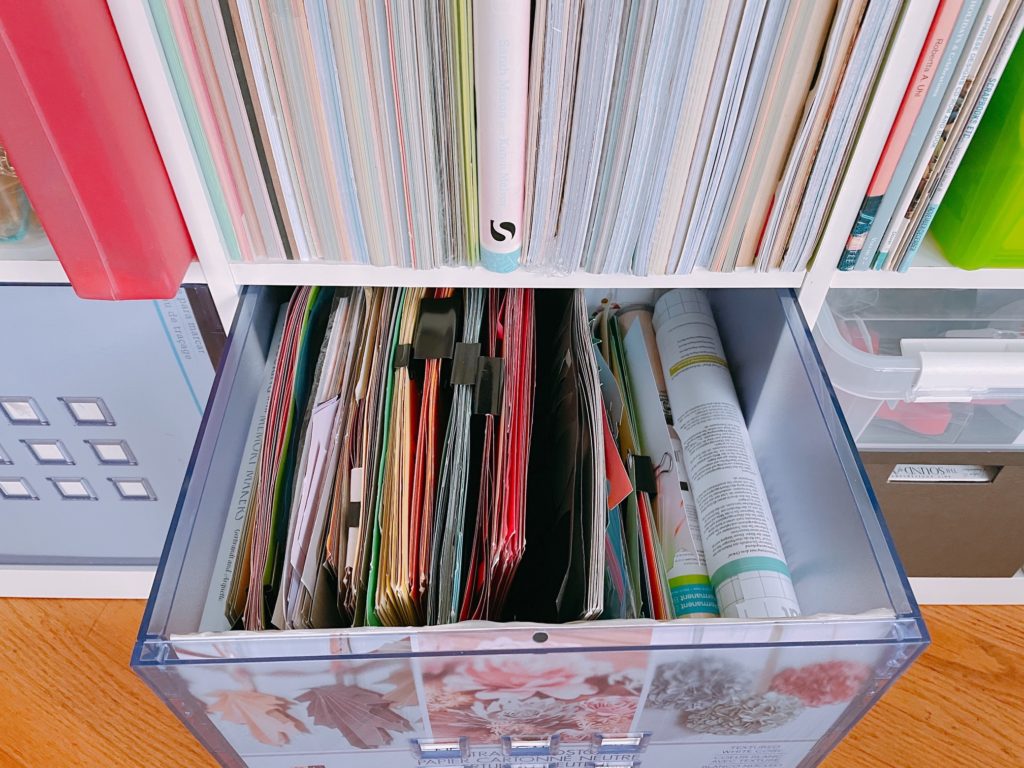
I have an IKEA open bookshelf to hold other craft supplies. Use plastic bins to organize the supplies efficiently.
Special Items for the Kids
I highly recommend the IKEA MALA easel, which is just $20 at the store. But beware of what appears to be the same easel selling on Amazon for $47. IKEA also sells the inexpensive roll of paper for the easel.
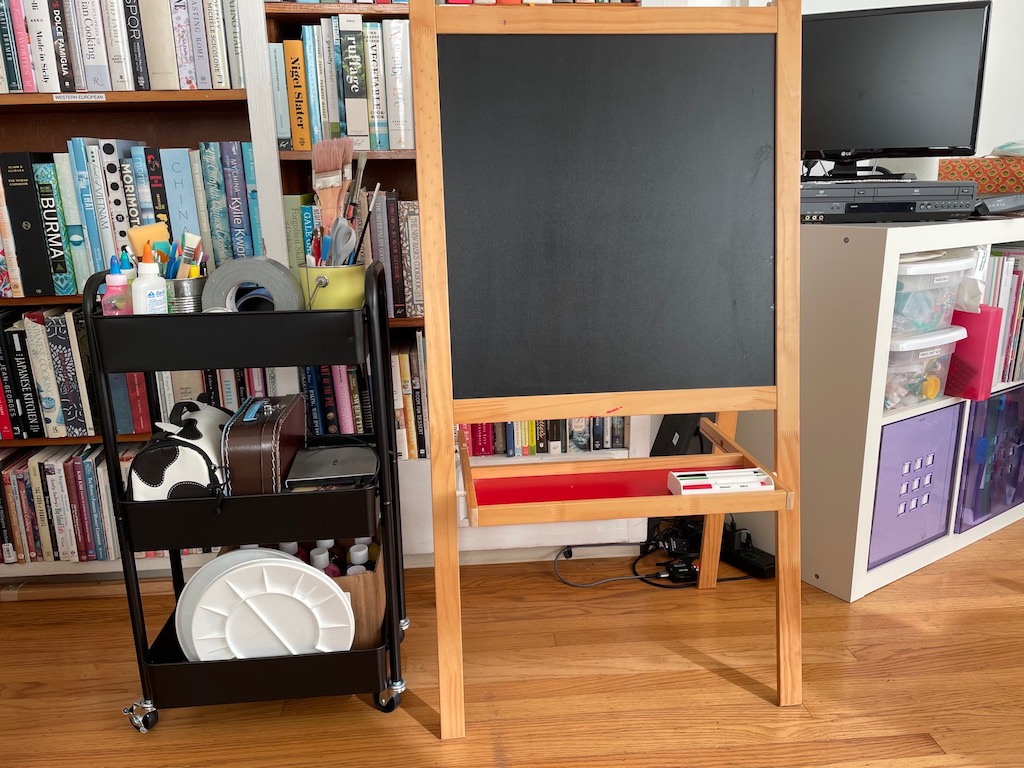
I found another handy item for my craft room: a small rolling cart. You can put the most-used craft tools on it and roll it around where needed.
When it’s time for the grandkids to paint, I move the lightweight easel outside, onto our deck. I can roll the cart, filled with tempera paint bottles, out with it.
Cookbooks and Craft Books
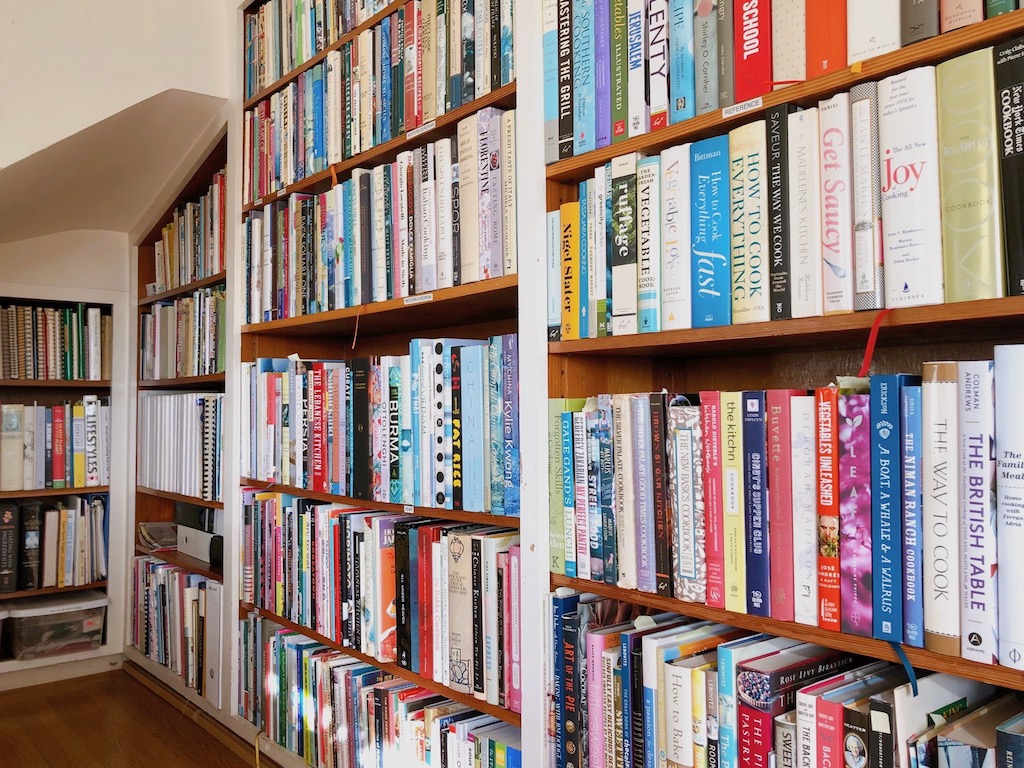
I have a vast cookbook collection from my decades of work as a food editor, food publicist, culinary director, and James Beard Cookbook Awards judge, and a small collection of arts and crafts books. While I try to edit the collection every so often, there are still so many left. Fortunately, I can store them in built-in bookshelves situated in the nook of the craft room that sits under the stairwell.
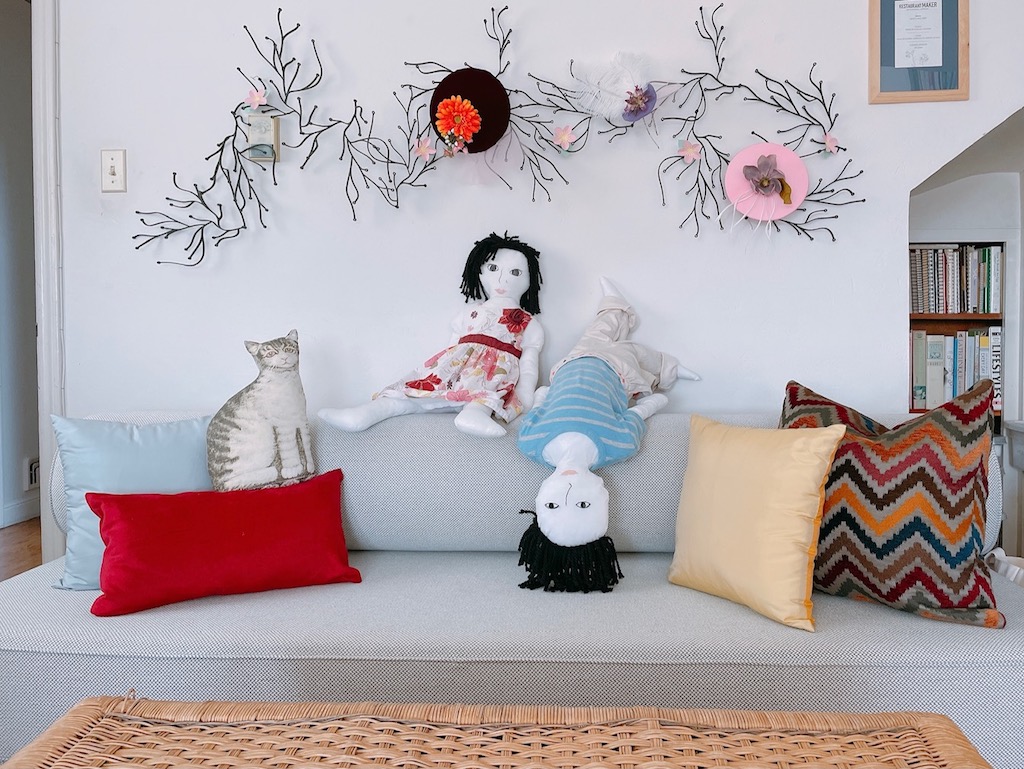
I like a place to sit and relax in the craft room where I can read my books, so I made this one splurge: a sofa bed. It also means the craft room can become a guest room, as needed.
Decorating with our Craft Projects
My craft room is full of color and cheer. It’s decorated with some of the craft projects Miss T and I have created over the years.
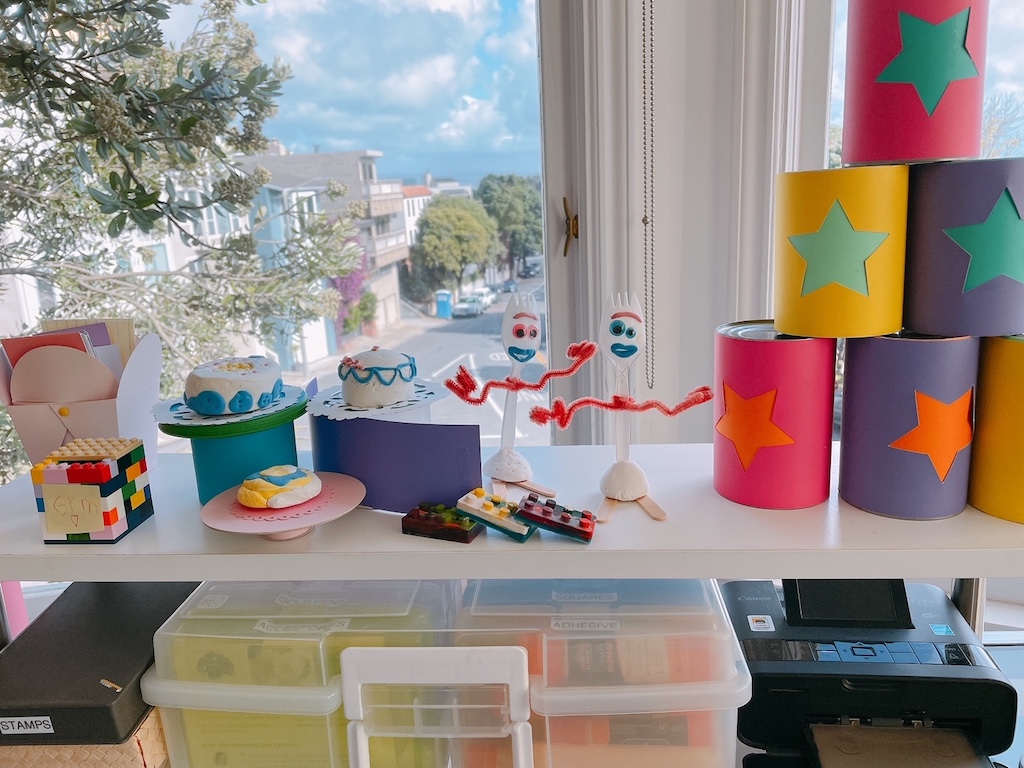
Here’s what’s on my desktop from left to right:
- A bank that Miss T made for me with LEGOs
- Air clay cakes on pedestals from when we played cookie shop
- Forkys that we made after I took Miss T to Toy Story 4 a few years ago
- LEGO-shaped crayons that we made from old, broken crayons
- Cans we decorated for a pyramid game we played at this summer’s Camp Grandma party
The rest of the craft room:
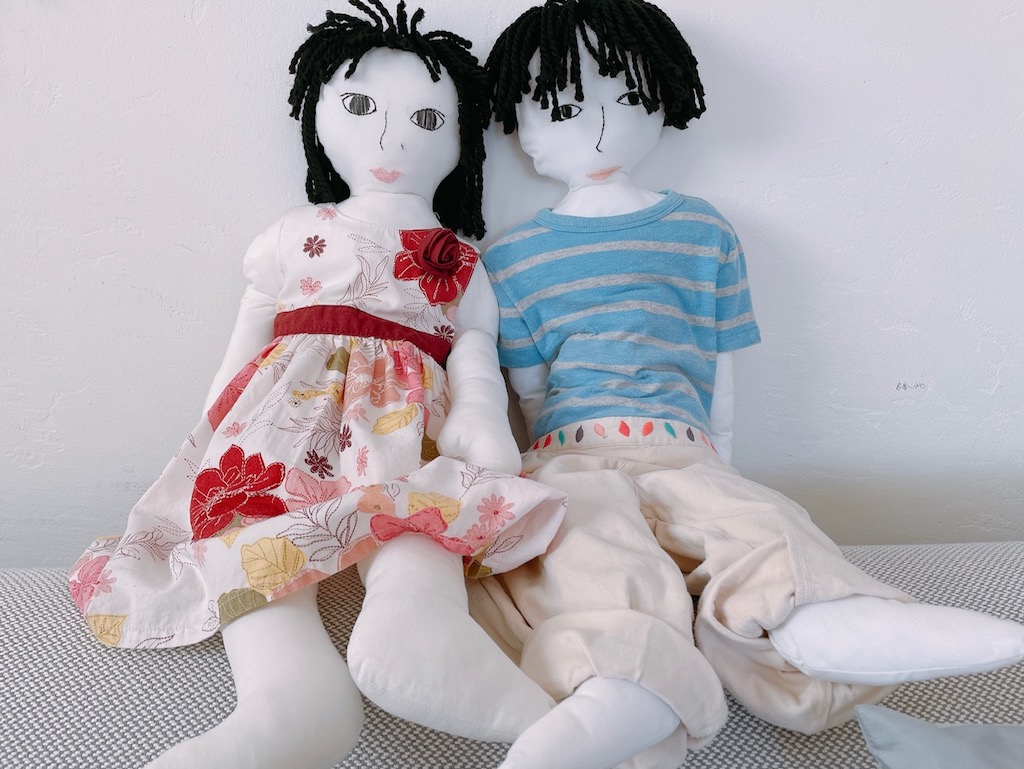
- Nancy and Stuart, life-size dolls I made by tracing the silhouettes of the grandkids sit on the sofa bed
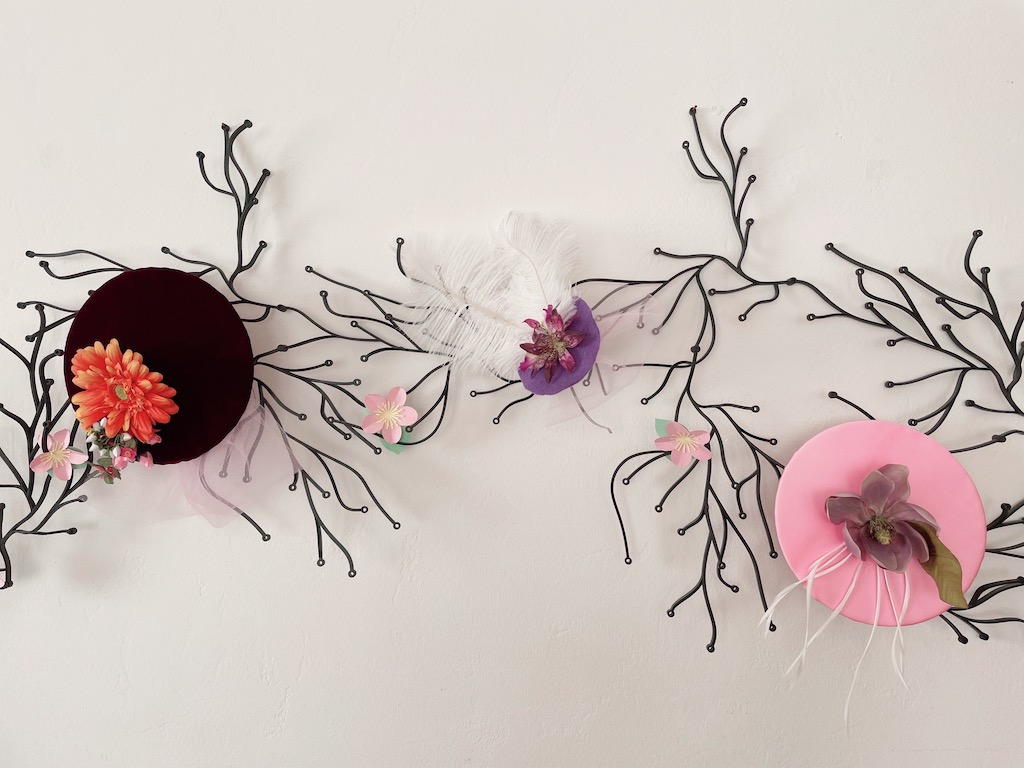
- Fascinators (elegant “hats”) that Miss T and I fashioned for our tea party at this summer’s Camp Grandma are hooked to my vine wall art. The vines, snapped together in different configuration, used to decorate our kitchen wall in its previous life.
Essential Supplies
Here is a list of supplies we use for our basic craft work:
Paper:
- Cardstock of different colors and patterns
- Construction paper
- Tissue paper
- Crepe paper
Coloring Media:
- Crayons
- Water colors
- Tempera paint (mine are 16-ounce bottles)
- Acrylic paint
- Colored pencils
- Colored markers
- Paint brushes
- Palette for mixing colors
Cutting Tools:
- Large sharp scissors
- Small, sharp scissors for fine work
- Fabric scissors
- Basic hole punch
- Paper punches of different sizes and shapes
- Paper cutter
Glue and Adhesives:
- Glue stick
- Tape runner
- Washi tape
- White school glue (such as Elmer’s)
- Low-temperature, small glue gun
- Regular glue gun
- Duct tape (for serious taping jobs)
- Blue painter’s tape (to pin artwork to walls)
- Foam brushes for applying glue
Embellishments:
- Stick on “jewels”
- Glitter
- Beads and sequins
I hope you’ve enjoyed seeing my craft room. If you have other ideas for organization and storage, I’d welcome your comments below!
.
Don’t forget to sign up for my email newsletter! Every Wednesday, I’ll give you a new idea for an activity or insight to nurture the little ones in your life. Come visit!