How to Make a Magical Fairy Lantern
I was searching online for birthday ideas for Miss T earlier this year, when I came upon a fairy lantern kit. I was charmed by the idea, but not by the reviews. So, I set out to make one myself.
You could make these fairy lanterns as a gift for the grandkids, use it as a project to do together, or create a DIY kit. You can even craft the fairy lantern remotely with the grandchildren if you stick to a simplified version, as I’ll outline below. Find tips for remote crafting with your grandchild on my previous Camp Grandma post.
Overview of the Fairy Lantern Project
I checked out a few other fairy lantern projects online for reference, but I wanted to create my own version:
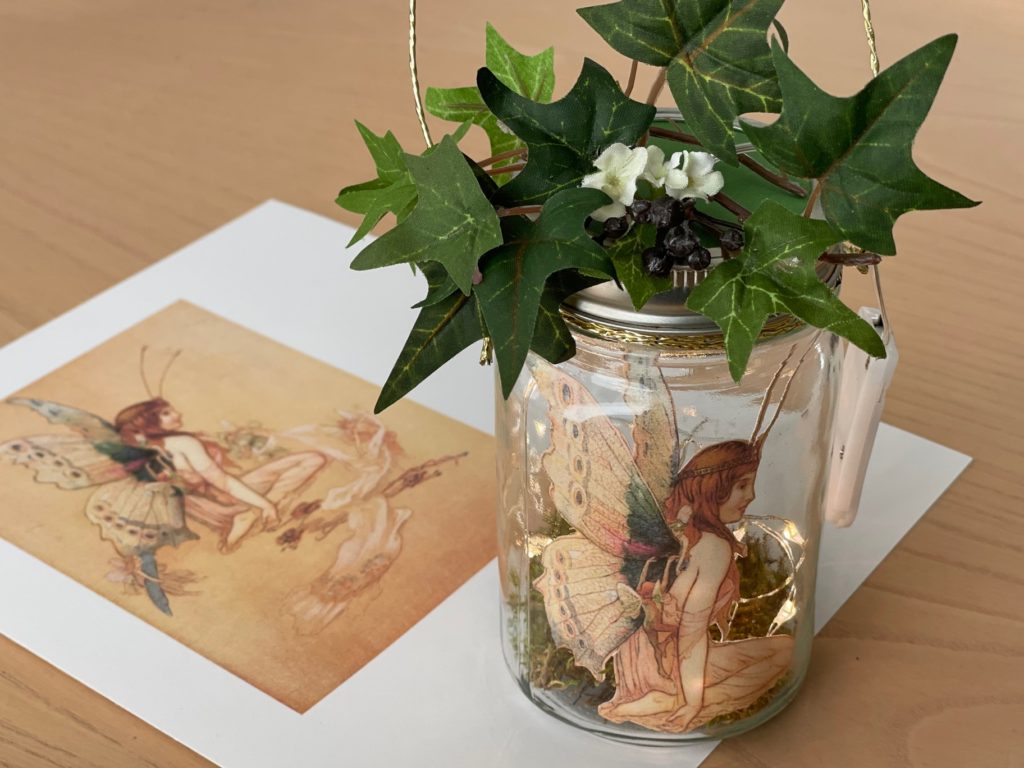
- For example, I wanted the fairy to appear three-dimensional, so I glued the image to a painted toilet paper tube. That way, as you turn the jar, the image continues; there is no flat back side to the fairy. The tube also served as an anchor for the flower decorations.
- I wanted the child to be able to control the light switch without having to open the jar. I needed a hole in the lid to thread the lights through. Instead of drilling through the mason jar lid, I replaced the lid inset with a cardboard circle that could be pierced with the point of scissors.
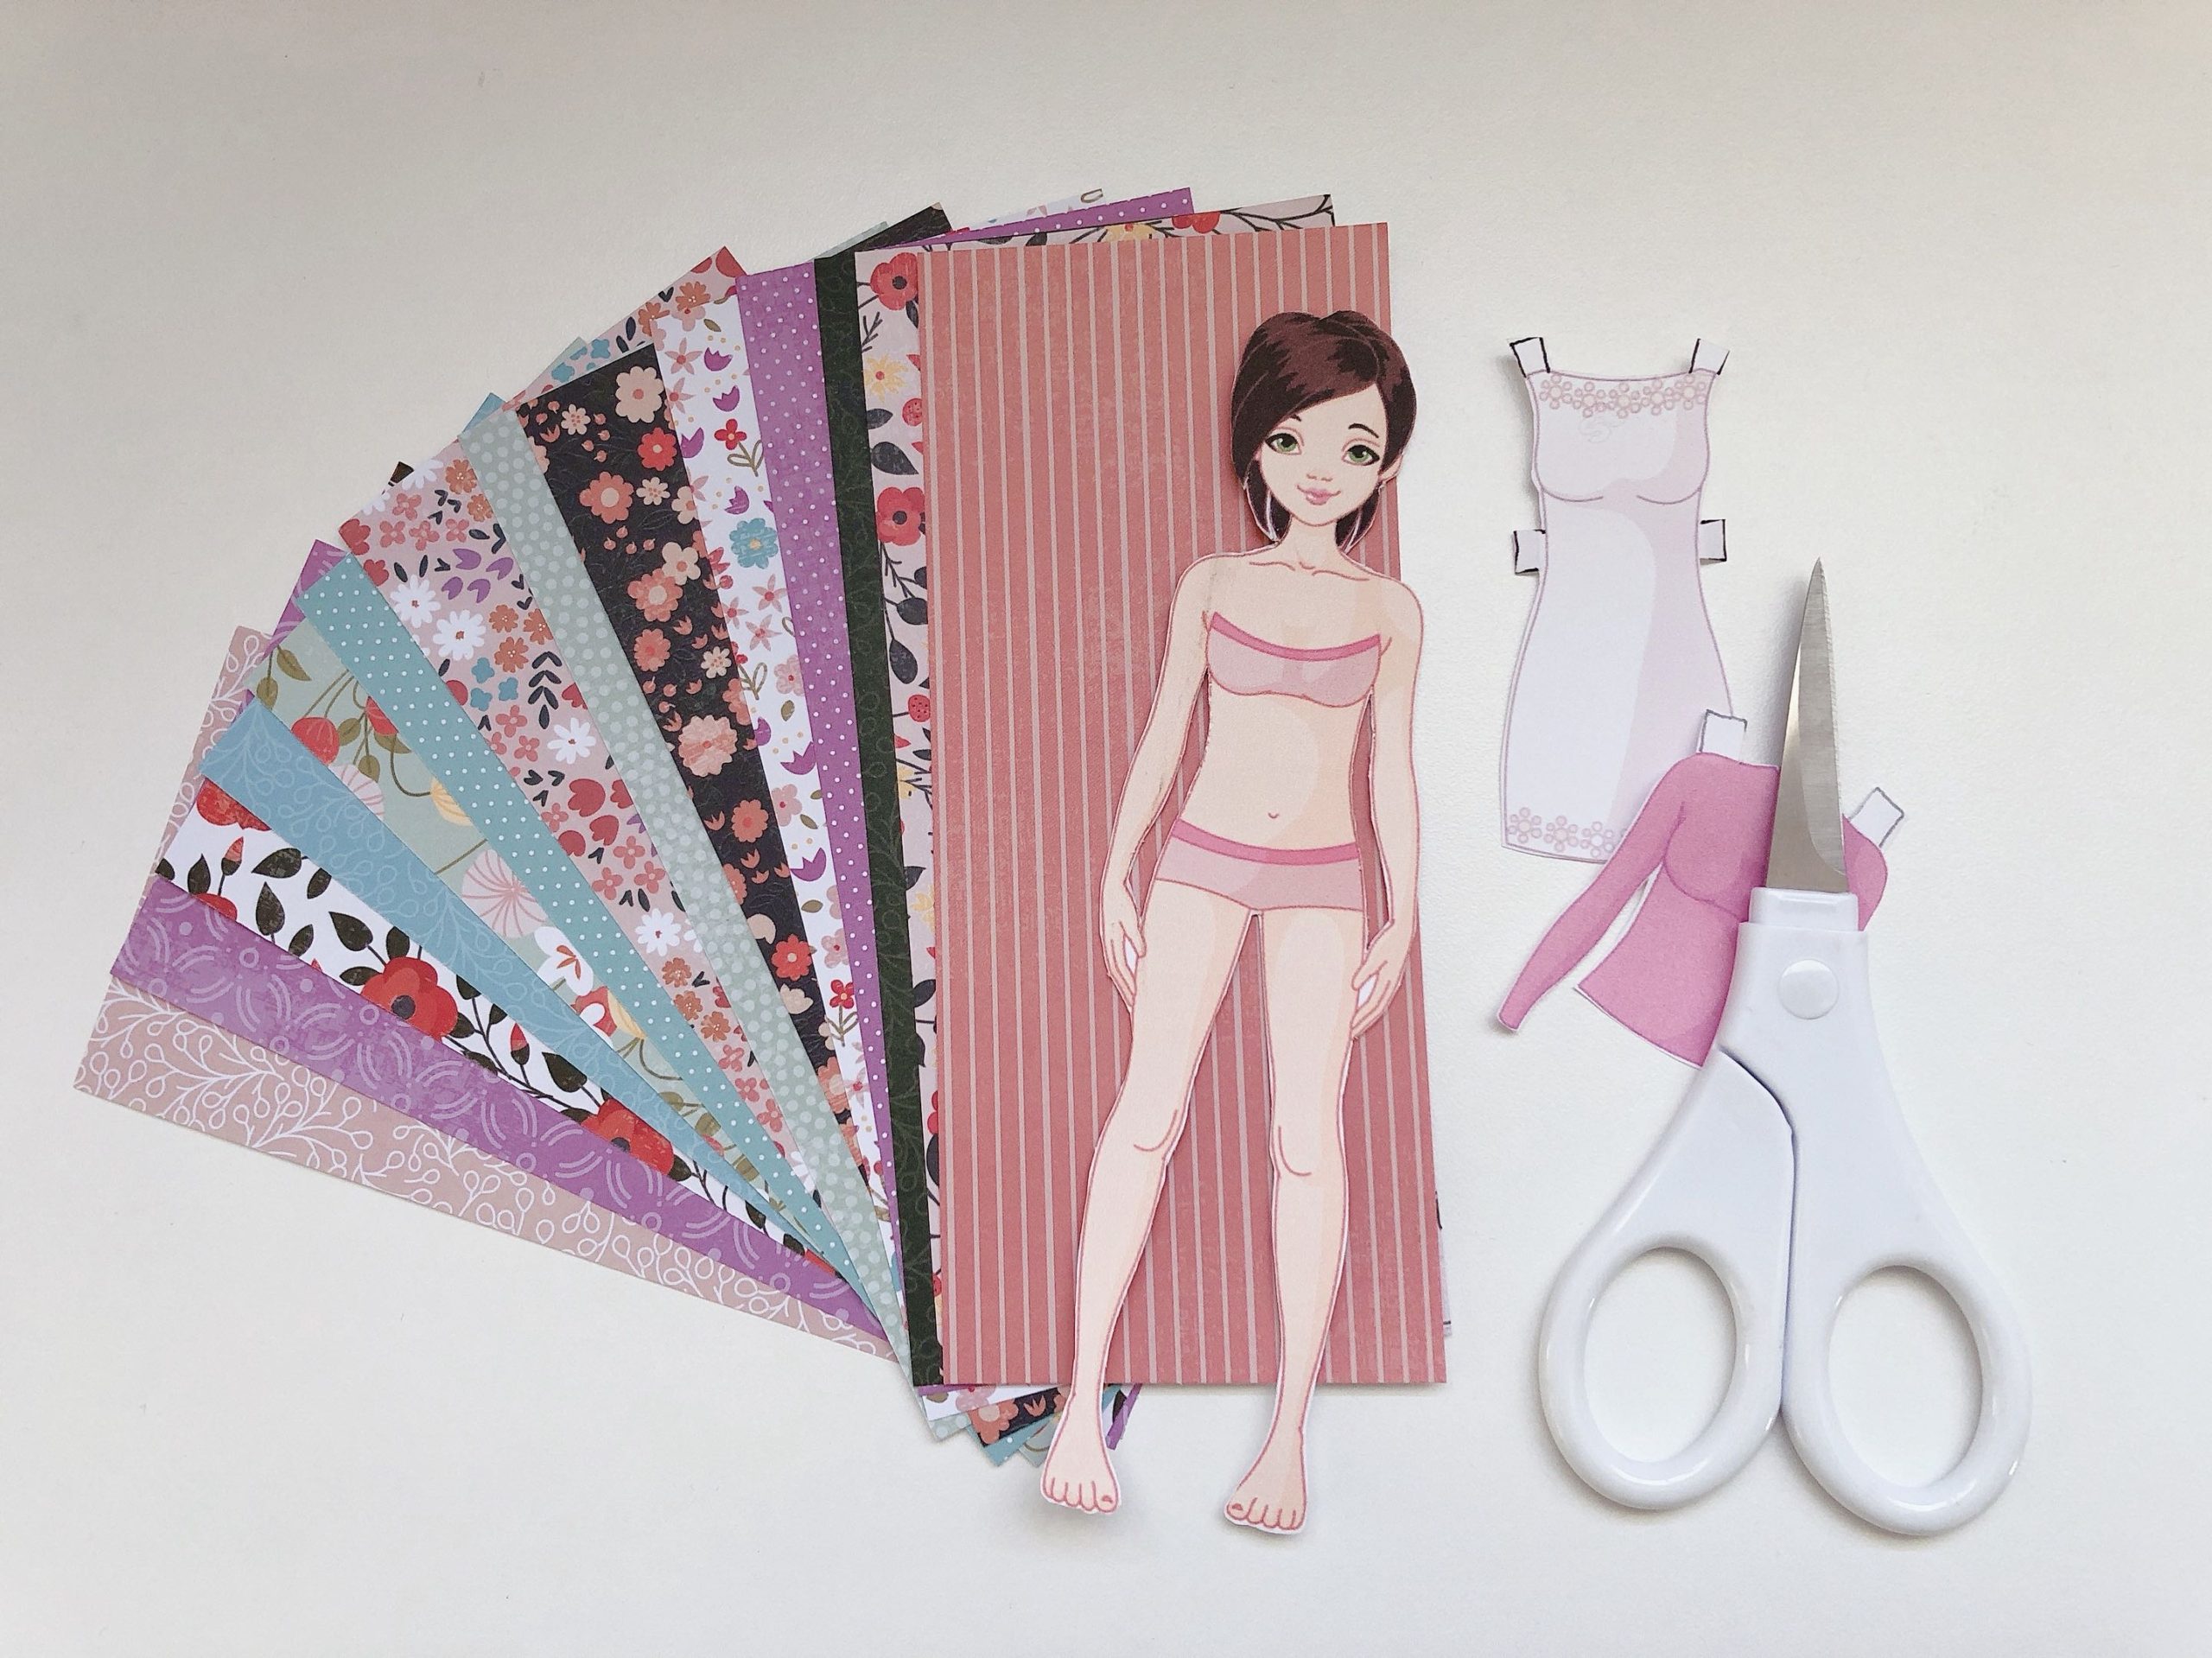
For a simpler project to do with your grandchild, make paper dolls and fashion doll clothes together.
The Simplified, Fuss-Free Fairy Lantern
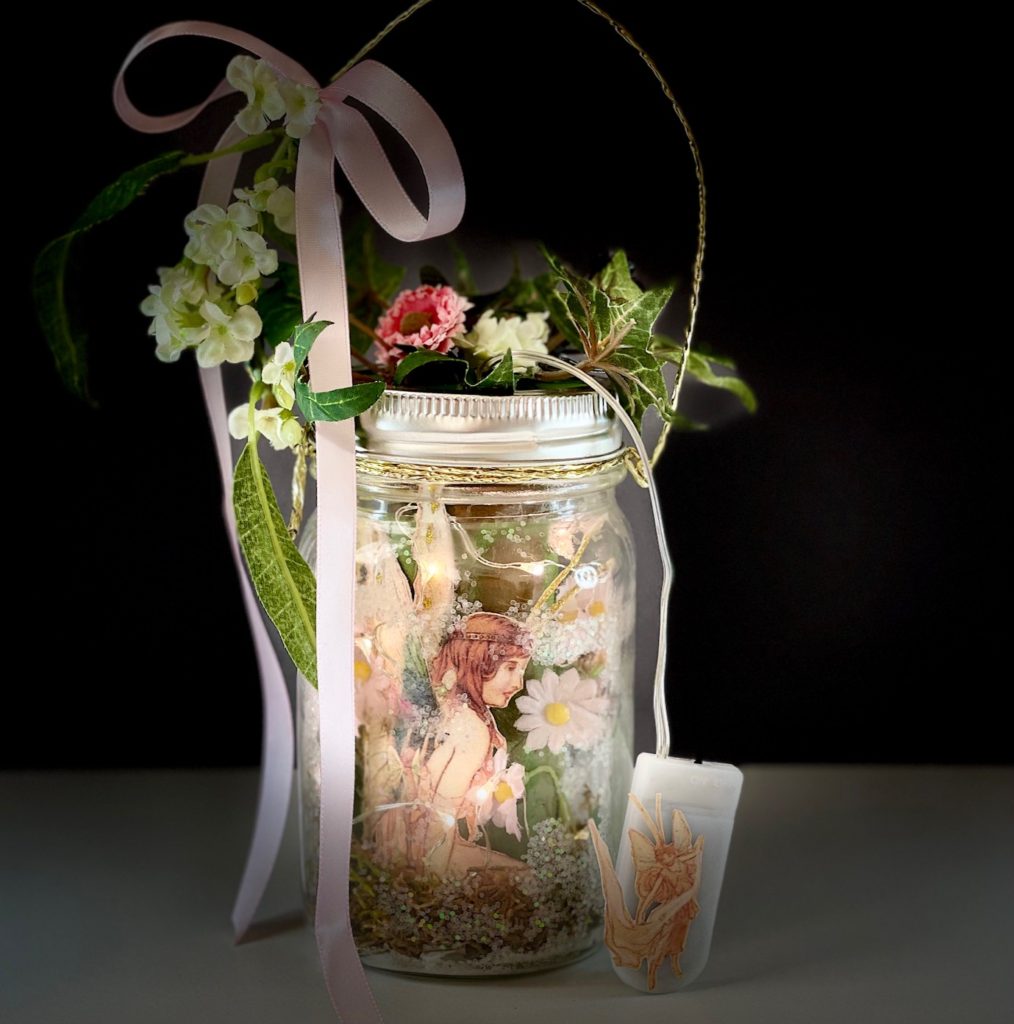
The fairy lantern consists of a fairy image in a jar, flowers and leaves for adornment, and a string of battery-operated, LED fairy lights. If you simply assemble these materials in a mason jar, you will have a lovely fairy lantern.
If you go on with the instructions below, you will end up with a more elaborate fairy lantern that will demand a little more time and a little more dexterity.

Materials
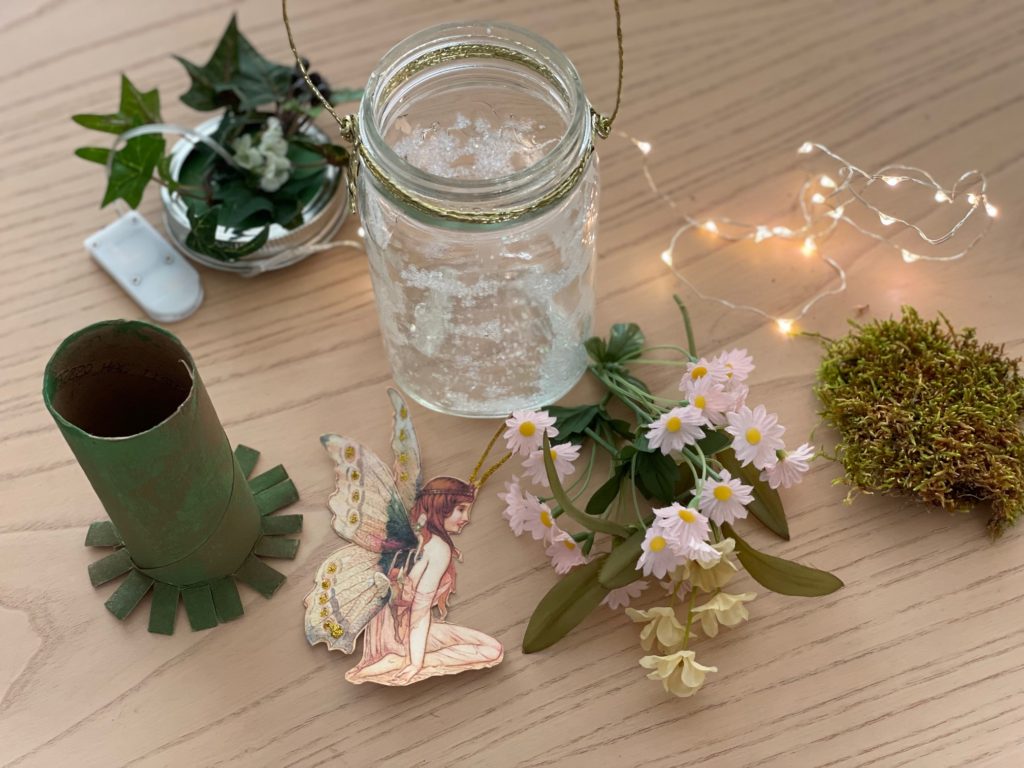
Fairy Lantern Materials (All Lanterns)
- Fairy image, about 4 1/2 inches tall (see prepare the fairy below)
- White cardstock to print fairy or use regular printer paper
- Glitter glue in a tube to decorate fairy wings (optional)
- 1 mason jar with lid, 2-cup capacity (5 inches high)
- Wire, about 50 inches long for the handle
- Cardboard, about 3 inches square
- Green cardstock, about 3 inches square
- 1 string LED fairy lights, mine were 20 lights on 3.3-foot string
- Dried moss
- Artificial flowers and leaves
- White school glue (such as Elmer’s)
Additional Materials (for Fancier Lanterns)
- Glitter to add sparkle to the jar, I used iridescent white glitter
- Dark green acrylic or tempera paint
- 1 toilet paper roll
- 3/8-inch wide ribbon, about 30 inches long
- Green florists tape (optional)
Tools
- Scissors
- Wire cutter
- Long-handled sponge brush or regular brush for gluing
- Paint brush for painting the toilet paper roll
- Low-temperature mini glue gun (best for kids)
- Wooden chopstick or other skinny implement to move items in jar
Method
At the start, you’ll build your fairy lantern the same way, whether making the simple or complex lantern.
PREPARE THE FAIRY:
I found my beautiful fairy illustration here. I’ve pinned some other lovely fairy illustrations on my Pinterest page.
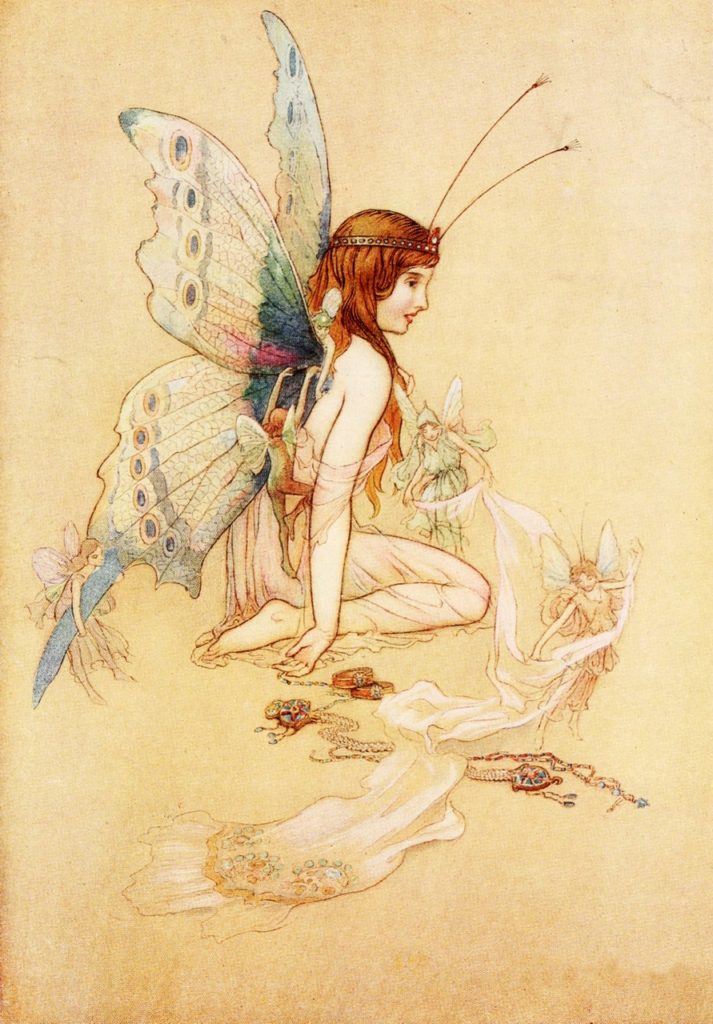
The fairy should be about 4 1/2 inches high. Here are some ways to resize your image. I did it the trial-and-error way: First, I downloaded the fairy image from the website. Then I inserted the image in a Word document and printed it to determine its original size. Next, I returned to the Word document and shrank the fairy using the corner arrows of the image, until I had a suitable size.
It’s best to print the fairy on white cardstock so it will be easy to manipulate (my printer will handle up to 80-pound weight cardstock). If you don’t have cardstock, regular printer paper will do.
Cut out the fairy. If you like, use a tube of glitter glue to add some extra sparkle to your fairy.
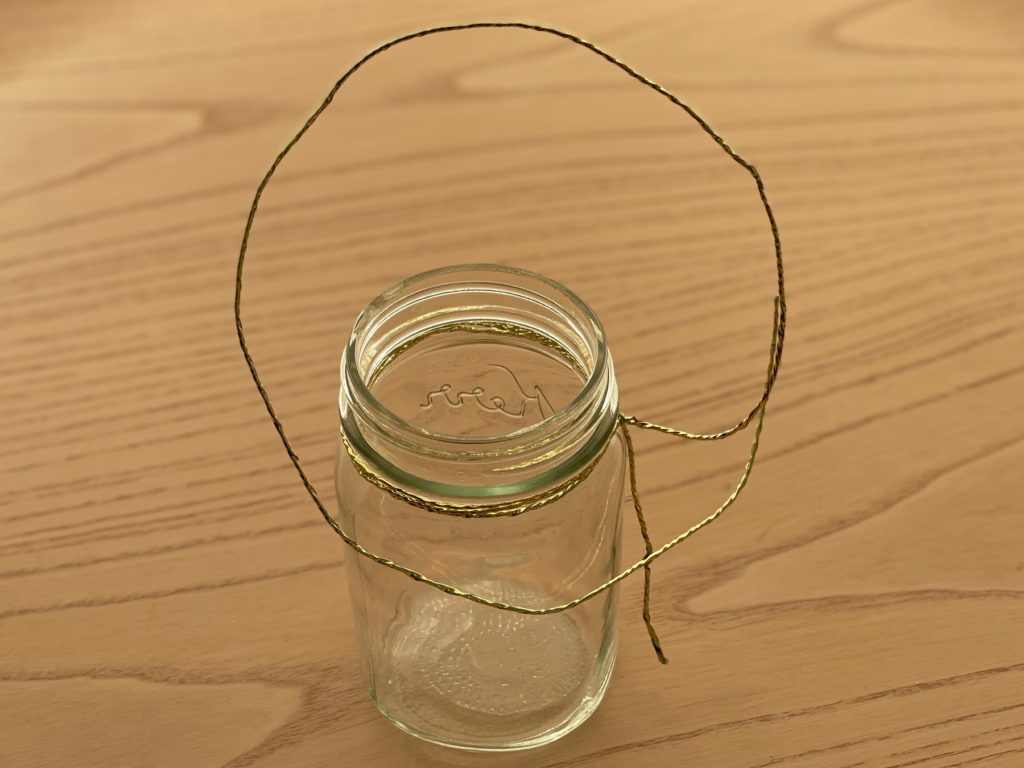
ATTACH THE HANDLE
Leaving about 4 inches of lead, wind the wire around the neck of jar three times, thread the wire through the opposite end of from where you started, leaving enough wire in between to form the handle, and twist to hold the wire in place; trim ends.
PREPARE THE JAR
ADD GLITTER: Mix equal parts glue and water and dab mixture with a sponge brush on the inside of the jar in a random pattern. Avoid the area where the fairy’s face will be. Pour glitter into the jar and shake to adhere glitter. Empty out additional glitter. Let dry.
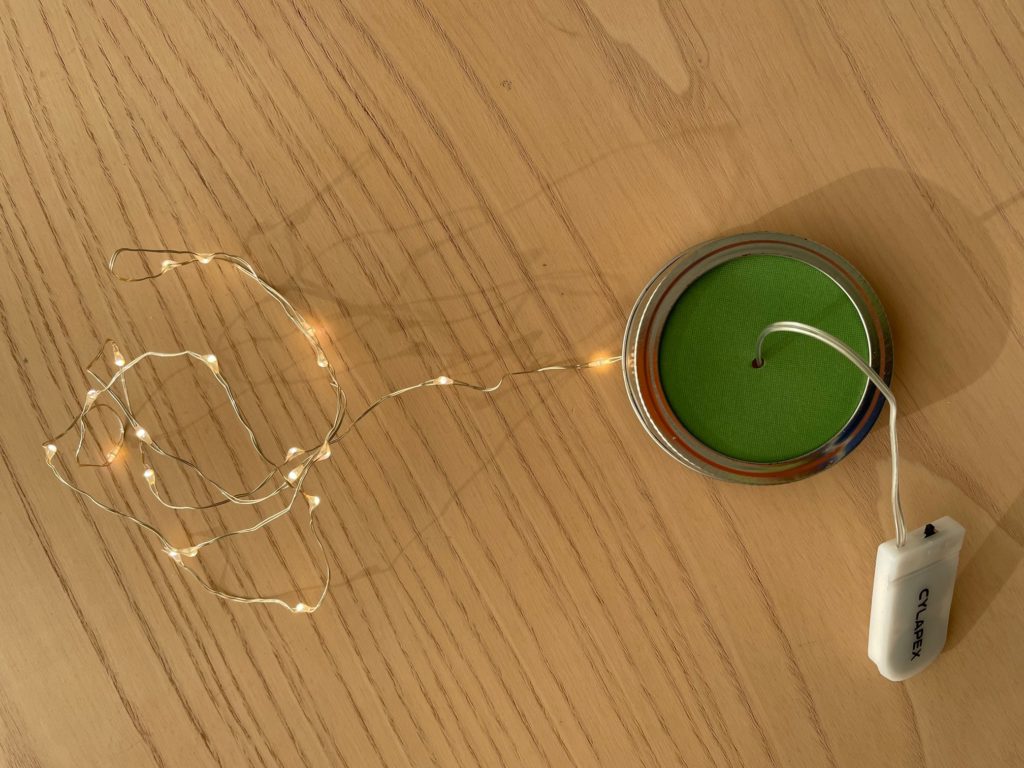
MAKE THE CARDBOARD JAR COVER: Trace the disk of the jar cover onto cardboard, then onto cardstock, and cut out both circles. Glue the two circles together with white glue. With the tip of a scissors blade or an awl, bore a hole into the center of the glued circles just large enough to thread the light string through. Insert the circles into the jar cover ring, with green cardstock on the outside.
ADD THE LIGHTS: Thread the light string through the hole, with the battery pack outside the cover, and the remaining lights to fit inside the jar. I used a strand of 20 lights on a 3.3-foot string that had a very slim on/off switch.
Simplified Fairy Lantern
- Make the jar handle with the wire.
- Replace the jar lid with cardboard and make a hole in the center.
- String the LED fairy lights through the hole, with light switch outside of the jar.
- Paint the bottom of the jar with white glue and glue dried moss for the floor.
- Paint the fairy with white glue (on the printed side) and attach to the jar from the inside, with printed side facing out.
- Add the string of lights into the jar and screw on the jar cover. (You can use a string with more lights if you aren’t adding anything else in the jar.)
- Using a hot glue gun, glue flowers and leaves on the cover of the jar.
Fancier Fairy Lantern
There are a few more steps to make the fancier fairy lantern.
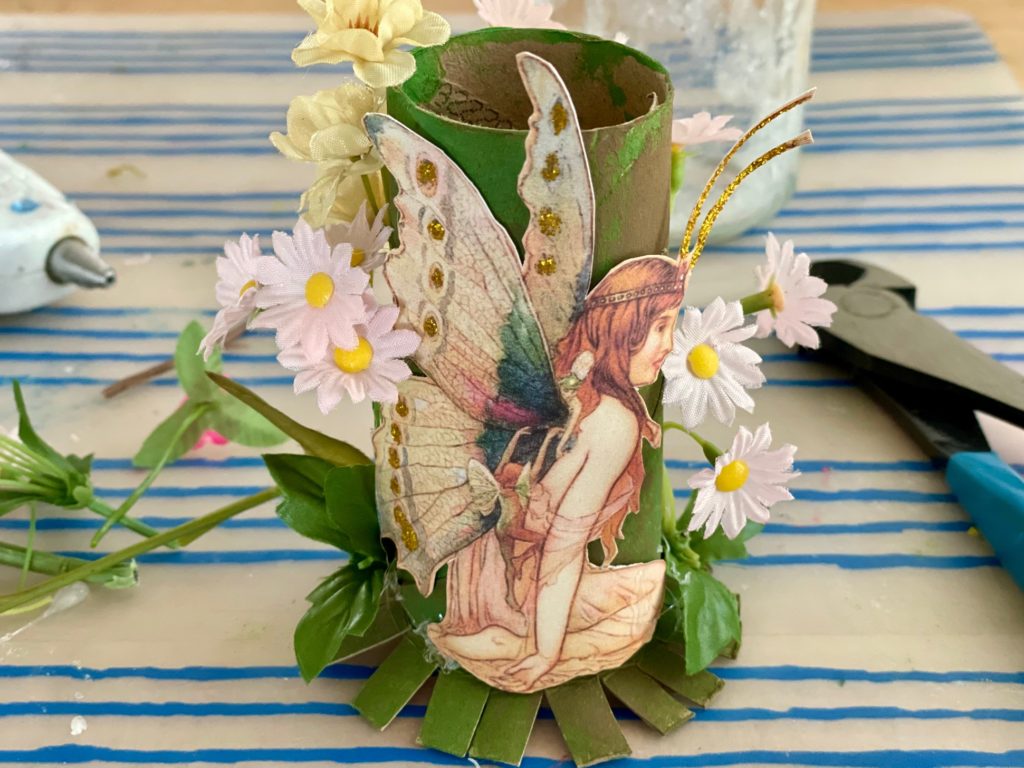
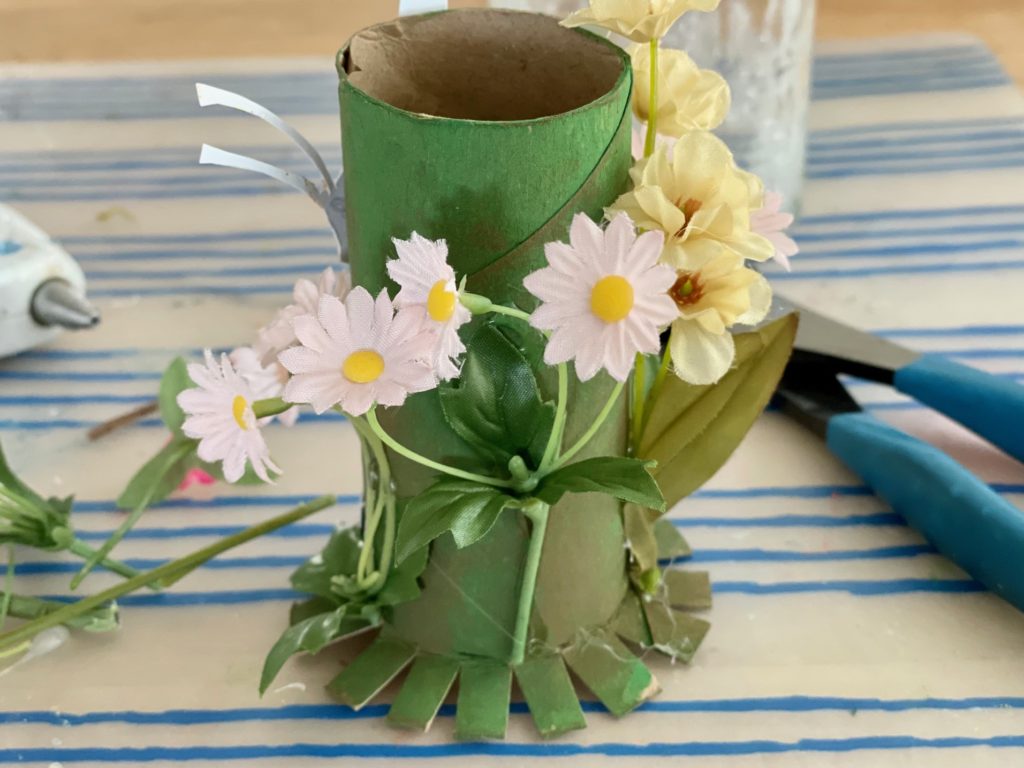
The Toilet Paper Roll as a Base:
Paint the toilet paper tube with green paint; let dry. Snip 1/2-inch around the bottom of the tube and bend the snipped edges outward.
With a glue gun (if you’re using a cardstock fairy) or white glue (if your fairy is printed on regular printer paper), glue the fairy to the tube, aligning the bottom of the fairy to the base. Now using the glue gun, glue flowers and leaves to the tube and around the fairy. Ensure the stems of the flowers do not exceed the base of the tube and your arrangement isn’t too full to fit in the jar.
Put the Parts Together:
Put the tube into the jar to make sure it fits; there needs to be enough room around the jar to add moss to cover the snips of the tube on the floor of the jar, and room to add the fairy lights. If the tube is taking too much space; remove some of the decorations now.
Remove the tube from the jar and set aside.
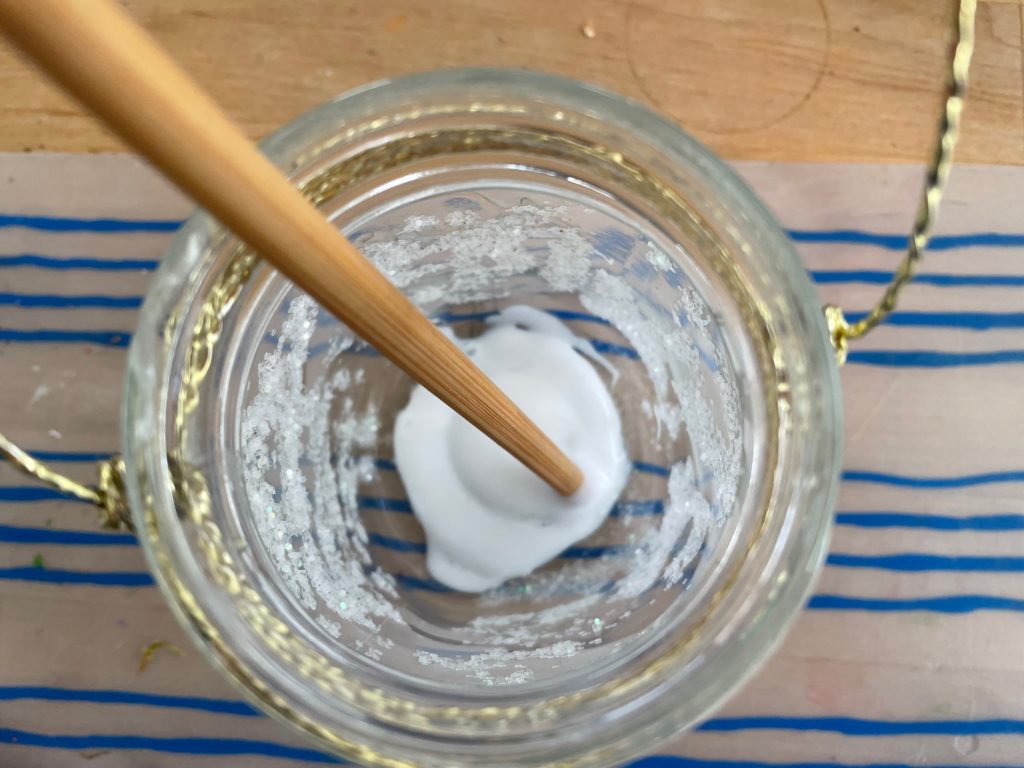
Make a puddle of white glue in the center of the jar and spread it to the edges. Set the tube into the glue. Use a chopstick or the handle of a skinny paint brush to press the snipped edges of the tube into the glue. Hold the tube in place for a few minutes until it is stable. Dribble bits of moss around the edges, between the jar and the tube, to hide the snips. Press the moss down with a chopstick. Allow to dry.
Arrange the lights around the toilet paper roll in the jar. You may have to jockey the lights to space them out around the toilet paper roll using your chopstick.
Final Decorations:

Using the hot glue gun, glue flowers and leaves on the cover of the jar, leaving the light cord and the light switch free. Use florists tape or a glue gun to attach flowers or leaves to the handle; tie with a ribbon.

This fairy lantern should delight your favorite child. The lights will add a warm, cheerful glow to light up a dark night.
About Safety
As you can imagine this fairy lantern has many small parts and small batteries that are dangerous for younger children. Because it lights up, little ones will be attracted to it. Be sure your child keeps the fairy lantern out of reach of younger siblings.
The light strings are inexpensive, made in China, and don’t come with any kind of UL approval. This seems to be standard for the category. In doing general research, the lights do not appear to be a fire hazard, despite the combustible materials like moss and paper that are in the jar. This is because the tiny lights give off very little heat. As an extra precaution, do please keep an eye on the fairy lantern when it’s in use.
.
Don’t forget to sign up for my email newsletter! Every Wednesday, I’ll give you a new idea for an activity or insight to nurture the little ones in your life. Come visit!
Three-dimension fairy and cardboard top —- GENIUS!
Thank you! It really works. Miss T loved it. : )
Thank you. Have to use all those cardboard rolls I’ve been saving!