Kid Art: How to Make Greeting Cards with Style
When there’s an upcoming family celebration, we make greeting cards. I provide paper, markers, and stickers, and let the grandkids go at it.
The results, however, have been predictable. The kids might draw a picture of the recipient, or simply slap on some stickers. They write, “Happy Birthday, Mommy,” or “Happy Father’s Day,” and consider the work done.
Nothing is wrong with such a card. But I realized that if I wanted the kids to make greeting cards with more style to them, I had to be more engaged.
Here are some ideas that evolved.
Make a Greeting Card from Torn Paper
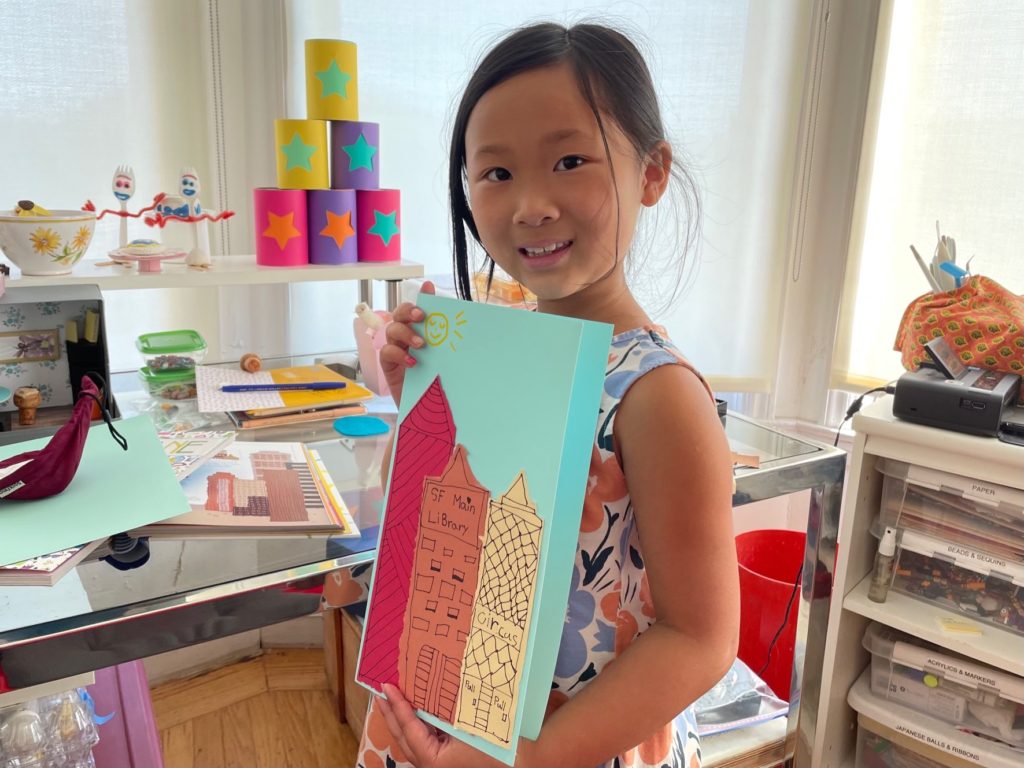
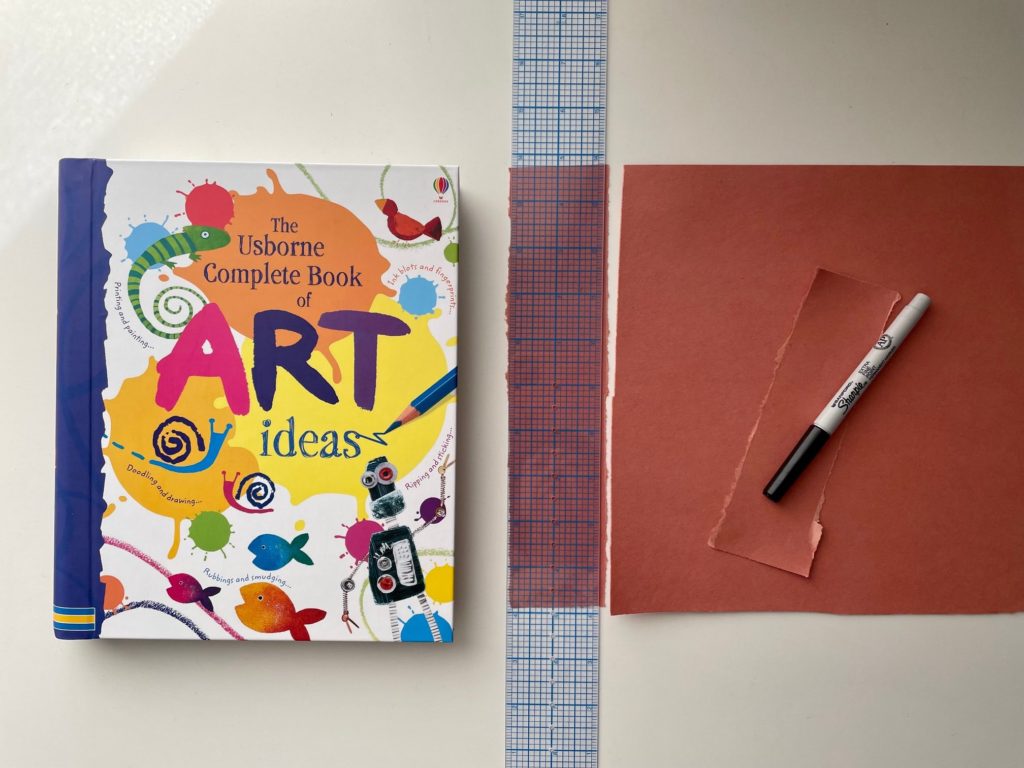
We took our cue from The Usborne Complete Book of Art Ideas by Fiona Watt, available in many museum gift shops, as well as on Amazon. The book is chockfull of simple, but polished art projects any kid can do. We turned this project from a stand-alone work of art into a birthday card.
To make, tear paper into rectangles to form the shapes of buildings. Use a black fine-point, felt-tip pen to outline the edges and add details, such as windows and doors. Group the buildings together to create a cityscape. Adhere with a glue stick to your card base.
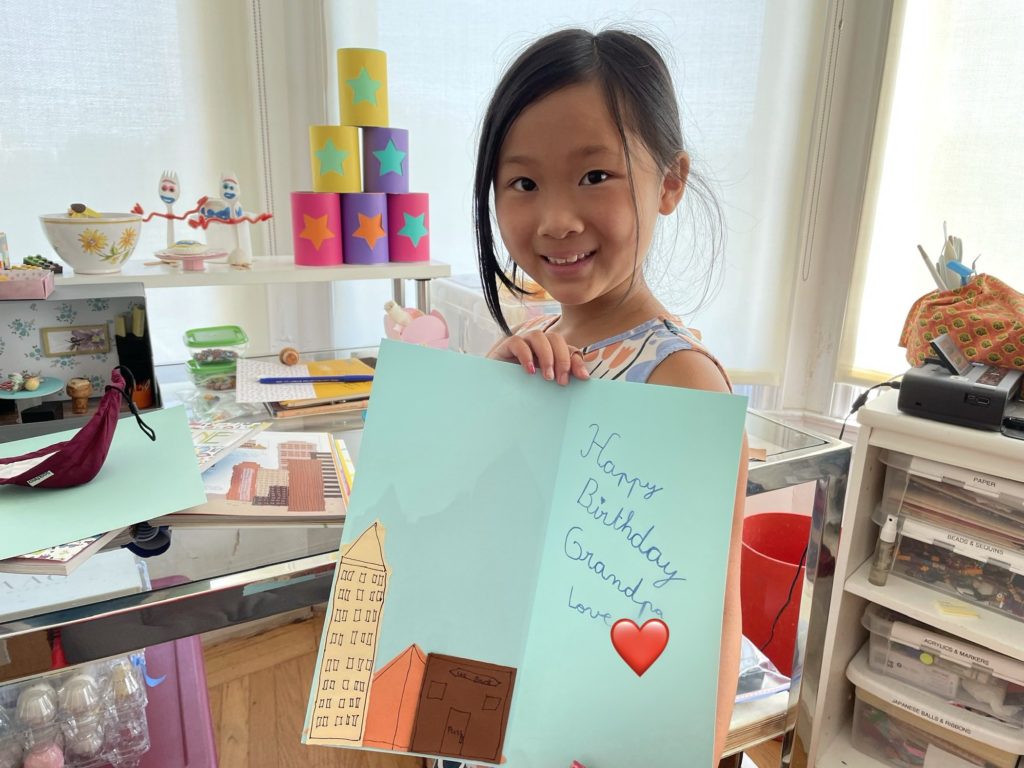
On her own initiative, Miss T added signs to some of the buildings. One is a library, which is especially appropriate for grandpa, who loves books and reading. Miss T glued more buildings inside the card to finish.
Tips:
- To control the tearing of paper, press a ruler down firmly on the paper and tear against the edge of the ruler.
- Like fabric, paper has a grain. That is, the fibers run in one direction. To find the grain, hold opposite ends of the paper and turn each end in toward the center. Try this top to bottom, then side to side. Whichever way the paper turns in easier is the direction of the grain.
- Experiment by tearing with and against the grain to see which way gets you a better result.
- There are many other art projects in this book that can be used to create interesting and beautiful cards. We’ve just started!
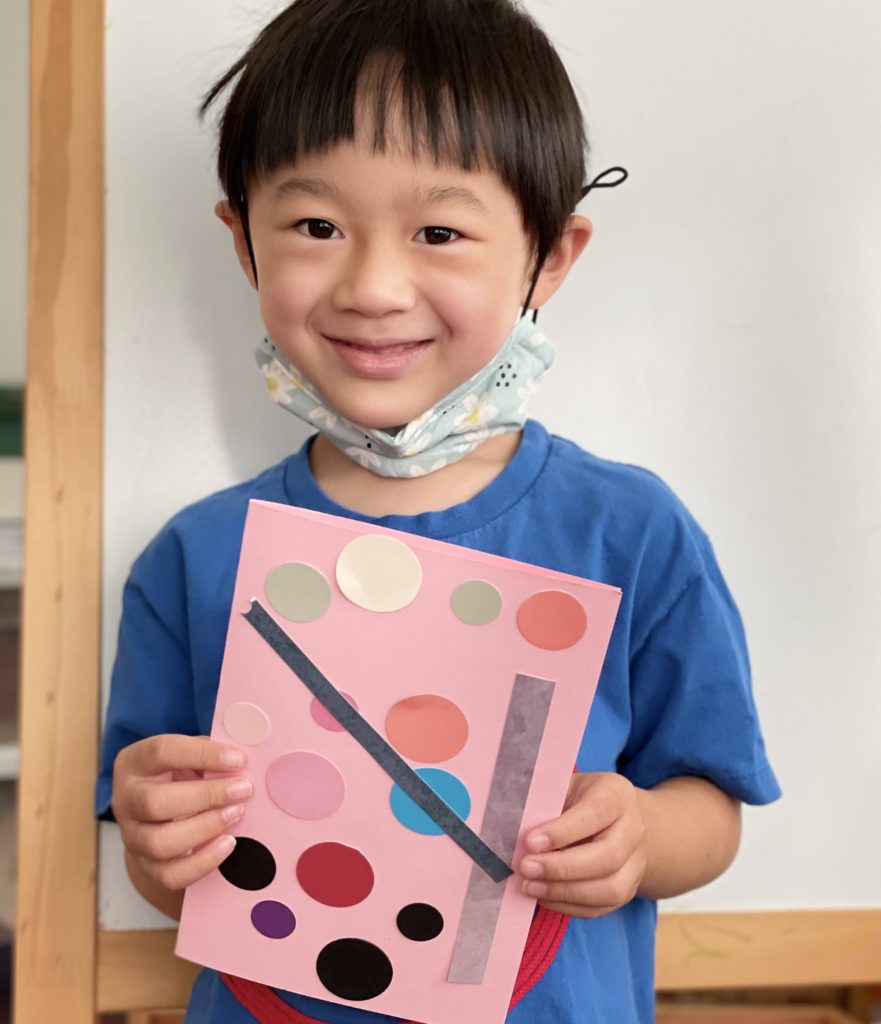
Paper Punch Collage Greeting Card
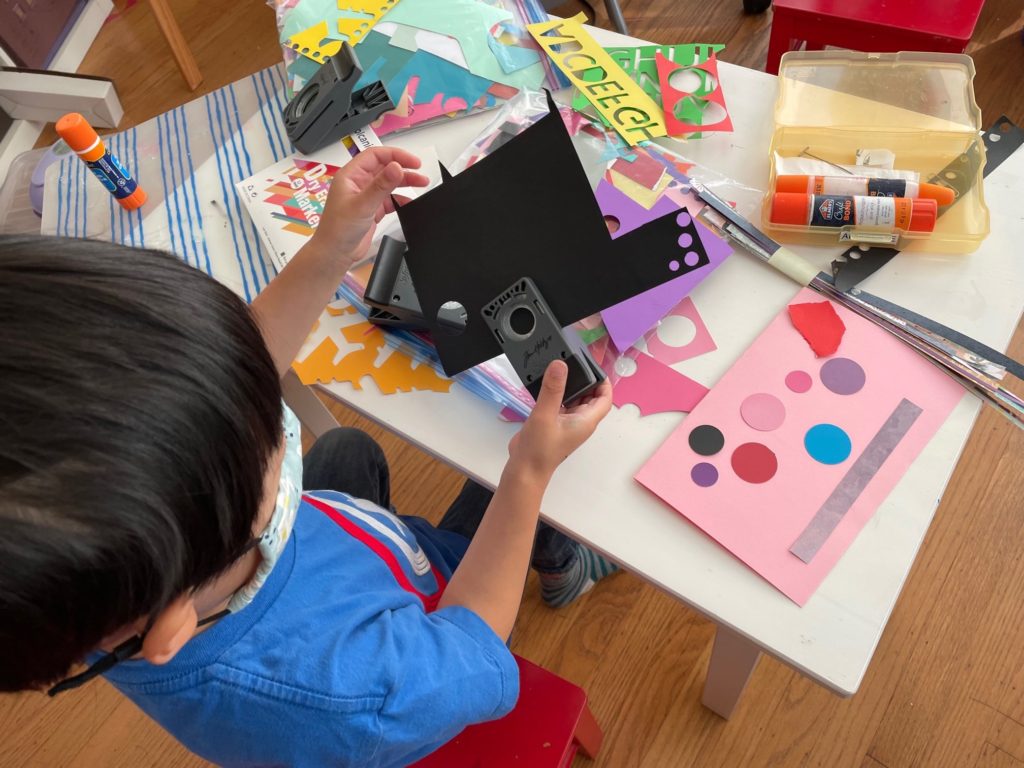
This card is a good way to use scrap paper. Little N punched out circles using three different-size circle punches and selected strips of paper scraps leftover from other projects.
Then he arranged the shapes to create his own modern art design, adhering the pieces with a glue stick. Finally, he used the inside space of the card to write his birthday greeting and to draw a fire engine for grandpa.
Tips:
- Use the torn paper technique from Miss T’s card and create a collage of paper punch circles and torn paper pieces for added interest.
- Save cardstock scraps in plastic zip-top bags for use in projects such as this.
- With any remaining scraps, make gift tags as Miss T and I did during last year’s Camp Grandma program.
Feeling the Music Card
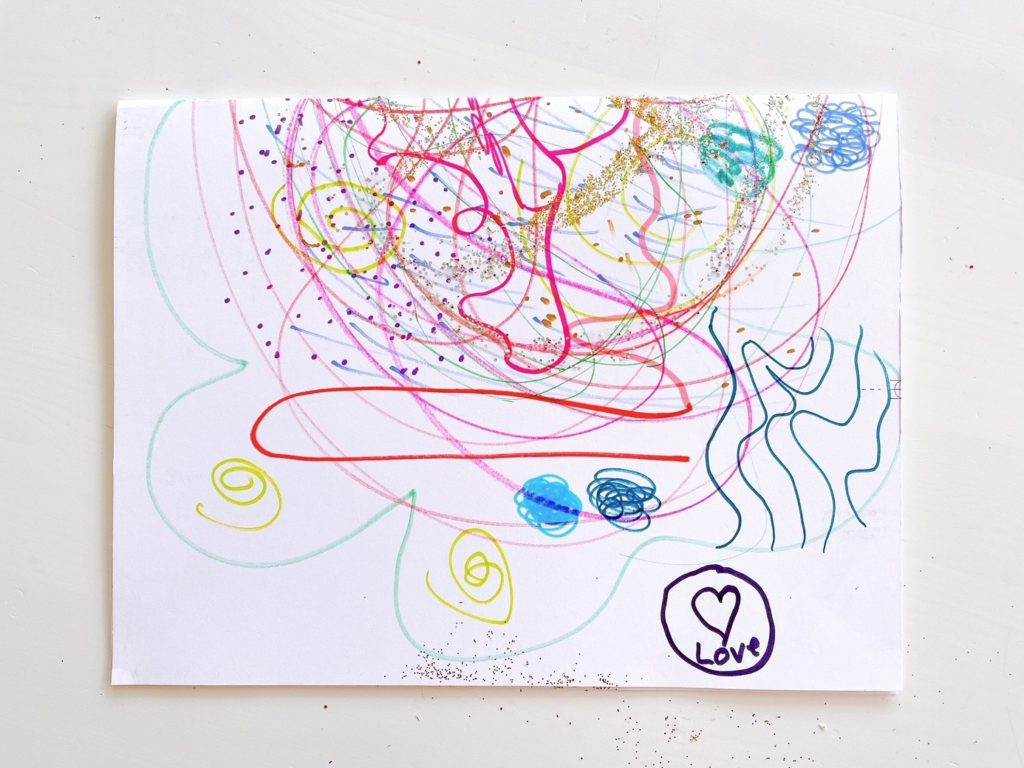
This is an exercise we did this year for Camp Grandma to interpret music through art. Simply play some music and ask the child to draw how the music feels, using a variety of colored markers and glitter pens to convey their mood.
In her interpretation, Miss T has used many colors, swirls, squiggly lines, dots, and gold glitter to express how she felt in real time while listening to Rhapsody in Blue. An expressive work of modern art, it’s probably not something she would have thought to create if she had just been given a handful of markers to work alone.
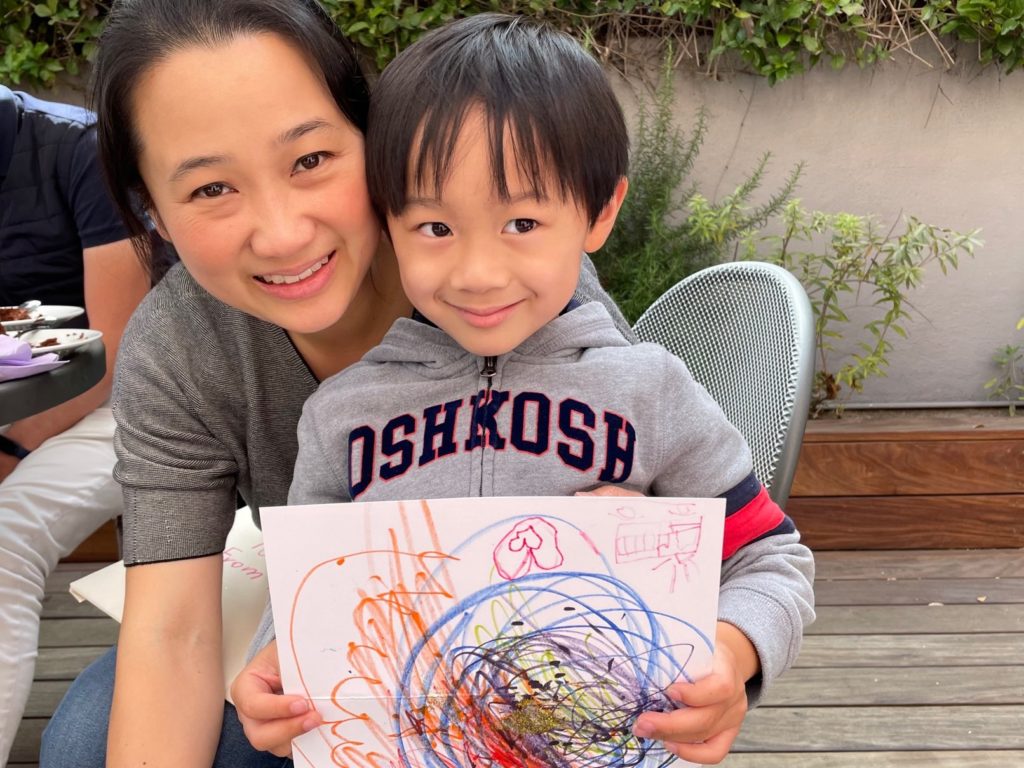
Little N made his own card designed around the same music. These cards were for their mom’s birthday.
Tips:
- Try a range of music styles to see which ones kids respond to best, such as pop, kid-friendly hip-hop, rock, electronic music, country; classical.
- Select four completely different styles of music and have the children interpret each one through art. Turn this into a guessing game to see if others can identify which music goes with which work of art.
Watercolor Exploration Cards

These cards were created for Mother’s Day this year.
To make, brush the entire surface of a sheet of watercolor paper with water, then have kids dab on paint; the colors will bleed to create designs. Pat lightly with tissues to remove excess water, then allow to dry completely. The paper will curl, so press it between heavy books to flatten.
Tips:
- Use the watercolor design as a background and draw pictures or patterns over it with markers to add an extra design dimension.
Don’t Wait for the Need
You don’t have to wait for an occasion to make greeting cards. Whenever you have time with the grandkids, start an art project. Keep the artworks on file and turn them into greeting cards months later, when needed.
Not only does working ahead save time, when kids aren’t rushed, they can devote more effort developing their creations, leading to more expressive end results.
.
Don’t forget to sign up for my email newsletter! Every Wednesday, I’ll give you a new idea for an activity or insight to nurture the little ones in your life. Come visit!