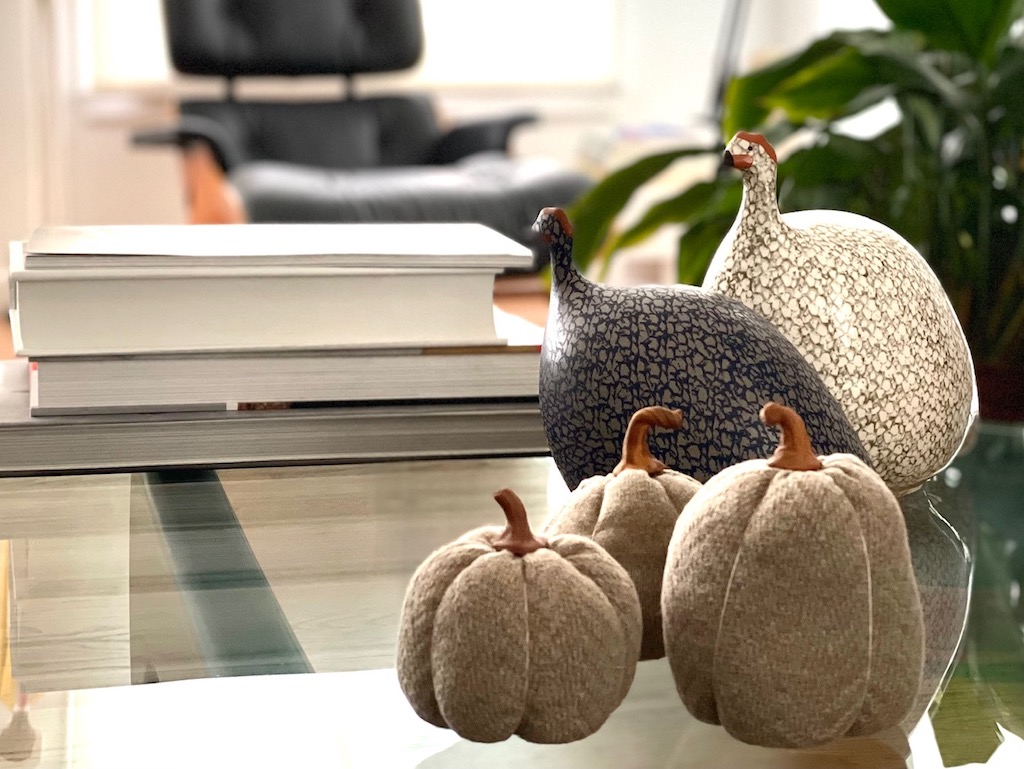
How to Make Cute New Pumpkins from Old Socks

I love it when I can give new life to throwaway materials. My latest project is making soft sculpture pumpkins from old socks.
This is not my own idea; I’ve been seeing many versions online. But here’s my take.
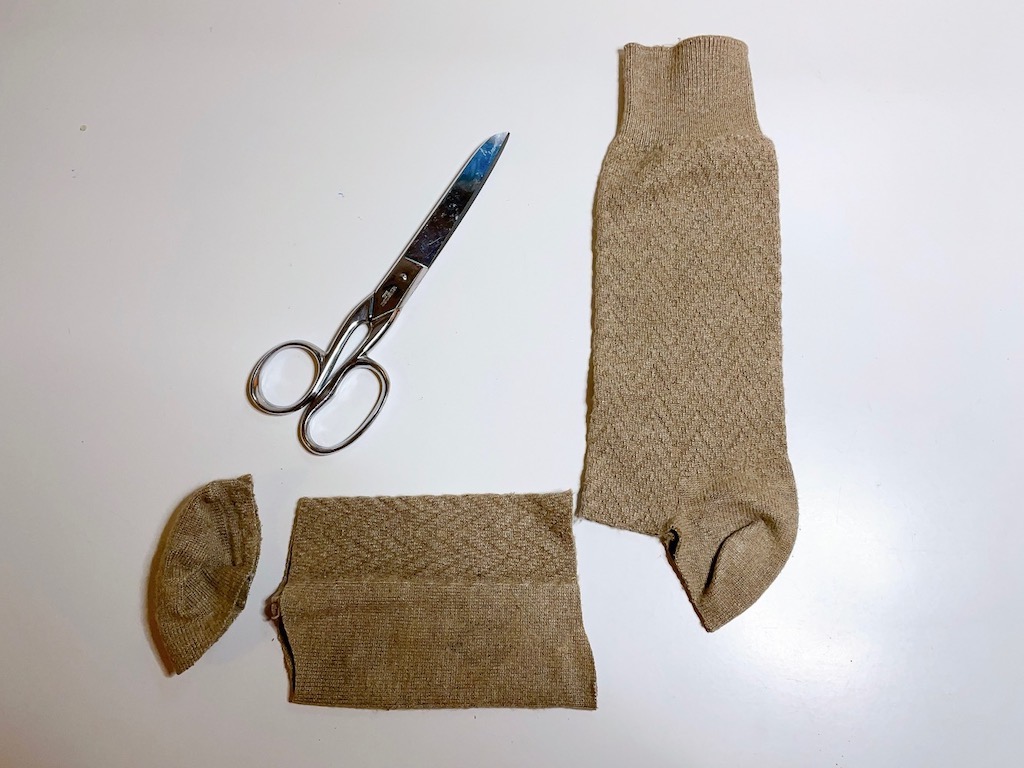
You can make four pumpkins from a pair of regular mid-calf socks. You’ll cut one pumpkin from the foot part of the sock and another from the calf part.
Other than materials and tools from your sewing basket, you’ll need pumpkin stems. You can buy real ones on Etsy, but I made mine with Sculpey polymer clay. Or, you can use twigs from the backyard.
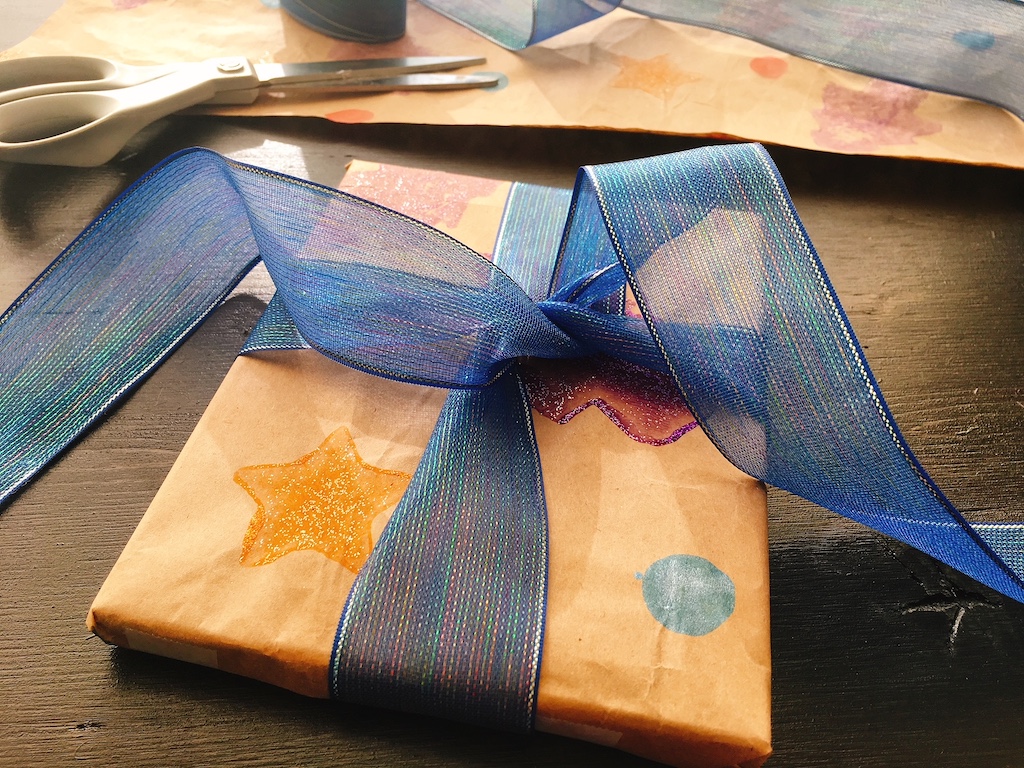
Another good recycle project: Make gift wrap from crumpled stuffing paper used in shipping.
Make Pumpkins from Old Socks
These pumpkins can be made fairly easily, with just a few materials.
Materials Needed
- 1 mid-calf sock
- Embroidery thread, crochet thread, or dental floss
- Raw rice
- Polyester fiberfill or other stuffing material
- 2 colors of brown polymer clay, such as Sculpey, for stems (optional)
Tools Needed
- Fabric scissors
- Sturdy needle
- If using polymer clay, something to bake it in, such as a glass pie plate (see instructions for suitable vessel)
- Hot glue gun
Instructions
Cut sock as shown above, so you have 2 tubes. One tube will come from the foot of the sock; the other from the calf part.
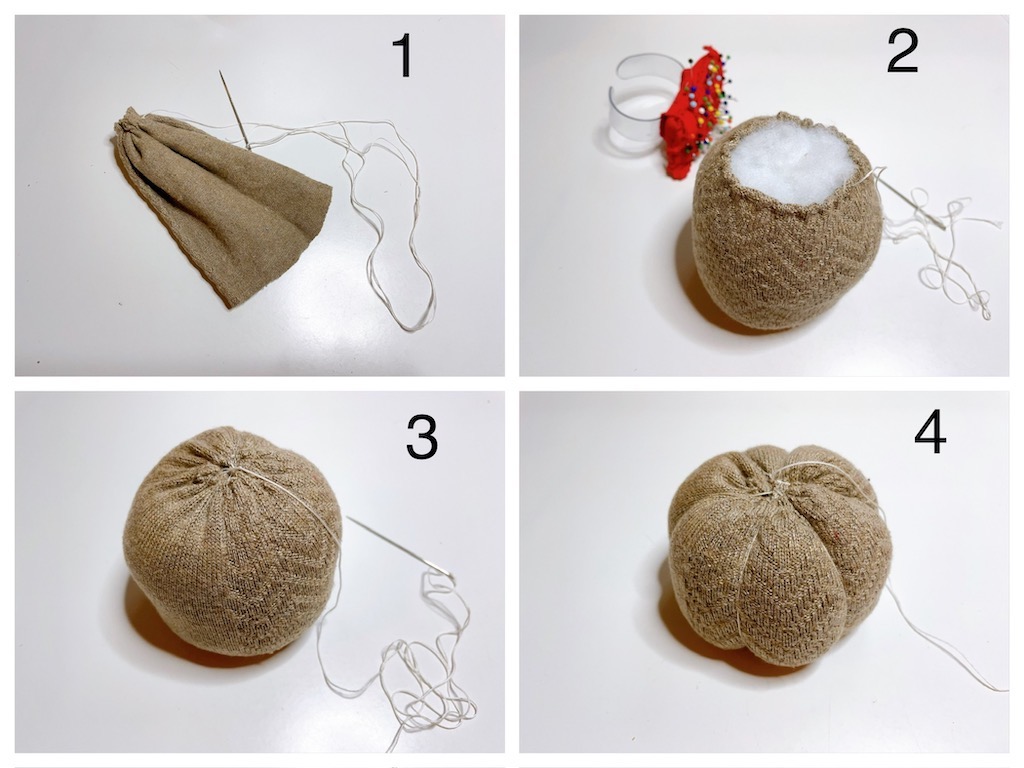
Step 1: Turn tube inside out. Make a running stitch along one end, sewing about 1/4-inch from the edge. Gather as tightly as you can, knot the thread and cut off remaining thread.
Step 2: Turn tube right-side out. Fold down the remaining raw edge to the inside, about 1/4 inch, and sew a running stitch along the folded edge. Keeping needle in place after the last stitch, stuff the sock with rice at the bottom to about 1 to 1 1/2 inches deep to weight the pumpkin, then stuff with fiberfill until the tube is firm.
Step 3: Gather the stitching as tightly as you can to close up the tube. You may need to take a few extra stitches from one side of the tube to the other side, to close the hole completely. Knot the thread to secure the stitching. Now you have a ball.
Step 4: This is where the ball becomes a pumpkin. You’re going to wind thread around the ball in three places, from top to bottom, to create 6 bulges.
Thread your needle with a long length of thread and knot it. Take a few stitches in the top of the gathered tube to anchor the thread, then wind the thread from that point, down and around to the opposite side and pull tightly to create a bulge in the ball. Take stitch at the top to hold the bulge in place. Repeat this process two more times so you end up with six pumpkin wedges. Take a stitch at the top and knot the thread.
Finishing
Stems: Knead together two brown colors of polymer clay for a variegated effect. Shape clay into stems. Bake as directed. Attach stems to pumpkin with a hot glue gun.
Alternatively, cut dried branches to stem height and attach with a hot glue gun. To ensure that the glue has purchase on the pumpkin, you may need to apply glue to the stem, then burrow the stem into the hole at the top of the pumpkin to secure it in place.
Repeat steps using the remaining sock tube to make another pumpkin.
Makes 2 pumpkins.
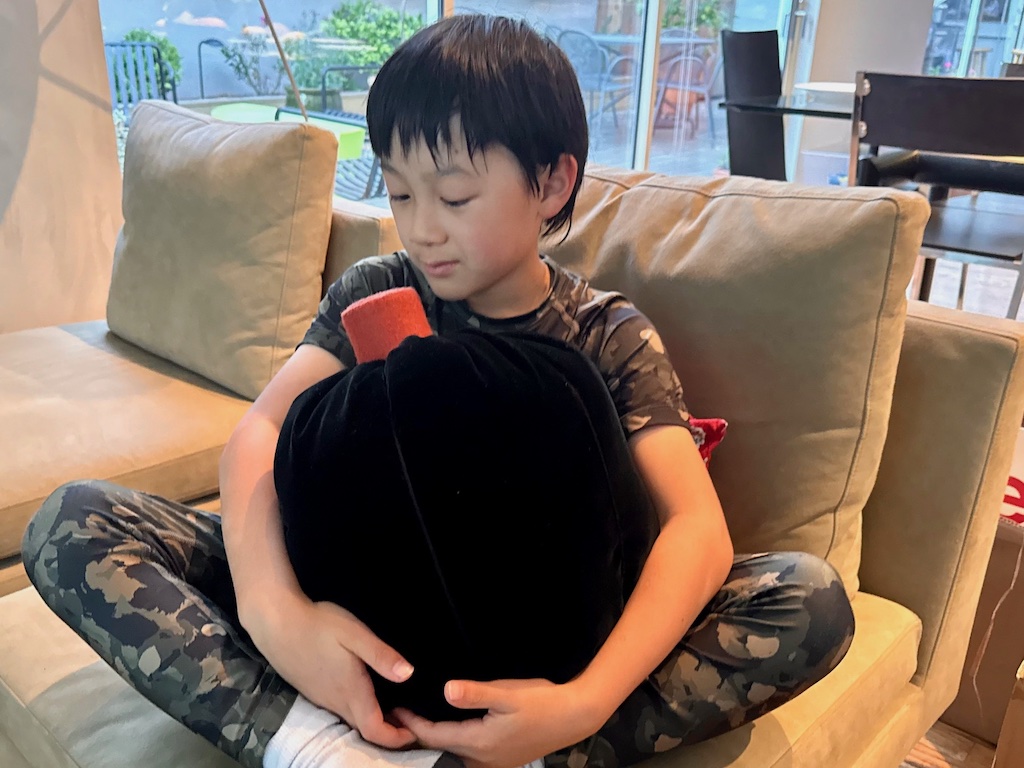
Pumpkin Project for Kids
Miss T is looking forward to make some pumpkins herself. At 10, she knows how to sew with a needle and thread. In fact, I taught her to embroider when she was seven, over FaceTime.
Just remind kids to be very careful around needles so they don’t poke themselves or others, and teach them to keep track of the needle so no one steps on it later.
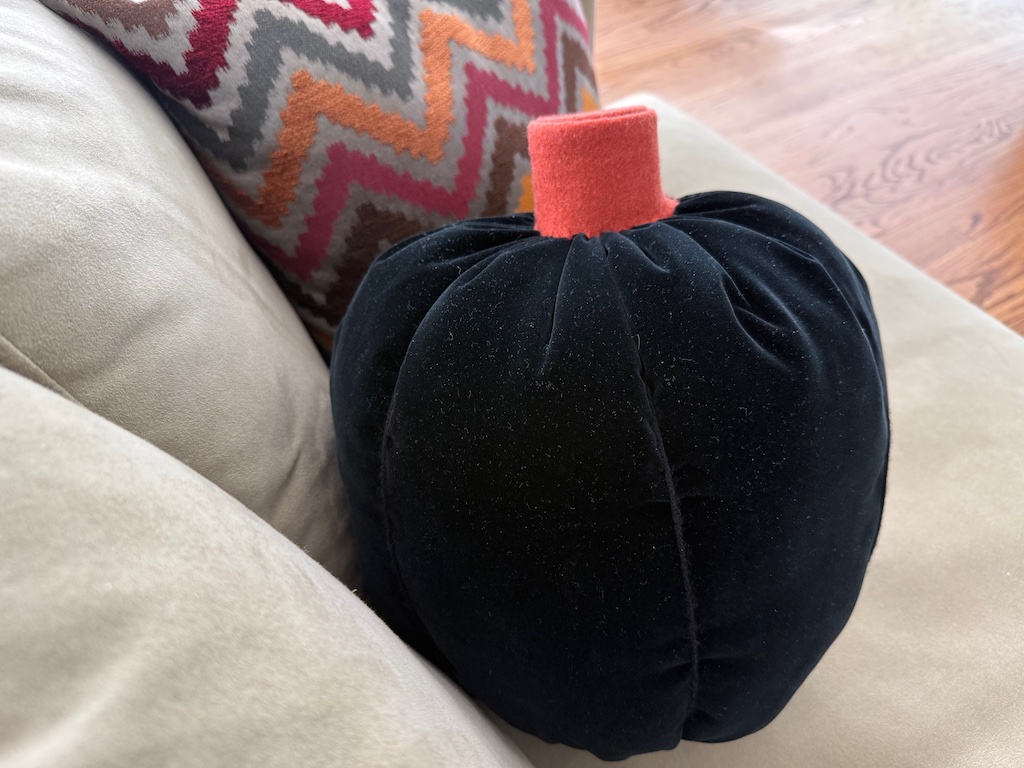
Pumpkin Pillow
You can make a larger pumpkin pillow using the same techniques. Kids love to cuddle with a pumpkin pillow because it’s soft and plump.
Materials Needed
- Soft fabric (mine was about 36 inches wide by 20 inches high)
- Strong sewing thread (I used crochet thread)
- Yarn in the same color or contrasting color to make the indentations
- Polyester fiberfill or other stuffing material
- Matching felt for the pumpkin base
- Brown felt for the stem
Tools Needed
- Sewing machine (or stitch by hand)
- Sturdy needle
- Ruler
- Fabric scissors
- White school glue
Instructions:
Step 1: Cut fabric to the height and width you want your finished pumpkin to be, allowing a half inch seam allowance along the top, bottom, and sides. The grain should run vertically, along the height of the pumpkin.
Step 2: Fold fabric in half, right sides in, and stitch 1/2-inch from the lengthwise edge. If you don’t have a sewing machine, you can hand stitch, using tiny stitches.
Step 3: Turn the fabric right-side out and using heavy thread, stitch a running stitch along the bottom of the pumpkin, 1/2-inch from the edge. Now pull the fabric tight, a little section at a time, gathering the fabric until the entire bottom is gathered tight. Take a few stitches from one side of the pumpkin to the other to tighten the hole.
Step 4: Stuff the pumpkin with fiberfill almost to the top. Now run a row of running stitches along the top of the pumpkin, 1/2-inch from the edge and gather the fabric until the entire top is gathered tight.
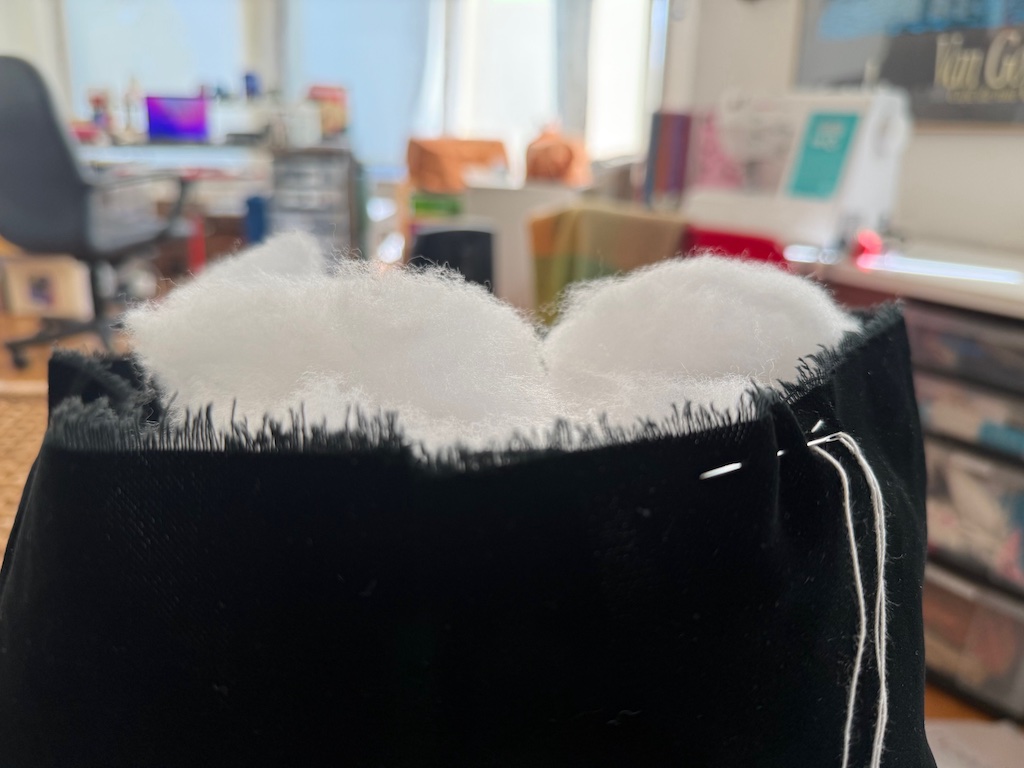
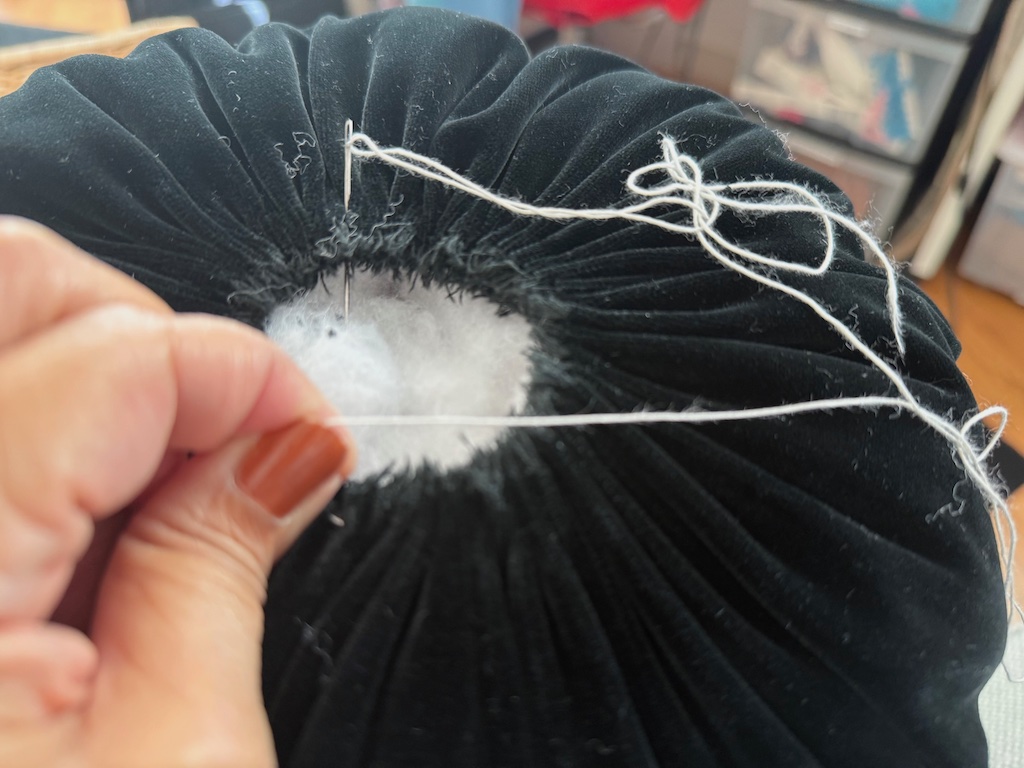
Take a few stitches from one side of the pumpkin to the other to tighten the hole.
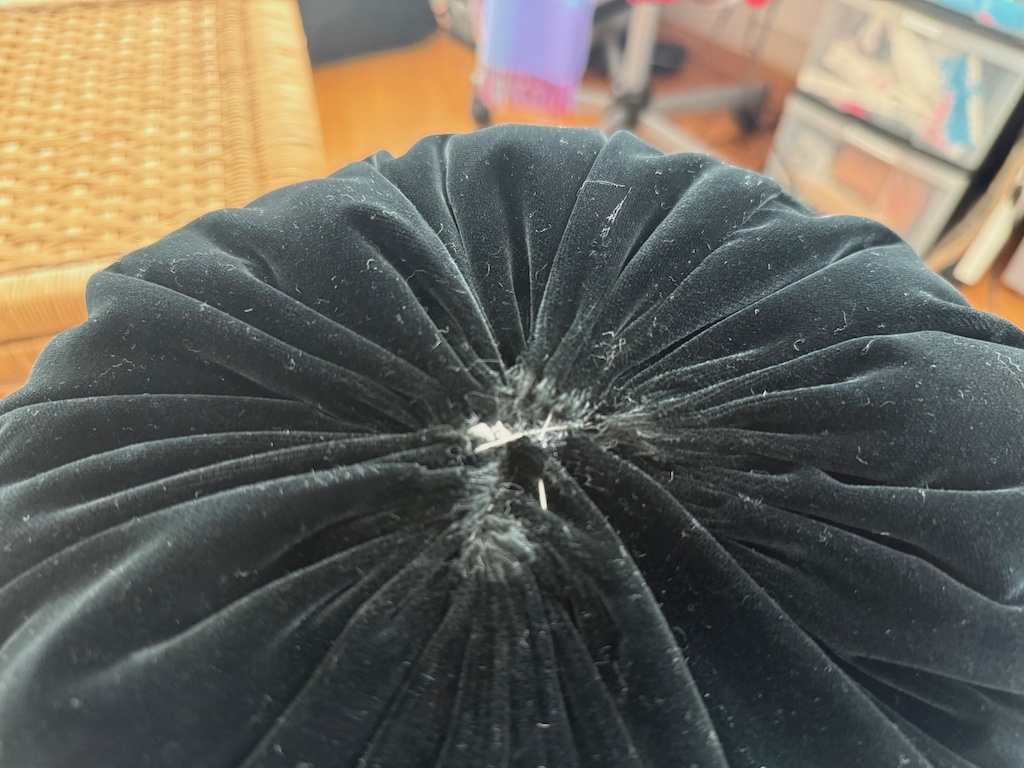
Make the Pumpkin Indentations
Step 5: This is where the ball becomes a pumpkin. You’re going to wind yarn around the ball in three places, from top to bottom, to create 6 bulges. Leave some lead yarn at the top of the pumpkin, then starting at the top of the pumpkin, wind the yarn from that point, down and around to the opposite side and pull tightly to create a bulge. in the ball. You can tie it here or twist the yarn, like tying a present, and repeat the process two more times so you end up with six pumpkin wedges. Tie the yarn tightly to hold the bulges in place.
Make the Pumpkin Stem
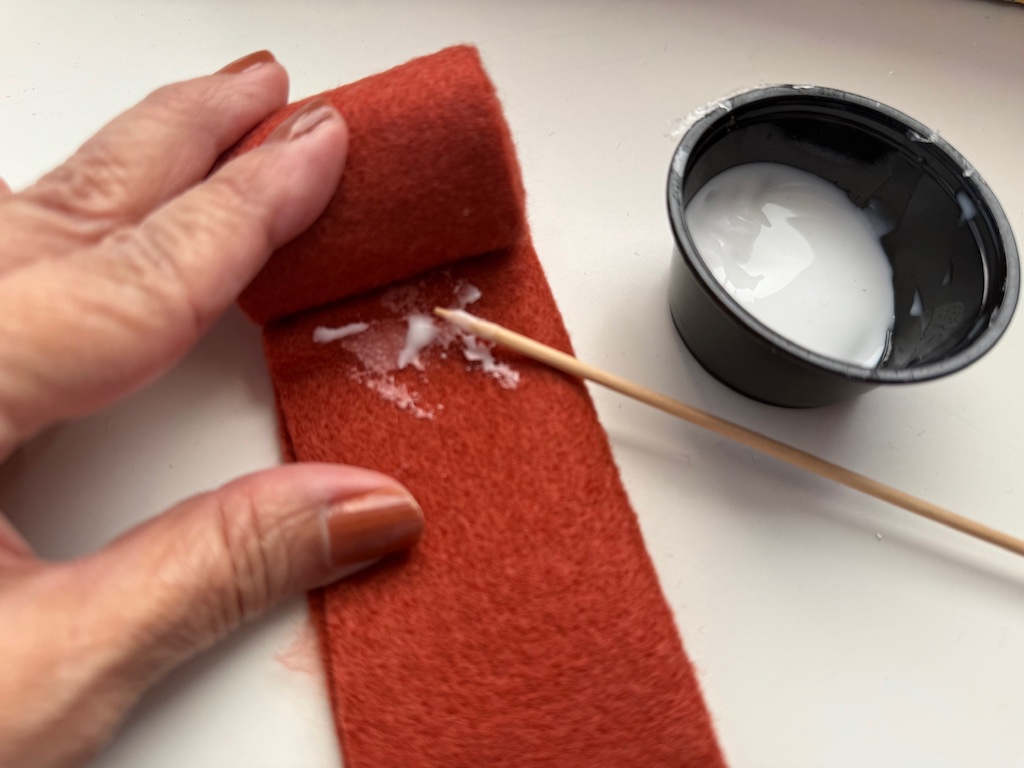
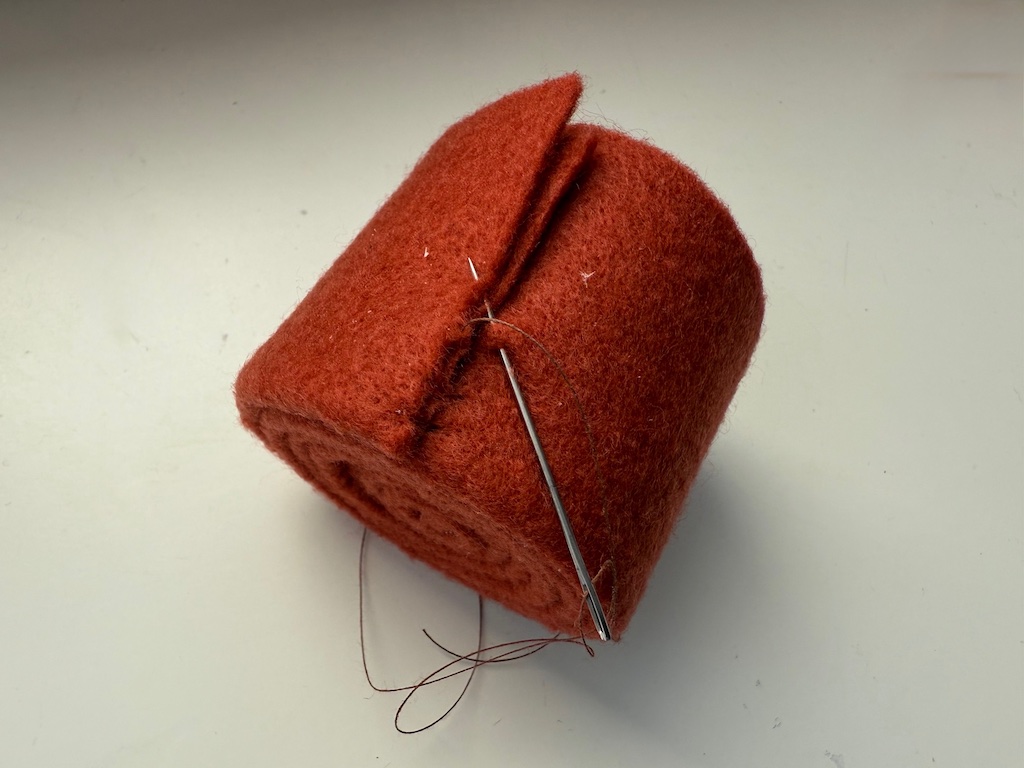
Step 6: Cut a strip of felt the height you want your pumpkin stem to be. Roll the strip, securing with white glue occasionally, until your desired thickness is reached. You want the stem to be thick enough to hide the running stitches at the top of the pumpkin, where you gathered the ball. Use a needle and thread to stitch the end of the fabric strip to secure the pumpkin stem.
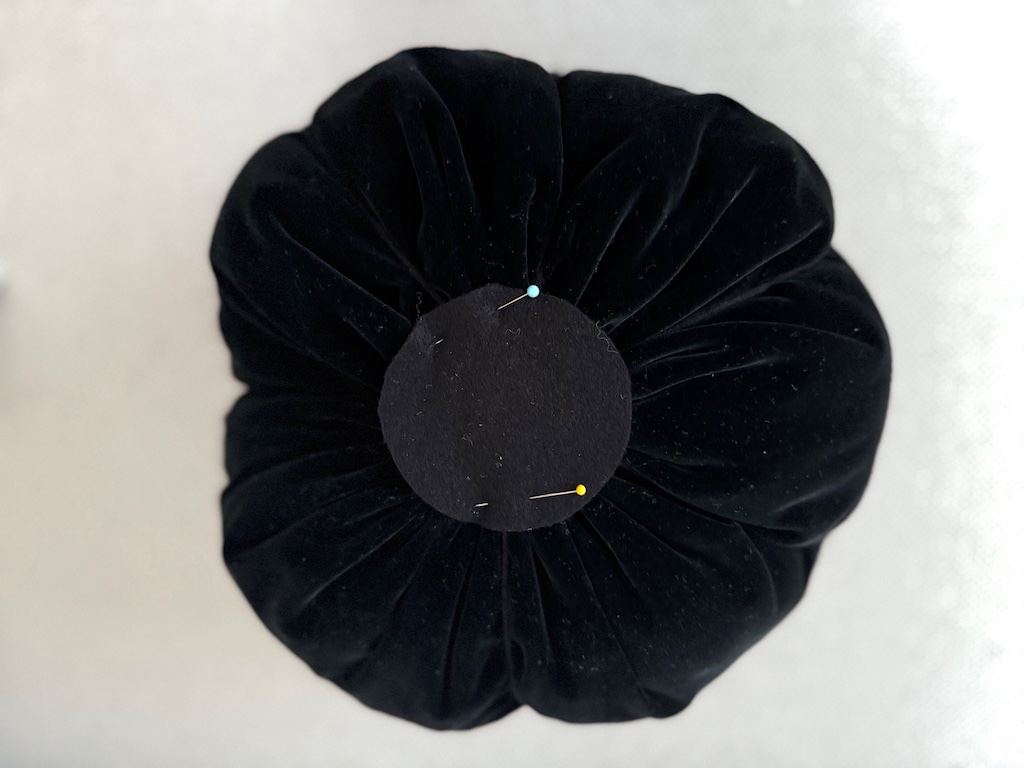
Finishing the Pumpkin
Step 7: Cut a circle of felt larger than the hole on the bottom of the pumpkin and stitch the circle to the pumpkin bottom. Stitch the stem to the top of the pumpkin.
Sign Up!
Don’t forget to sign up for my email newsletter. Every Wednesday, I’ll give you a new idea for an activity or insight to nurture the little ones in your life.