Camp Grandma #1: DIY Puppets Let Imagination Fly
We opened the doors to Camp Grandma last week. I invited both grandkids together, instead of separately, because the activity was suitable for both ages. We would be boosting our creative powers by crafting DIY puppets.
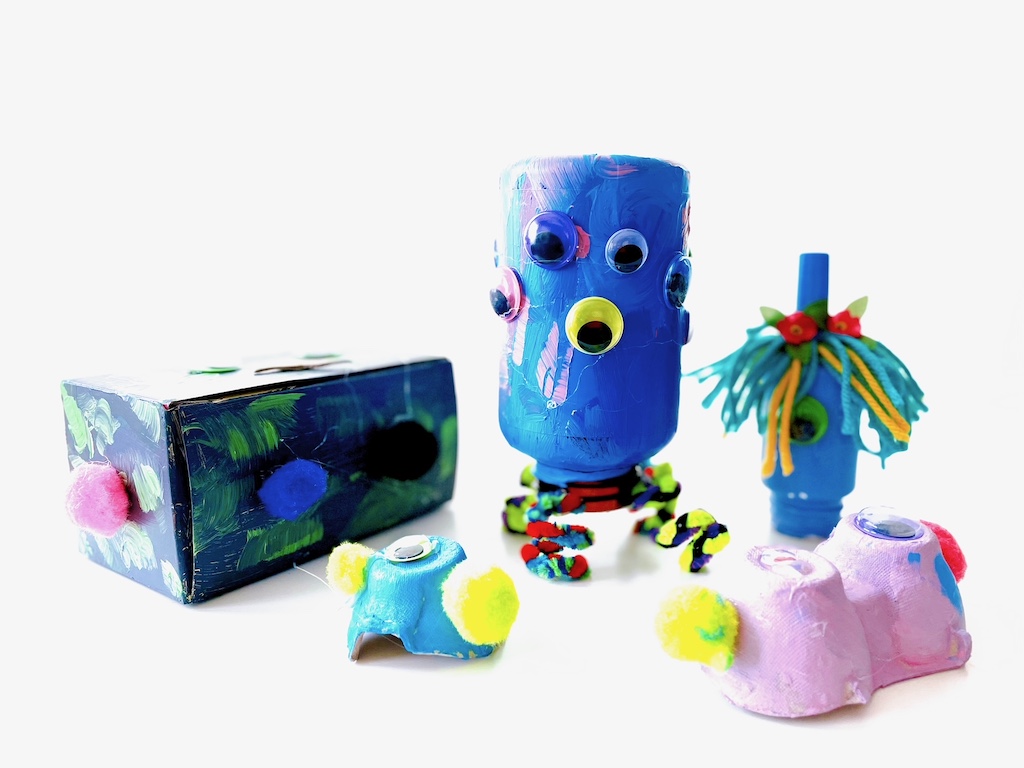
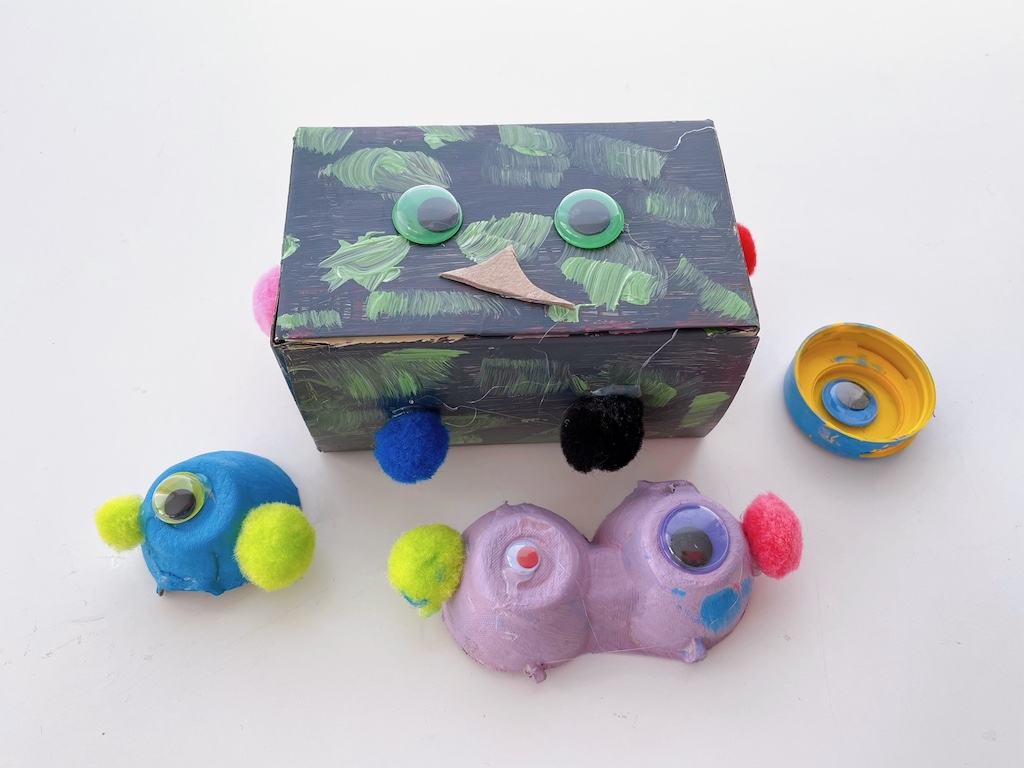
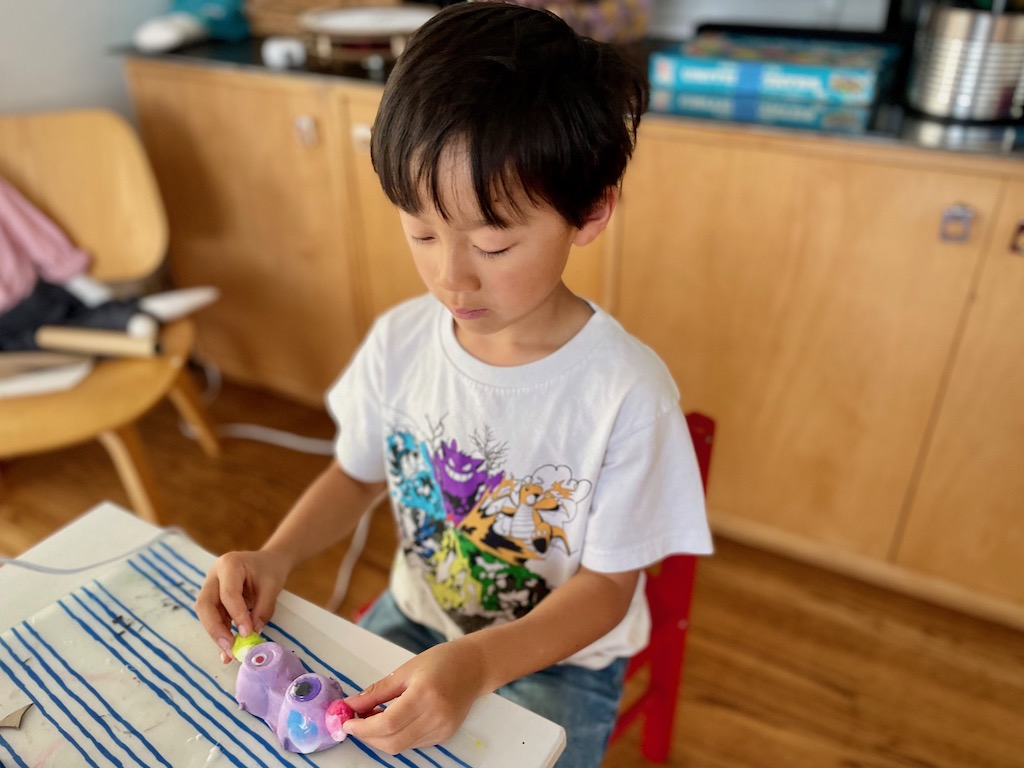
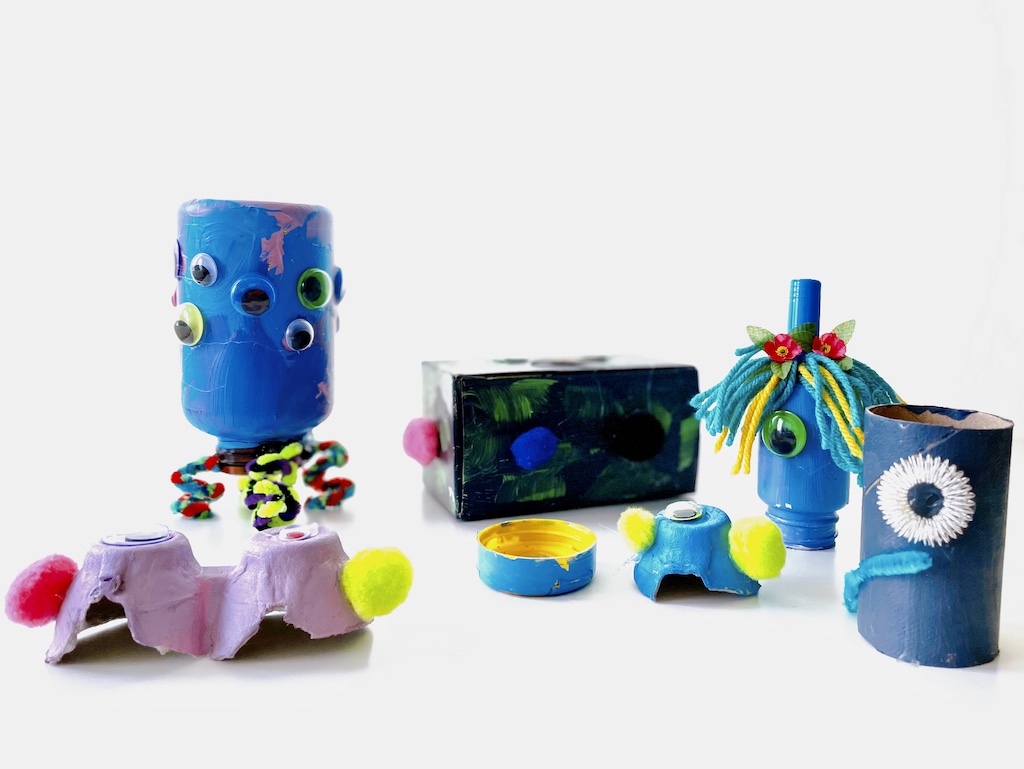
For this activity, the grandkids were challenged to make out-of-this-world puppets. Using discarded recycle items like pill bottles, cardboard tea boxes, and egg cartons, the campers were told to come up with new species of animatable objects.
The point of the exercise is to kickstart the kids’ inner creativity since there are no limits, boundaries, or expectations of what the puppets should look like.
What We’ll Do with our DIY Puppets
Making the puppets is just the beginning of a five-part project I envision. But you can stop with just making the puppets as its own art activity.
Part I, We Make the Puppets
Fashioning the puppets is Part I of our project. We’ll continue to create more characters when we meet next, and then, hot glue a chopstick or flat wood craft stick to each so they can be animated for a puppet show.
Part II, Character Exploration
We’ll explore the character of each puppet. N already has a start. He insists that his tea box puppet is the cutest and all the other puppets like tea box puppet because he’s so cute. (Which of course, opens a discussion about what defines “cute,” and why cuteness should play a role in likability.)
We’ll create a personality for each puppet; then we can explore how they will interact. We will have starring characters (no doubt, tea box puppet will be one), and minor characters. But the identity of each will be fully fleshed out.
Part III, We’ll Tell Stories
What will happen when all our puppets, with their varying personalities, get together? The kids will develop a plot and we’ll put together a loose script that they can act out for a puppet show.
I’ve proposed two story lines: one is about a planet populated with misfits and the second is about recycled trash coming to life in the trash bin. They liked the trash bin, unanimously, so we’ll go from there.
Little kids can make simple puppets with magazine cutouts, cardboard, and toilet paper rolls.
Part IV, Make a Puppet Theater
We’ll make a puppet theater from a cardboard box. I have a box set aside already.
Part V, We’ll Put on a Show!
We’ll put on a puppet show for the family.
How to Make your DIY Puppets
Materials:
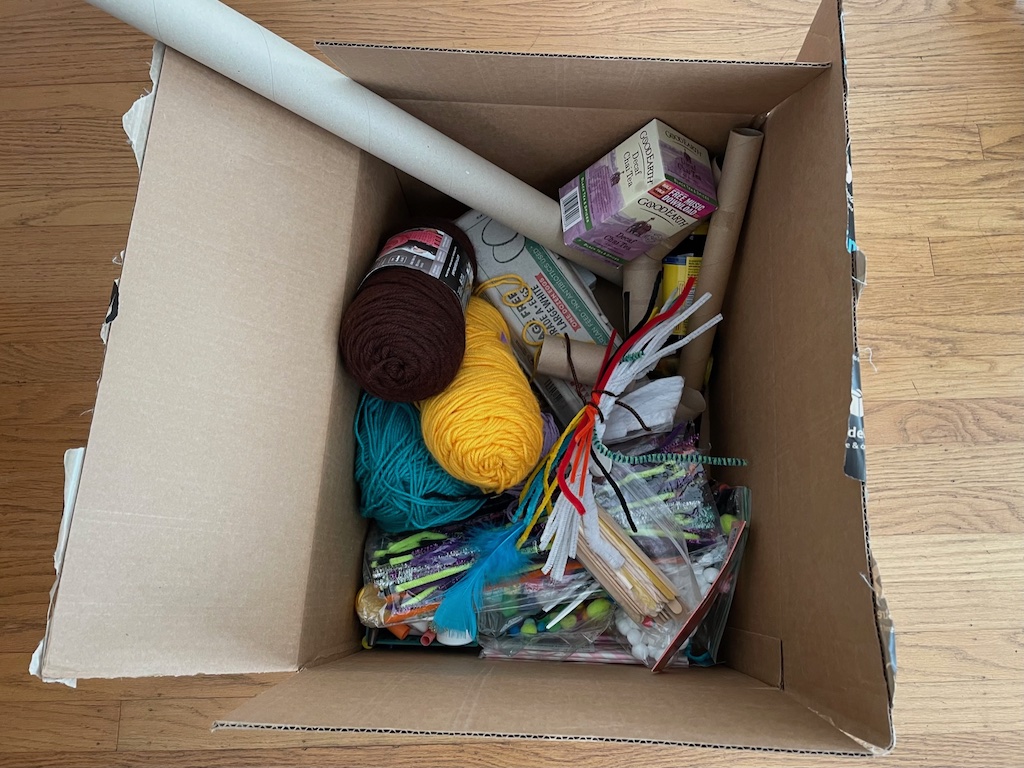
- Puppet bodies–containers of different sizes: plastic bottles, toilet paper tubes, small boxes, egg cartons, paper towel tubes, empty ribbon spools, thread spools, etc.
- Acrylic paints
- Colored markers
- Decorations–plastic googly eyes, yarn, pipe cleaners, pompoms, artificial flowers, pen caps, bottle caps, plastic spoons, feathers, “jewels,” etc.
- Wooden disposable chopsticks and/or flat wood craft sticks to make a handle for the puppets
- White school glue, such as Elmer’s
Tools:
- Scissors
- Paint brushes
- Sponge brushes for glue
- Paint palette
- Jars to rinse paints
- Low-temperature glue gun and glue sticks
Setting Up
Start collecting throwaway items that could be used to make puppets. Gather all the materials and the decorations in a carton so kids can rummage through to see what’s available as they create.
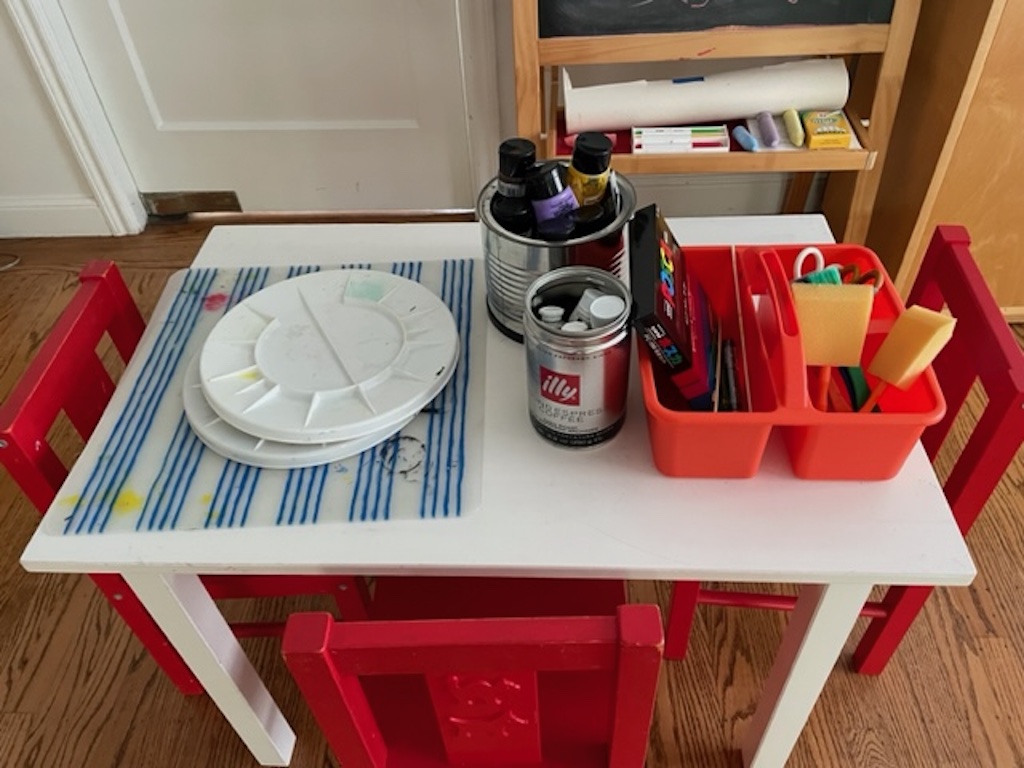
Set up a table, ready for work. We use old plastic placemats to protect table surfaces. Gather all the tools the kids will need. I love my $3, red supply caddy from Target to contain the tools.
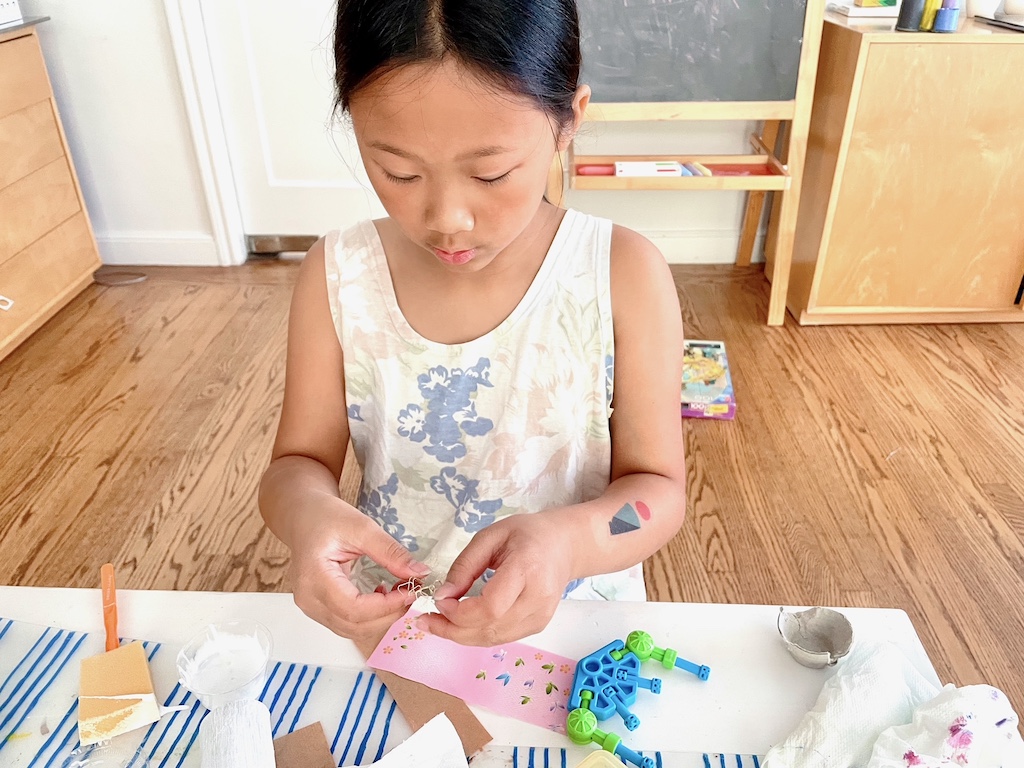
Then let the kids get started painting the bodies and decorating their DIY puppets. Acrylic paint may take a few hours to dry, so be sure to have another activity for kids to do while they wait. It might be a good time to get them outdoors for some water play.
Alternatively, for a no-wait project, paint the various items for bodies yourself, in advance; then let the kids create and decorate.
Use a glue gun to glue on a chopstick or flat wood craft stick to each puppet as a handle so kids can manipulate the puppet. The size, shape, and weight of the puppet will determine what kind of handle you will need.
What Kids Learn
In this activity, kids will kickstart their own inner creativity by:
- Using imagination to produce original puppets from found items.
- Seeing everyday discarded objects in new ways. Another such exercise is making dollhouse vignettes, using items like a dental floss container for a sink, an empty spool of thread for a lamp, and more.
- Tapping into their creative minds to develop character profiles for all the puppets.
- Coming up with a story idea for a play and writing a script.
- Performing their puppet show.
All this while enjoying summer and having fun at Camp Grandma.
Sign Up!
Don’t forget to sign up for my email newsletter. Every Wednesday, I’ll give you a new idea for an activity or insight to nurture the little ones in your life. Next week, we’ll embark on Camp Grandma #2.