Camp Grandma #3: Make a Puppet Theater from a Box
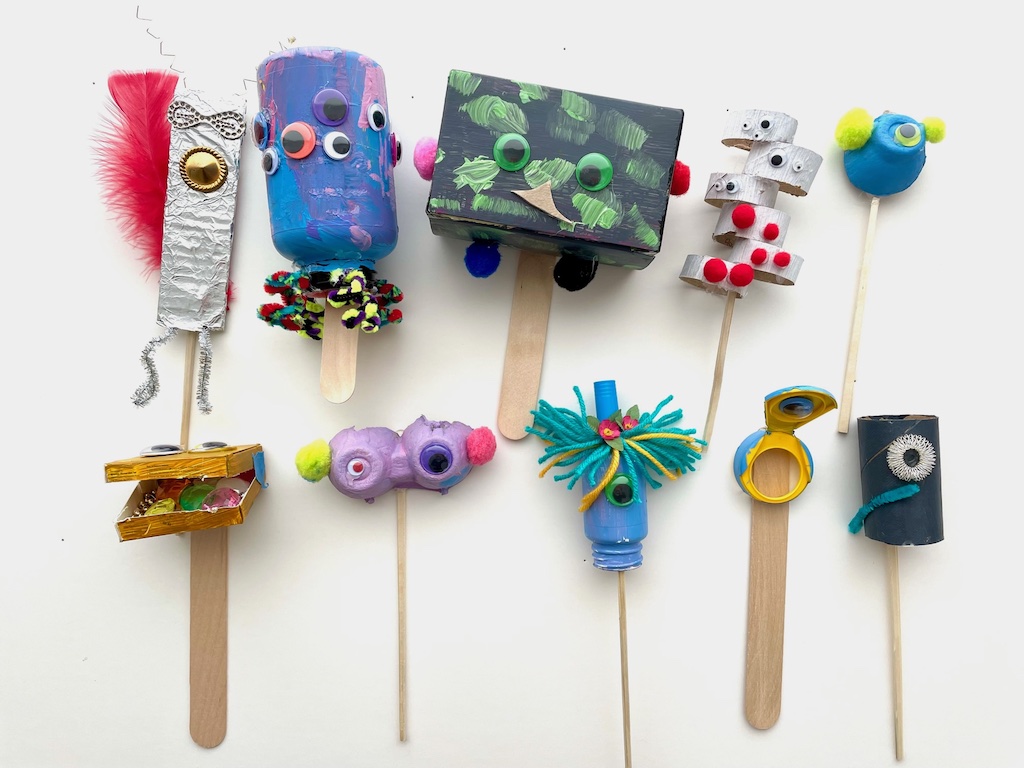
We crafted DIY puppets from recycle items during Camp Grandma #1. Making puppets from trash challenged the grandkids to see castoffs in a creative new light.
Now, we are giving the puppets a home by making a puppet theater from a cardboard box.
Next to toilet paper rolls, my other favorite crafting freebie is the cardboard box. It inspires so many fun projects, such as a DIY cardboard house for a toddler or forts for a fort fight.
Puppet Theater Ideas
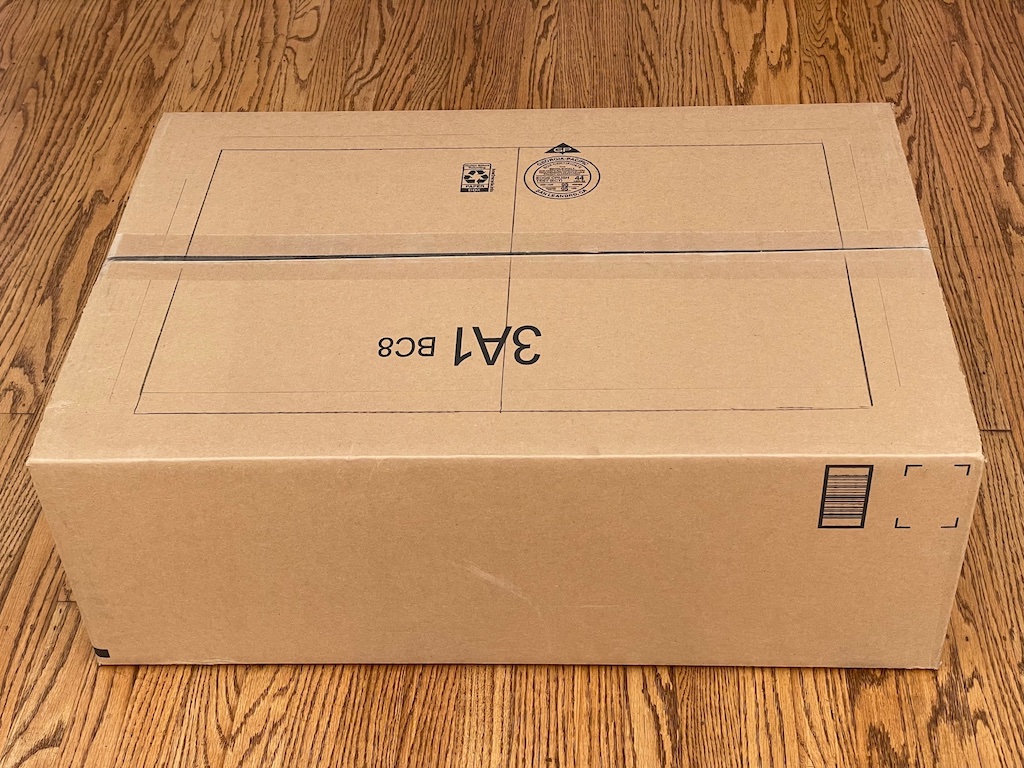
To make a puppet theater, you’ll need a good-size cardboard box. The box will sit on a cloth-covered table, where the kids can be hidden from view.
Our puppet theater takes a little effort, but you can try one of several simpler options if you don’t have the time:
#1: If you have an even larger box–such as a wardrobe box used by movers–simply cut out a hole to make the stage. The puppeteers can crouch in the box, below the stage. Use the back wall of the box to tape background scenery. Done!
#2: To make a simple stage from a smaller box, just cut a hole in the front of the box for the stage and cut out the flaps from the opposite end to access the stage. Set the box on a table covered with a sheet, and have your puppeteers perform behind it. Use a deep box for stability; a shallow box may collapse.
#3: Skip the theater construction entirely. Just cover a table with a blanket. Kids can duck behind the blanket to manipulate the puppets.
How We Made our Puppet Theater
Our puppet theater was a trial-and-error effort. In the end, it had everything we wanted: doors that can open and close, enough space for the puppets to perform, and a back wall to mount background scenes.
Materials Needed for the Puppet Theater:
- Large cardboard box, about 31 inches wide X 21 inches tall X 11 inches deep
- Clear, heavy duty packing tape
- Blue painter’s tape
- Poster paint
- Cardboard to cover the back wall of the theater (I used a foam core board)
- Velcro tape about 1 1/2 inches wide and about 12 1/2 inches long (optional)
Tools Needed for the Puppet Theater:
- Ruler
- Pencil
- Box cutter
- Hot glue gun
Preparing the Front Stage of the Puppet Theater
Step #1: Tape the box closed with clear packing tape.
Step #2: Determine how large you want to make the opening for your theater stage. We gave ourselves a margin of 2 inches on the top and 3 inches on the sides and bottom. Mark your cutting lines using a ruler and pencil. Rule the center of the box between the top and bottom margins for the doors.
Step #3: Using a box cutter (this should be done by an adult very carefully), cut through the center line marking JUST up to the top and bottom margins, and then cut along the TOP and BOTTOM margin marks. DO NOT cut the side margin lines; those will hinge your doors.
Step #4: Now score the side margin lines (the hinges) by lightly running the box cutter over the lines, and gently fold the flaps back.
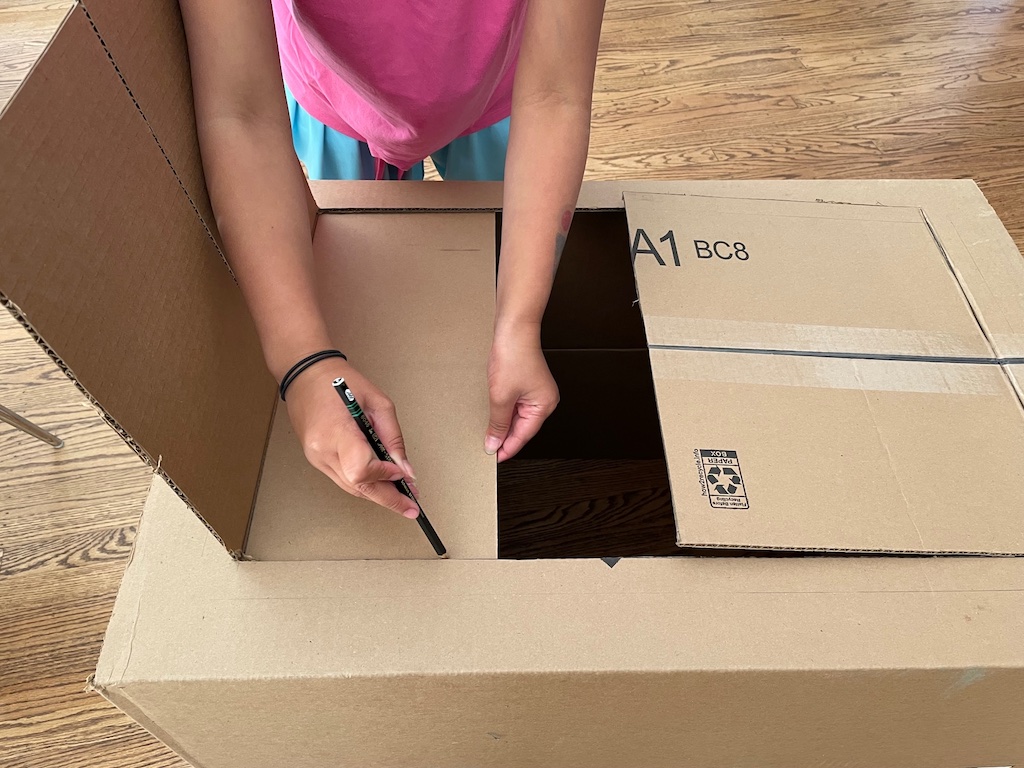
Step #5: When you open the hinged doors, you’ll see that the box flaps on the opposite sides of the box are blocking the opening of your puppet theater. Use a pencil to trace the part of the flaps that are blocking the puppet theater opening and cut them away with the box cutter. (You could have simply cut off the box flaps, but the theater is more stable this way.)
Preparing the Back Stage of the Puppet Theater
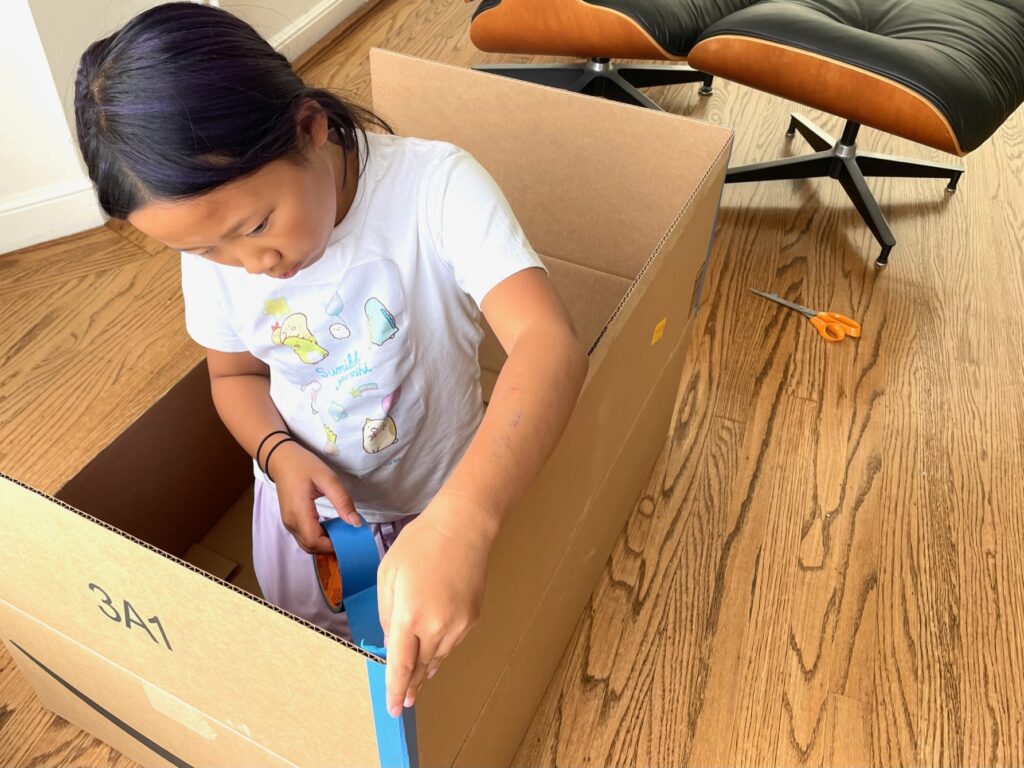
Step #6 Now you have an attractive front stage for the puppets with doors. Next, flip the box, stage side down, and tape the remaining flaps to keep the box open using the blue tape along all corners. This will give you the back end of your stage.
Step #7: Turn the box so the stage is right side up. At this point, if your back stage is too deep, trim the back flaps of your box. We cut our back flaps down to 5 1/2 inches all around, which gave us just enough space for the puppets to get on and off stage.
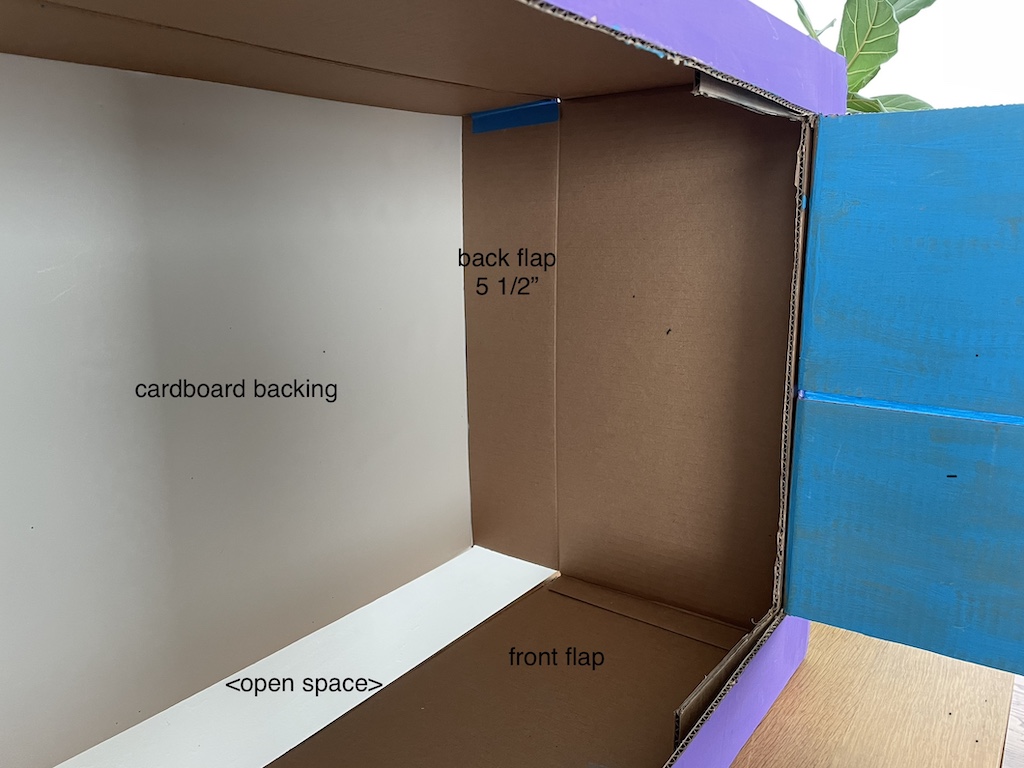
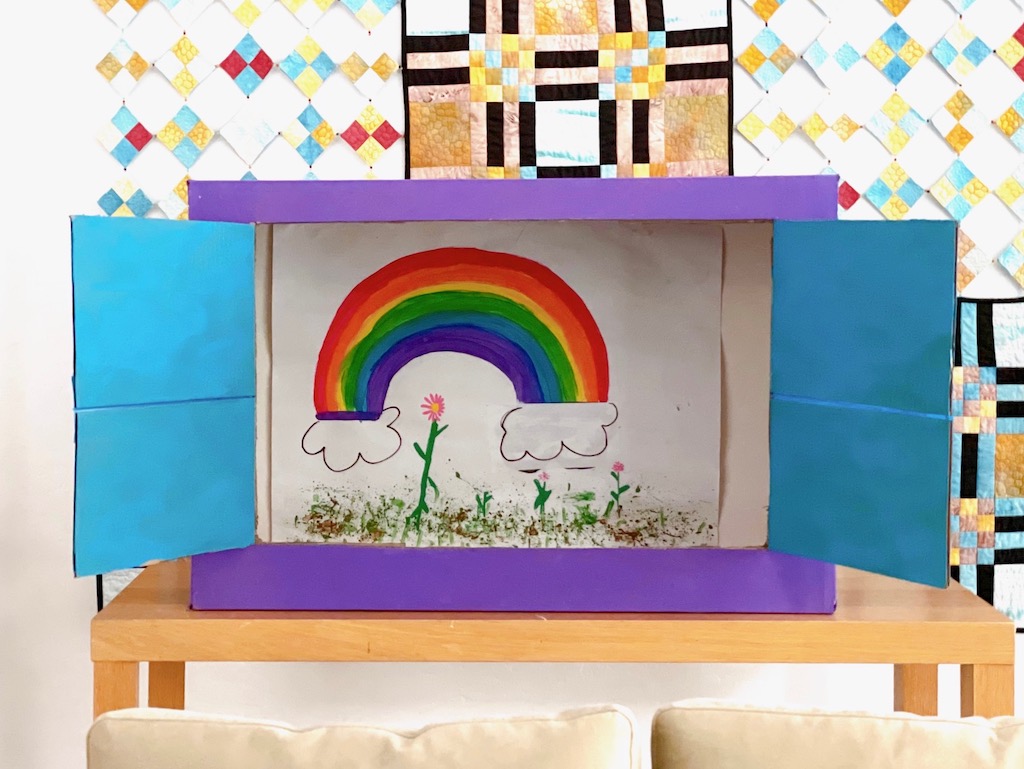
Step #8: Tape the cardboard backing to the back of the theater with blue tape. Tape your background scene onto the cardboard. Paint the puppet theater and you’re done.
Attaching Optional Velcro Strips
If you want to change the background scenes during your play, instead of securing the cardboard backing permanently with tape, you’ll want to use Velcro.
Attach Velcro strips to the back of the theater to secure the cardboard. Then, to change the scene, undo the Velcro, attach a new background scene to the cardboard, and Velcro back in place.
For example, we have three background scenes for our play: the first scene is set inside the recycle bin. The second is set on a highway. And the third is set in a rainbow paradise. We can replace the background scene each time by detaching the cardboard back, affixing the next scene, and reattaching the cardboard with the Velcro strips.
You’ll attach the Velcro in five spots: the top and bottom of each side of the theater and one on top in the middle. Cut Velcro strips about 1 1/2 inches long. Cut only the hook side in half again.
Lay the cardboard against the theater back, as though you were going to tape it in place. Now glue the hook side, hook facing out, to the top side of the theater using a hot glue gun. Glue half the fuzzy loop to the cardboard in the opposite, corresponding place, loop side down (you’re gluing on the loop side). The remaining half of the loop side will attach to the hook side of the theater to hold the cardboard in place.
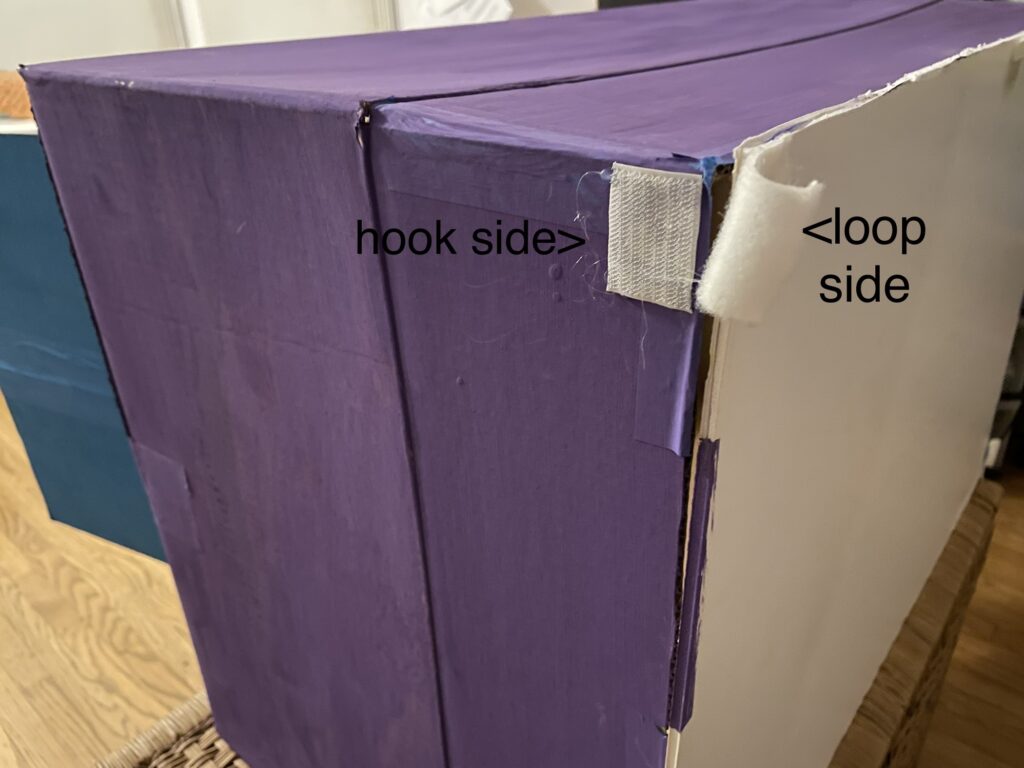
Repeat for remaining three corners and the top of the theater.
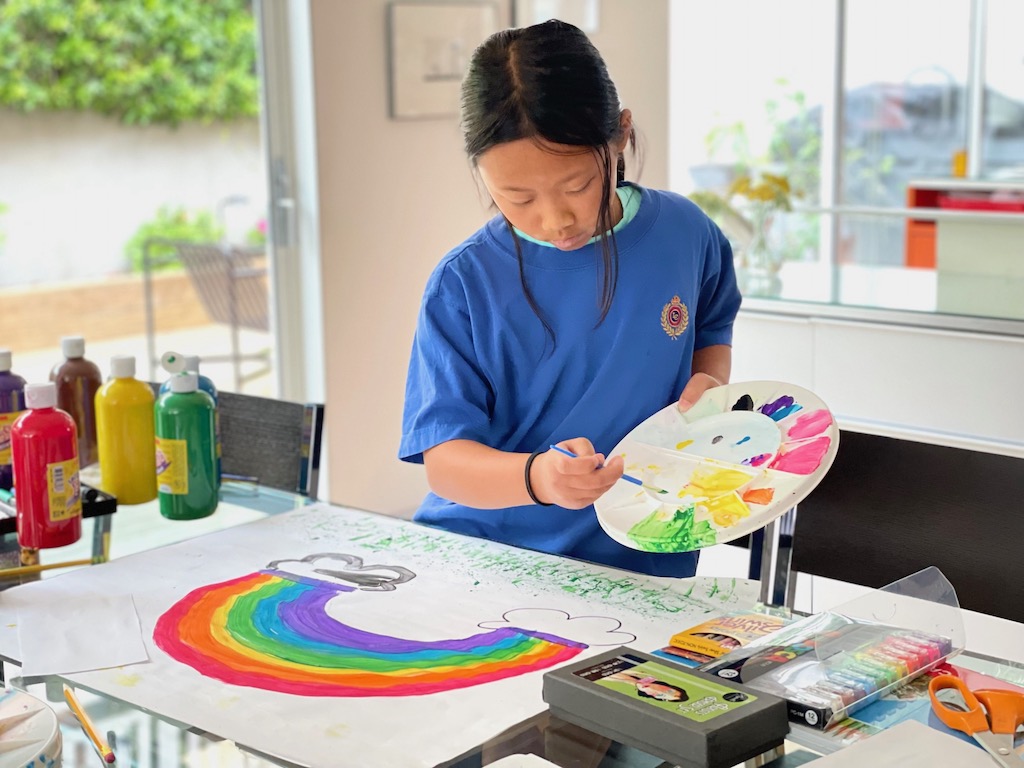
How to Make Background Scenery
I happened to have 25- X 30-inch self-stick easel pads for business brainstorms, so we used the sheets for the scenery. They’re convenient because, as self-stick post-its, the scenery can be easily switched out. However, they are expensive for a child’s project.
Alternatively, use any kind of large paper you have on hand and tape in place onto the cardboard backing with resealable tape. Use poster paints, markers, crayons, and colored pencils to create your background scenery.
Next Steps:
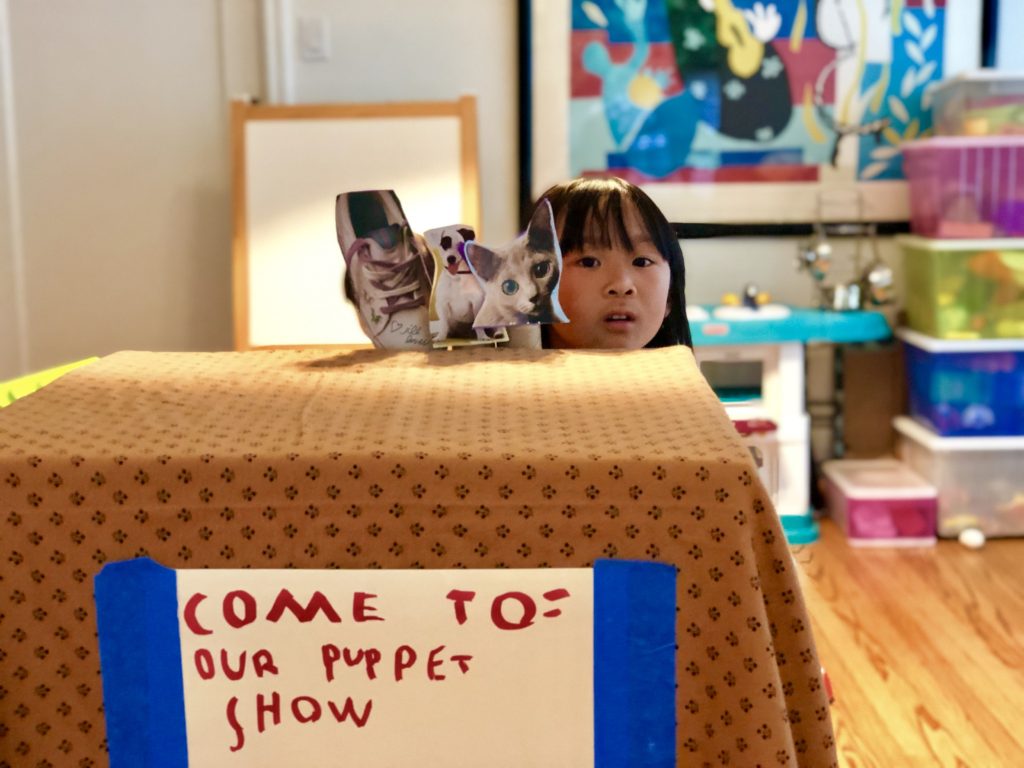
The final part of our project is writing a script and performing a play with the puppets we made, in our new puppet theater.
Sign Up!
Don’t forget to sign up for my email newsletter. Every Wednesday, I’ll give you a new idea for an activity or insight to nurture the little ones in your life. Next week, we’ll be working on Camp Grandma #4.