Christmas Crafts: How to Make Tiny Stockings
At my first job, I was struggling to make ends meet while working at a magazine in New York City. That Christmas, instead of buying gifts, I made Christmas crafts–stitching tiny stockings for my editorial friends and filling the stockings with small goodies.
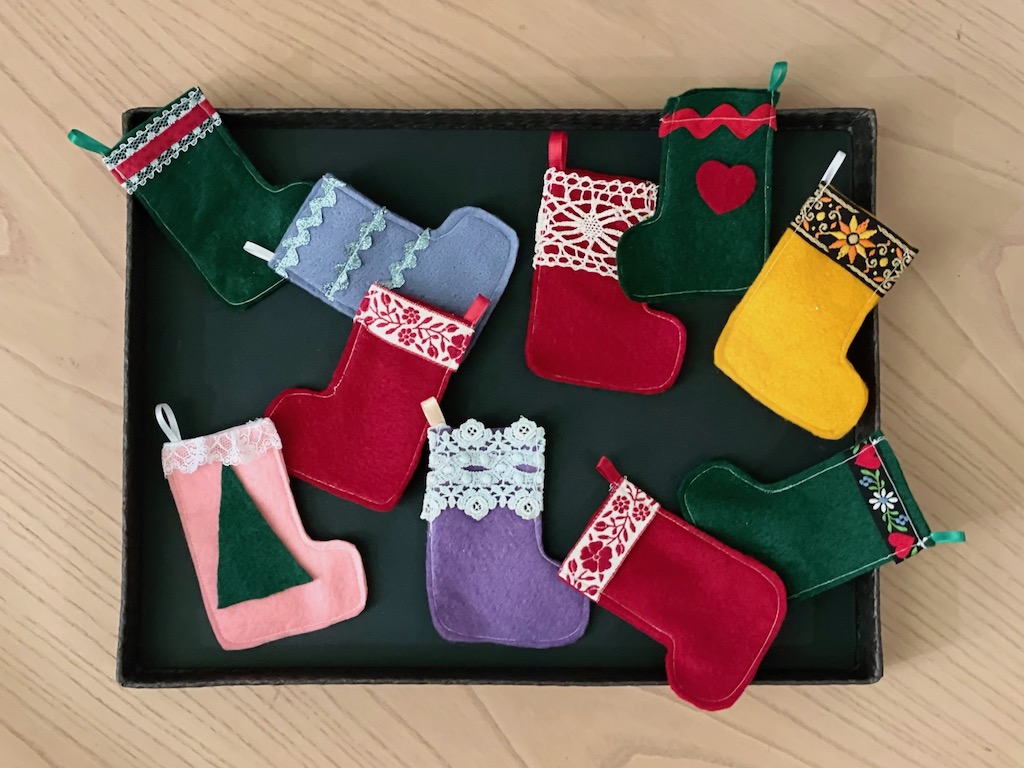
After all those years, last week, I started making these stockings again. My grand plan was to make 24. I’d string them together, fill a little something in each, and make an Advent calendar for the grandkids.
While making one stocking was quick, making 24 was more time-consuming than I had imagined–and also a little challenging. As I cut the stockings and lined them up, I realized that it would take a mighty big wall to hold them all.
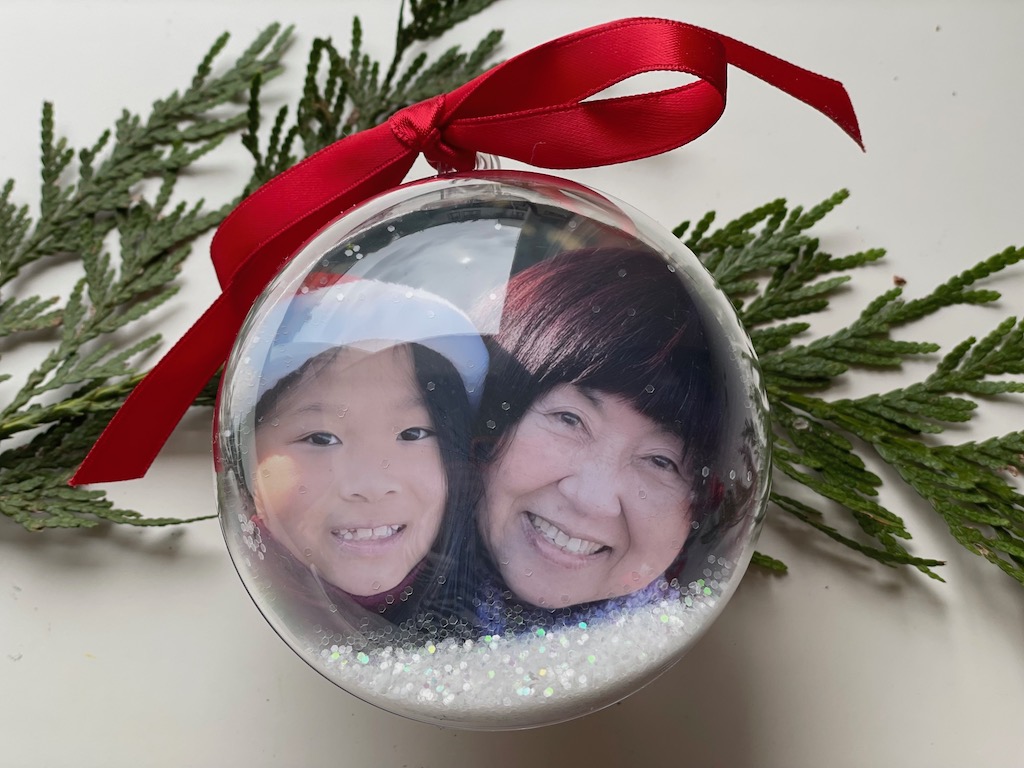
How to make photo ornaments for Christmas.
This is a work in progress. If you think a tiny stocking Advent calendar is a great idea, you are on your own to complete it! (But I do provide some thoughts below on how it might work.)
Still, there are so many ways to use these tiny stockings during the holidays, why not make up a batch?
What to do with Tiny Stockings
Here are some fabulous uses:
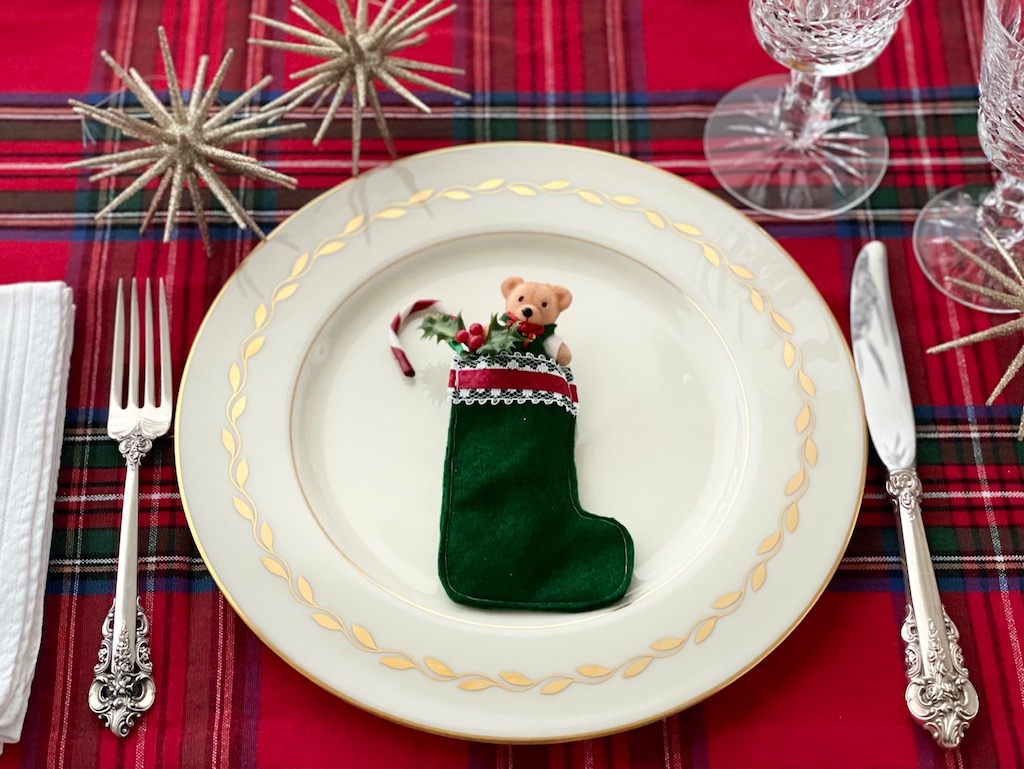
- Turn them into party favors; fill with goodies and add one to each place setting for Christmas dinner.
- Hang them on your Christmas tree.
- Fill with cash, a check, or a gift card as a Christmas present.
- Fill with candy and tie to a gift package as a bonus treat.
- Tie to a bottle of wine to dress up a hostess gift.
- Make one for a child’s doll and ask Santa to fill it.
- Help a child to make tiny stockings and stuff with promissory notes for future tasks as a gift for parents.

How to Make Tiny Stockings
If you can sew and have a sewing machine, these are quite easy to make. If you don’t have a sewing machine, you can hand stitch with embroidery thread using a running stitch or blanket stitch. Hand sewing makes this a project suitable for a child.
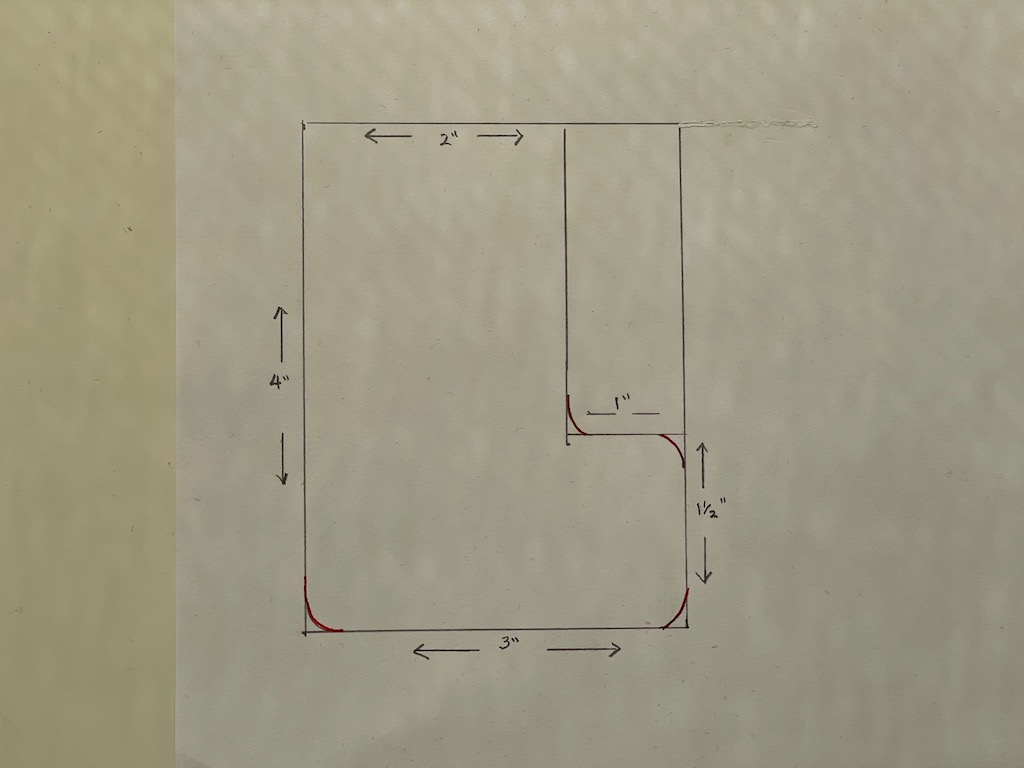
Step #1, Make a Pattern
To do this, draw a rectangle 4 inches X 3 inches. Measure up from the bottom 1 1/2 inches and draw a parallel line 1 inch wide from the right edge. Draw a perpendicular line from the end of that line to the top of the rectangle. Round the corners with a pencil. Cut out your pattern.
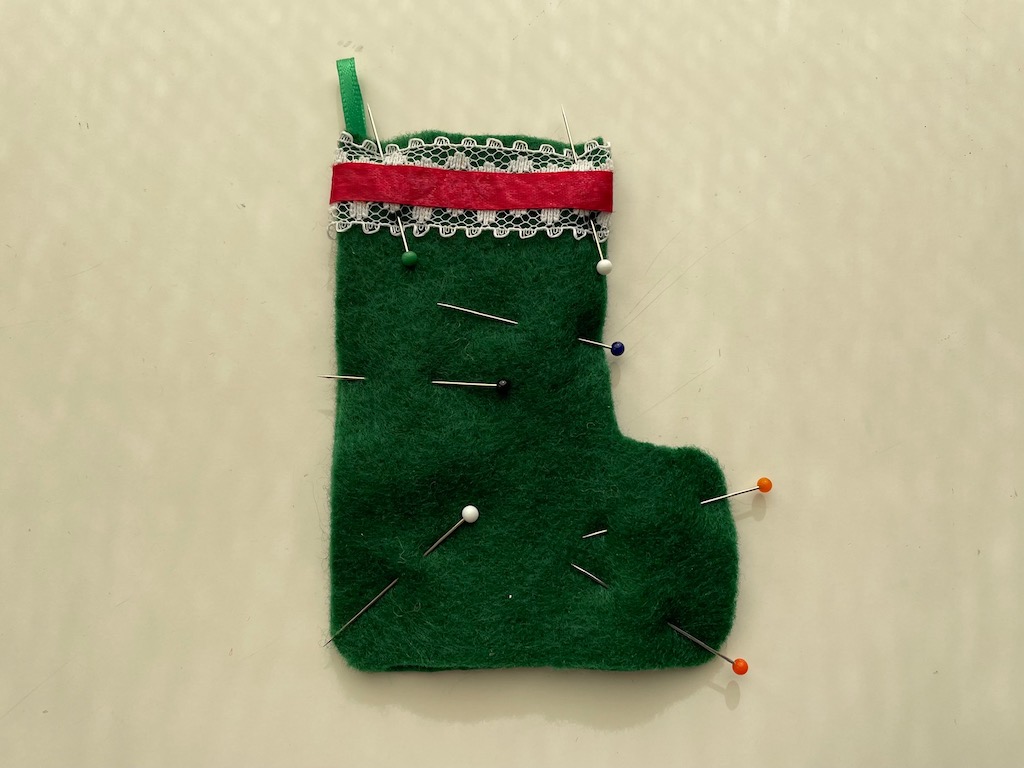
Step #2, Cut and Stitch
Pin the pattern to two layers of felt and cut. To add a band of trim at the top, cut the trim longer than the width of the stocking, allowing about 1/2-inch margin on each side. Center the trim and top stitch the trim to one layer of the felt.
Cut a piece of narrow ribbon to 3 inches. Fold in half to form a loop.
Pin the two stocking pieces together, folding in the extra trimming on each side so the raw edges are sandwiched between the back and front of the stocking. Pin ribbon loop to the top of the stocking, again sandwiched between the back and front of the stocking.
Top stitch the two layers of the stocking 1/4-inch from the edge along the sides and bottom of the stocking, catching the trim and loop as you stitch. The idea is to attach trimming and loop with one pass of the sewing machine.
If your stitching isn’t perfectly even along the outer margins of the stocking, take a pair of sharp scissors and trim any excess.
Notes
- For efficiency, I sewed all the stockings with white thread. While it’s best to color-match, it takes too long to change the thread when sewing many stockings.
- If you have trouble catching the ribbon loop of the stocking as you sew, just insert it between the two layers of the stocking and machine stitch in place after the stocking has been stitched together.
How to make snow-covered branches as a centerpiece

How to Decorate the Tiny Stockings
These tiny stockings are cute as they are, but if you would like to embellish them, here are some ideas. Some decorations are best applied before stitching the stocking; others are best after the stocking is made.
Do these decorations before stitching the stocking together:
- Embroider a design, a child’s name or Advent day number
- Sew on sequins
- Cut a scrap of felt into a heart or Christmas tree shape and glue or stitch in place
- Sew on colorful buttons
- Sew on Christmas-themed appliqués (here’s an example–some of them may be too large)
Do these decorations after stitching stocking together:
- Attach a sprig of fake holly, a small jingle bell, or other holiday decorations with needle and thread
- Stitch on a small bow
- Glue on a small photo of a child using white school glue
The Advent Calendar Christmas Craft
I can’t guarantee the results, since I haven’t completed this Christmas craft myself. But here’s what I’m thinking:
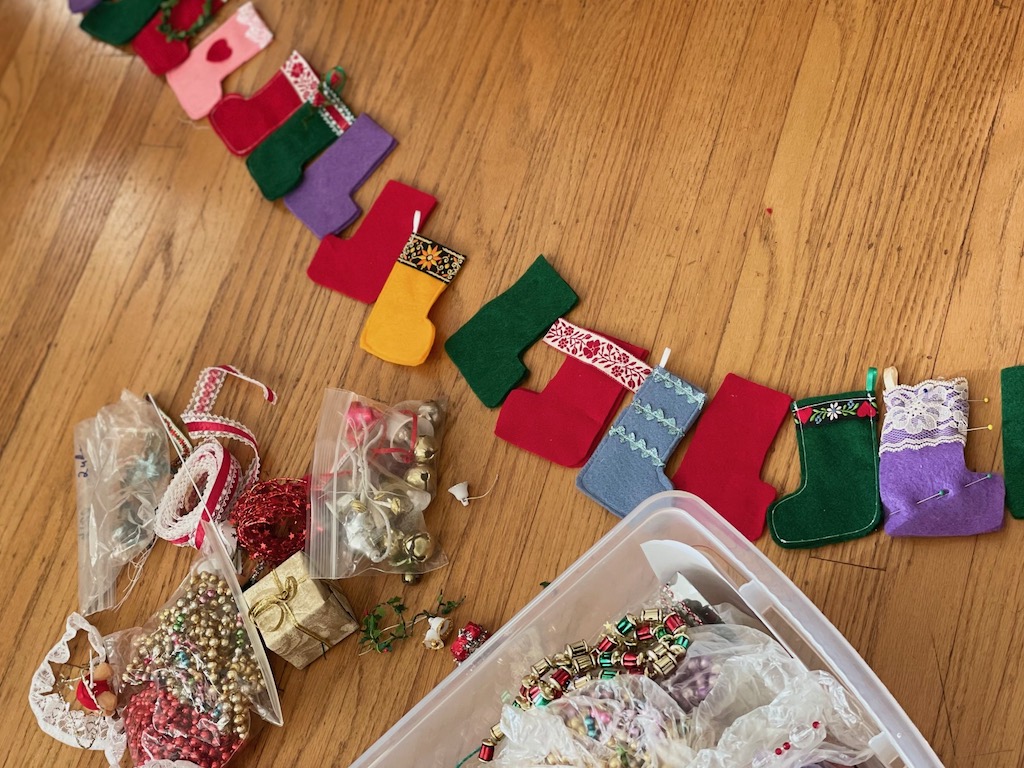
- If you don’t want all the stockings facing in the same way when you string them up, you have to plan in advance. Lay out all the felt shapes and determine which ones will turn which way so you’ll know where to put the loops and which side to decorate with trim. Think also about colors and how you will want them arranged.
- Take a photo for reference.
- To string up the stockings, thread the twine (I’m thinking red and white baker’s twine) through the loop from one end, then loop it back so that the stockings will be locked in place; otherwise they’ll shift and slide when you hang them. Or use tiny clothespins.
A year later, I came up with some better ways to turn the tiny stockings into an Advent calendar.
Next week, we’ll do more holiday crafting!
Sign Up
Don’t forget to sign up for my email newsletter. Every Wednesday, I’ll give you a new idea for an activity or insight to nurture the little ones in your life.