Create a Book with Felt for a Toddler
How to entertain a toddler stuck in an airplane for hours? In sympathy with her parents, I created a book for Miss T that would be interactive, enabling her to make up her own stories while on her first flight overseas.
Whether on a plane, in. a car, or staying at home, a felt book is a simple, old-fashioned way to entertain a child.
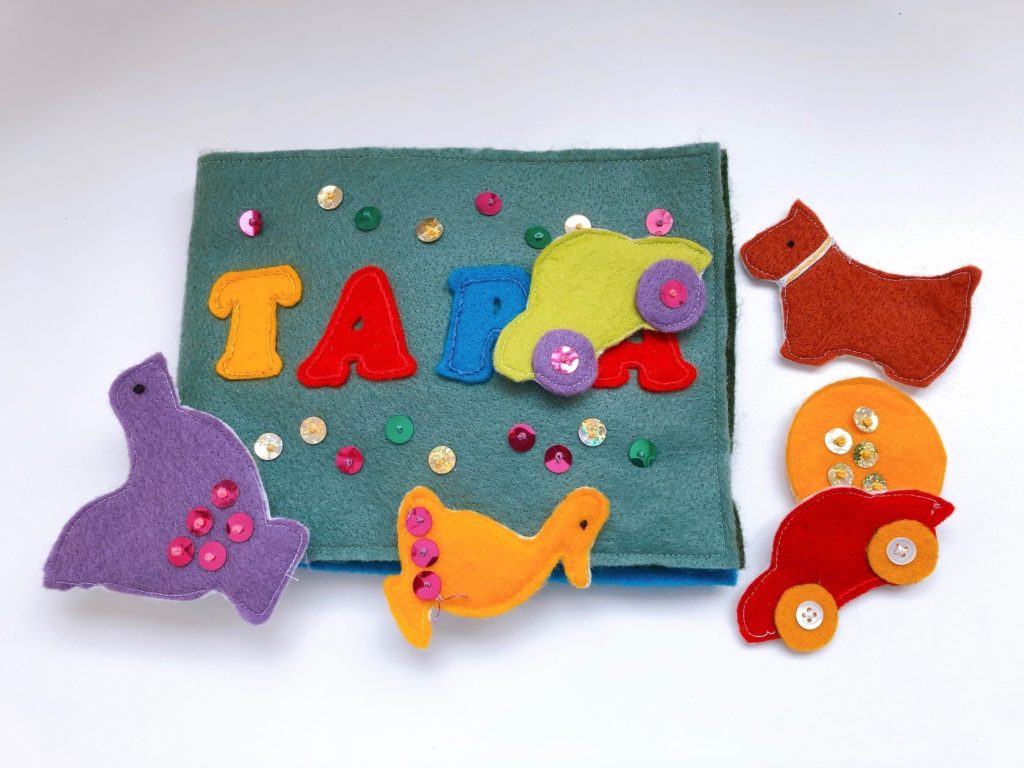
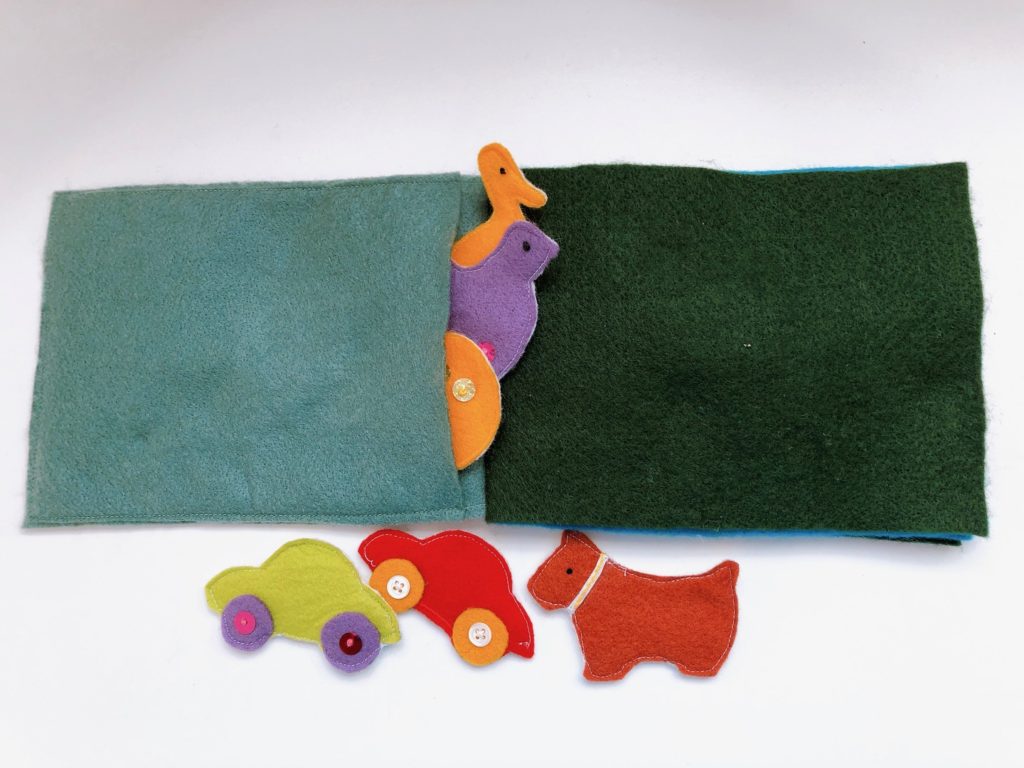
I fashioned the six-page book using three rectangles of felt stitched together in the center, with two storage pockets attached. For images to manipulate, I traced cookie cutters onto felt, and stitched Velcro tape to the backs so the cutouts would adhere to the book.
If you can do basic sewing with a sewing machine, this project isn’t very hard to do.
How to Create your Book
Materials Needed:
- 4 felt rectangles, each 16 inches X 6 inches, in different colors
- Additional felt for the cutouts
- Ruler
- Assorted cookie cutters
- Pencil
- Sharp scissors
- 5/8-inch-wide white Velcro tape
- Appliques, sequins, buttons, decorative patches, embroidery threat, and other trims
First, Make the Cover
To Decorate the Cover: Select 1 felt rectangle. Remember that the felt will be folded in half to make an 8- X 6-inch book so you want to decorate the right half of the rectangle.
You can decorate the cover with machine stitching, appliques, or patches. I traced the letters of the child’s name from a stencil onto colored felt and used an embroidery backstitch to secure the letters to the book cover. I also added sequins for sparkle.
For an easy project, make a custom board book for a baby.
To Make the Inside Pocket: Cut 1 of the remaining felt rectangles in half, crosswise, to form 2 rectangles, 8 inches by 6 inches. This will become the front and back pockets for holding the felt cutouts. Now trim each of the 2 rectangles by 1/2 inch on one short side. So, each rectangle is now 7 1/2 inches by 6 inches. (This is to allow clearance for the pocket opening.)
To Finish the Cover: Lay the decorated cover with decorated side face down on your work surface and pin 1 pocket piece, lining it up with the left outer edge of the rectangle. Pin the other pocket piece to the right outer edge of the rectangle. Now you have 2 pockets pinned with 1 inch of space in the middle of the book. Baste, then top stitch around the entire cover, 1/4-inch from the edge.
Next, Create the Book
Lay the cover page face down with pockets facing up, and stack the remaining 2 rectangles on top. Pin and baste the stack together, making sure the edges are evenly matched. Mark a perpendicular line down the center of the rectangle; it should be 8 inches from each outer edge. This will be the binding to hold the book together. Stitch on the line you’ve marked.
Finally, Make the Cutouts
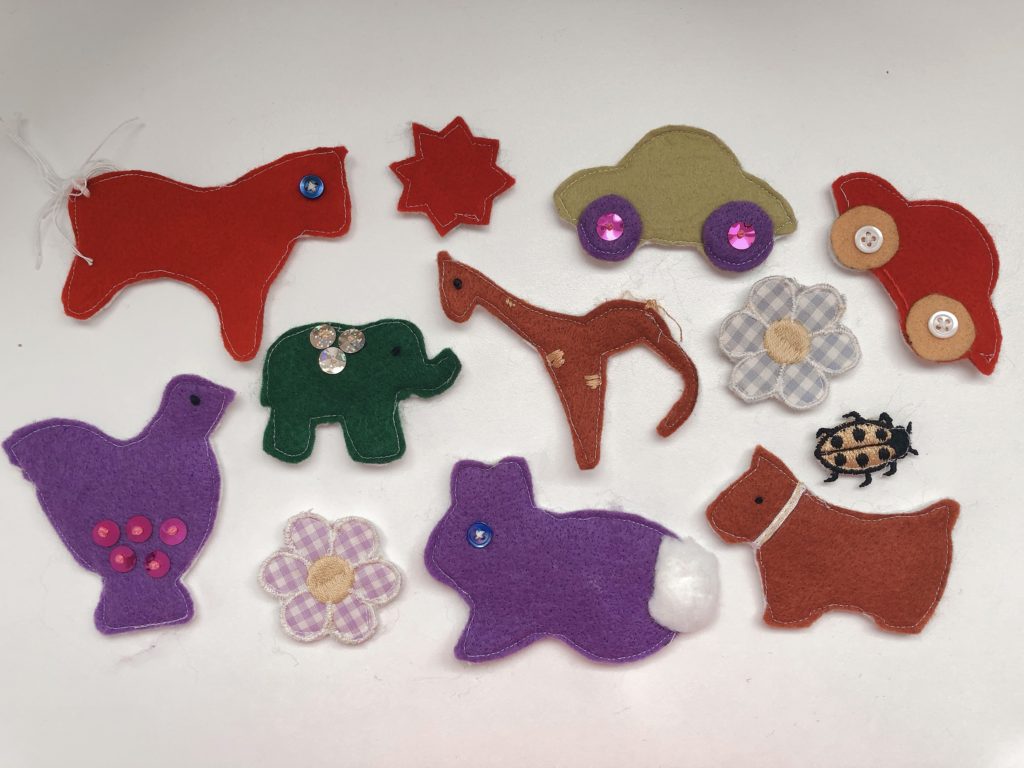
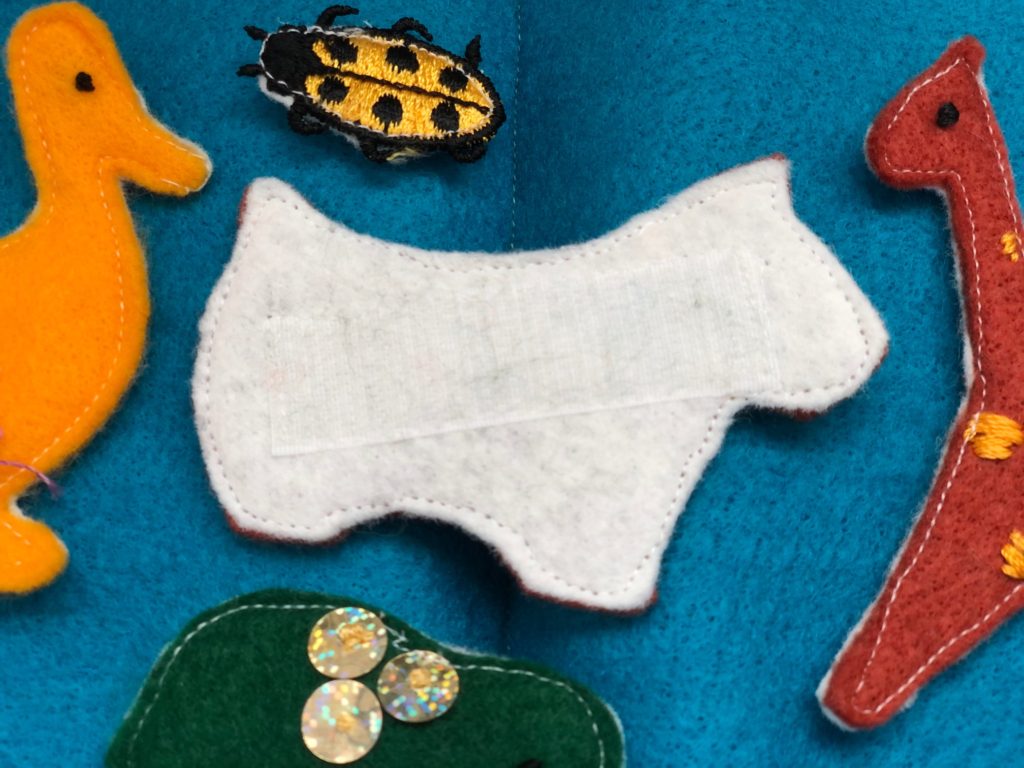
Trace simple shapes from cookie cutters onto felt. You will need to cut two of each shape: one as a backing (I used white felt for the backing).
First, cut a piece of Velcro tape a little shorter than the width of the cutout you are working with. Velcro tape consists of two strips stuck together. One strip is the hook and the other strip is the loop. You’ll only need the hook strip.
Next, test to be sure you have identified the hook strip by sticking it onto a piece of felt. If you have the loop side, it will not adhere. Now stitch the Velcro hook strip to the backing cutout with the hook side facing out.
Decorate the front of the cutout by stitching sequins, embroidering, sewing on buttons, and adding other touches. For a bunny’s tail, use a cotton ball. For a giraffe’s tail, attach strands of embroidery floss.
When the cutouts are decorated, pin, baste, and topstitch each cutout to its matching backing, so that the decorated side and the Velcro side are each facing out.
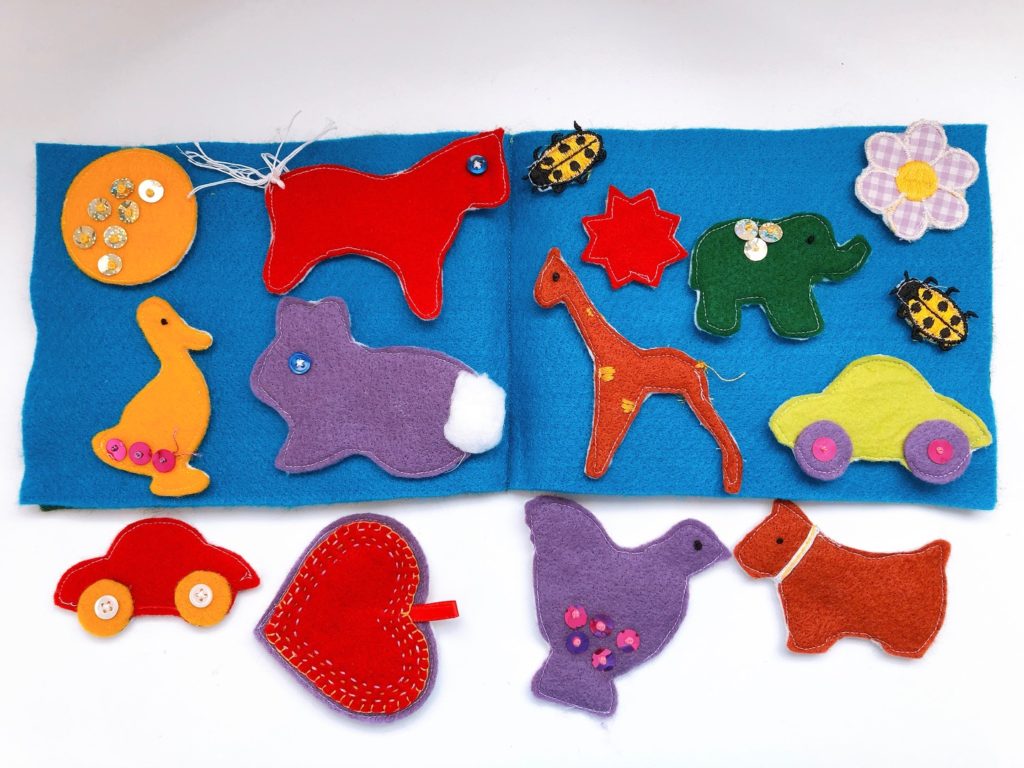
Now your book is complete. Pack the cutouts in each of the two pockets and your book is ready for gifting.
Sign up to Get Grandma’s Favorite Recipes–Free
Sign up here for my email newsletter. Every Wednesday, I’ll give you a new idea for an activity or insight to nurture the little ones in your life. And once you subscribe, I’ll send you a link so you can download your set of quick and easy recipes as my thanks to you.