Toilet Paper Roll Crafts: A DIY Gift for Dad
I returned yesterday from a month-long vacation in Japan and I’ve yet to see the grandkids. Being away from home for so long and out of touch with the calendar, I thought Father’s Day was this upcoming weekend.
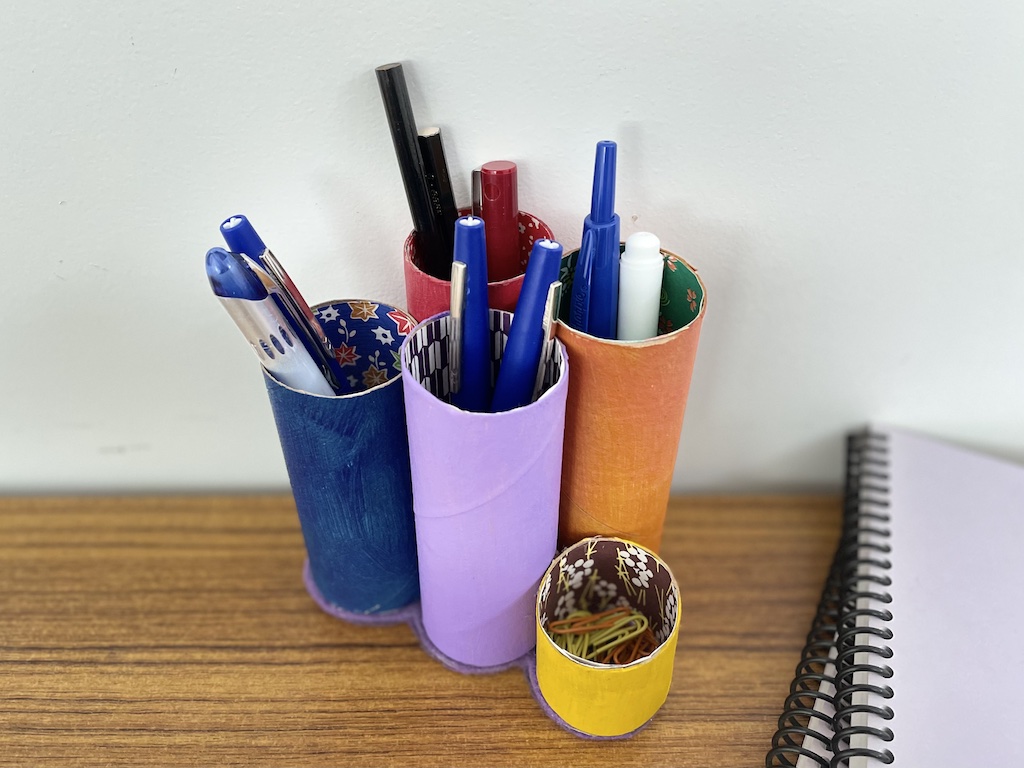
So, I worked out a sample gift idea using toilet paper rolls. This desk caddy will be crafted as a joint gift, with each child decorating a few rolls. I expected the kids could made this gift for dad over the weekend, in time for (premature) Father’s Day.
A Gift for Dad: the Basic Idea
Here’s the basic idea: Paint toilet paper rolls and glue them together with a hot glue gun. Then, glue the bottom of the roll to a cardboard base.
The key to a successful project is to ensure that all the rolls stand up straight when glued together or your desk caddy will be lopsided.
There are many variations to this gift for dad, depending on materials you have on hand and time available:
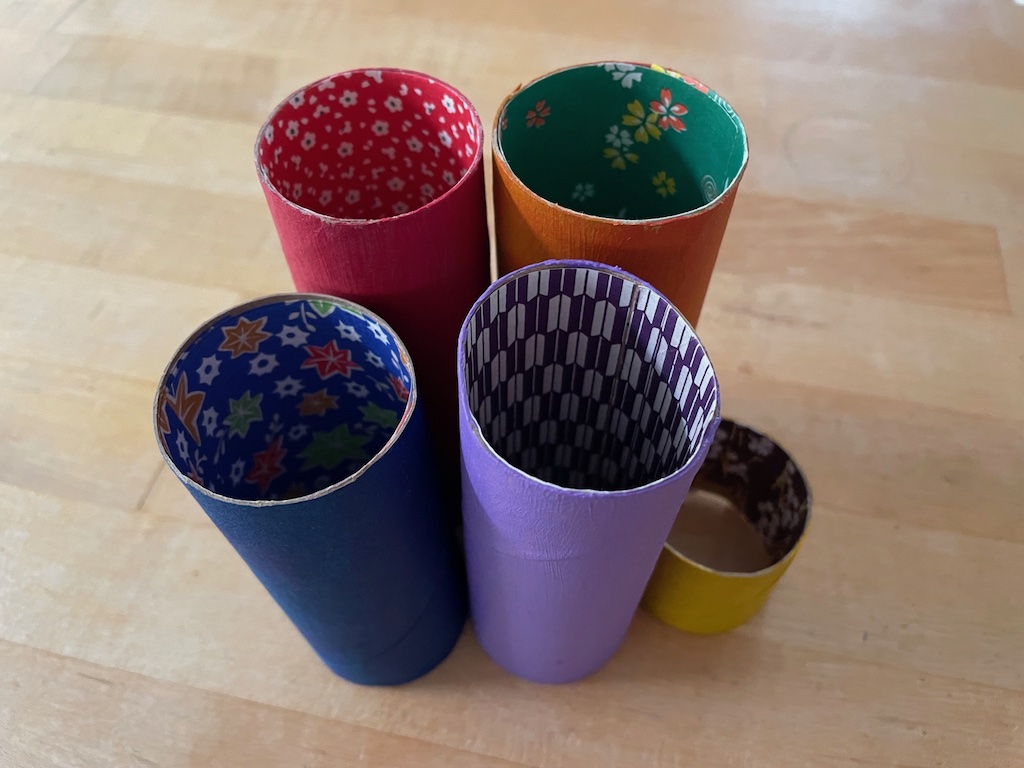
- Instead of painting the rolls, you can glue colored or patterned paper on the outside.
- If you are painting, an origami paper liner will hide any paint splotches on the inside of your rolls. But you can skip this step. Nobody will see much of the inside when the caddy is filled, anyway.
- To decorate the rolls, consider trims like rickrack, “jewels,” sequins, washi tape, stickers, felt markers, flat buttons, paper punch shapes, and photographs.
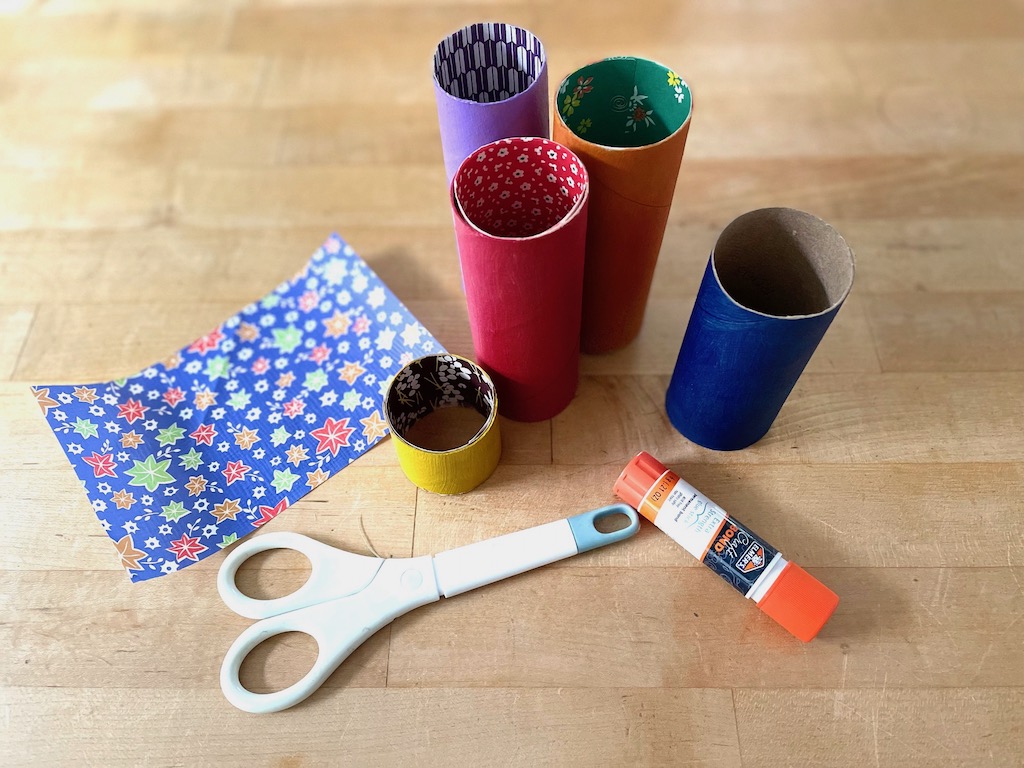
Materials Needed:
- 4 or more empty toilet paper rolls or buy craft rolls
- Acrylic paint or paper to cover the outside of the rolls
- Origami paper or other colored or patterned paper to line the inside (optional)
- Cardboard for the base of the caddy
- Felt to line the base of the caddy (optional)
- Glue stick
- White school glue (such as Elmer’s)
Tools Needed
- Scissors
- Pencil
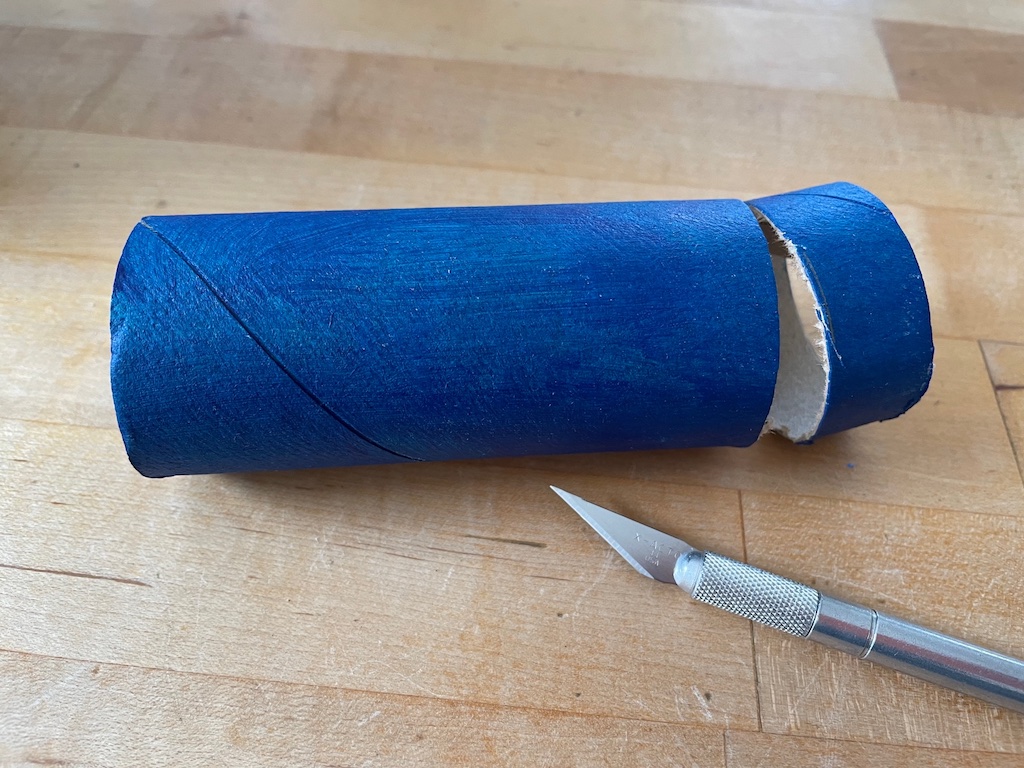
- X-acto knife
- Hot glue gun
How to Make the Desk Caddy
- First, paint the rolls and dry completely. (If you’re a scrap saver like me, you’ll probably have some pre-painted rolls already.)
- Cut the rolls to the desired heights using an X-acto knife. This should be done by an adult.
- Now cut origami paper or other paper to fit the inside of the tube and glue in place with a glue stick. This liner is optional.
4. Using a glue gun, glue the rolls together. This should be done by an adult or if using a low-temperature glue gun, by an older child under adult supervision. To make sure the rolls are standing straight, work on a flat surface.
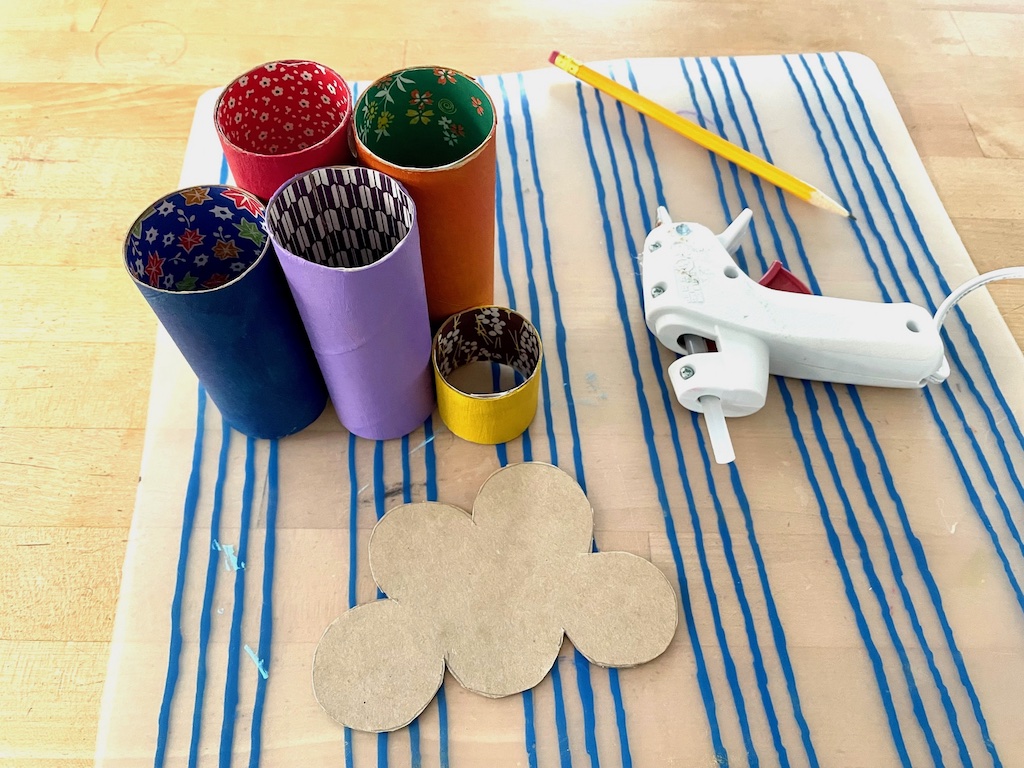
5. Trace the base of your desk caddy onto cardboard and cut it out. Here, you can experiment with how best to glue the base to the caddy. I found that it was hard to use a glue gun because the glue from my low-temperature glue gun dried up too quickly.
6. I ended up cutting two pieces of felt to the shape of the caddy and gluing one to the top of the cardboard and the second one to the underside using white school glue. Then I put a line of glue around the entire edge of the felt, and set the toilet paper rolls onto the glue, matching the edges.
The felt absorbs the glue and helps to hold the rolls in place. You could skip the felt, if you don’t have any. In either case, hold the rolls over the base with a little pressure, until the white school glue begins to get tacky, to ensure the glue adheres to the base.
Adult Supervision
This project is a bit finicky, and will require some adult supervision, both for cutting the rolls and attaching the rolls to the base.
Now that I know we have more than a week until Father’s Day, we have plenty of time to complete the project. But if you find yourself in a time crunch–as I expected to be in originally–you can streamline this activity.
Simply have all the materials for the kids ready: assorted painted toilet paper rolls, acrylic paints and felt markers, origami paper, and decorative trims.
If you run out of time, you can glue the decorated tubes together yourself and attach to a base for the kids. It will still be their artistic creation.
Sign Up!
Don’t forget to sign up for my email newsletter. Every Wednesday, I’ll give you a new idea for an activity or insight to nurture the little ones in your life. In a few weeks, we’ll be starting the third year of Camp Grandma with new fun and educational activities for the grandkids.