It’s Easy to Make Your Own Banana Pops
I was looking for a food project for five-year-old Little N when I remembered those frozen banana pops we made as kids in Hawaii. You may have made them, too. You simply insert a stick into a peeled banana and freeze, for a healthy banana “popsicle.”
Better with Chocolate
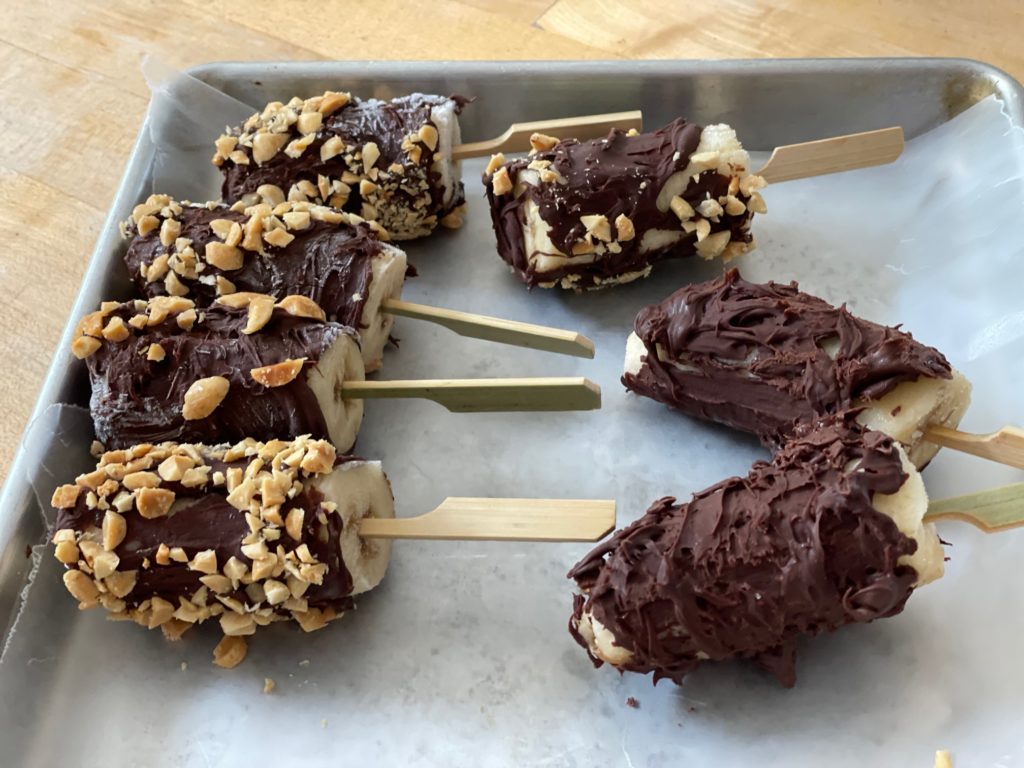
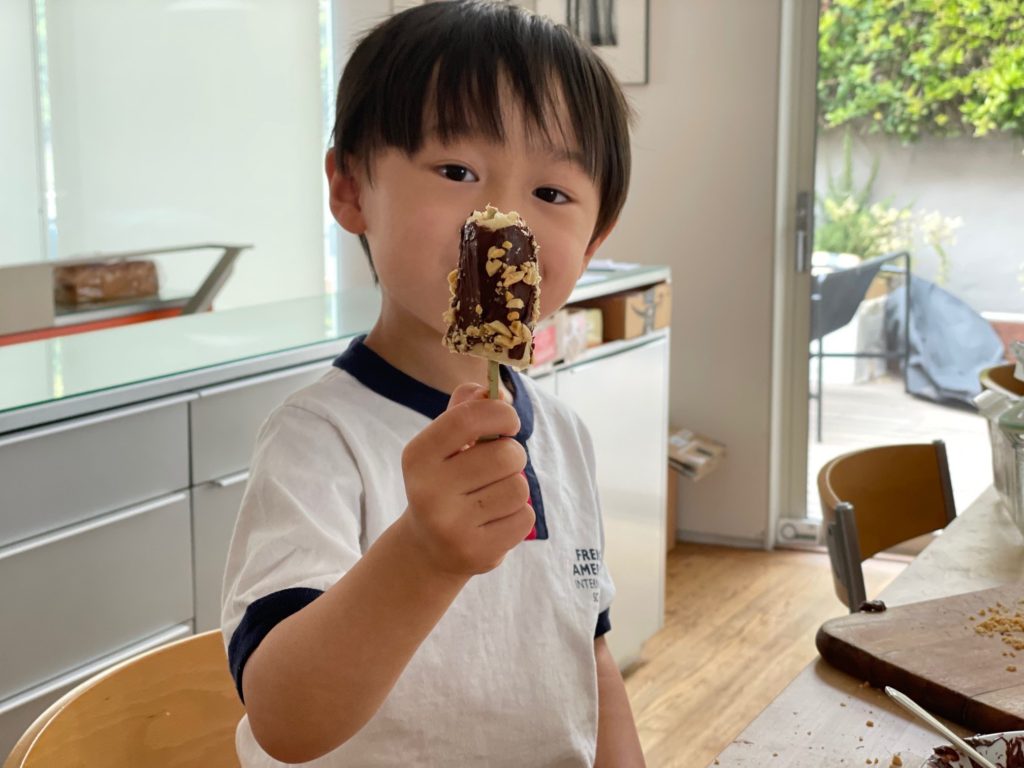
But what I wanted was something with a few more steps that Little N could master. So we made chocolate-covered banana pops coated in chopped salted peanuts. After rewarding my little chef with one to eat on the spot, I froze the rest for our Friday night family dinner, where Little N could win accolades.
This project takes two days, since the bananas need to be frozen solid. If you have just one day with your grandchild, you can prep and freeze the bananas in advance; spreading the chocolate on the bananas is the best part, anyway!
Day I: Prepare the Bananas
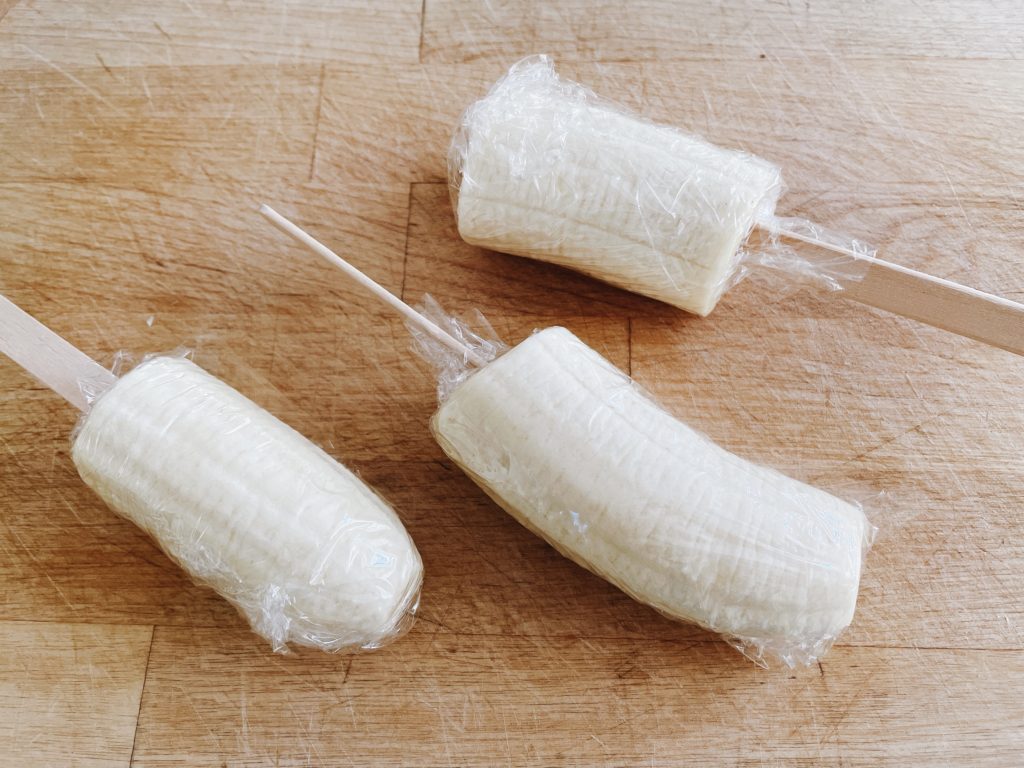
Step 1: Little N used a table knife to cut bananas into thirds. The smaller size would make it easier for a five-year-old to handle, and also would provide just enough of a serving to satisfy a child’s appetite for sweets.
Step 2: Little N inserted a stick into each banana chunk, then wrapped each banana in plastic wrap to cover completely.
Step 3: We put the bananas on a quarter sheet pan to freeze overnight.
Day II: Coating in Chocolate

Step 4: I melted chocolate chips in my microwave oven (see how-to notes below) and handed it to Little N to spread the chocolate on bananas with a small spatula (or use a table knife), one section at a time. Just be careful—that bowl of microwaved, melted chocolate will be hot at the start. Then he dipped each chocolate-covered section immediately in a small plate of chopped salted peanuts.
Step 5: After handing Little N a banana pop as a reward for his work, I stored the rest in an airtight container and returned them to the freezer for our family to enjoy later.
The recipe below is for one banana, to give you an idea of general quantities. Just multiply quantities for the number of bananas you chose to make. (A good math project for older children). You may need more chocolate chips and nuts, so be prepared with extras of everything.
Chocolate-Covered Banana Pops
- 1 ripe but firm banana
- 3 wooden popsicle sticks or wide, flat bamboo BBQ skewers (snap off pointed end for safety)
- 2 tablespoons chopped, roasted and salted peanuts
- 1/4 cup good-quality chocolate chips (see notes below)
Peel banana and cut into thirds with a table knife. Insert a popsicle stick lengthwise, into the cut side of each banana chunk. Wrap each chunk in plastic wrap. Lay bananas on a small baking sheet and freeze six hours or overnight.
To make the pops, put peanuts on a shallow plate. Line a small baking sheet with waxed paper.
Melt chocolate chips in a microwave oven. To microwave, put chips in a wide microwave-safe bowl and microwave 30 seconds at a time, stirring with a fork after each time. Chocolate chips are designed to hold their shape when heated, so unless you stir, you won’t know when chips are melting. Stir and continue to microwave in 30-second intervals, until chocolate is smooth and completely melted.
Remove bananas from the freezer; unwrap the plastic wrap. Use a spatula or table knife to spread chocolate along the length of the banana in a stripe about 1-inch wide. Holding the banana over the plate of nuts, immediately dip the chocolate section into the nuts or sprinkle with nuts. The chocolate will harden almost immediately when the melted chocolate comes in contact with the frozen banana, so you have to work fast. Lay each chocolate-coated banana on the wax-paper-lined baking sheet.
NOTE: Just be very careful when working with children—that bowl of microwaved, melted chocolate will be hot at the start. Teach them how to spread the chocolate without touching the bowl.
Continue spreading the chocolate and sprinkling the nuts, section by section, until the banana is covered. If the chocolate becomes too thick to spread, microwave it again to melt; do not overheat.
Repeat with remaining bananas and eat immediately, or return bananas to the freezer in an airtight container. If you must stack the bananas, put waxed paper between layers.
Makes 3 banana pops; double or triple as needed.

Notes:
- Use good-quality chocolate chips. When we tried a house brand, the chocolate was viscous and spread in craggy stripes; when we used chips with a higher cacao content (Ghirardelli bittersweet, 60 percent cacao chips), the texture was thinner and smoother and spread on the banana more easily.
- Water is the enemy of chocolate; it will make it seize up. So, make sure banana chunks are well-frozen; if they are not frozen hard, the hot chocolate might cause condensation to form on the partially frozen banana, making the chocolate harder to adhere. If there are ice crystals on the banana, scrape off with a table knife before dipping.
- If the child is working too slowly, return some of the bananas to the freezer; take out a few at a time.
- The amounts of chocolate chips and nuts are a starting point; depending on the size of the banana and how thickly the child spreads the chocolate, you may need more.
- If children are allergic to nuts, or just don’t like them, you can use sprinkles instead.
- If the chocolate hardens up before the child can add the nuts, just spread a little more chocolate over the chocolate shell and add nuts immediately.
- Depending on the child, this can be a messy project so be prepared to protect surfaces and kids’ clothes.
- When eating these pops, provide a small plate. As you bite into the pops, some of the chocolate will likely fall off the banana.
Other Things to Do with Bananas
If bananas are ripening too quickly for your family to eat, you can freeze them in their skins. Use them later for making banana bread or for other baked goods where mushy bananas would work.
Here are other ways to use bananas.
- Banana “ice cream”: This is a good idea for very ripe bananas. Simply freeze small chunks of ripe banana until hard-frozen, about six hours or overnight; pulverize in a blender until smooth. Eat immediately, or pack into a container and freeze until firm.
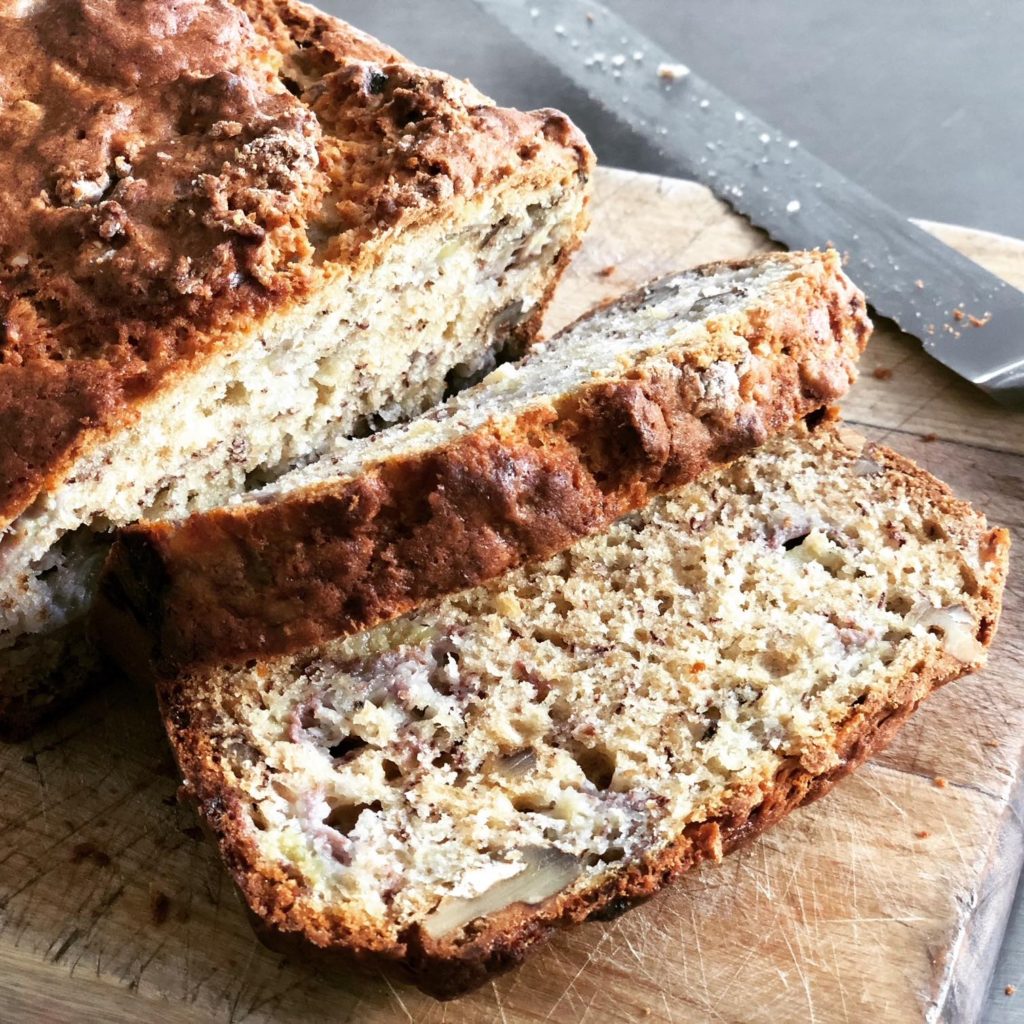
- Banana bread: Try My Favorite Banana Bread recipe. I have made this bread for years, since we lived in Hawaii, and we still love it.
- Fried bananas: My mom used to cook ripe but firm whole bananas with butter in a skillet over low heat, then she’d sprinkle brown sugar on the bananas and continue to cook, turning the bananas, until the sugar began to caramelize. We used to have this for breakfast, but it would make a good dessert with ice cream.
.
Don’t forget to sign up for my email newsletter! Every Wednesday, I’ll give you a new idea for an activity or insight to nurture the little ones in your life. Come visit!