How to Make a Cookie Christmas Centerpiece
Every year, I take great delight in creating the Christmas centerpiece. Last year, I made “gingerbread” cookie trees.
Not only was the Christmas centerpiece festive. The grandkids were invited to pluck off the cookies to eat them for dessert!

How I Designed the Christmas Centerpiece
I planned to build the cookie trees on a Styrofoam cone base. For sanitation, I wrapped the cones with clingy plastic wrap–I used the Kirkland brand from Costco. Another option is Glad Press’n Seal cling film. Unless the plastic wrap seals tightly, the weight of the cookies will pull the wrap off the cone.
Once each Styrofoam cone base was securely covered, I simply slathered it with icing and attached the cookies.
But there’s a bit more to this….

Prepping the Centerpiece
Before you construct the centerpiece, here are a few good things to know:
How to Bake the Cookies
My grandkids don’t like gingerbread so I made Chocolate Cutout Cookies that resemble gingerbread.
Larger “gingerbread” men need to be shaped to fit the curvature of the Styrofoam cone; most of the smaller cookies can be baked flat.
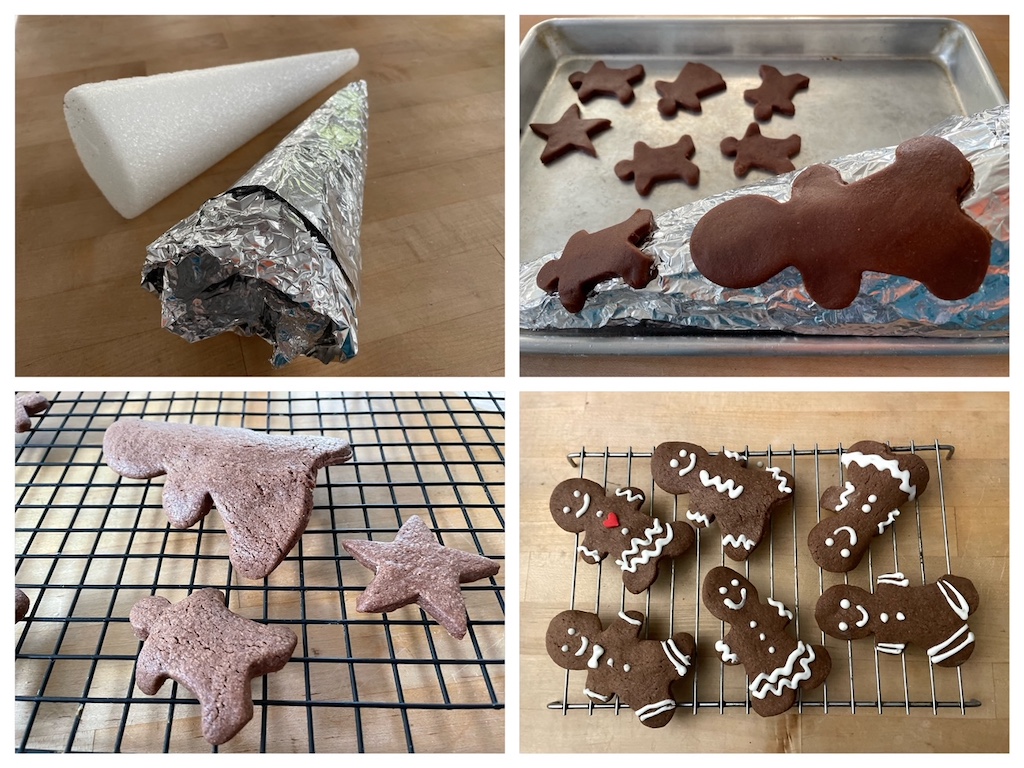
- Step 1: Make the molds. To do this, wrap heavy-duty aluminum foil around a Styrofoam cone; remove Styrofoam, and stuff the cavity loosely with crumpled foil so it holds its shape. (Don’t put Styrofoam in the oven; heat can release harmful chemicals.)
- Step 2: Roll out and cut the cookies. Drape the larger ones on the foil mold and set on a baking sheet. I used a recipe that didn’t require greasing.
- Step 3: Bake the cookies and cool. You can’t bake more than a few cookies at a time on the mold. Cool cookies on the mold until firm to retain their curved shape. Bake the smaller cookies flat and cool on a wire rack.
- Step 4: Pipe icing. Pipe the faces and clothes with white icing.

Assemble the Christmas Centerpiece
Materials Needed
- Styrofoam cones
- Clingy plastic wrap (see note above)
- 1 to 3 candy canes as a topper for each tree (about 3.5 inches tall)
- Icing (I used Lemon Royal Icing); any stiff icing will do
- Pre-shaped and baked cookies (I used Chocolate Cutout Cookies)
- Small red and green candies (such as mini M&Ms)
- Ramekins or other small bowls with flat bottoms to use as the base for each tree
- Small candy canes to make a candy cane tree (optional)
- Red candy heart cookie decorations (optional)
Tools Needed
- Wooden chopstick or metal skewer
- Small offset spatula to spread the icing
Method
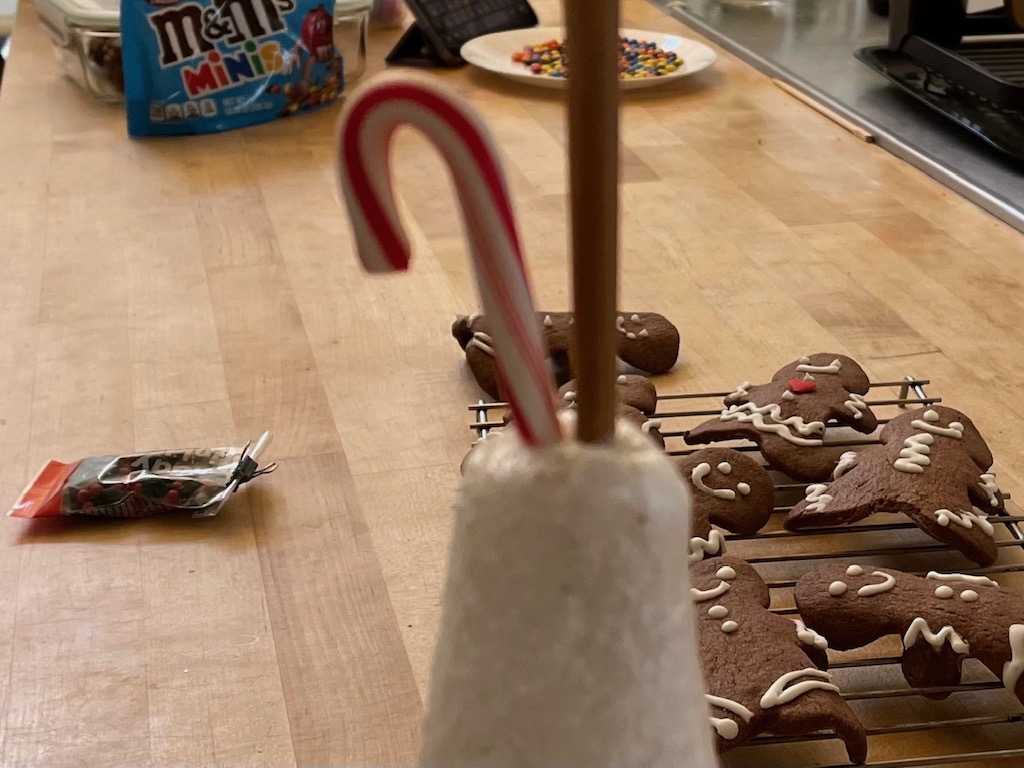
- Step 1: Cover the Styrofoam cones with plastic wrap and secure tightly.
- Step 2: Using a wooden chopstick or a metal skewer, make one to three small holes at the top of the cone; then insert a candy cane in each hole.
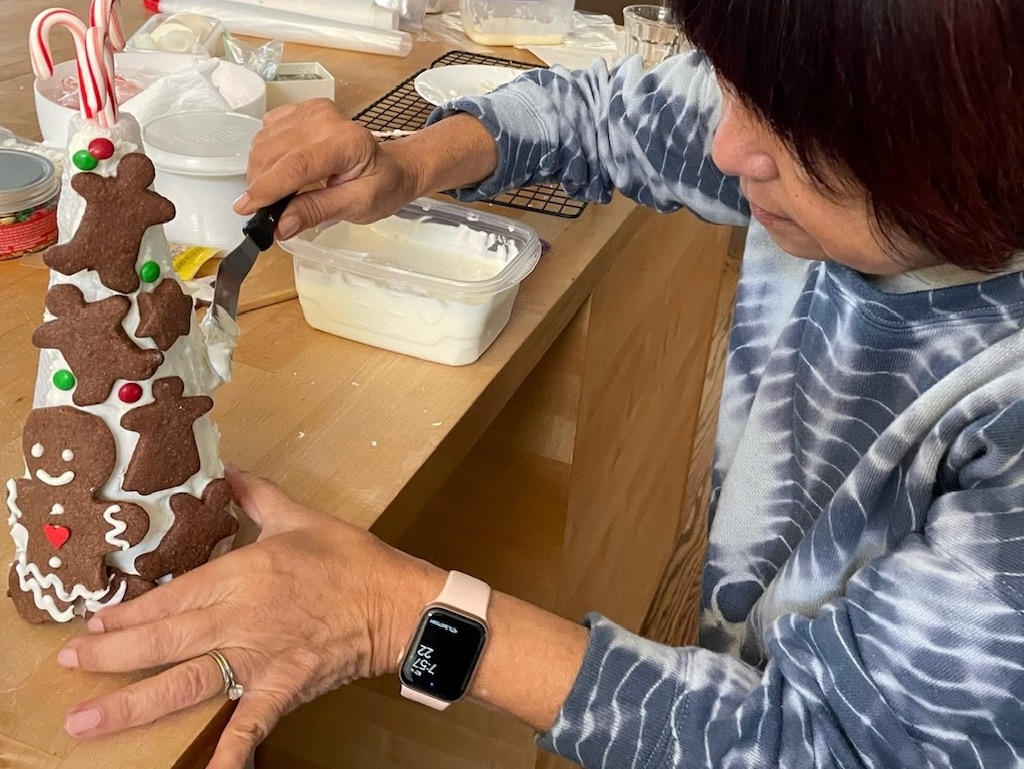
- Step 3: Spread the icing on the cone, a section at a time, and secure the cookies to the cone, section by section. Fill in spaces with M&Ms.
- Step 4: Allow the icing to dry completely. Then turn ramekin upside down and spread with icing. Position the styrofoam cone on the icing and allow to dry.
Here’s another fun Christmas tree table centerpiece.
Notes:
- The small gingerbread shapes baked flat, will stick out beyond the cone closer to the top where the cone narrows. I’m fine with that. If you want the cookies to hug the cone, you’ll have to bake the small cookies on your foil mold.
- My cookie recipe didn’t require greasing. If yours does, I expect you’ll need to grease the cone before baking cookies on it to prevent sticking.
- For the candy cane version, cover the iced cone with small candy canes. Intersperse with red hearts or mini M&Ms.
- Instead of gingerbread people, you could bake small spritz cookies in holiday shapes and cover the Styrofoam cone with them.

To Finish the Centerpiece
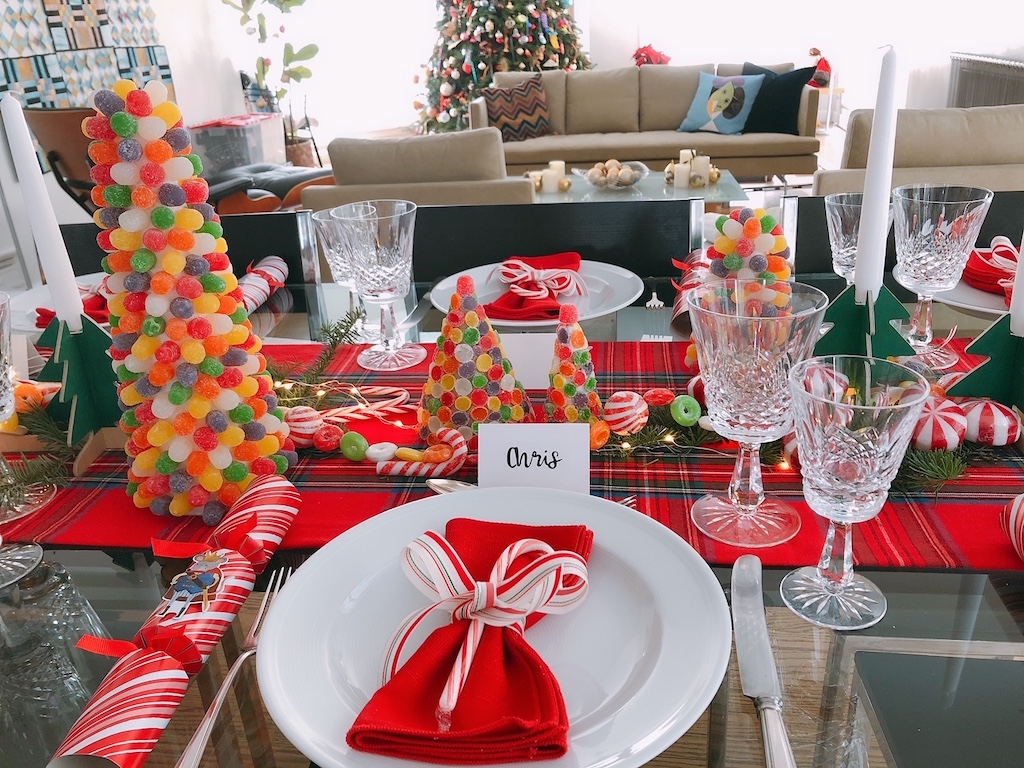
I laid down a “runner” of Christmas tree sprigs–discarded branches that I picked up from a Christmas tree lot, washed, dried, and trimmed. Then I added tall candles and tea lights. Next, glittery gold balls, and a string of battery-operated fairy lights along the length of the “runner” added sparkle.
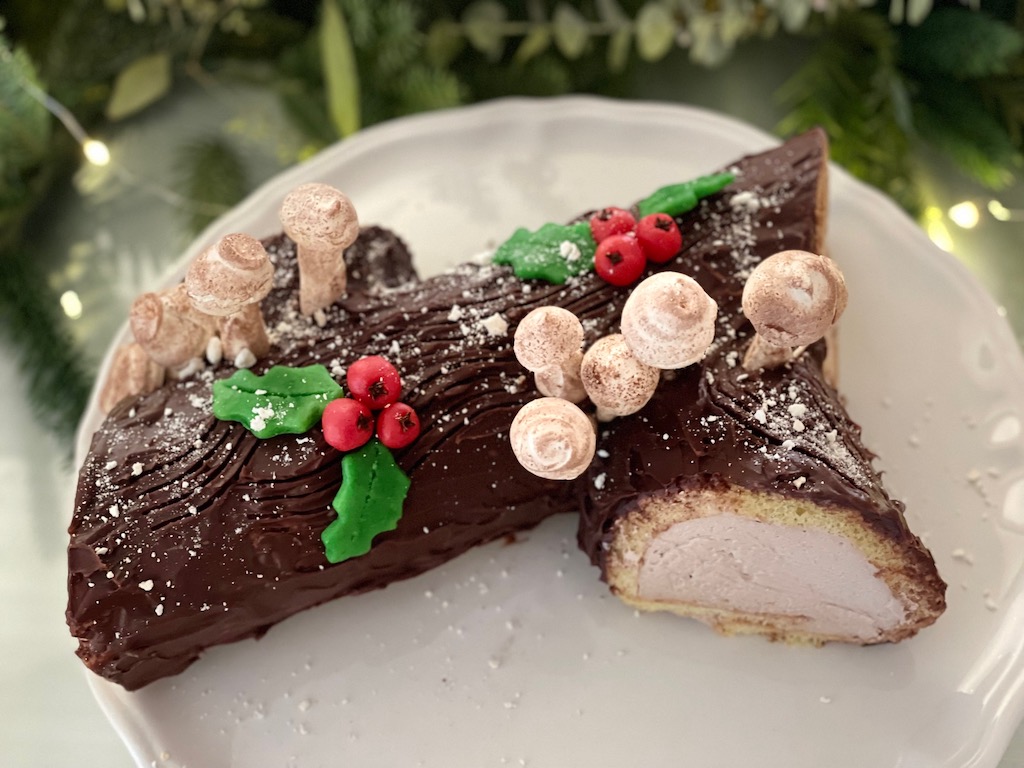
While the kids headed straight for the edible centerpieces, the adults enjoyed Bûche de Nöel, a yule log cake, that I make every year for Christmas Eve dinner.
Next week, we’ll work on more holiday projects.
Sign Up
Don’t forget to sign up for my email newsletter. Every Wednesday, I’ll give you a new idea for an activity or insight to nurture the little ones in your life.