DIY Valentines Say Love to Mom and Dad
I used to have a family Valentine’s Day dinner on the Friday closest to February 14. Miss T and I would make DIY valentines, bake heart-shaped cookies, and we’d all sit down to dinner at a specially decorated table.
Since we are distanced, most Valentine’s Day projects have been curtailed. The one we can maintain is making valentines–but this year, we did it remotely, via FaceTime.
About Our Valentines
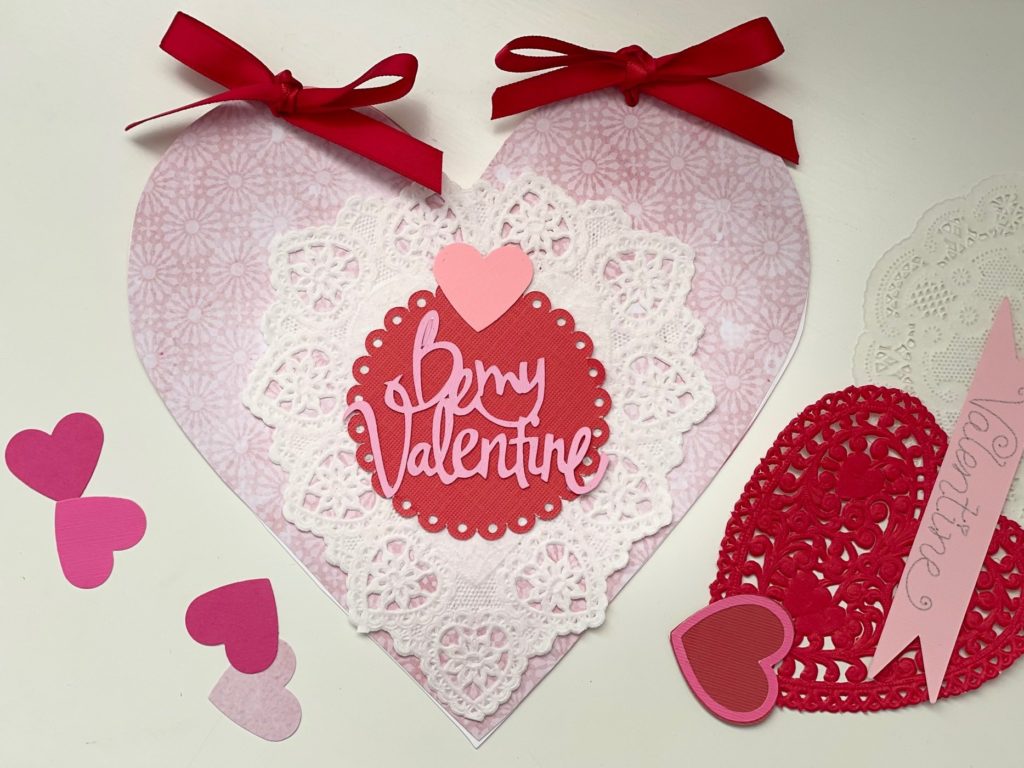
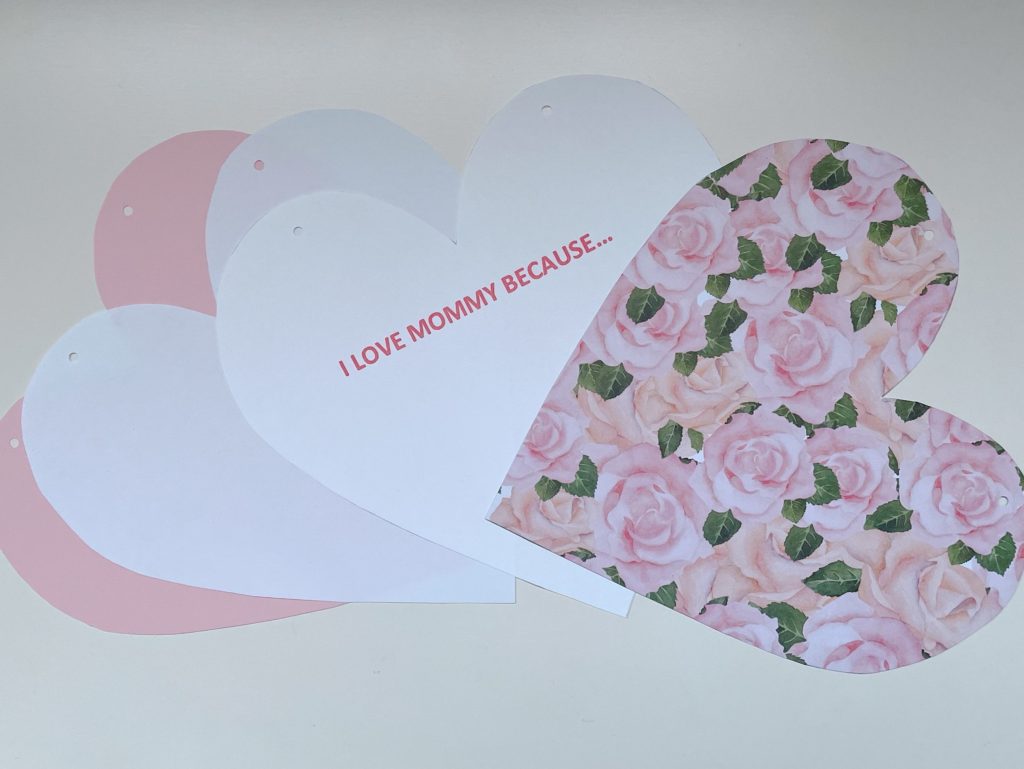
This year’s valentines are made with two cardstock hearts (a printed cover and solid color back cover). Between the covers are two white hearts cut from regular printer paper.
On the first, the child writes their sentiment of love; the second sheet is for an illustration.
The card is hole-punched at the top in two places and ribbon is threaded through to hold the Valentine “book” together.
The heart measures roughly 7 inches by 7 inches.
Materials Needed for One Card
- 2 sheets basic white printer paper
- Glue stick
- Cardboard to make a pattern, at least 7 X 7 inches
- Pencil
- 1 sheet printed cardstock, at least 7 X 7 inches
- 1 sheet solid color cardstock to coordinate with printed cardstock, at least 7 X 7 inches
- 30 inches of narrow ribbon (3/8-inch wide)
- Paper doilies, sentiments, hearts, stick-on “jewels,” Valentine stickers, etc., to decorate
- Color pencils, color pens, markers, or crayons for the child to write a message and draw a picture
Tools Needed
- Sharp scissors
- Single-hole punch
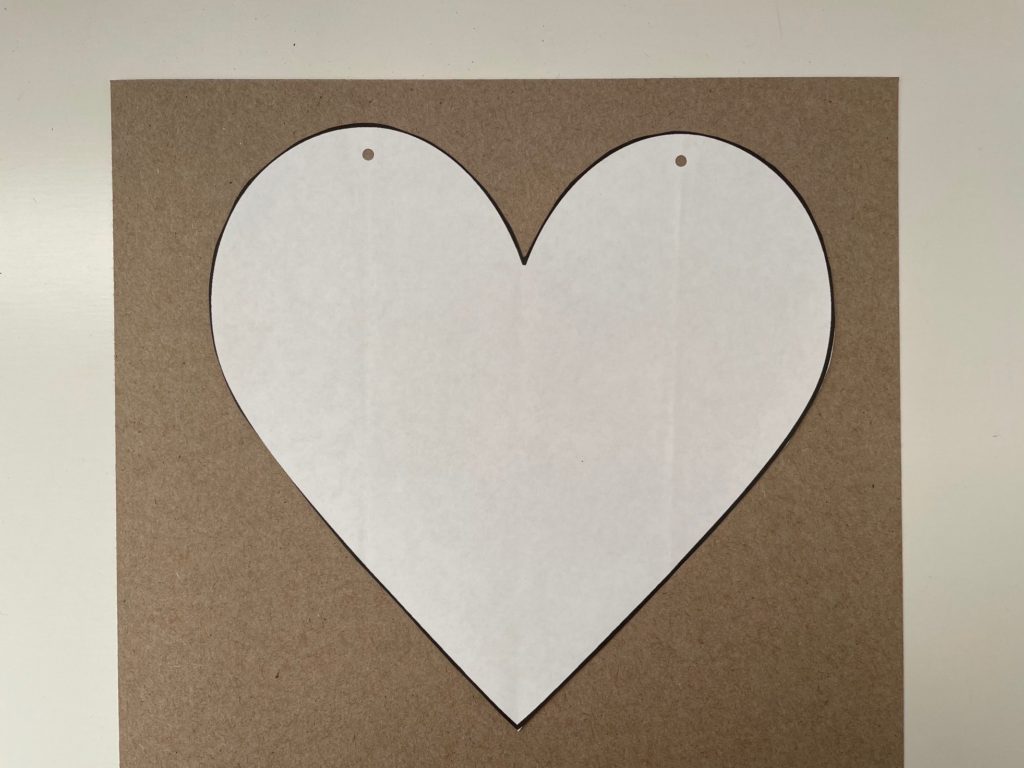
DIY Valentines, Step 1: Make a Pattern
I used a template from First Palette to print a large heart. Cut out the heart. Determine where the holes will be to thread the ribbon. (To do this, fold the heart in half lengthwise, then fold again, lengthwise. That second fold should mark the location for the holes on each side. Using a hole punch, punch out the holes.
Now use a glue stick to glue the paper heart onto cardboard. Cut out the heart shape and punch the holes out of the cardboard. This is your pattern.
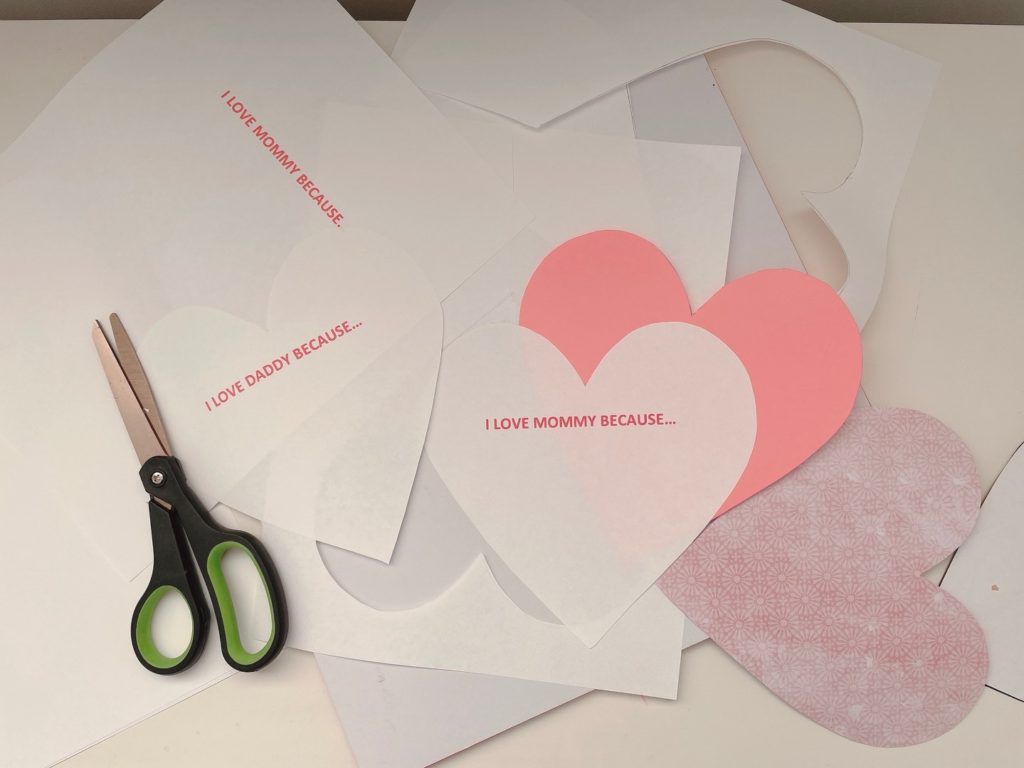
DIY Valentines, Step 2: Print the Sentiment
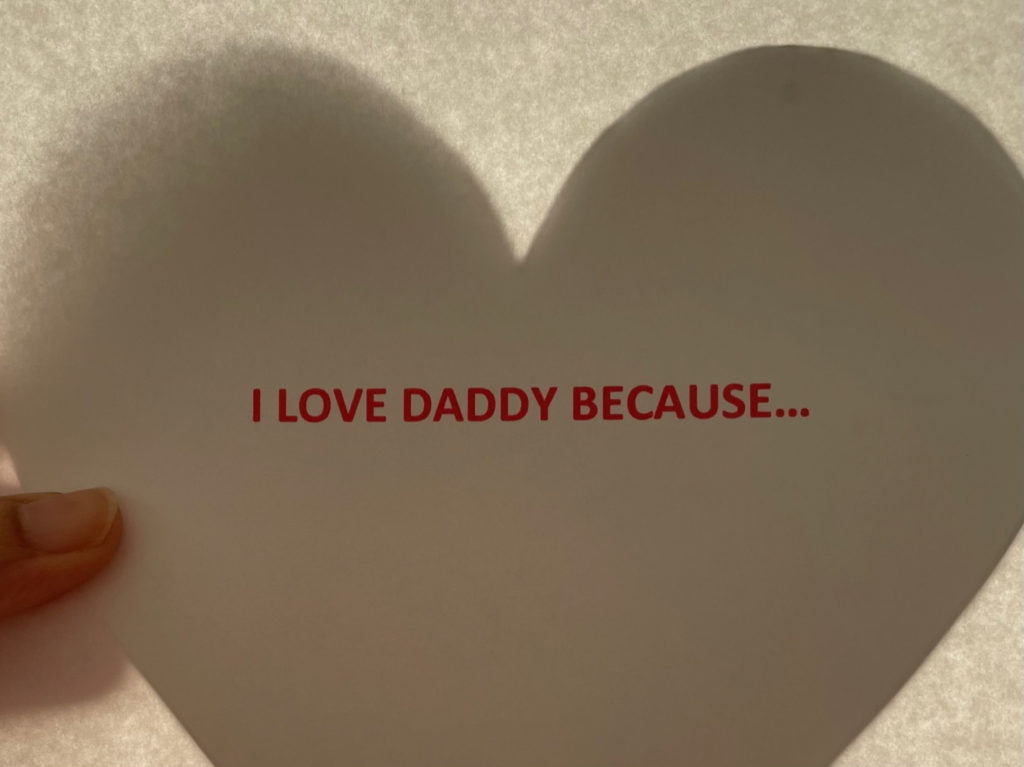
Open your word processing software such as Microsoft Word, and scroll down to about 1/3 of the page. I used 24-point type, boldface caps and red ink, and centered the type to write, “I LOVE DADDY BECAUSE” and printed the page. Then, “I LOVE MOMMY BECAUSE” and printed that page. Set aside.
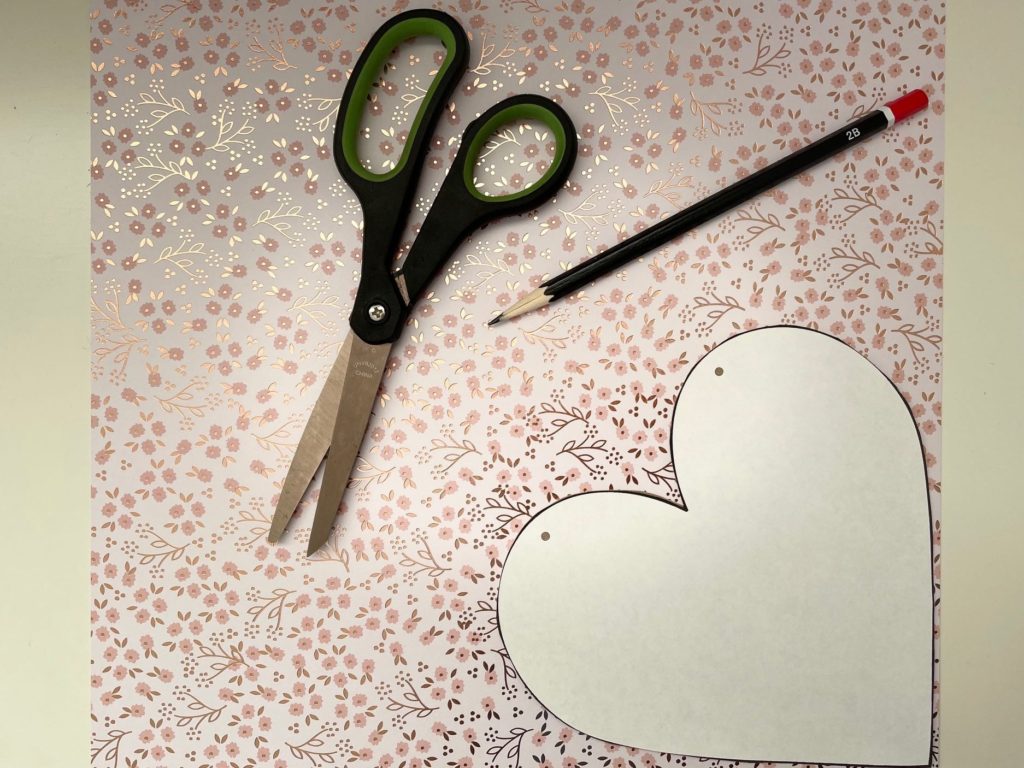
DIY Valentines, Step 3: Cutting the Hearts
Lay the cardboard heart pattern on the patterned cardstock, trace lightly with a pencil and cut out the cardstock. Line up the pattern with the cardstock and punch holes at the top.
Repeat for solid cardstock and blank printer paper (the one that the child will draw on).
For the heart with words, I put the cardboard heart pattern under the paper and held it up to the light. Using the shadow of the heart on the paper, I manipulated the cardboard pattern so the words would be where I wanted them, then traced the heart shape, cut it out, and punched the holes.
DIY Valentines, Step 4: Decorating the Hearts
Now the child can decorate the patterned heart with glue sticks to affix the decorations. Next, have them finish the sentence, “I love Mommy/Daddy because” by writing their answer. Finally, have them draw an illustration on the blank white heart.
DIY Valentines, Step 5: Assembly
To assemble the valentine, have the child cut ribbon in half. Show them how to thread the ribbon through the front decorated cover heart, then through the white sentiment heart, then the illustrated heart, and finally, through the solid color cardstock heart. They should have about equal lengths of ribbon on the front of the card and the back of the card.
Show the child how to tie a loose knot and test to make sure the knot is loose enough that you can flip the cover heart up to see the inside sentiment heart. Adjust knot as needed and make a bow. Repeat on second side. Trim tails of the ribbon.

How to Package a Valentine Kit
As in all things, packing everything attractively is more likely to entice your grandchild and make the project more appealing.
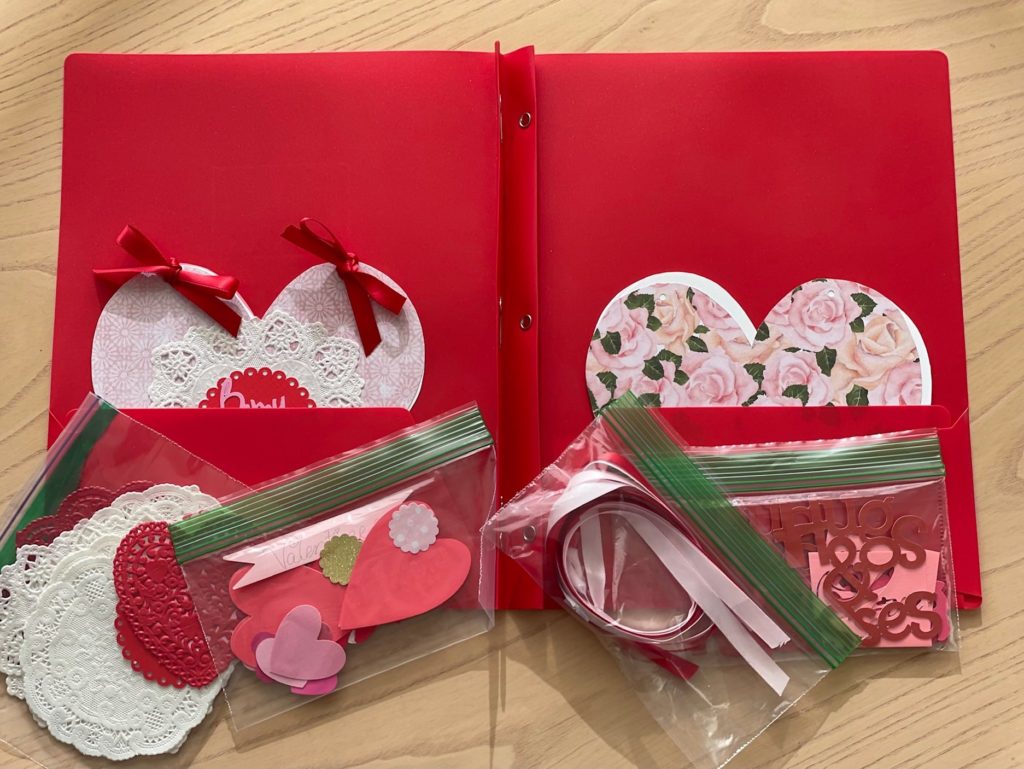
For this project, I used a two-pocket, three-pronged red folder. I put all the embellishments in different sandwich or snack bags–one for hearts, one for doilies, and so forth. The sandwich bags will all go into a plastic sheet protector and held in place with the prongs of the folder.
Tips:
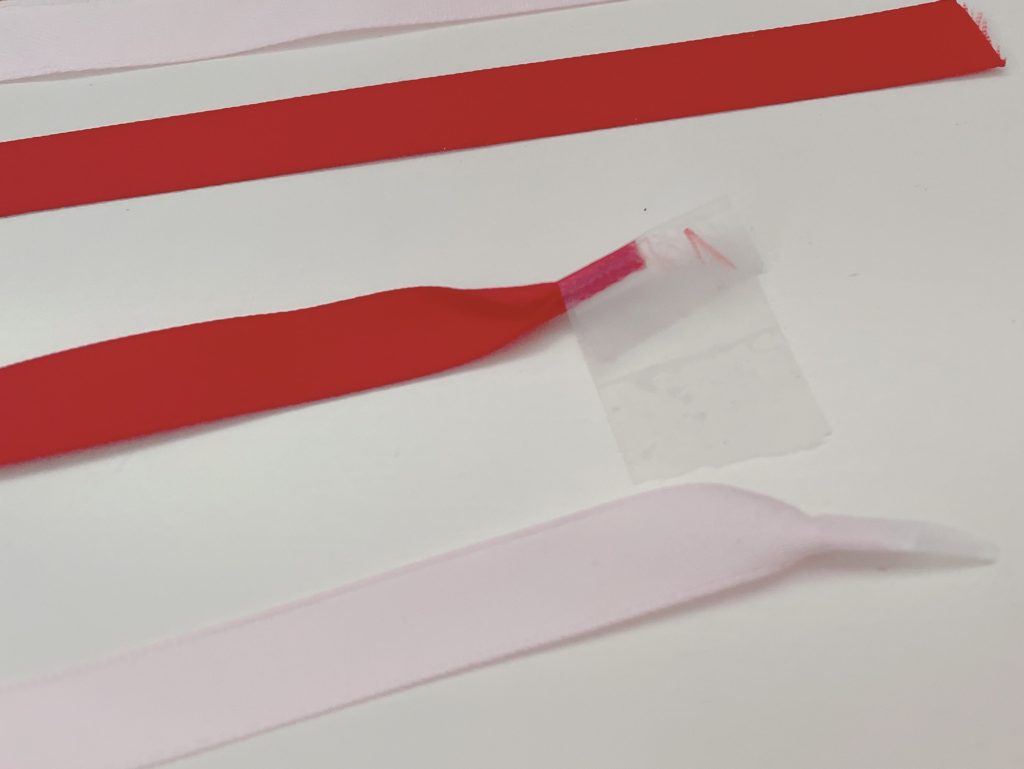
- If the ribbon is too thick to go through the punched holes, roll the edge lengthwise as tightly as you can and wrap with adhesive tape. Snip off excess tape and trim edge to a fine point.
- If you own a Cricut cutting machine, you can use the free heart pattern and enlarge it to cut out your hearts.
- To make this project easier, skip printing out the words and let the child handwrite them on a blank heart instead.
- If the child has a short attention span, they can make just one shared card for mommy and daddy, using one white heart page for each parent.
- It’s always ideal to make a sample of the finished Valentine that the child can refer to while working.
- Try to make the project yourself while working with the child instead of simply supervising. The companionability comes from working side-by-side–even if it’s remotely. Ask the child their advice, such as which heart they think is best for your project, comment on what they are doing, and so forth. This is where the bonding opportunity comes in.
- These cards are also great for Mother’s Day or Father’s Day.
.
Don’t forget to sign up for my email newsletter! Every Wednesday, I’ll give you a new idea for an activity or insight to nurture the little ones in your life. Come visit!
what fun! Beautifully done. I’m saving this for my little girl in about 6 years 🙂
I’m so glad you liked today’s post, Rosemary! And so happy that one day, you might be doing this activity with your own little girl. Thank you for your comment.
Great project, Sandy! She’s growing up so fast- it’s wonderful that you’ve managed to stay so close, despite covid precautions! She will think of you every time she does a creative project- how wonderful is that!!
Thanks so much, Jill! Yes, she is growing fast so I have to stay as close as I can until she outgrows grandma and pursues other interests. : ) I won’t mind, because that’s part of growing up. You’re right though–I am hoping she will remember all we did together and the fun we had in the doing.