Make Beautiful Easter Ornaments with Air Dry Clay
Last Christmas, it seems everyone was crafting ornaments with air dry clay and napkins. Here’s what I’m doing for Easter.
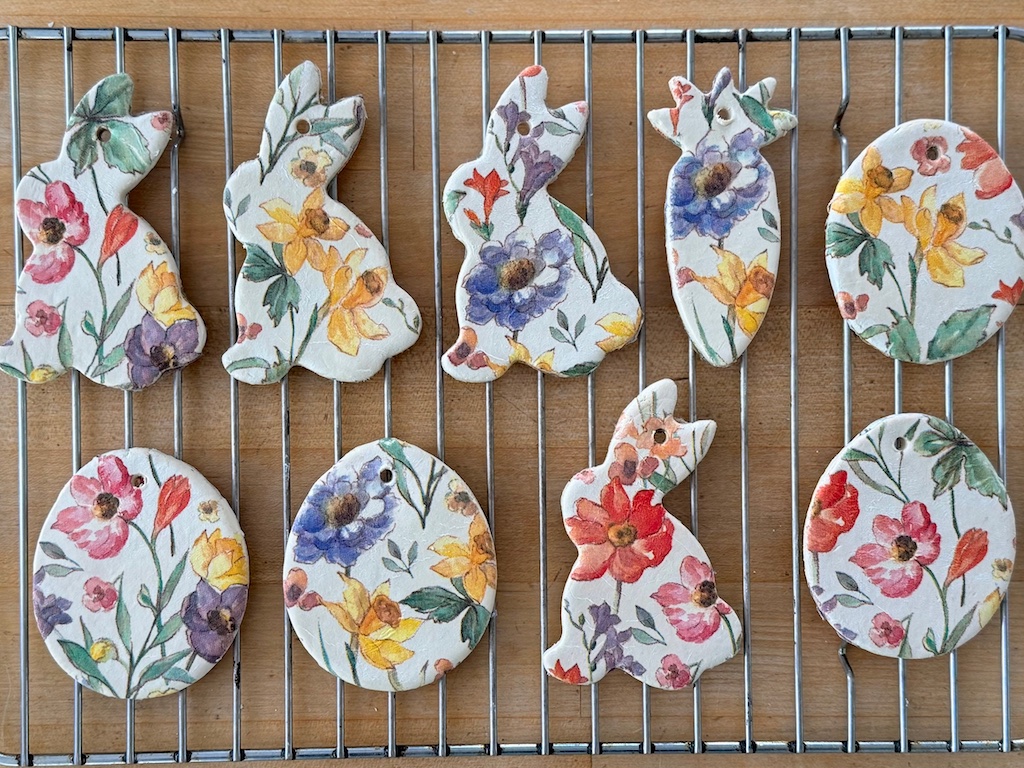
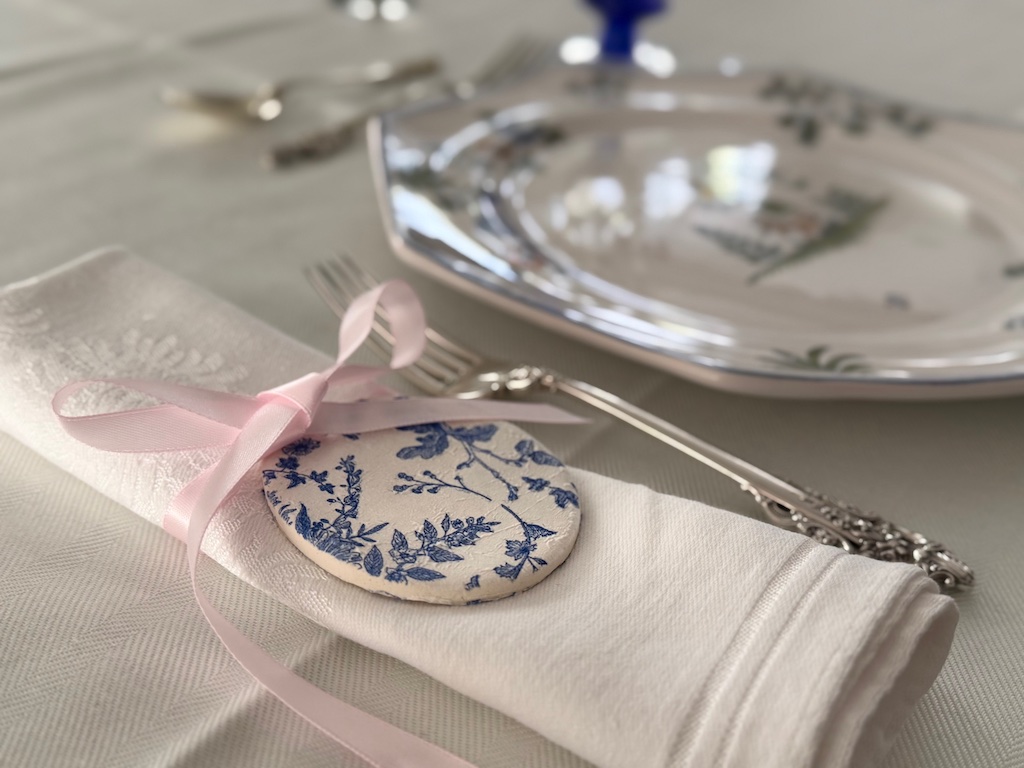
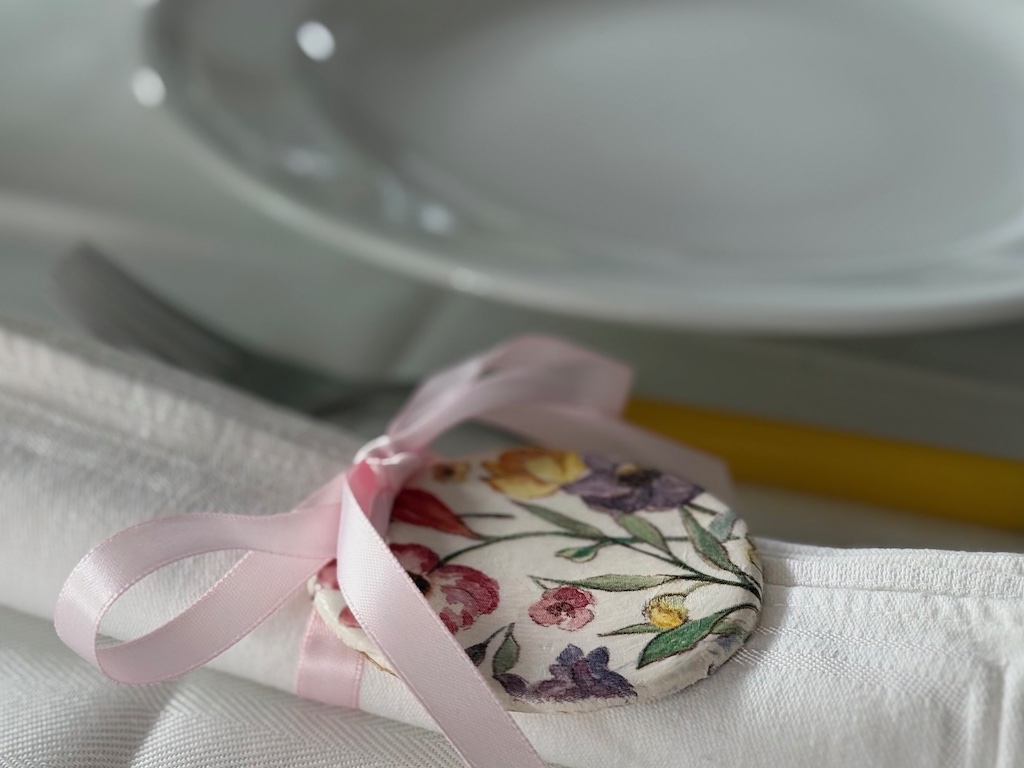
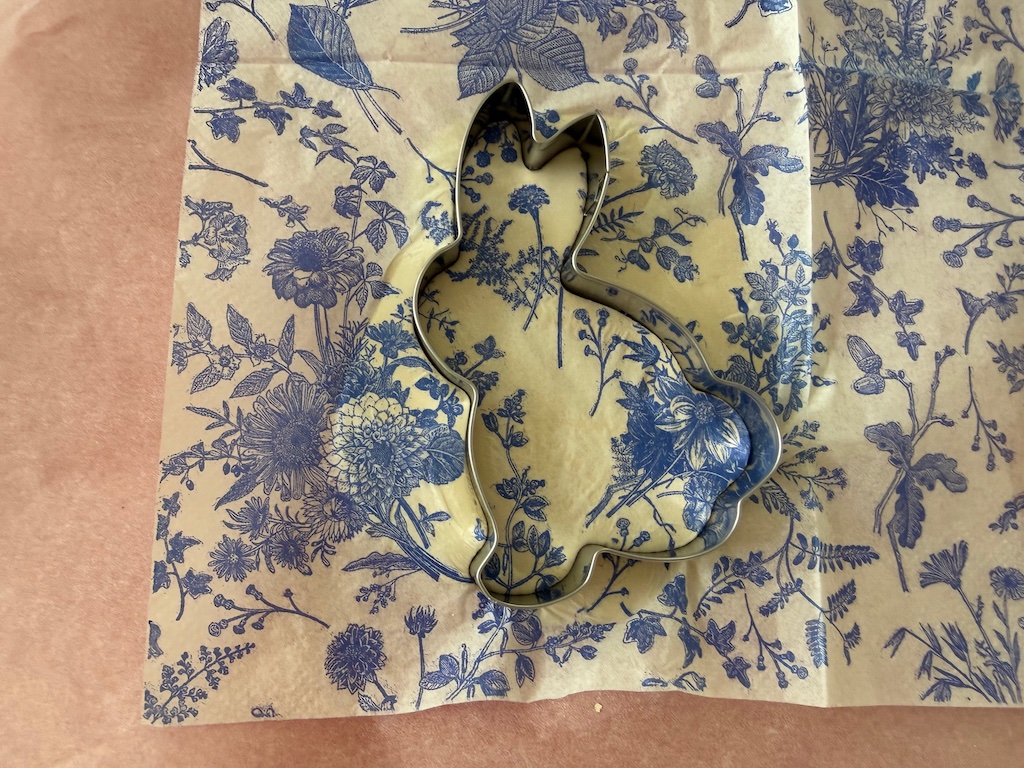
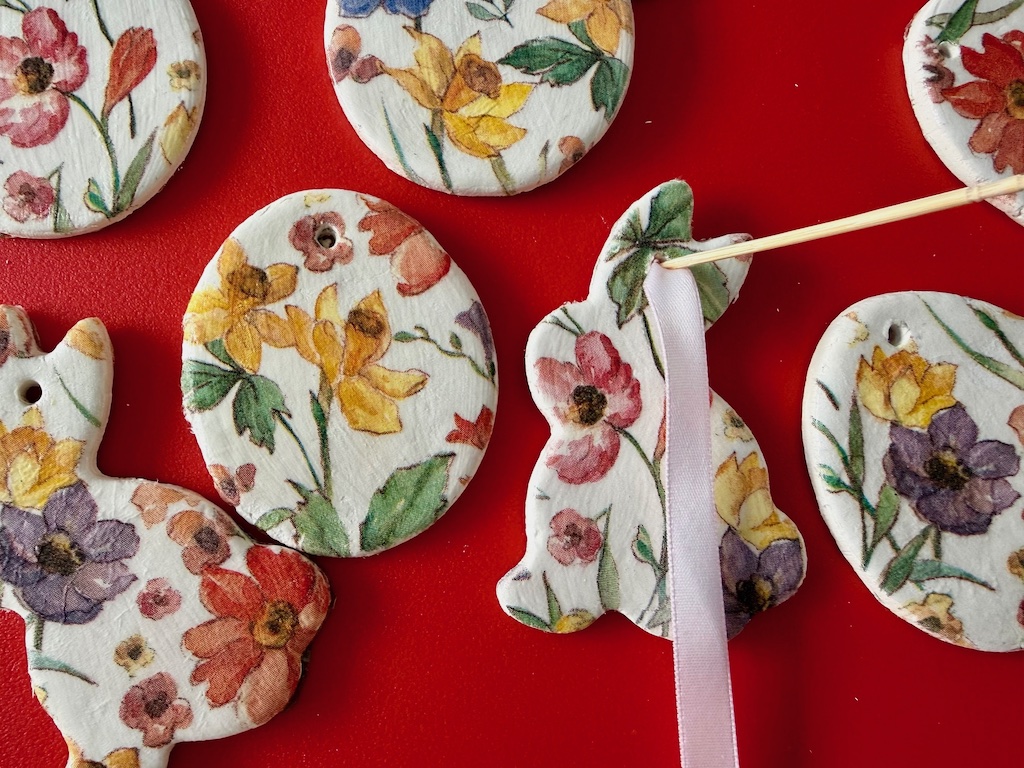
I made these ornaments for my Easter table. I’ll thread a ribbon through each and tie it around a napkin at each place setting. I started with a blue and white toile design, which was quite elegant, but I changed to an overall floral design to be more in keeping with spring.
These Easter table decorations aren’t hard to make, but they will take time, including a few days for the clay to dry, so start now. Or try some of my other Easter table setting ideas that don’t require drying time.
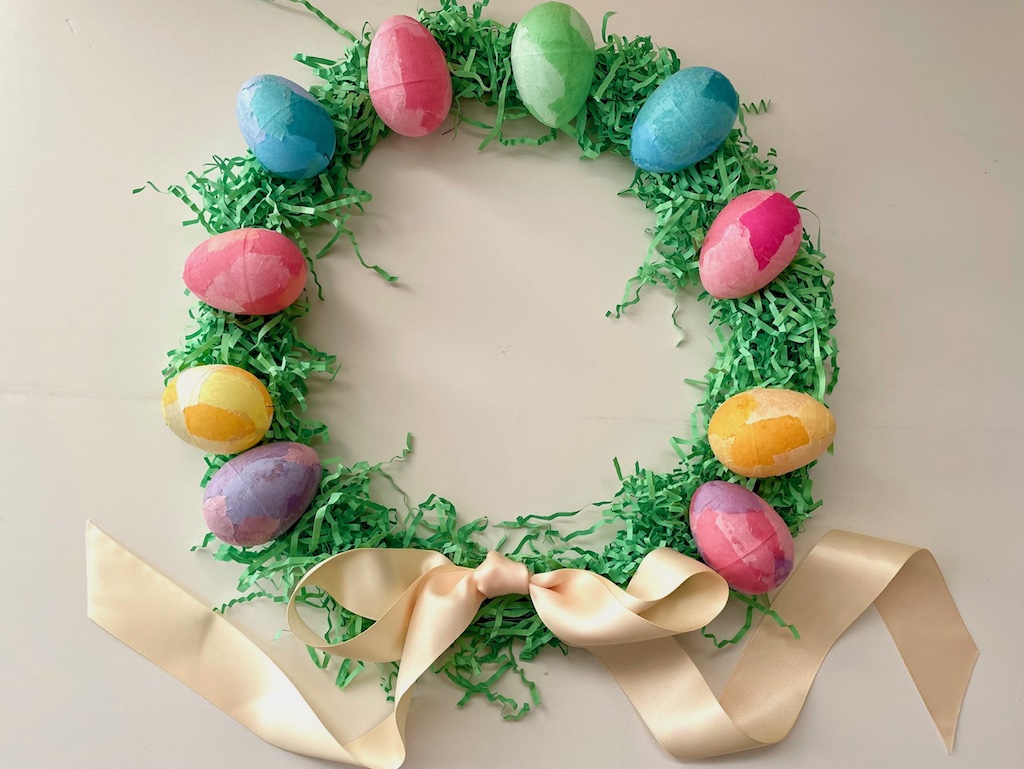
Aside from using these ornaments to dress up the Easter table, you can utilize them to decorate Easter baskets. Or, string them on a length of ribbon as a garland or turn them into a mobile. Hang the Easter ornaments on a tree branch set in a tall vase.
To make these Easter ornaments, you’ll use an appropriate cookie cutter, a stack of printed paper napkins, and air dry clay. It’s important that you peel apart the napkin so you are using just one ply. If you have more than one thickness, the moist clay will adhere to the bottom layer and the second layer, sitting on top, will just get puffy. Allow the clay to harden at room temperature.
You can use it as is, or brush with a sealant like Mod Podge. You can also continue the napkin pattern on the unfinished side. It’s up to you.
Air Dry Clay Easter Ornaments
Materials Needed
- Air dry clay
- Package of 2-ply printed paper napkins (cocktail size will do)
- Baking parchment paper
- Mod Podge gloss or matte, depending on the look you want (optional)
- 3/8-inch ribbon, about 20 inches per ornament
Tools Needed
- Easter-themed metal cookie cutters in simple shapes about 3 to 3 1/2 inches tall
- Rolling pin or wooden dowel
- Cylindrical chopstick with a pointed end or pencil
- Small sharp scissors
- Foam brush for applying Mod Podge
- Toothpick
How to Select Napkins
Choose a napkin design in proportion to your cookie cutter. Don’t select napkins that have embossed or crimped edges because that part will not be usable for your project and it might be difficult to separate the layers. If you can’t separate the layers because they are fused together around the edges, cut the napkin in half using scissors and you’ll be able to see the layers where the napkin has been cut, to separate them.
If your napkin is three ply, be sure to peel away two layers; you’ll work only with the printed layer.
Make an Easter Egg Wreath
Preparation
Prepare your work surface. I use an old plastic placemat as a base to keep clay off my countertop.
Tear a piece of parchment paper. Air dry clay is sticky; the parchment will allow you to lift the ornament off the surface. If you don’t have parchment, you could try sprinkling a little baby powder or cornstarch on the rolling surface, but I haven’t tried it myself.
Method
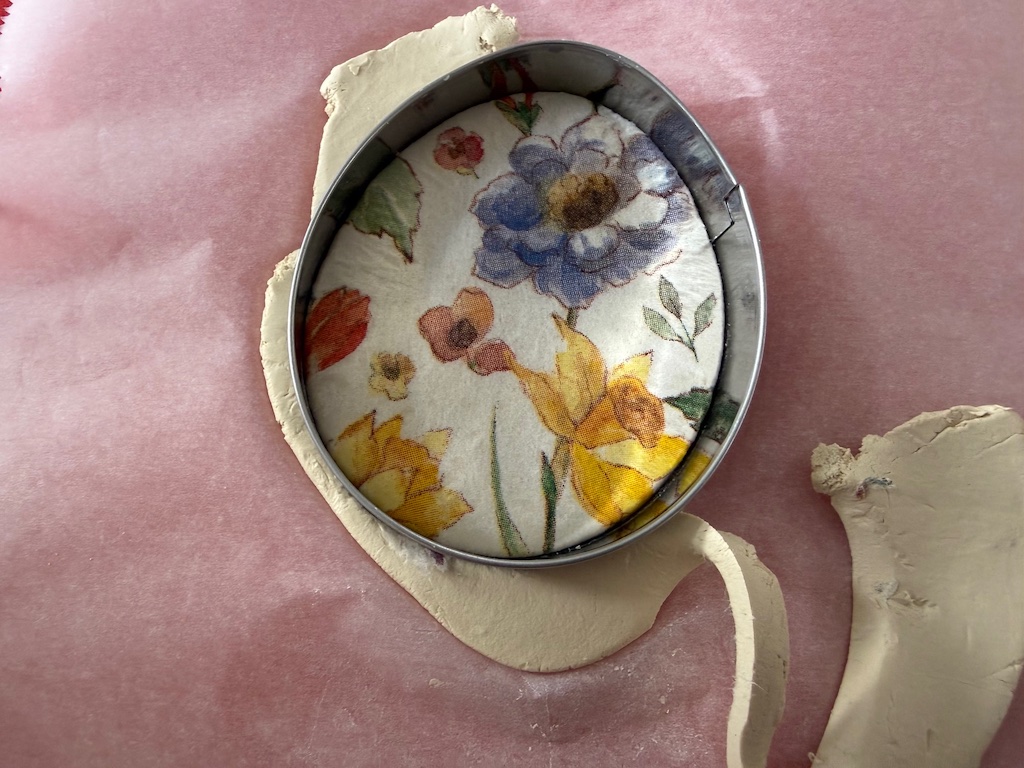
Roll out a lump of clay on the parchment, about 3/8-inch thick and large enough to accommodate your cookie cutter. You’ll make one ornament at a time.
Peel the napkin so you have just one thin patterned layer. Lay the patterned layer on the clay and smooth in place. Set your cookie cutter over the part of the pattern you’d like to use. Run your fingers around the cookie cutter to make sure there is a margin of clay underneath, since you can’t see the clay under the napkin. Cut through the napkin and clay.
Now flip the entire thing over–cookie cutter, napkin, and clay–and run your rolling pin or chopstick over the cut lines to ensure you have cut through all layers.
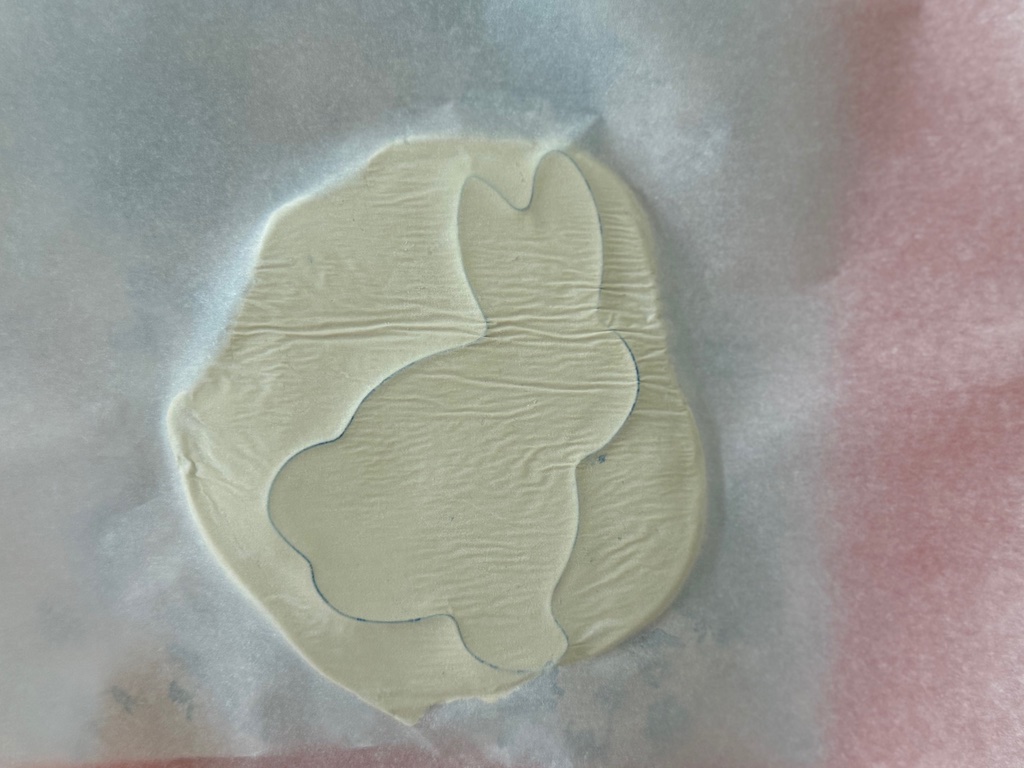
Flip the entire thing right-side up again and holding the cookie cutter firmly onto your work surface, peel away the excess clay and napkin.
The parchment paper will be damp and wrinkly where you rolled the clay, so find a new spot to roll the next piece.
Now this part is important: Use your index finger to smooth the paper over the clay so there are no wrinkles. If your napkin didn’t cut cleanly, use scissors to trim the excess napkin.
Run your finger along the edges of the ornament to smooth any bits of fuzz from the paper napkin. Now use your chopstick or a pencil to make a hole for your ribbon
Set the clay on a wire rack to dry. It may take 24 to 72 hours depending on the temperature, the humidity, and the size of the piece.
You can turn the piece over halfway in the drying process, but be careful the rack doesn’t leave stripe marks on the front of your piece when it is face down.
Finishing your Easter Ornament
Once dry, use a foam brush to apply Mod Podge to the ornament. I like to give it two coats, allowing the Mod Podge to dry between coats.
Thread ribbon through the hole of your ornament. If the hole has closed up, poke a toothpick or skewer through to open the hole. If you can’t thread the end of the ribbon through the hole, use a toothpick to push the end through. The ribbon will get frayed, so simply re-trim.
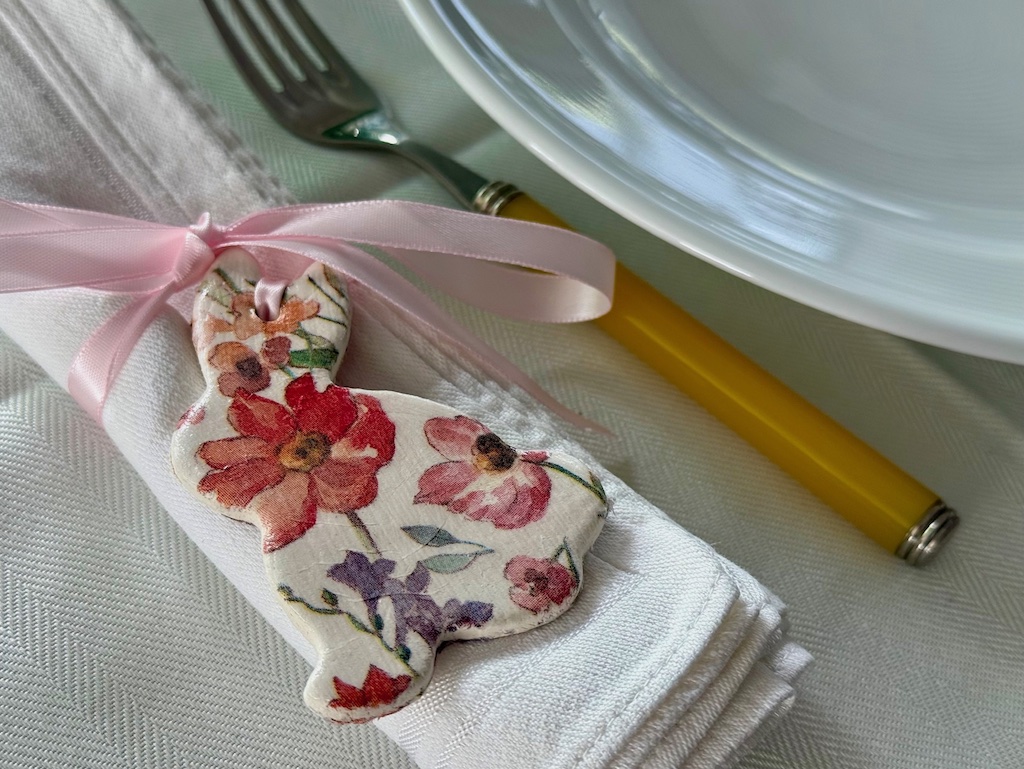
Tie the ornament and ribbon onto a rolled-up napkin, one for each place setting.
Additional Refinements
Here are some additional ways you can enhance your Easter ornaments.
Patterned on Both Sides
I like to have both front and back of the ornament patterned. To do this, as soon as you cut the ornament out, while it is still damp, cut out the backing from the remaining napkin scrap. To do this, flip the napkin scrap so the pattern side is faced down. Use the cookie cutter to trace the outline from the inside edge of the cookie cutter; not the outside edge. You want this shape to match your ornament, but be a tad smaller so it won’t show from the front. Cut out the shape and press it into the back of your ornament; now set out the ornament to dry on a rack, right-side up.
Outlined Edging
You can use gold paint and a fine brush or a fine gold marker to color the edges of the ornaments to finish them. I find it’s too difficult to get right, without getting a smear of gold onto the front or back of the ornament. If you choose to do this, try it on your least favorite ornament first.
Positioning the Hole
When you make a hole for your ribbon, think about how the ornament will hang. I poked the hole at the base of the bunny’s ears. So when I tied the ribbon, it obscured the ears. Better to poke the hole closer to the top of the ear, but not at the very tip, where the hole could break the ear apart.
More Air Dry Clay Projects
I bought a five-pound tub of air dry clay for $10.50 two years ago and I still have some left.
We’ve used our clay to make:
- Heart-shaped ring dish for Mother’s Day
- Christmas cookie ornaments
- Flower frogs for Valentine’s Day
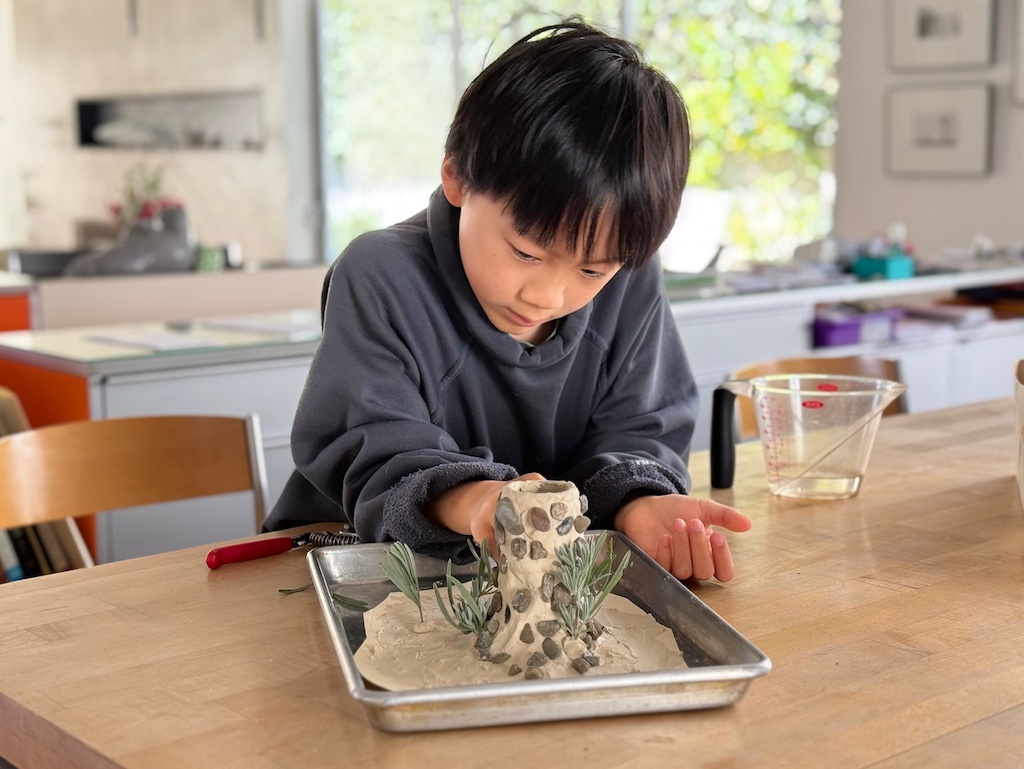
- An erupting volcano science project
Sign Up to Get Grandma’s Favorite Recipes–Free!
Sign up here for my email newsletter. Every Wednesday, I’ll give you a new idea for an activity or insight to nurture the little ones in your life. And once you subscribe, I’ll send you a link so you can download your set of quick and easy recipes as my thanks to you.