Paint Pumpkins for a Beautiful Thanksgiving Table
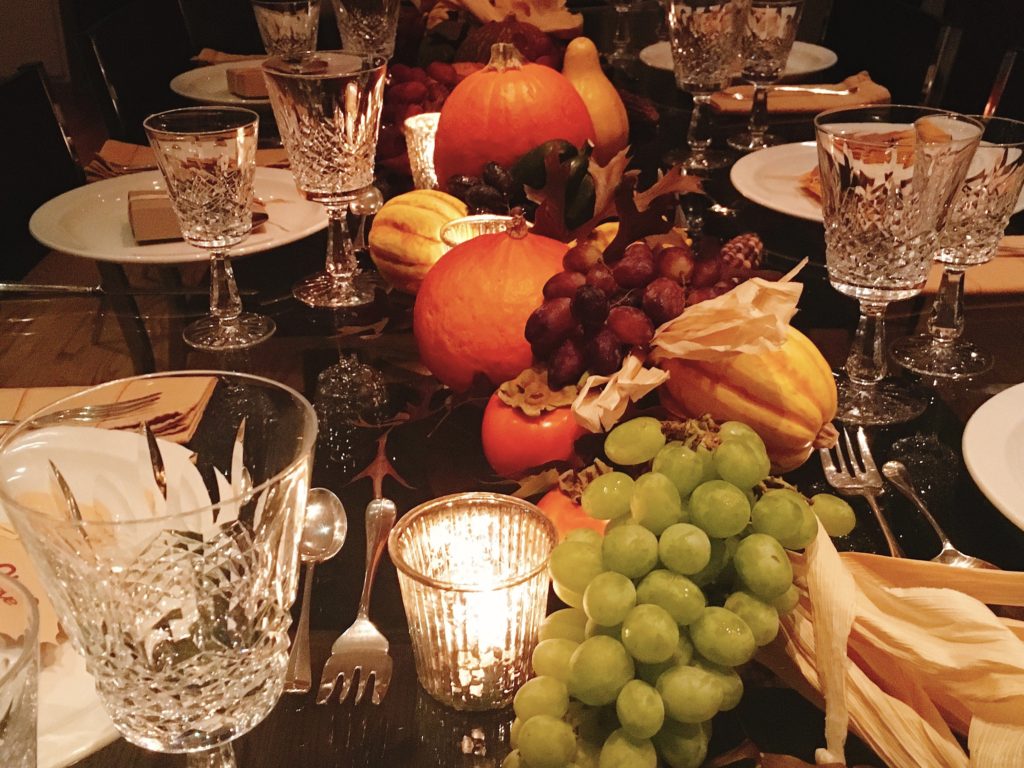
I’m trying to change up my typical Thanksgiving table setting. Usually, I create a runner with pumpkins and fall produce. It looks gorgeous and you can eat the table decorations afterwards.
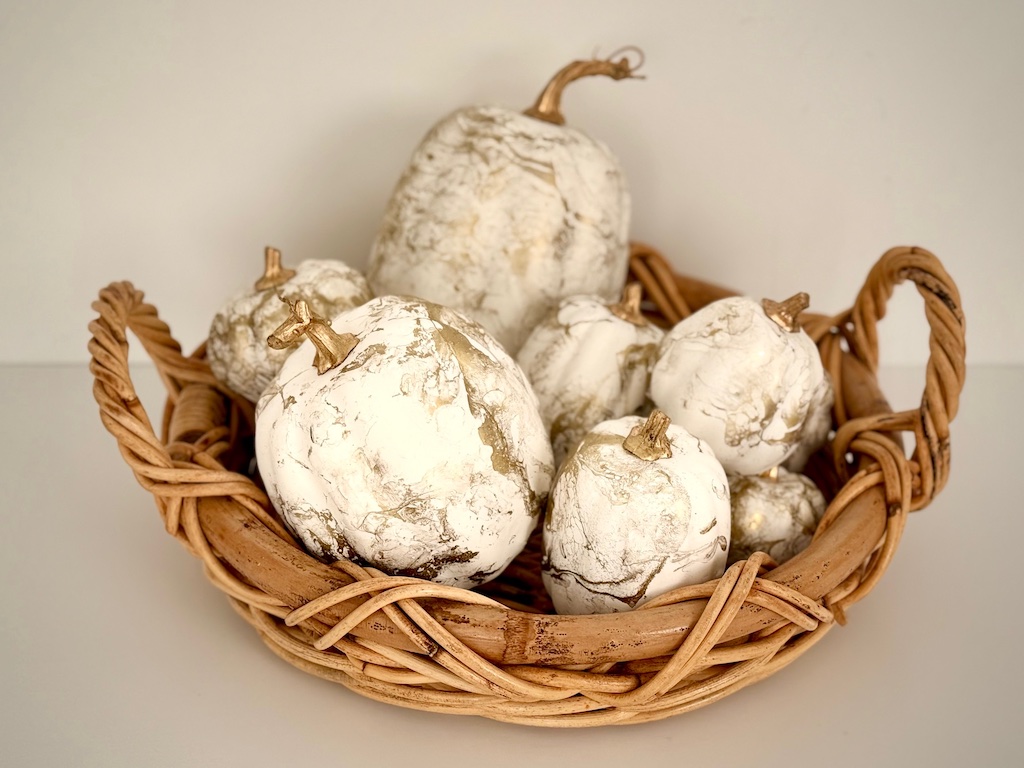
To change it up, I’m introducing white pumpkins flecked with gold. You spray some paint into water and dip pumpkins into the mixture for a marbling effect.
The process is called hydro dipping and there are many techniques.

About my Pumpkins
The white pumpkins were quite pricey at Trader Joe’s, so I bought fake ones from Amazon: $20 for 10 foam pumpkins.
The tiniest three are about 3 1/2 inches in diameter. One had a light black smudge and a few had some dents. I didn’t bother to exchange them; the gold dipping hid their imperfections.
You may do better at a dollar store or a craft store to hand select what you want.

Caution Before you Paint
Here are a few IMPORTANT tips:
- Work outdoors or in a well-ventilated place. Paint fumes are toxic. Use a respirator.
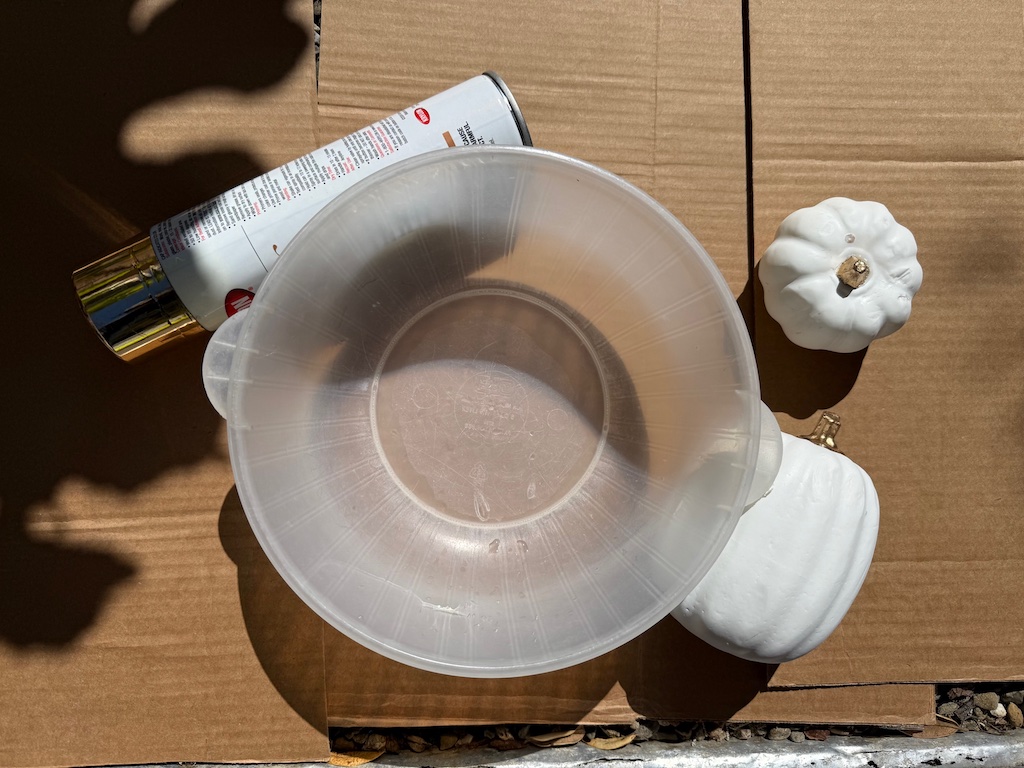
- Chose a container for dipping that you’re willing to discard afterwards.
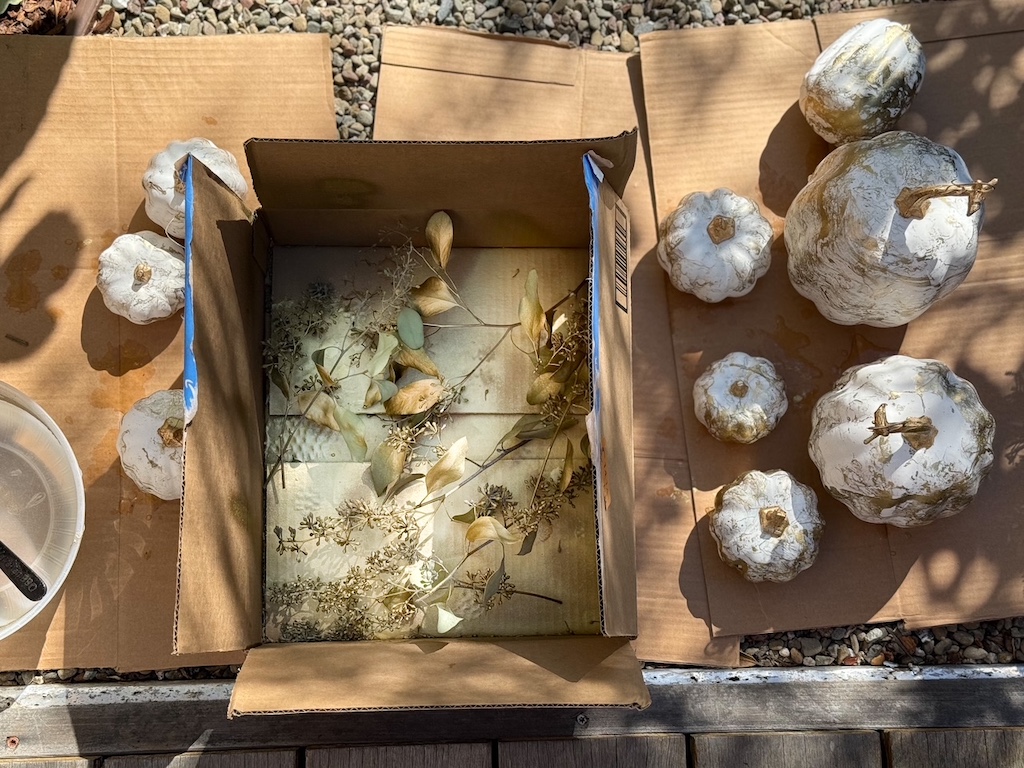
- Protect your work area with cardboard; I also put my dipping container in a box.
- Wear disposable gloves. Even holding by the stem, you’ll get paint on your fingers, as I discovered.
- Have a plan for where you will toss the paint water afterwards.
How to Paint Pumpkins
Spray paint works because droplets are light, so they’ll float on the water.
Materials Needed:
- Pumpkins, real or foam
- Spray paint (I used Krylon Premium Metallic Paint)
- Water
Tools Needed:
- Disposable bowl or pail large enough to dip the pumpkins
- Disposable gloves
- Respirator to avoid fumes
- Cardboard carton to hold bowl
- Cardboard to protect work area
Method:
Lay down cardboard to protect your work space. Put your bowl in a cardboard box. Fill bowl with water. Spray the paint into the water in the center of the bowl.

Hold pumpkins by the stem and immerse in the water. Lift to drain and set aside to dry on cardboard.
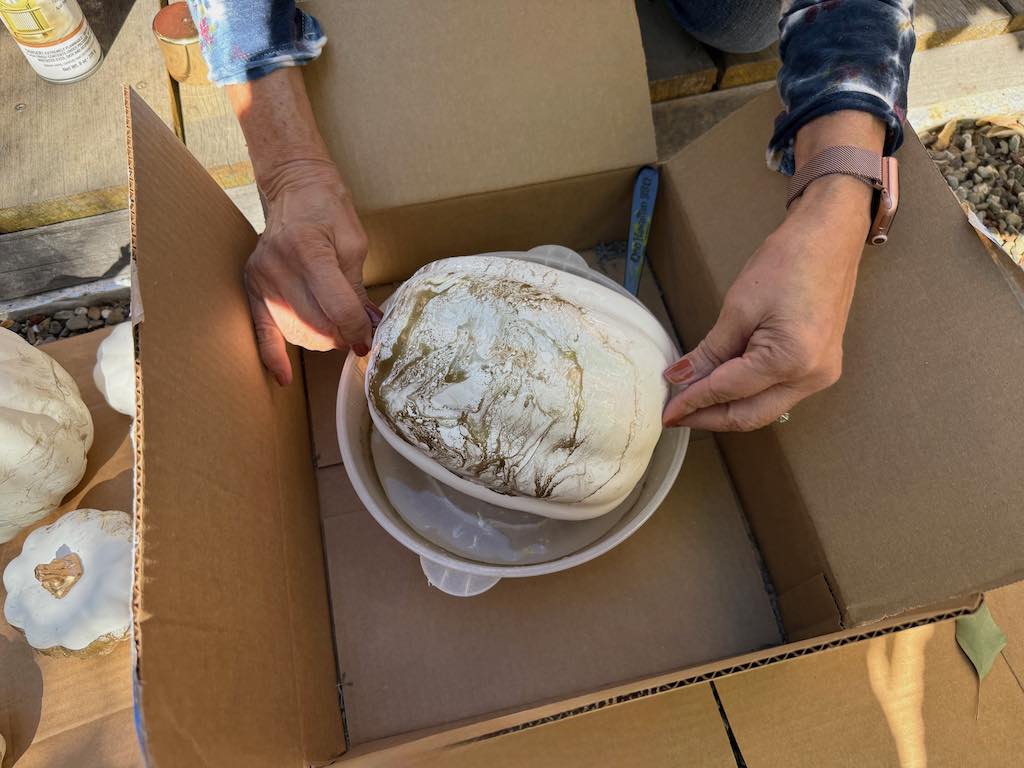
My bowl was quite small for the larger pumpkins so I had dip them sideways and rotate them in the water to coat.
After a few dips, the paint will migrate to the edges of the bowl and you’ll have to spray more paint into the water.
Allow the pumpkins to dry.
Technique Note:
By not wearing gloves, my dipping method was side-to-side, instead of directly up and down. In retrospect, I think you’ll have a better result wearing gloves and immersing the pumpkins straight down into the water and up.
Spraying Eucalyptus
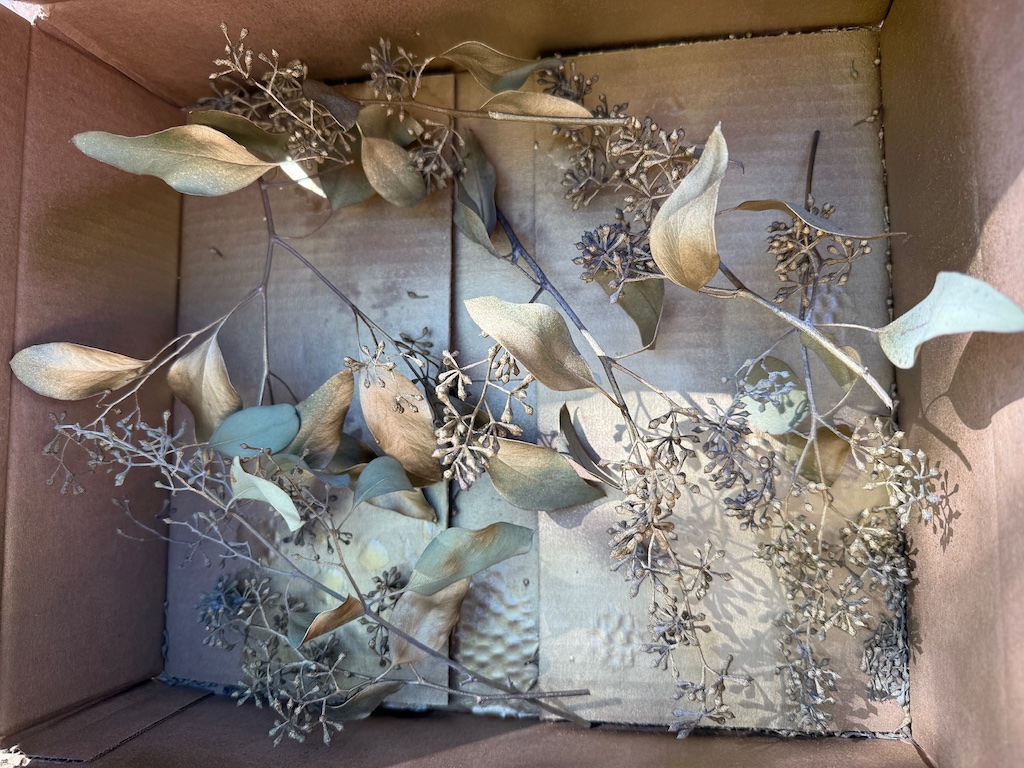
I had dead Silver Dollar Eucalyptus from an ikebana arrangement so while I had the spray can out, I sprayed them, too.
How to Use your Painted Pumpkins
The pumpkins, grouped, make a pretty fall arrangement on a coffee table.
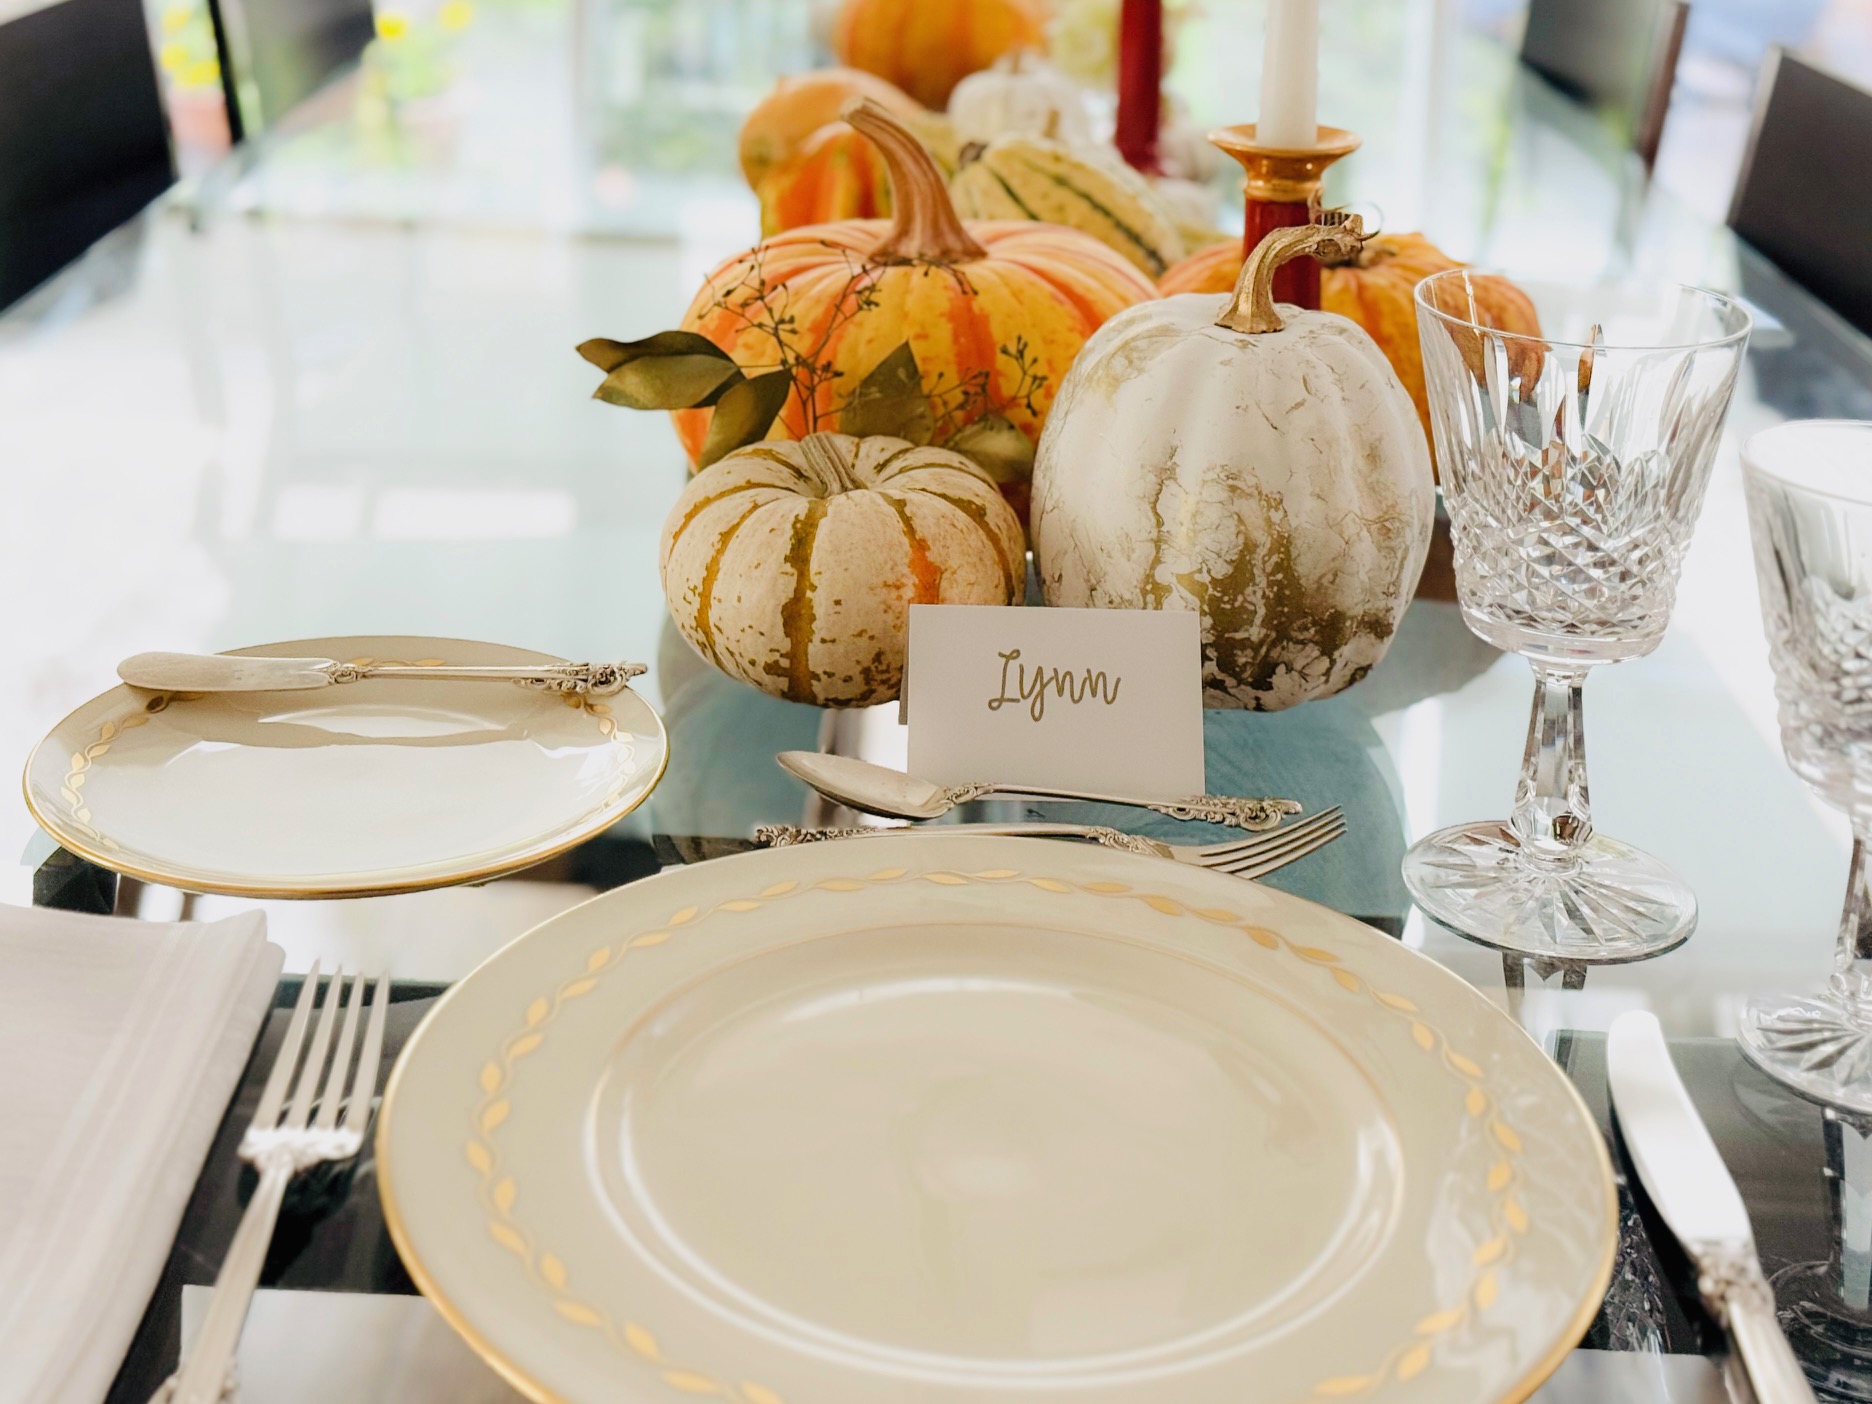
I’m using mine for my Thanksgiving table, interspersed with natural gourds and pumpkins. The white and gold of the painted pumpkins will pop. I’ll tuck in the gold leaves.
I’m thinking striated pumpkins and gourds will look best with the painted pumpkins, instead of solid color ones.
Important: if. you are using dried leaves and foam pumpkins, it’s best not to use real candles, since they could ignite–especially if little children are present. Instead, use battery-operated tea lights.
Sign Up to Get Grandma’s Favorite Recipes–Free!

Sign up here for my email newsletter. Every Wednesday, I’ll give you a new idea for an activity or insight to nurture the little ones in your life. And once you subscribe, I’ll send you a link so you can download your set of quick and easy recipes as my thanks to you.
Great idea! Looks great! Nothing like streaks of gold to elevate the look.
Thank you, Carol! Glad you liked it.