Make this Easy Halloween Craft with Kids

Are the kids beside themselves, waiting for Halloween? These spooky ghosts are a fun Halloween craft project to focus their energies and curb their excitement.
You need just three items: cheesecloth, white school glue, and a scrap of black felt. You’ll start by building a mold using aluminum foil and a bottle or cup.
Easy Tabletop Ghost Halloween Craft
You can be as creative as you wish with this Halloween craft. Make different shapes and sizes of ghosts. Make them with or without arms; with or without eyes.
At the end of this post, you’ll find instructions for making a big, almost-life-size ghost. It requires just a few extra steps and a few extra materials.
Materials Needed for the Molds
- Aluminum foil
- Bottle, such as a small salad dressing bottle, or a plastic cup
Materials Needed for the Ghosts
- Cheesecloth (see note*)
- White school glue, such as Elmer’s
- Small scrap of black felt
Tools Needed
- Sharp scissors
- Small bowl for mixing glue
- Large plastic bag or plastic wrap to protect work surface
- Bamboo skewer or toothpick
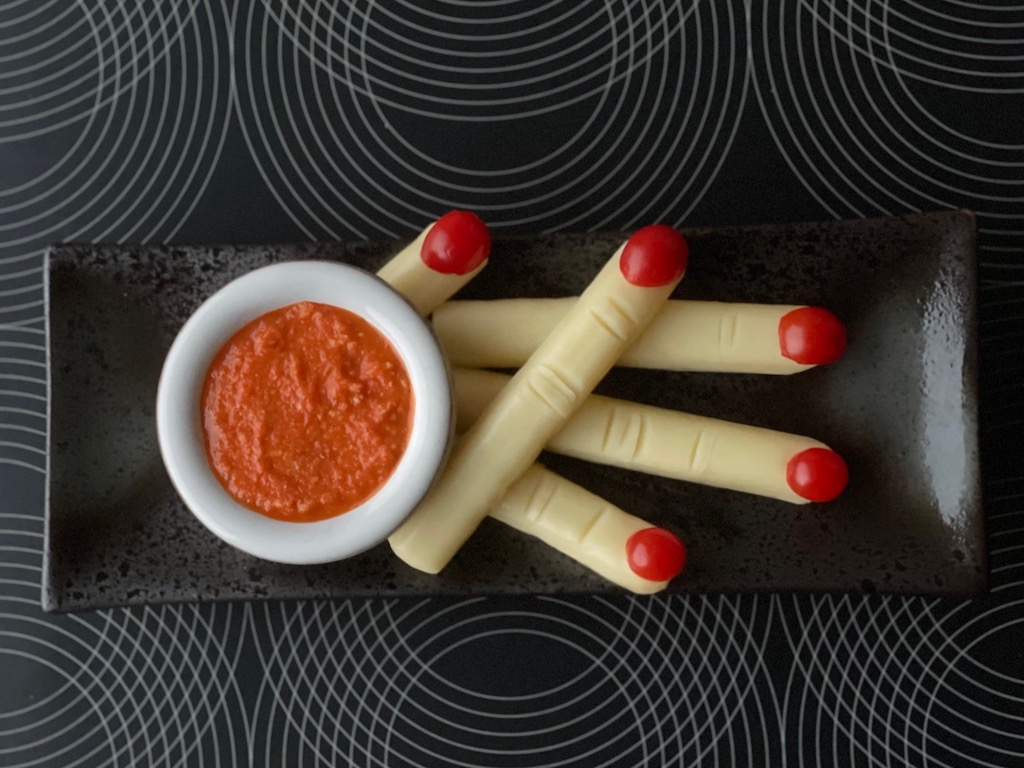
Make Creepy Fingers and “Blood” Dip, plus other terrific Halloween ideas.
Instructions
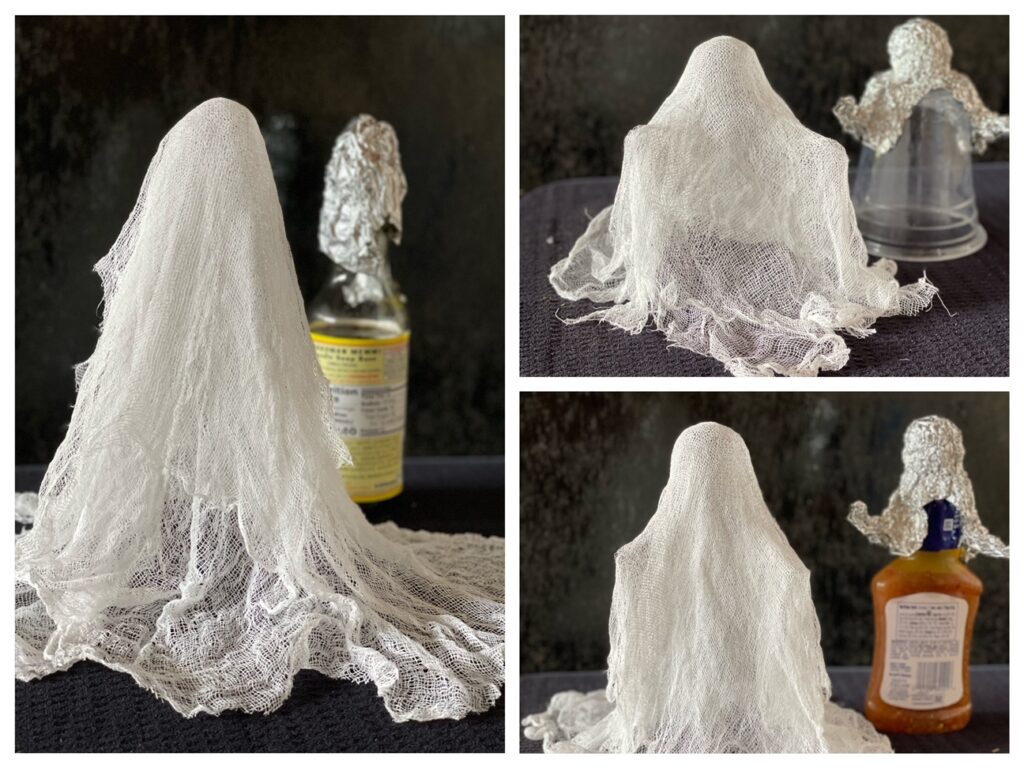
Make the Mold: Cut a square of foil. Fashion the head of the ghost by scrunching up the middle of the foil so you have a ball, with excess foil around it. Smooth the excess foil around the neck of the bottle to form shoulders and so the ball can rest on your bottle. This will make a simple ghost shape. If you want hands reaching out, shape the excess foil into two arms facing forward.
Make the Ghost: Drape the cheesecloth over the mold, covering it completely, allowing extra cheesecloth to cascade beyond the base of the mold. The excess fabric at the base will enable the ghost to stand.
Cut away any remaining cheesecloth beyond what you need to form the base. Repeat to cut another layer of cheesecloth.
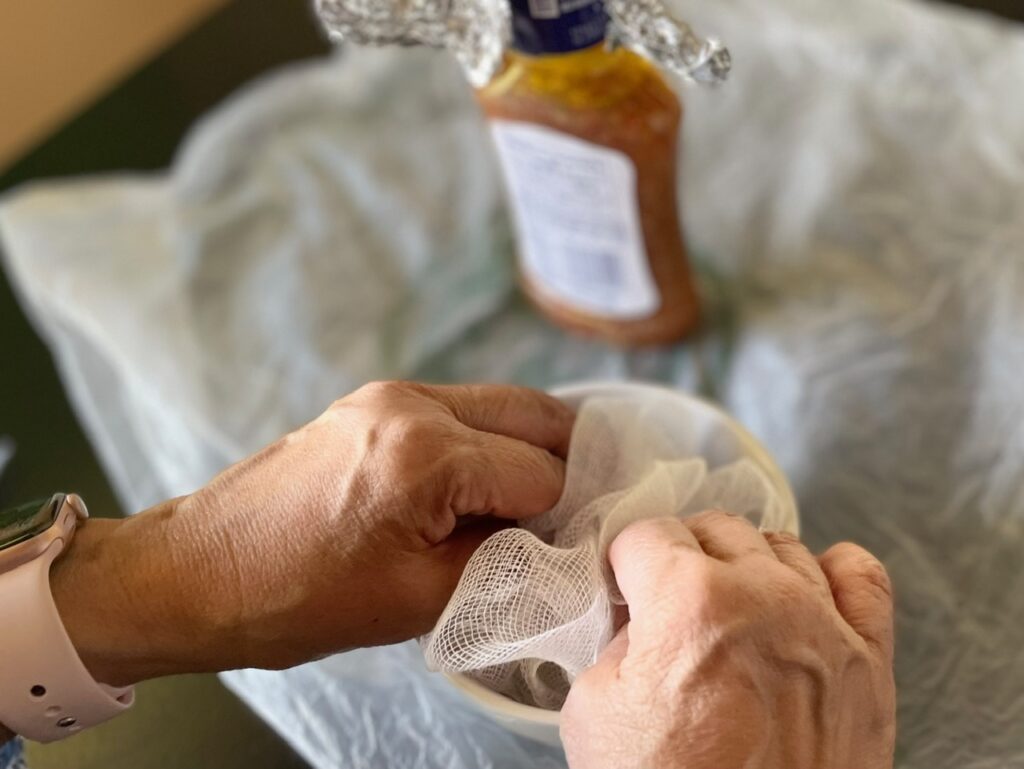
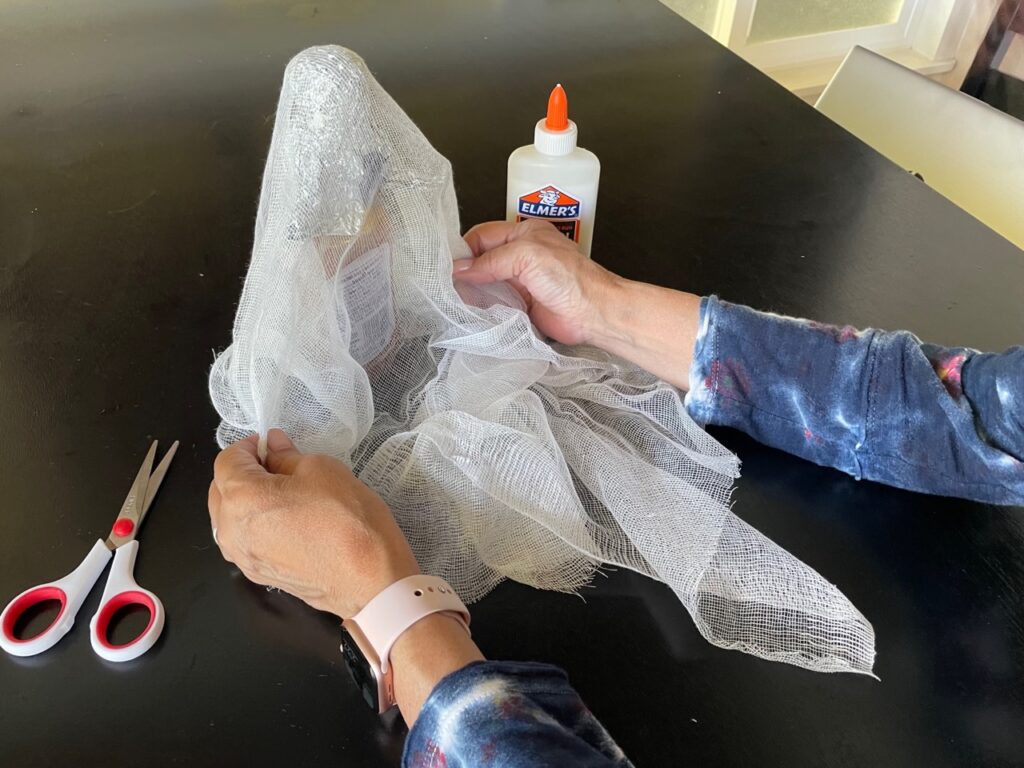
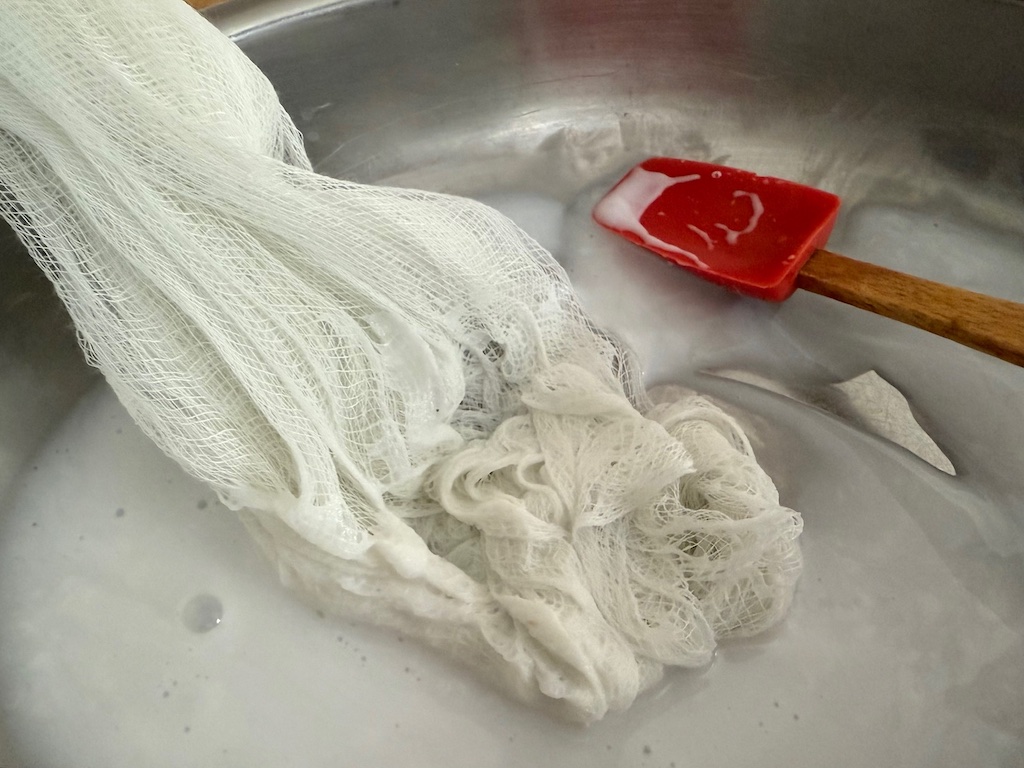
In a small bowl, mix glue with an equal amount of water. Here’s where it gets messy: Dip cheesecloth into the mixture and squeeze out excess. Do not wring completely to ensure you have enough glue to shape the ghosts.
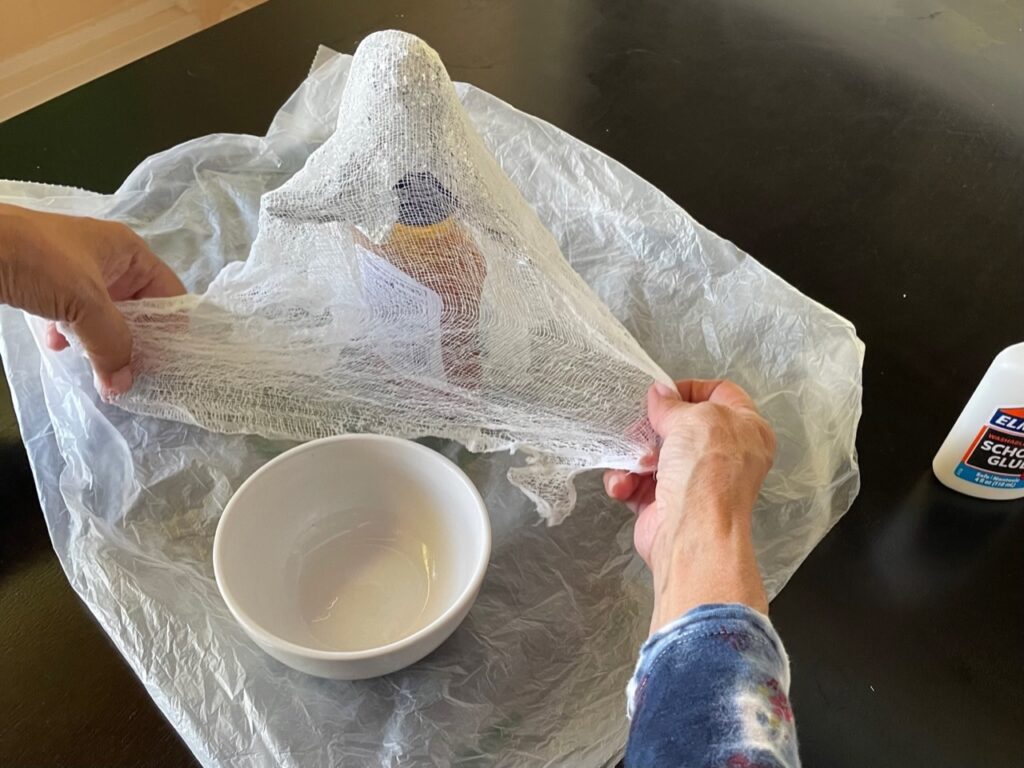
Lay down a plastic bag to protect your work surface. Now drape the damp cheesecloth over the mold and shape it around the mold. Dip the second layer of cheesecloth in the glue mixture and repeat so you have two layers. Set aside to dry—it will take about half a day or overnight.
When dry, remove ghost from mold. Cut eyes from felt and using a skewer or toothpick, spread some white glue on the felt and adhere to the ghost.
Note:
* The cheesecloth I bought at Ben Franklin Crafts was $3.99 for 2 square yards and it made four ghosts of assorted sizes.
How to Use the Ghosts
Stand these ghosts on a table to decorate for Halloween. Or stitch a string through the top of the head of each ghost and hang them from the ceiling. A grouping of ghosts would make a wonderful table centerpiece for a Halloween party.
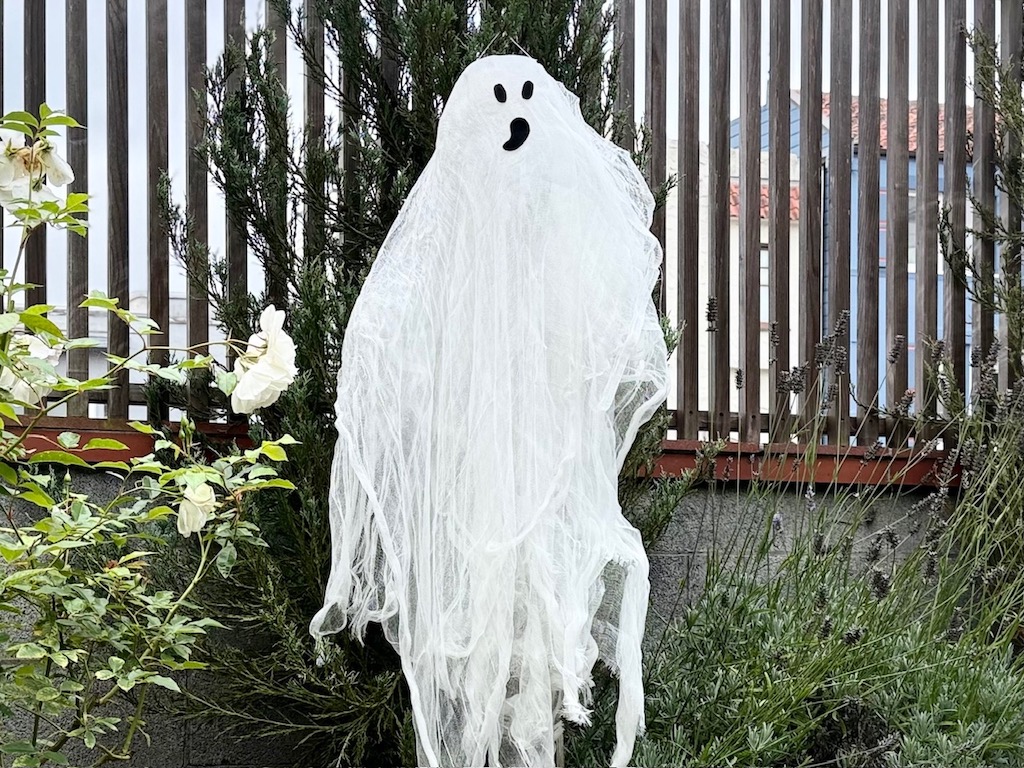
Variation: Make a Big Cheesecloth Ghost
For this variation, only the cheesecloth around the ghost’s head is stiffened with glue. The body of the ghost is kept free, enabling the body to move in the slightest breeze.
While I like to hang our ghost outdoors, it will disintegrate with moisture since wetness will dissolve the glue and deflate the shape. Take it in every night and any time it rains. You might prefer to use it indoors.
Materials Needed for Big Ghosts
- Blown-up balloon
- Empty plastic container, such as a large (48-ounce) yogurt container
- Sturdy tape (masking tape, clear tape or blue tape)
- Cheesecloth, at least 39 inches wide
- White school glue, such as Elmer’s
- Small scrap of black felt
- Bubble wrap
- Sturdy white thread (crochet thread or dental floss)
Tools Needed
- Sharp scissors
- Bowl for mixing glue
- 2 Large dry cleaner plastic bags to protect work surface
- Sturdy sewing needle
Instructions
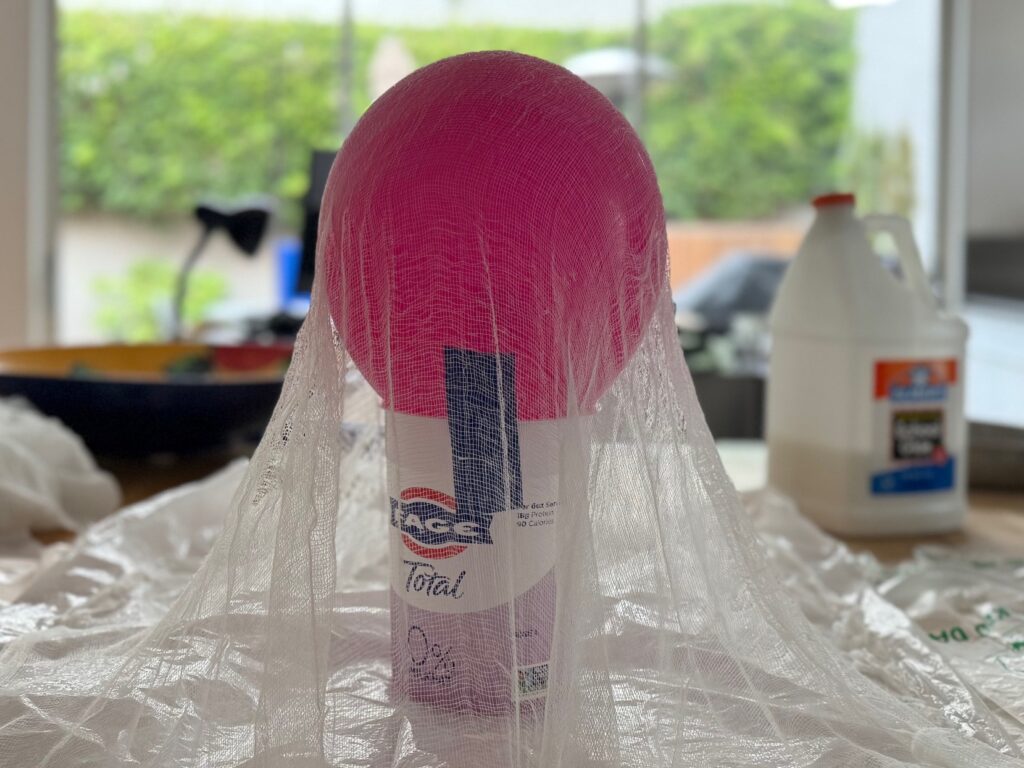
Tape the balloon to the plastic container; this becomes the mold for the head. The plastic container will serve as a stand to hold the head in place.
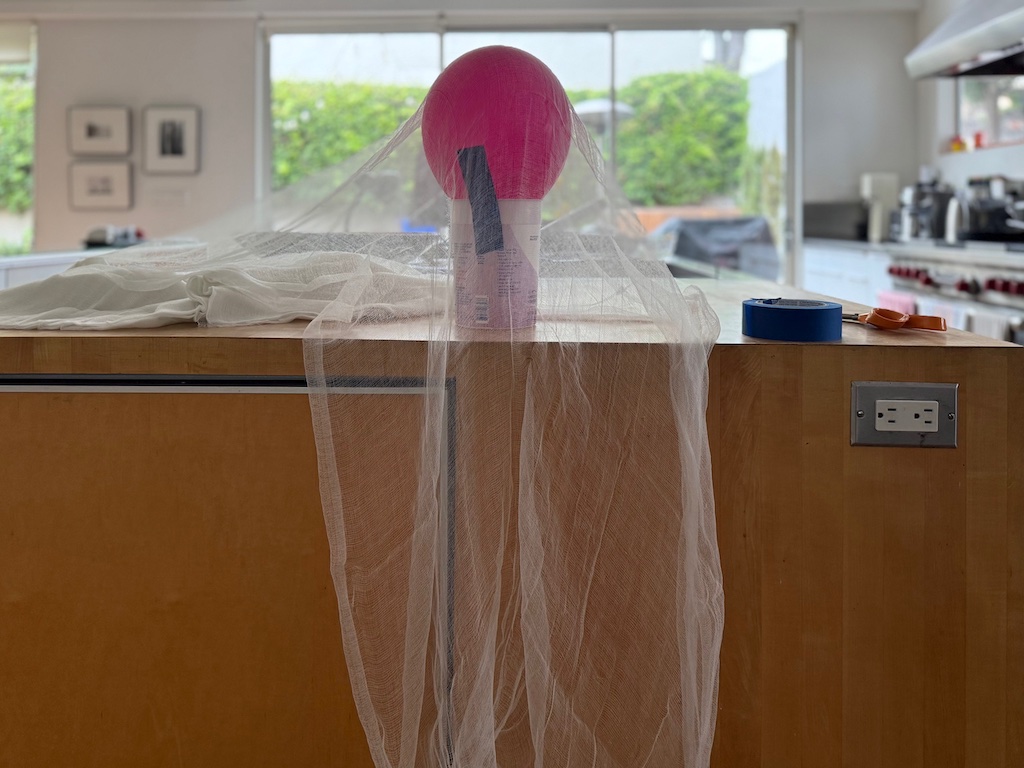
To determine how much cheesecloth you need, drape the cheesecloth over the balloon, letting it fall front and back equally, to the height of ghost you desire. (My ghost was 56 inches tall so my total cheesecloth length was 112 inches.)
Cut three pieces of cheesecloth to that length.

In a small bowl, mix glue with an equal amount of water. (I used 1/4 cup glue and 1/4 cup water for a ghost that was 56 inches tall.) Fold the cheesecloth in half crosswise and dip the fold to about 12 inches into the glue mixture. Squeeze excess water but do not wring out completely to ensure you have enough glue to shape the ghost.
Arrange the cheesecloth over the balloon, shaping it over the head and patting the glue-soaked area around the head. Repeat with second length of cheesecloth, laying the cloth crosswise from the first layer. Then follow with the third layer, laying it the same way as the first layer. Smooth all the layers of cheesecloth evenly over the balloon.
Let the cheesecloth dry overnight. Carefully peel the cheesecloth off the balloon. Cut eyes and a mouth from black felt; glue to the ghost.
Finishing your Ghost
Stitch a loop at the top of the ghost’s head for hanging. Stuff the top third of the head with crumpled bubble wrap to give the cranium some shape. If you don’t have bubble wrap, crumple some clear, soft plastic bags–the kind you get from the produce counter–instead.

Here are more tips and additional information for making big ghosts.
Sign Up!
Don’t forget to sign up for my email newsletter. Every Wednesday, I’ll give you a new idea for an activity or insight to nurture the little ones in your life.