How to Make a Simple DIY Marble Run with Kids
If you follow “Call Me Grandma!” you know I’m a saver. Trash can be treasure. It is so elemental–we can challenge kids to see discarded objects in a new light.
For example, we furnished a dollhouse with empty thread spools, tea tin lids, and pill bottle caps. And last weekend, we turned cardboard tubes into a DIY marble run.
To be quite honest, my original marble run was a bust. I thought we could attach tubes with painter’s tape and angle each tube to allow gravity to do its work. But painter’s tape didn’t hold the cumbersome tubes as our run got longer. It needed some kind of elbow connector between tubes. (If you have a solution, please comment below!)

Insight from Pinterest
So, I checked to see what others had done on Pinterest, and I learned two important lessons:
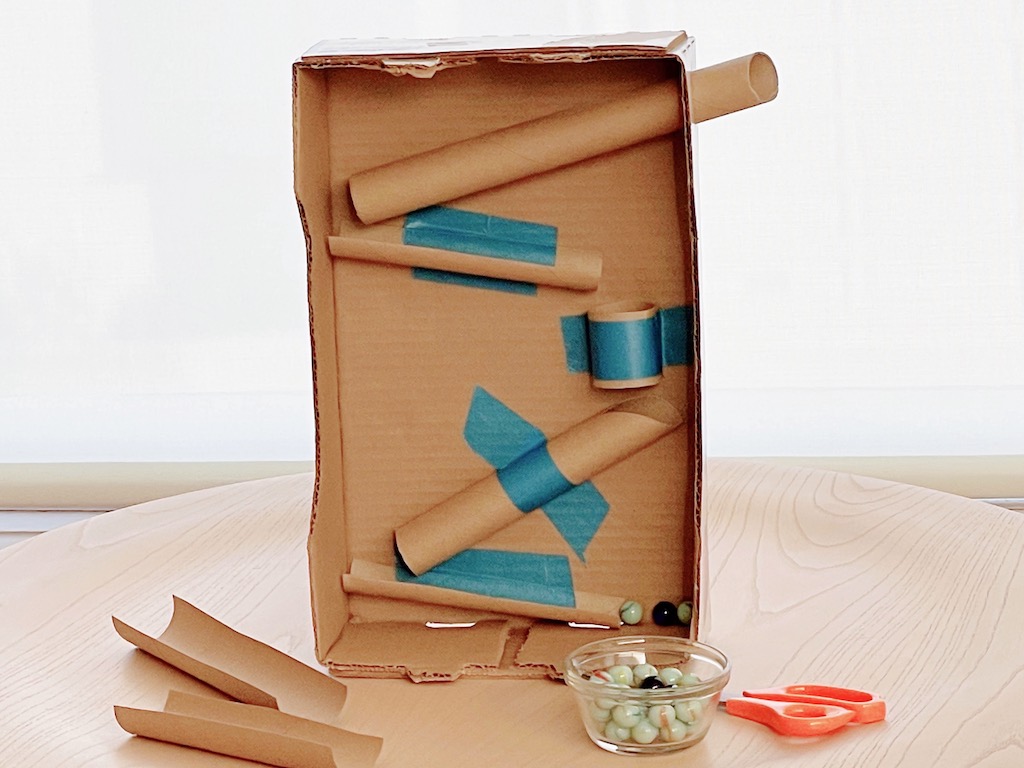
- It’s best to arrange the tubes in a box and have the marble drop down from tube to tube, instead of connecting the tubes together in one long run.
- Cutting a tube in half lengthwise creates a channel for the marble run, which keeps the marble from rolling off in its descent.
Benefits of a DIY Marble Run
Making a marble run was an interesting exercise. Both grandkids are builders by nature.
Miss T took to the project immediately. She was my helper in the ill-fated first attempt, then she was on board to build our marble run in the box.
Little N was only slightly interested, at first. It was only the next day, when he took apart our marble run to build his own, that he got engaged. A child who can spend hours building with LEGOs, he didn’t want a collaborative project. He wanted to discover for himself.
Here’s why I like the DIY marble run:
- It allows kids to engineer a design that works, through trial and error, to sharpen their thinking.
- The marble run is fun to play and a challenge to build.
- It’s a simple, educational, and fairly inexpensive project, using found objects–the only cost is painter’s tape and a handful of marbles (mine were less than $5).
How to Make your DIY Marble Run
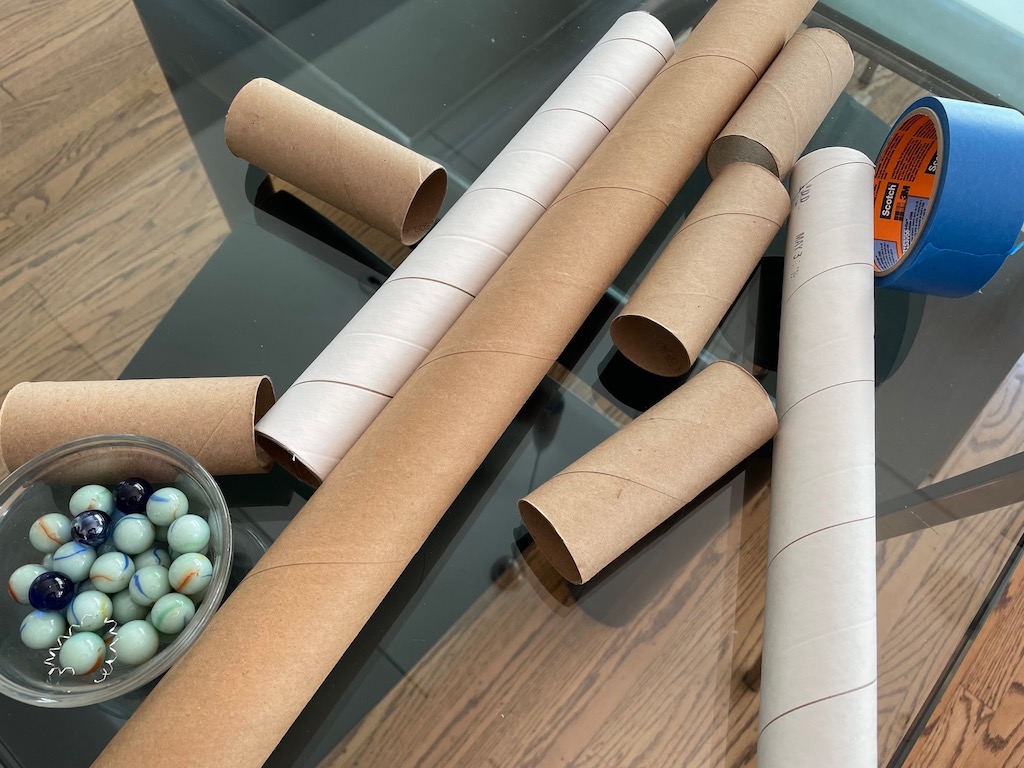
Materials and Tools Needed:
- Cardboard tubes from wrapping paper, toilet paper, waxed paper, etc.
- Cardboard frame, such as a sturdy box cover (we used a Costco produce box tray; ours measured 10 X 16 inches)
- Heavy-duty cardboard strips for ramps, if using
- Pencil
- X-ACTO knife or other small-bladed craft knife
- Small, sharp scissors
- Regular, full-size scissors
- Painter’s Tape, ours was 1 1/2 inches wide
Instructions:
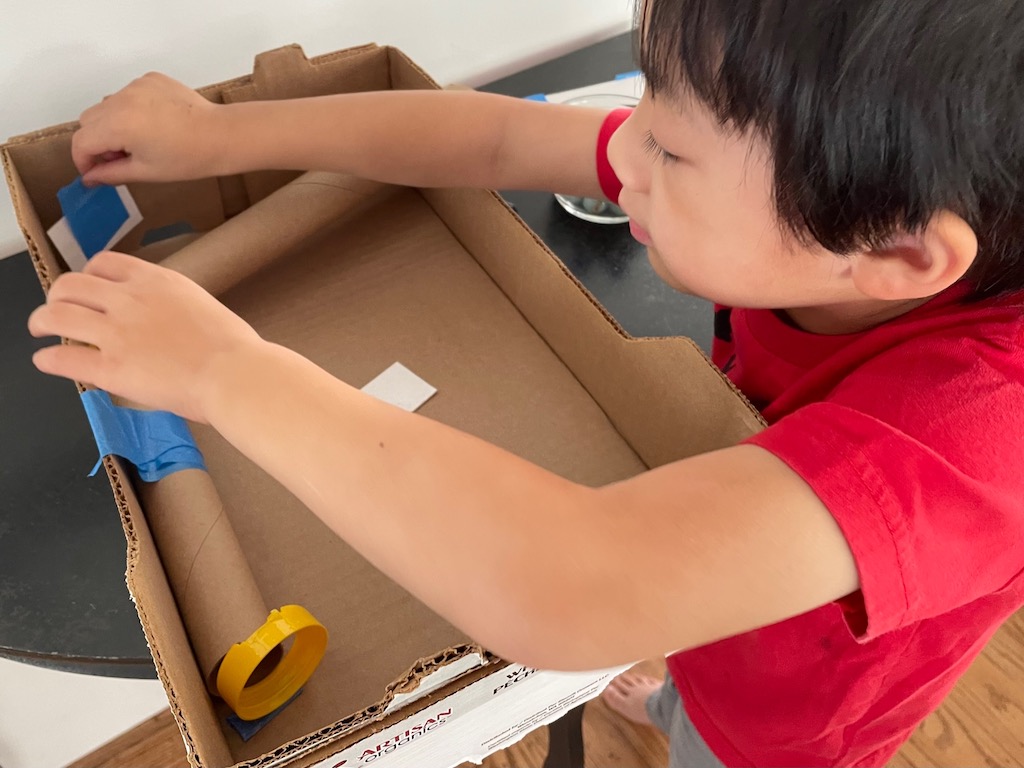
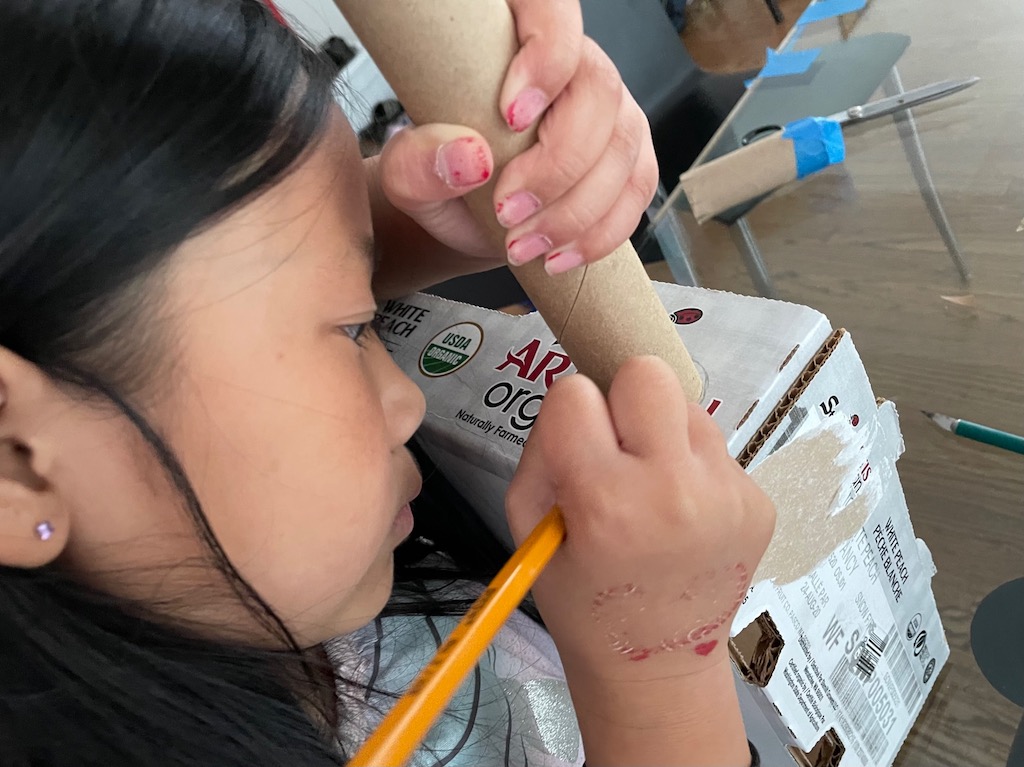
- Using the cardboard tube as your guide, trace a circle on the right side of the box, close to the top. (See finished marble run below for placement.)
- Have an adult cut out the circle with the X-ACTO knife; be careful because the knife is sharp and it’s hard to gain purchase on corrugated cardboard.
- Insert the tube into the hole and angle it so it stays in position horizontally across the box, but at a slightly downward angle so the marble dropped from the top of the tube will roll downward.
- Trim the tube, as needed, with scissors.
- Now, you’re on your own. Experiment with your arrangement of tubes and ramps, using painter’s tape to hold the elements in place.

Painter’s tape is the best tape because it can be removed easily and reused. So, if your marble falls off the track, simply reposition the track, as needed, using the same tape.
Ours was a simple marble run. With a bigger box, you can add more elements to your run.
More Things to Do
Once you’ve built your first successful marble run, there are more things you can do:
- Time your run. Reposition the elements and time it again to see how long you can keep the marble moving.
- Build a bigger run in a bigger box, with more complex twists and turns.
- Learn more about gravity. Here’s a good video that’s easy for kids to follow.
Don’t forget to sign up for my email newsletter! Every Wednesday, I’ll give you a new idea for an activity or insight to nurture the little ones in your life. Come visit!