How to Make a Flower Bouquet like a Pro
Recently, I’ve been seeing Instagram posts on how to make a flower bouquet. You gather up the flowers in one hand, secure the bunch with a rubber band, snip the stems, and…voilà!
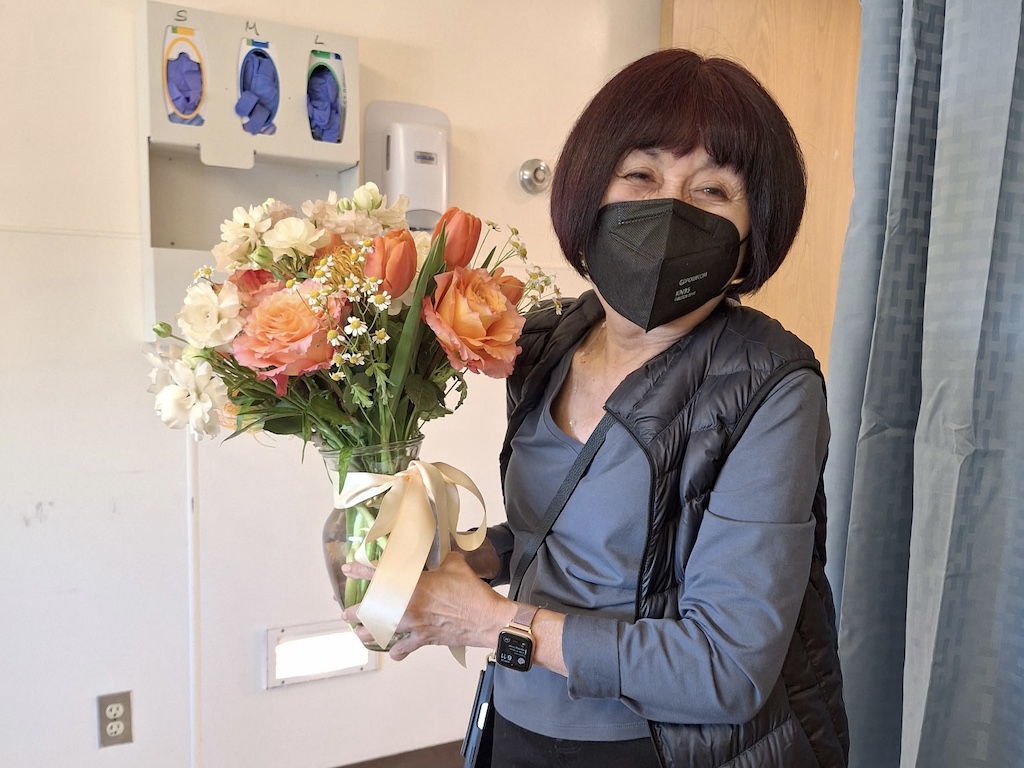
My good friend’s hospital stay gave me the impetus to give it a go. I bought six bunches of flowers from Trader Joe’s for $50. The finished bouquet would have cost much more from a florist.
If your budget is tight, try some less expensive alternatives below.
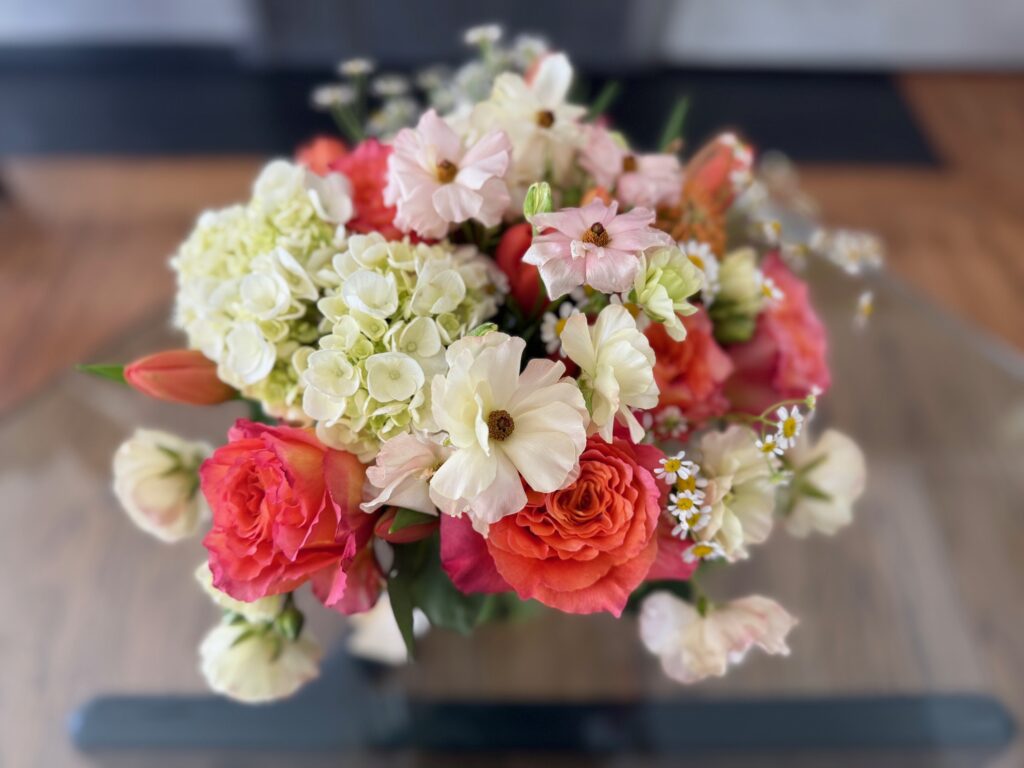
Flowers for a Bouquet
It will depend on the season, but here are flowers I bought:
- hydrangeas
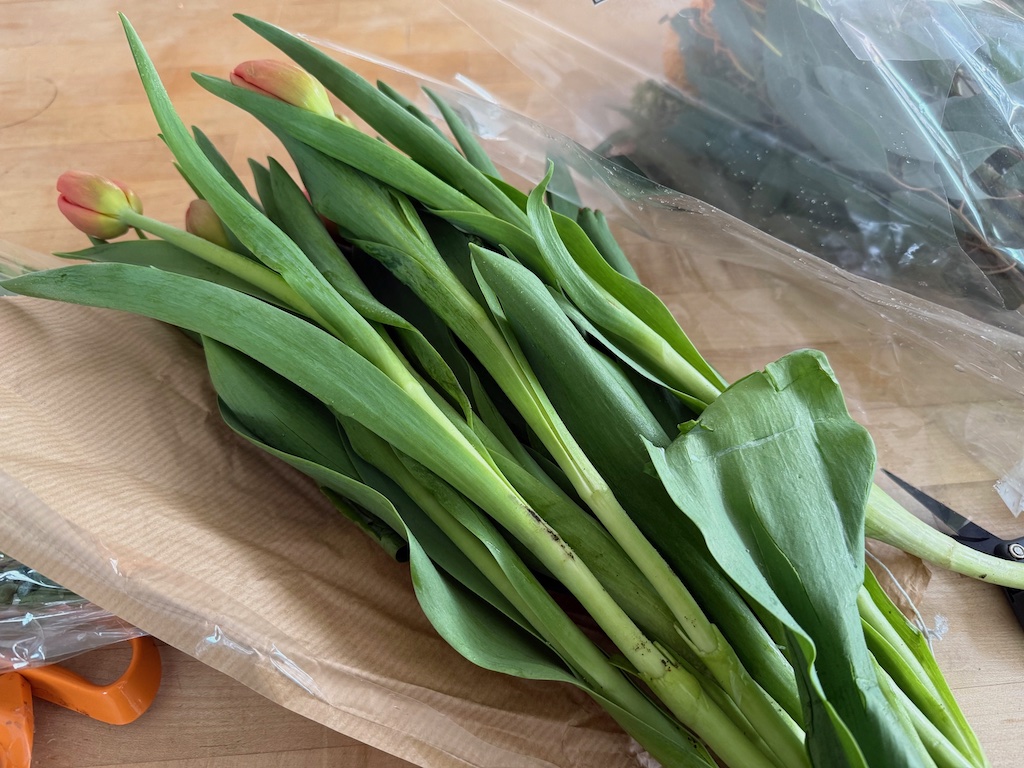
- tulips
- butterfly ranunculus
- ornamental chamomile
- pin cushions
- garden roses
Selecting your Flowers
While you can buy mixed bouquet bunches for your arrangement, they tend to look look rather gaudy. These bouquets also tend to have some of the less expensive, filler flowers and greens that might not fit the style of arrangement you envision. So, it’s better to hand-select your own flowers.

Plan a color scheme and build around it. I started with coral tulips. I selected roses of a similar shade, then chose white and pale tints for the other flowers.
Introduce a variety of shapes and textures. Combine simple shapes with more complex ones; larger flowers with smaller blooms.
Avoid small chrysanthemums and other types that have many flowers branching out from one stem. They don’t work well in this kind of bouquet because the flowers stick out at different angles and at different heights..
Skip heavily-scented flowers like stargazer lilies if your bouquet is going to a hospital.
Steps to Make a Flower Bouquet

Here are the basic steps to make a flower bouquet:
- Remove the wrappings and rubber bands and undo the bunches of flowers so you can see each flower.
- Strip off lower leaves; leafy material in the water will decompose, shortening the life span of your bouquet.
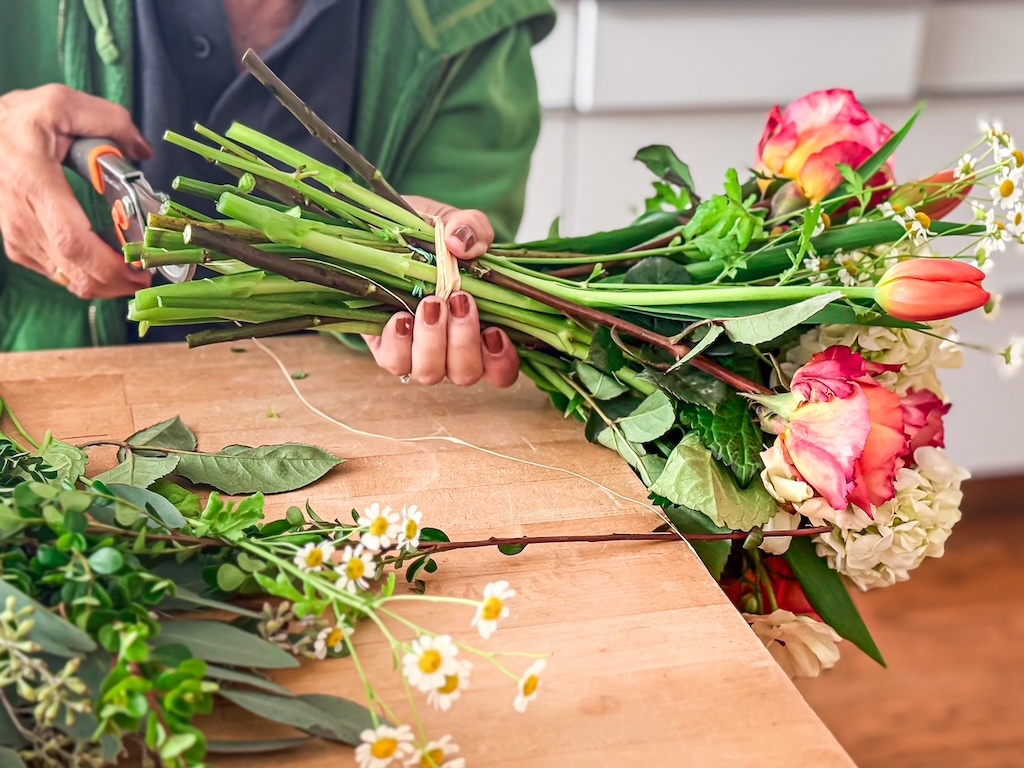
- Trim stems and keep the flowers in water while you work.
- Select a flower to be the center of your arrangement. Hold that flower stem in your non-dominant hand (for most of us, the left). Use your other hand to add flowers around the main flower, continuing to build from the center. Keep cinching the flowers together as you add more. Remember to vary colors and textures, adding smaller, more delicate flowers in between.
- When you have created a bouquet to your satisfaction, rubber band it in place.
- Overwrap the rubber band with a bit of raffia, if you like.
- Trim stems to fit the vase.
An Important Rubber Band Technique
When you gather and cinch your flowers, the bottom stems will be splayed and they will seem a long distance from where you are holding the flowers together. How do you get a rubber band around it?
You anchor the rubber band around the hardiest stem by slipping it through that stem, then wrap the rubber band around all the stems once or twice–whatever feels secure.
When you return to the stem where you anchored the rubber band, stretch the rubber band down to the bottom of that stem and slip the rubber band loop around it.
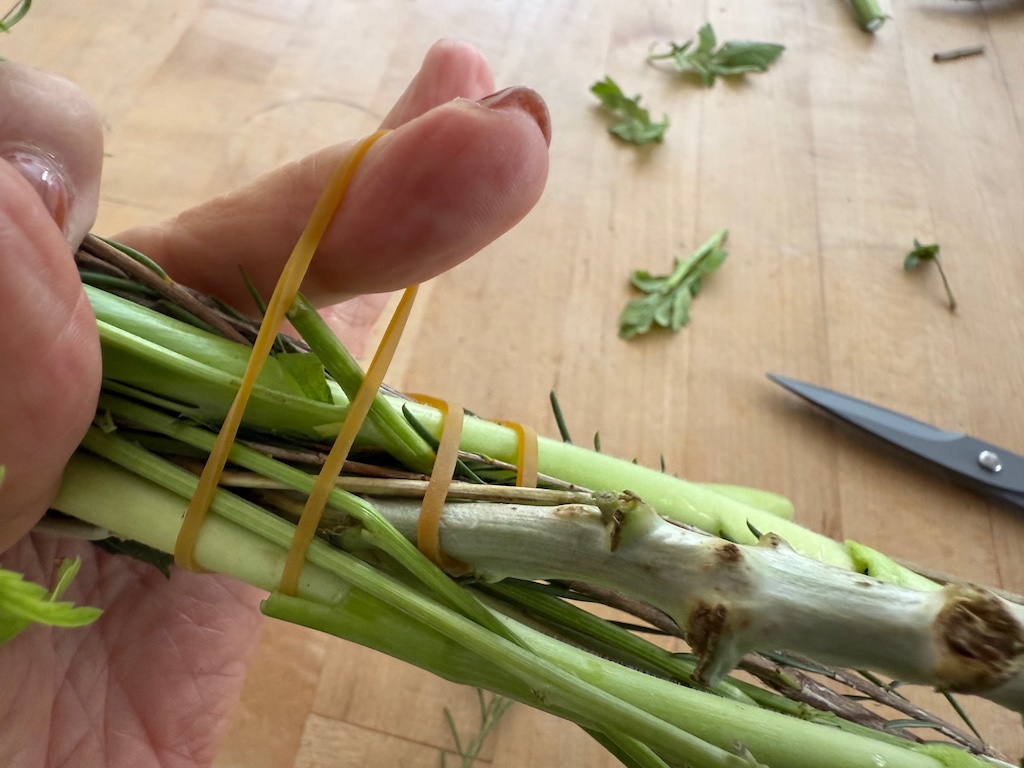
If you have small hands like I do, it’s hard to gather a big bunch of flowers. So, rubber band halfway through making your bouquet. Then build around that bunch to fill out the bouquet, adding a second rubber band to hold everything together.
Tips to Make a Flower Bouquet
Here are some tips to help you make your first flower bouquet:
- Flowers have a front and back. Rotate the flower to find its front.
- Small tulips will grow bigger in a day or so. Buy tight buds if you want them to open later.
- Keep bouquet in a cool, dark place until you’re ready to present it.
- To keep hydrangeas from wilting, cut the stems at an angle and dip the ends in boiling water for 30 to 60 seconds, then cool in room temperature water.
Money-Saving Tips for a Flower Bouquet
For a bouquet on a smaller budget, here are some tips:
- Use a narrower necked vase or a short vase. You’ll need fewer flowers.
- Select less-expensive flowers like alstroemeria.
- Combine bought flowers with flowers from your garden.
- Scout out flowers at the farmers market.
Remember that a gift of flowers, no matter the size of your bouquet , is a gift of love. All flowers are beautiful and in fact, a few flowers in a bud vase will make each individual bloom a star.
Bouquet Alternatives
Instead of making a traditional flower bouquet, consider these alternatives:
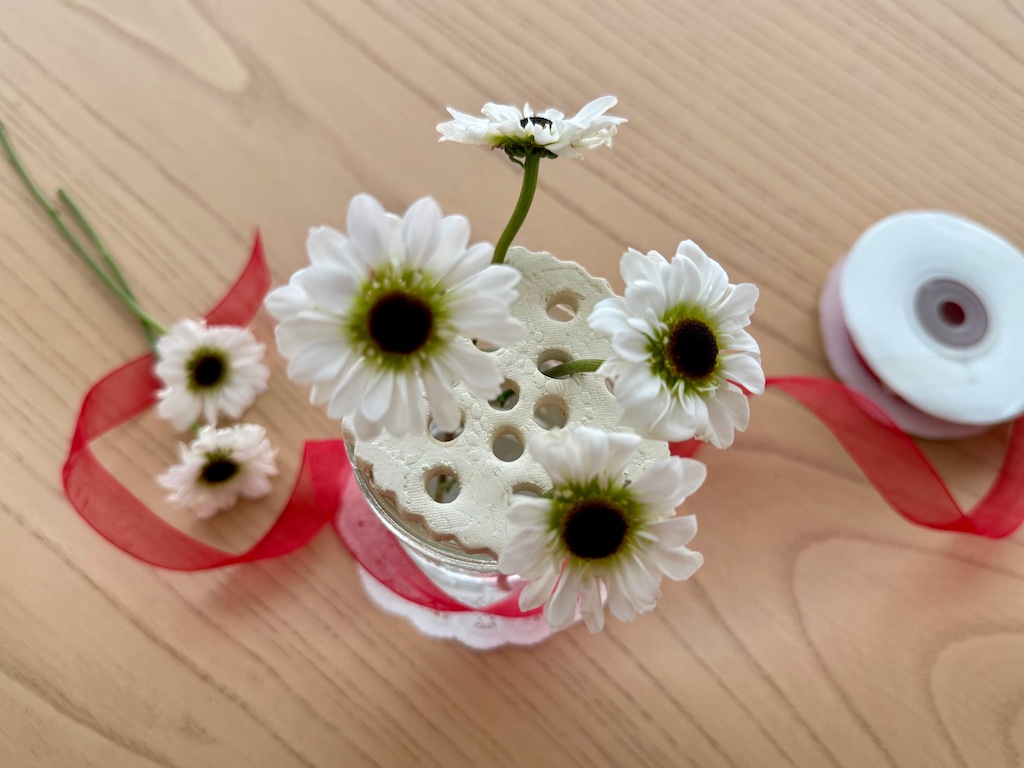
- Make a flower frog from air dry clay. Sit it on a glass jar. Add a few flowers. This is a double gift because the recipient gets a bouquet AND the flower frog.
- This one takes a bit of learning, but here’s my experience with ikebana, the Japanese art of flower arranging–it could be something to pursue. I’ve linked to a video and book so you can learn more. You only need a few flowers to create minimalist beauty.
Sign Up to Get Grandma’s Favorite Recipes–Free!
Sign up here for my email newsletter. Every Wednesday, I’ll give you a new idea for an activity or insight to nurture the little ones in your life. And once you subscribe, I’ll send you a link so you can download your set of quick and easy recipes as my thanks to you.

What a lovely post! Thanks for the ideas and especially the hydrangea cutting tip.
Thanks so much, Rosemary! Glad you liked the post.