Thankful Tree and other Useful Crafts for Thanksgiving
Some kids love to help in the kitchen at Thanksgiving. So, last week, I provided tips for cooking with kids during the holidays. Others kids might prefer pitching in to make a thankful tree or other useful Thanksgiving crafts.
What’s a Thankful Tree?
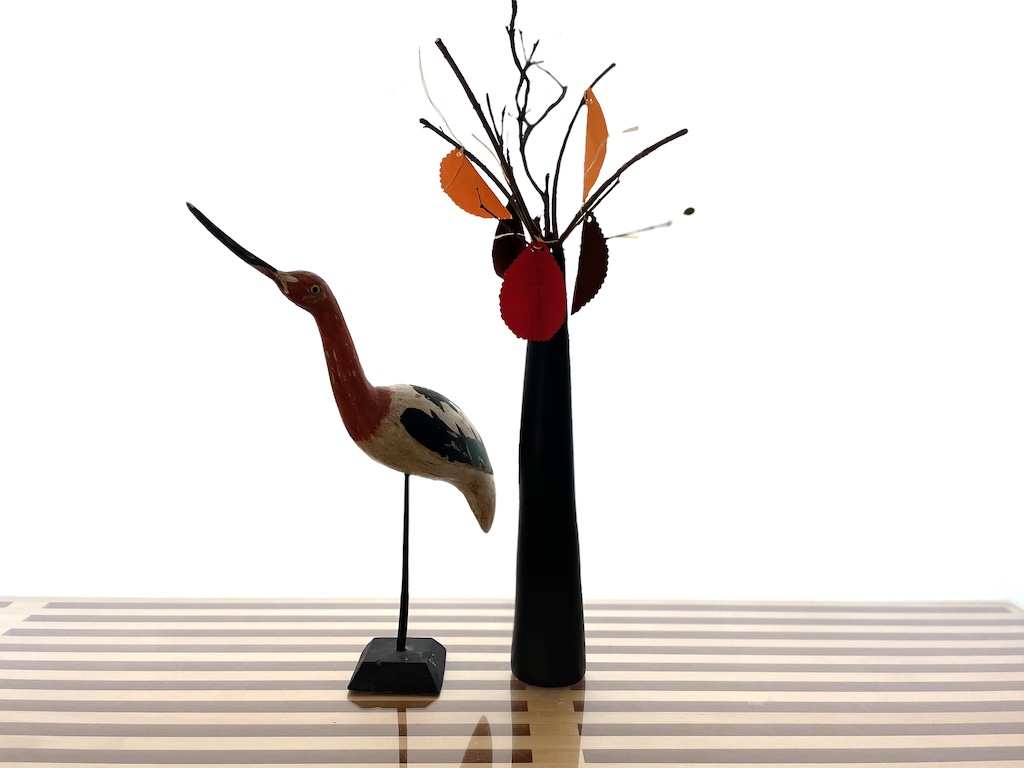
A thankful tree consists of a “tree” of bare branches and paper leaves. At Thanksgiving, people write down what they are thankful for on the leaves and attach their sentiments to the tree. It’s a good way to put a focus on the meaning of the holiday.
For our thankful tree, every Thanksgiving dinner guest will get one or a few leaves at their place at the table to write down what they are thankful for before starting dinner.
During dinner, guests will take turns reading what they wrote, then attach their leaf to the bare branches of the thankful tree. Soon, the branches will be covered with leaves and expressions of gratitude!
Make the Thankful Tree
You’ll want one or more bare tree branches to put together in a tall vase. If you have just a few dinner guests (we will be nine at dinner), you won’t need many branches; if you’re having a crowd, plan accordingly.
Make the Leaves
Materials Needed
- Construction paper in autumn leaf colors
- Raffia or twine to attach the leaves
Tools Needed
- Scissors
- Scalloped or pinking shears (optional)
- Single hole punch
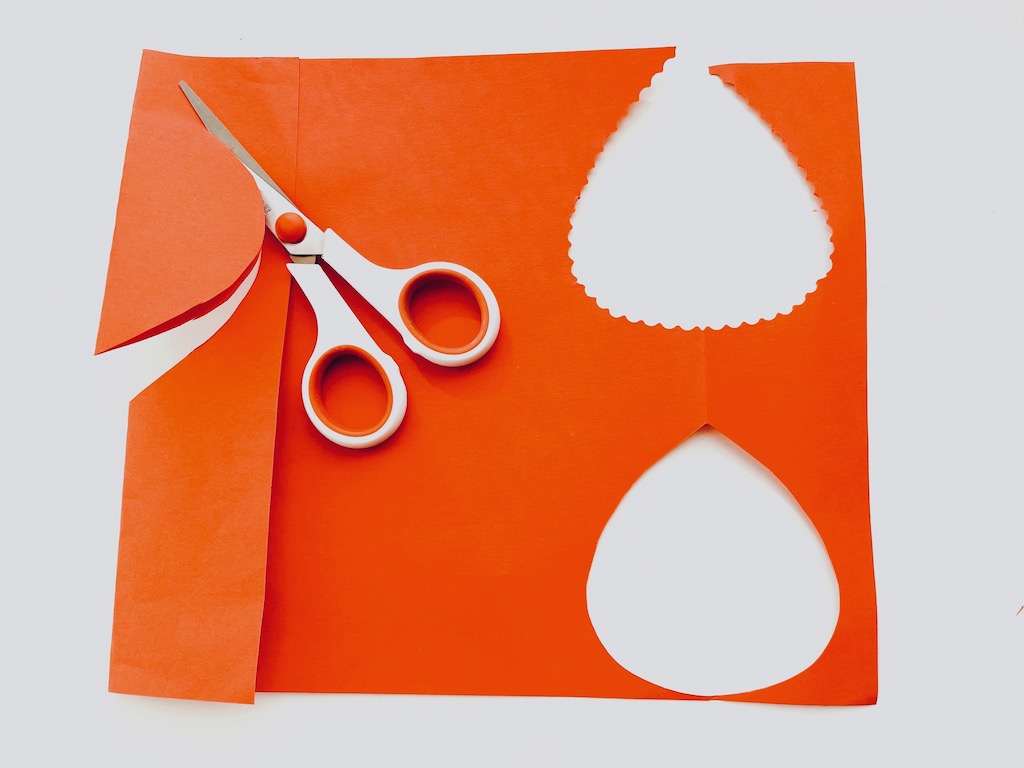
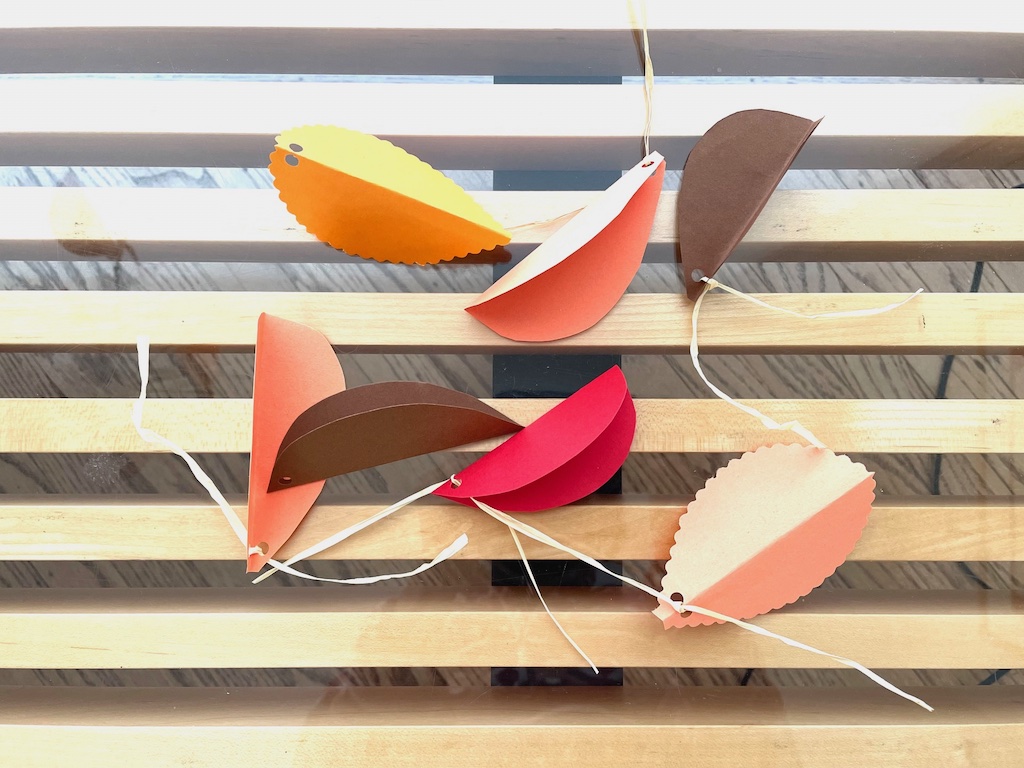
Fold construction paper along one side about 4 inches in. Cut half a leaf shape along the fold, so when the fold is open, you’ll have a complete leaf. My leaves were about 3 1/2 to 4 inches wide and 4 1/2 inches long.
The leaves are easy to cut free-hand, but if a young child is cutting them, you might want to make a pattern for half a leaf from cardboard and have the child trace the leaf pattern with a pencil before cutting on the pencil lines.
Vary the color of the leaves. Cut some with regular scissors and others with scalloped or zig-zag edges (optional).
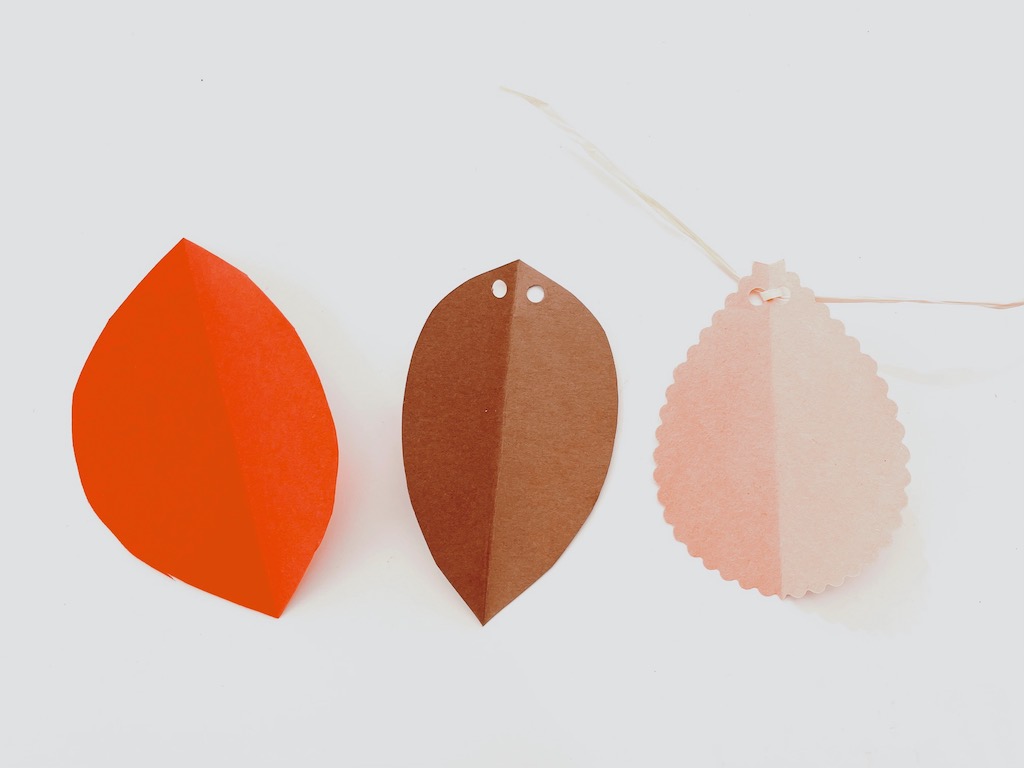
Punch a hole through the folded leaf. Thread a strip of raffia about 8 inches long through the holes. If raffia is stiff, strip it lengthwise to make thinner strips. Tie raffia to leaf, leaving equal margins of raffia on each side.
How to Use
Set a few leaves at each place setting at the dinner table. Scatter a few pens on the dinner table and ask guests to write what they are thankful for this Thanksgiving.
Set the written leaves aside. Throughout dinner ask each guess to read their leaf. When the leaf has been read, tie it to the the thankful tree.
By the end of dinner, the bare tree will be covered with leaves and expressions of gratitude.
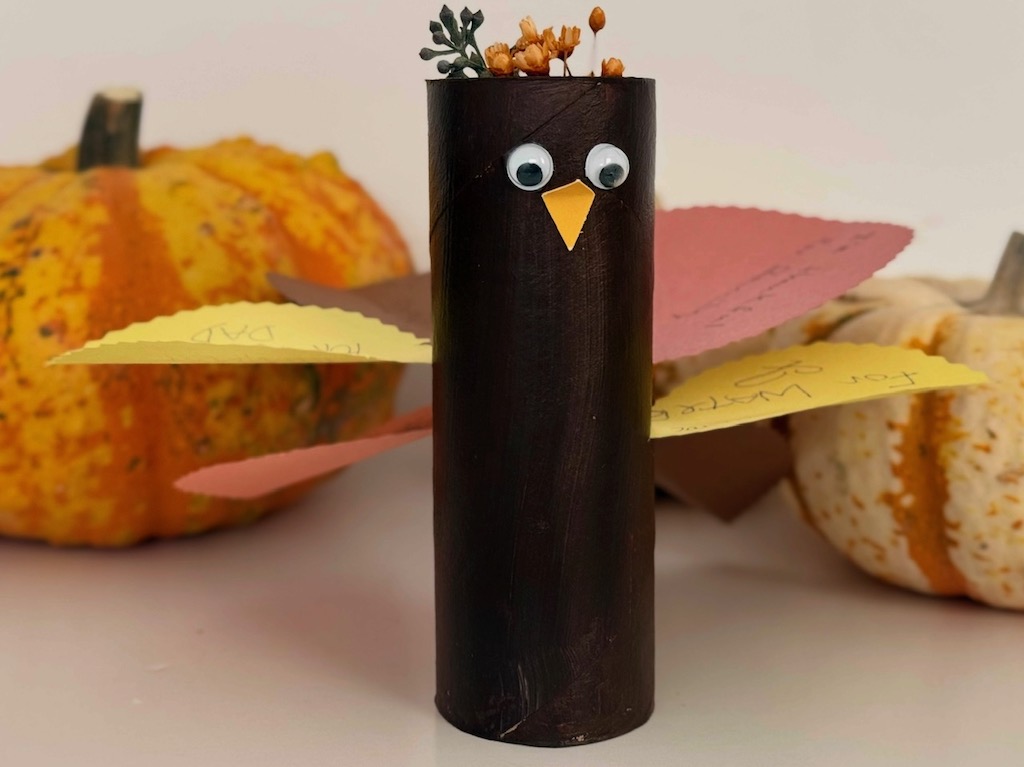
Make a Thankful Turkey
A twist on the thankful tree is a thankful turkey. Instead of hanging leaves on branches, insert thankful sentiments, written on construction paper feathers, into turkeys made from toilet paper rolls.
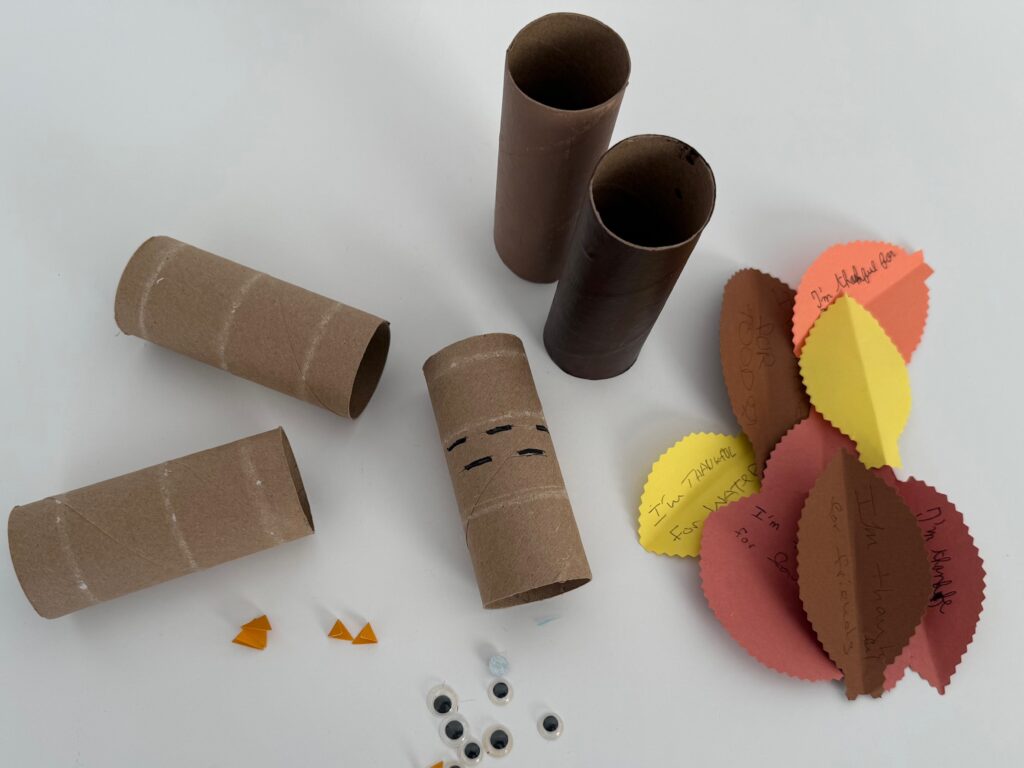
Kids can get involved in making thankful turkeys–you’ll need several. They can paint and decorate, but do NOT let them use the craft or utility knife. You’ll have to be very careful not to cut yourself, too.
Materials Needed for Each Turkey
- 1 toilet paper roll
- Acrylic or tempera paint
- Marking pen
- Small piece of yellow cardstock for beak
- 2 googly eyes
- White school glue (such as Elmer’s)
- Dried flowers (optional)
- Construction paper in autumn leaf colors
Tools Needed
- X-ACTO knife or other such craft or utility knife
- Scissors
How to Make It
Have kids paint the toilet roll. Using a marking pen, mark where you want the feathers to be and cut the marks CAREFULLY with the utility knife to form slits. This job is for an adult. I made 2 rows of slits.
Now kids can decorate the turkey, gluing on eyes and a beak. To cut a beak, fold a cardstock scrap in half. Cut an upside-down “v” from the fold; when you open it up, you’ll have a diamond. Glue the diamond onto the toilet roll on the fold line.
If you like, you can add a sprig of dried or artificial flowers into the roll to finish the top of the turkey head.
How to Use It
Ahead of Thanksgiving, cut out construction paper feathers, similar to the thankful tree. The only difference for these feathers is to make the base narrow enough to fit the slits. You’ll want to test this beforehand.
At the Thanksgiving dinner, have guests write what they are thankful for and attach it to the turkey. To do this, they’ll have to gently squeeze the roll so the slit opens up, enabling the leaves to be inserted. You might want to do the leaf insertion yourself to ease the process.
These turkeys, made in advance with the feathers inserted, can be used for Thanksgiving table decorations, too.
Thanksgiving Vases for the Big Dinner
Kids can help to make spice jar vases for the Thanksgiving table. Miss T and N painted the vases above during the summer and we used them to set the table for a family dinner.
For Thanksgiving, have kids decorate empty spice jars using acrylic paints in autumn colors. Fill the jars with bronze chrysanthemums or other autumn flowers or foliage.
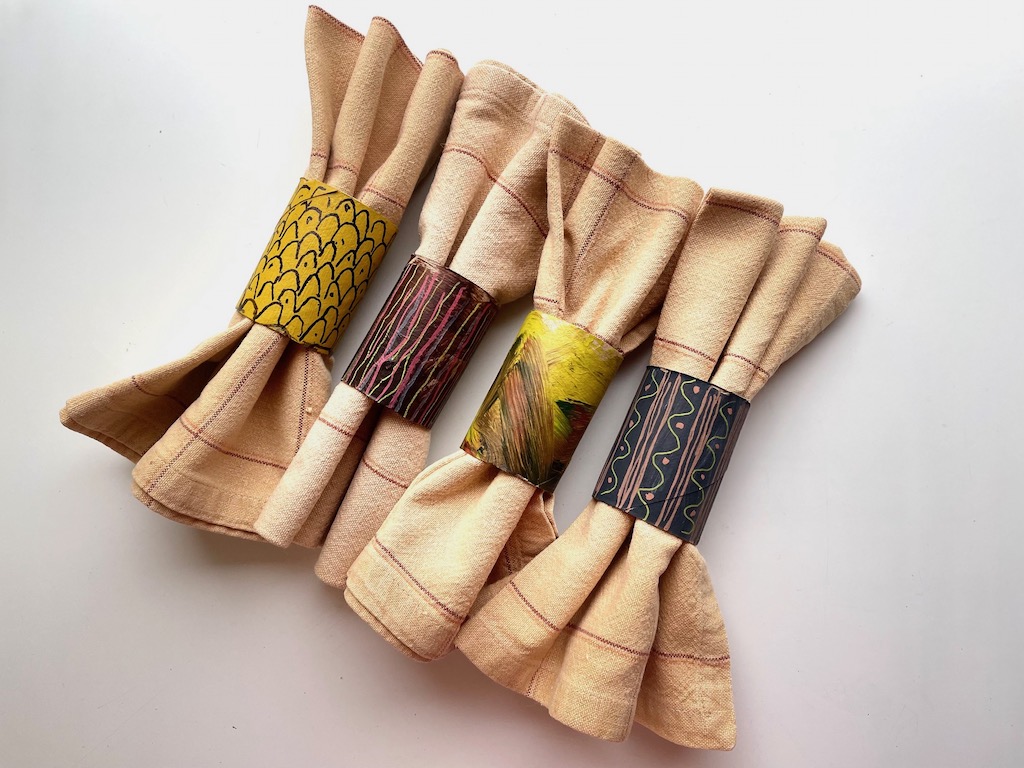
Thanksgiving Napkin Rings
Miss T made napkin rings from cardboard gift wrap tubes for a Fourth of July celebration, so originally, the napkin rings were red, white, and blue. For Thanksgiving, use autumn hues.
In the original post, I recommended lining the edges of the napkin rings with a strip of tissue paper for a smooth finish. However, this time, we just cut the cardboard rolls as neatly as we could and skipped the extra work of lining the edges. They look just fine.
Getting Kids Involved with Thanksgiving
Often, kids aren’t involved in Thanksgiving preparations. And unlike anticipating an Easter basket or Christmas presents, there’s nothing particularly motivational for kids about this holiday. That’s why, finding a useful Thanksgiving craft project they can do to contribute to the festivities is such a good idea.
Next Week: We Make Advent Calendars
My son Dave used to buy Advent calendars for the kids. But the fancy ones like Harry Potter or Star Wars gets to be quite expensive. So, a couple of years ago, he introduced homemade ones. Next week, I’ll show you how you can make a really cute Advent Calendar if you start right away.
Sign Up and Get Grandma’s Favorite Recipes–Free!